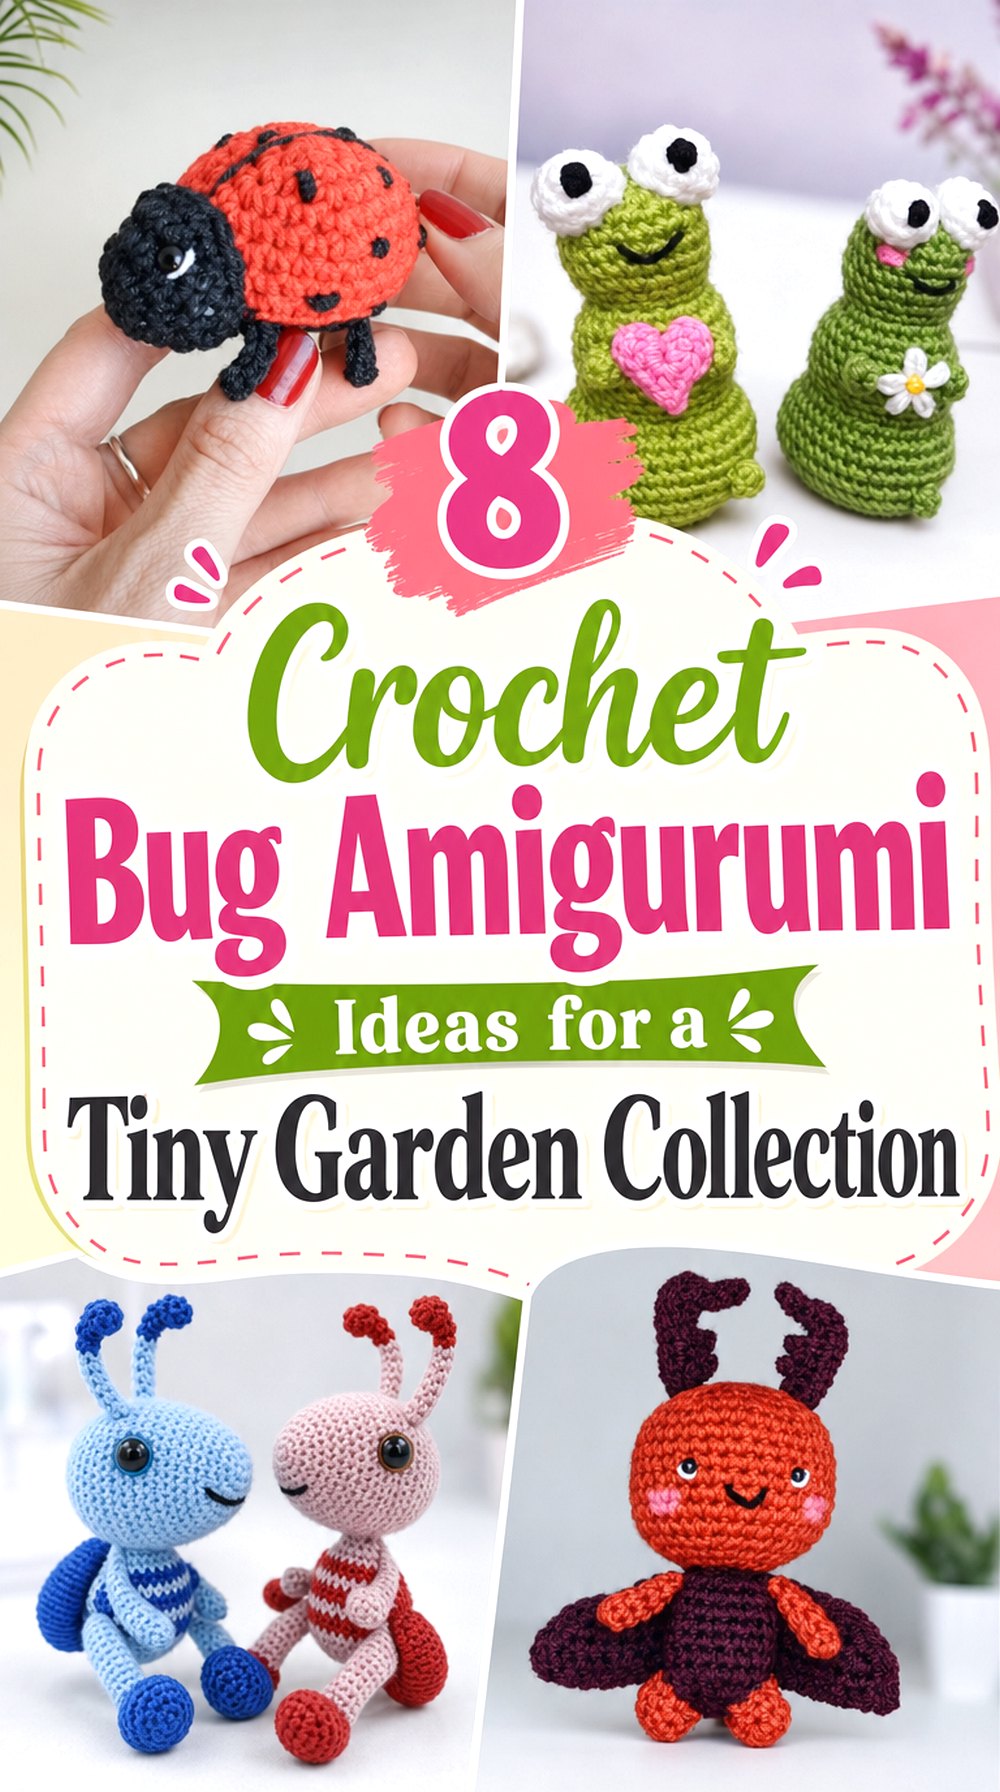

Tiny crochet bugs can turn a shelf, nursery corner, craft table, or seasonal display into a small garden scene without needing large projects. This collection brings together different bug shapes, including round-bodied, winged, long-bodied, and many-legged amigurumi designs, so the finished set can feel varied instead of repetitive.
Each idea below points to one YouTube tutorial from a different creator. The mix is useful for choosing a balanced garden collection: some pieces work as small accents, some bring height or wing detail, and others add a playful ground-level look beside flowers, leaves, or other crochet nature pieces.
Quick List
- Crochet Round Ladybug Amigurumi
- Crochet Striped Bee Amigurumi
- Crochet Butterfly Garden Accent Amigurumi
- Crochet Long-Wing Dragonfly Amigurumi
- Crochet Curved Caterpillar Amigurumi
- Crochet Tiny Ant Amigurumi
- Crochet Garden Beetle Amigurumi
- Crochet Soft Spider Amigurumi
Why These Crochet Bug Amigurumi Projects Are Worth Making
A tiny garden collection works best when the bugs do not all share the same outline. A round ladybug, a striped bee, a winged butterfly, and a stretched dragonfly each bring a different silhouette, which helps the display feel more like a miniature scene. Smaller amigurumi projects can also be easier to place around plant shelves, baskets, window ledges, or handmade flower arrangements.
These bug designs also help readers think about details before choosing a tutorial. Some pieces may need close attention to wings, legs, antennae, facial features, or final assembly. Others may be more about keeping the stuffed shape neat and balanced, especially when the bug is meant to sit upright or display cleanly.
Crochet Round Ladybug Amigurumi
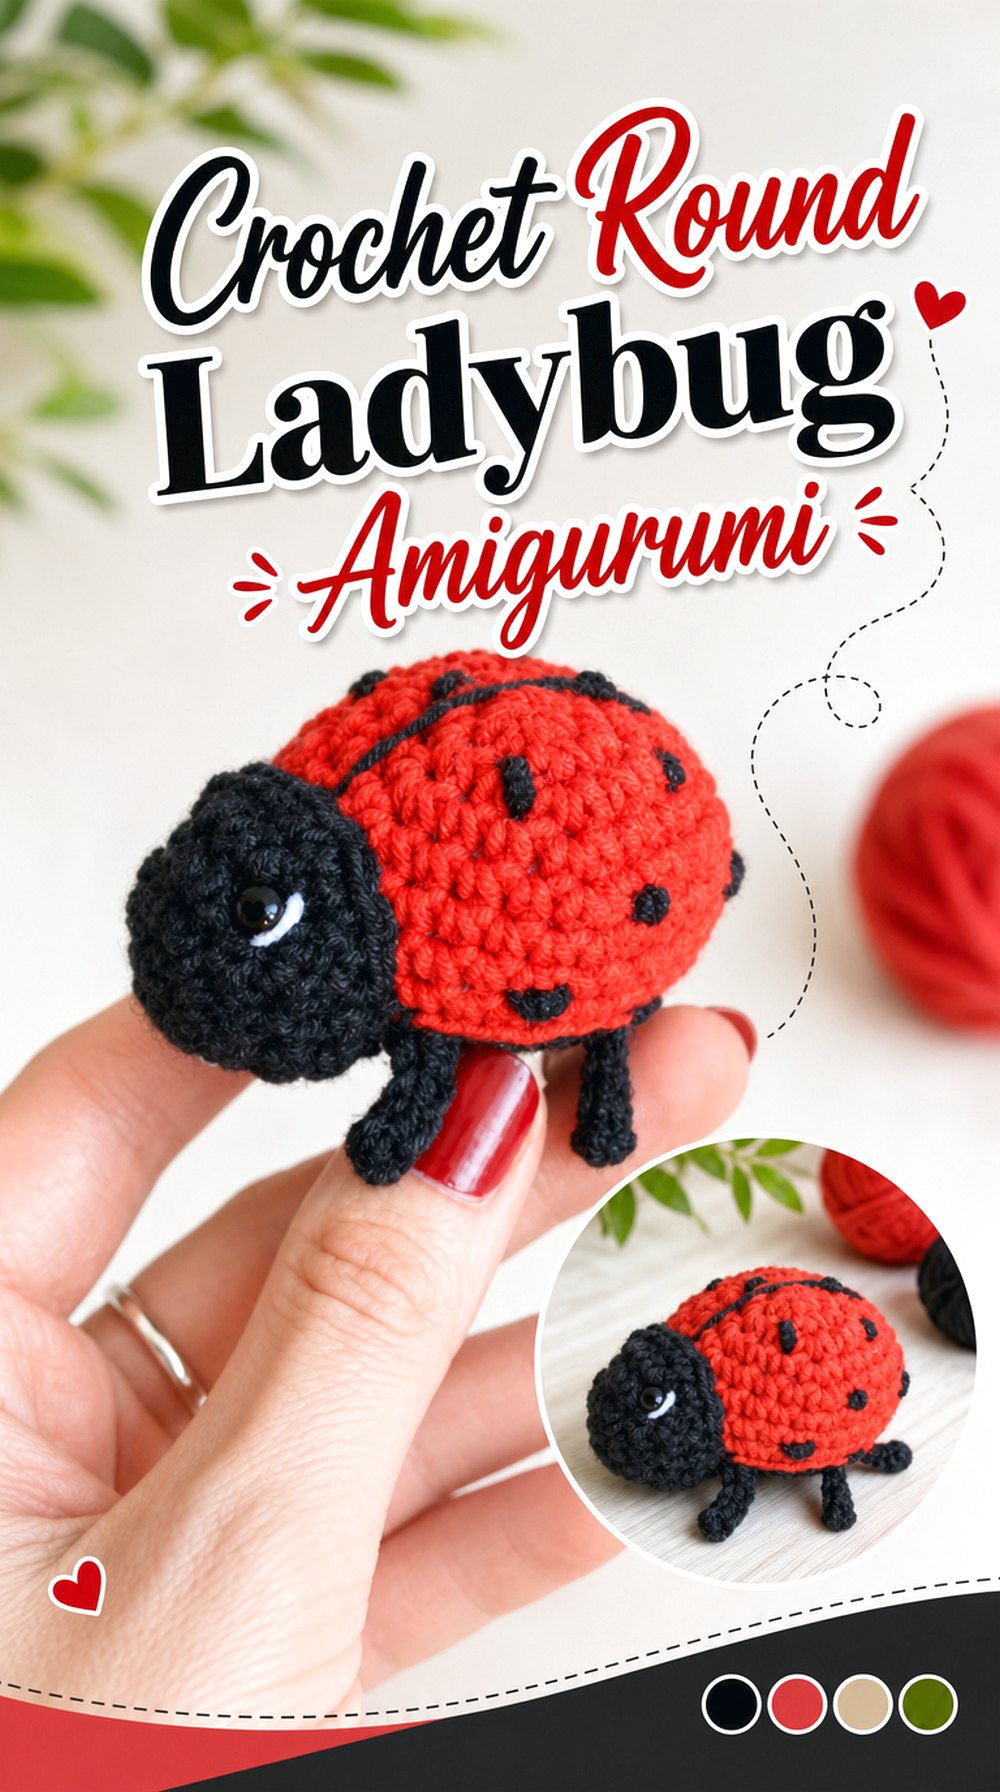
A round ladybug shape is a strong starting point for a tiny garden collection because it gives the set a low, compact bug with a clear garden identity. Its small body can sit near crochet leaves, flowers, or a handmade plant pot without taking over the display.
Compared with the longer bugs in this list, the ladybug idea is more about a neat dome-like presence and bold surface detail. Readers choosing this project should focus on how the finished body sits, how the face is placed, and whether the final size suits their display area.
Check the Rounded Body Shape
A ladybug amigurumi usually depends on a smooth stuffed body to look tidy. Before starting, look at the finished view and decide whether you want a very compact accent or a slightly larger display piece. A rounder shape can look sweet on a shelf, but it may also need careful stuffing so the body does not look uneven or flattened.
Plan the Face and Back Details
The face and back details carry much of the ladybug character. Check how the creator handles small features and whether the details are sewn, crocheted, or added another way. This matters if the project will be handled often, used only for display, or placed near other tiny amigurumi where loose parts could look out of scale.
Confirm the Finished Size
Finished size is important for a tiny garden set because one oversized bug can dominate the whole arrangement. If measurements are not clearly stated in the source, compare the finished ladybug with the creator’s hand or nearby tools on screen. That visual check can help readers decide whether it fits with flowers, leaves, or other small crochet animals.
Crochet Striped Bee Amigurumi
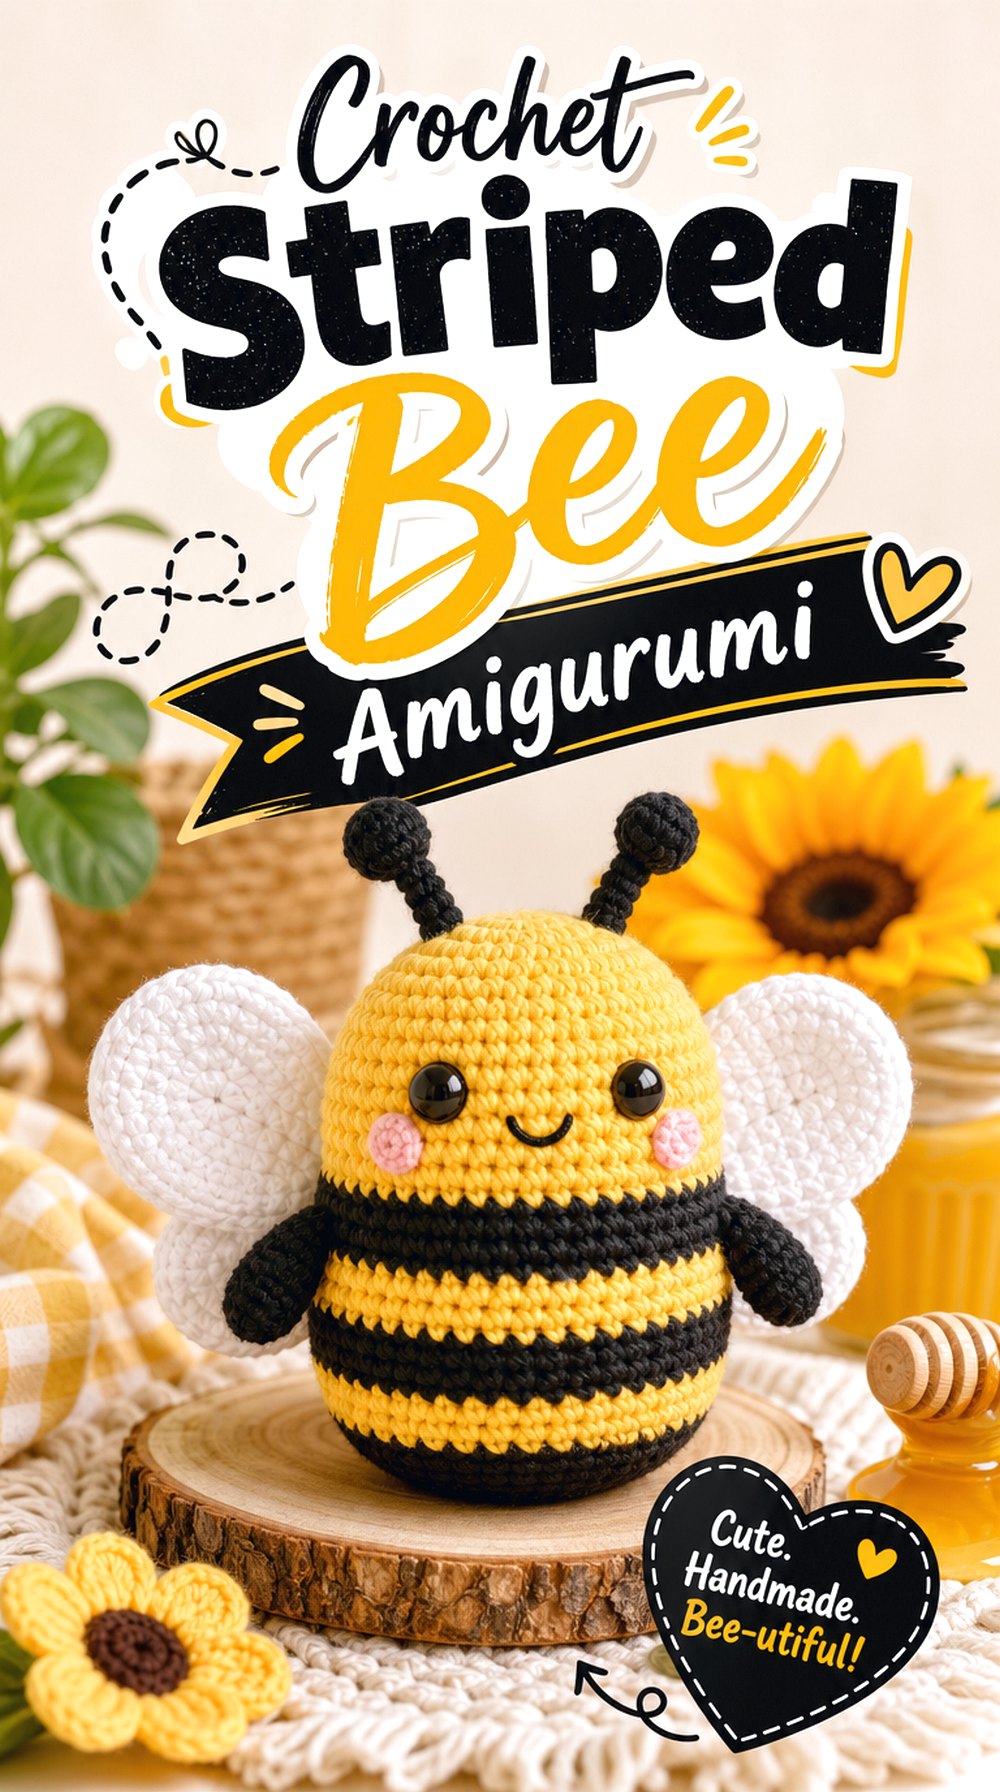
A bee adds a bright, winged shape to the tiny garden theme and gives the collection a different look from flatter or rounder bugs. The striped body makes it easy to recognize, while the small wings can add height and movement to a shelf display.
This project may suit readers who want one cheerful flying insect among ground-level bugs like the ladybug, ant, and beetle. Before choosing it, pay attention to the body shape, wing placement, and whether the finished bee is intended as a small toy, keychain-style piece, or simple display accent.
Look Closely at the Wing Placement
Wing placement changes the whole personality of a bee amigurumi. Wings that sit evenly can make the bee look balanced from the front and side, while uneven placement may be more noticeable on a small project. Use the finished view to check where the wings attach and how visible they are once the body is stuffed.
Keep the Stripe Order Clear
The striped body is one of the bee’s most important visual features. Instead of focusing only on color, pay attention to how cleanly each section appears in the finished project. A tiny bee can look crowded if the stripes are hard to read, so readers may want to pause at color changes and compare the body as it grows.
Review the Full Guide First
The creator’s description notes a small finished size range, but final size can still depend on tension and yarn choices. Review the guide before buying supplies, especially if the bee needs to match other tiny garden pieces. Readers planning a set should keep notes on yarn weight, hook size, and finished scale for consistency.
Original Tutorial and Creator Credit
Creator: Maxel
Crochet Butterfly Garden Accent Amigurumi
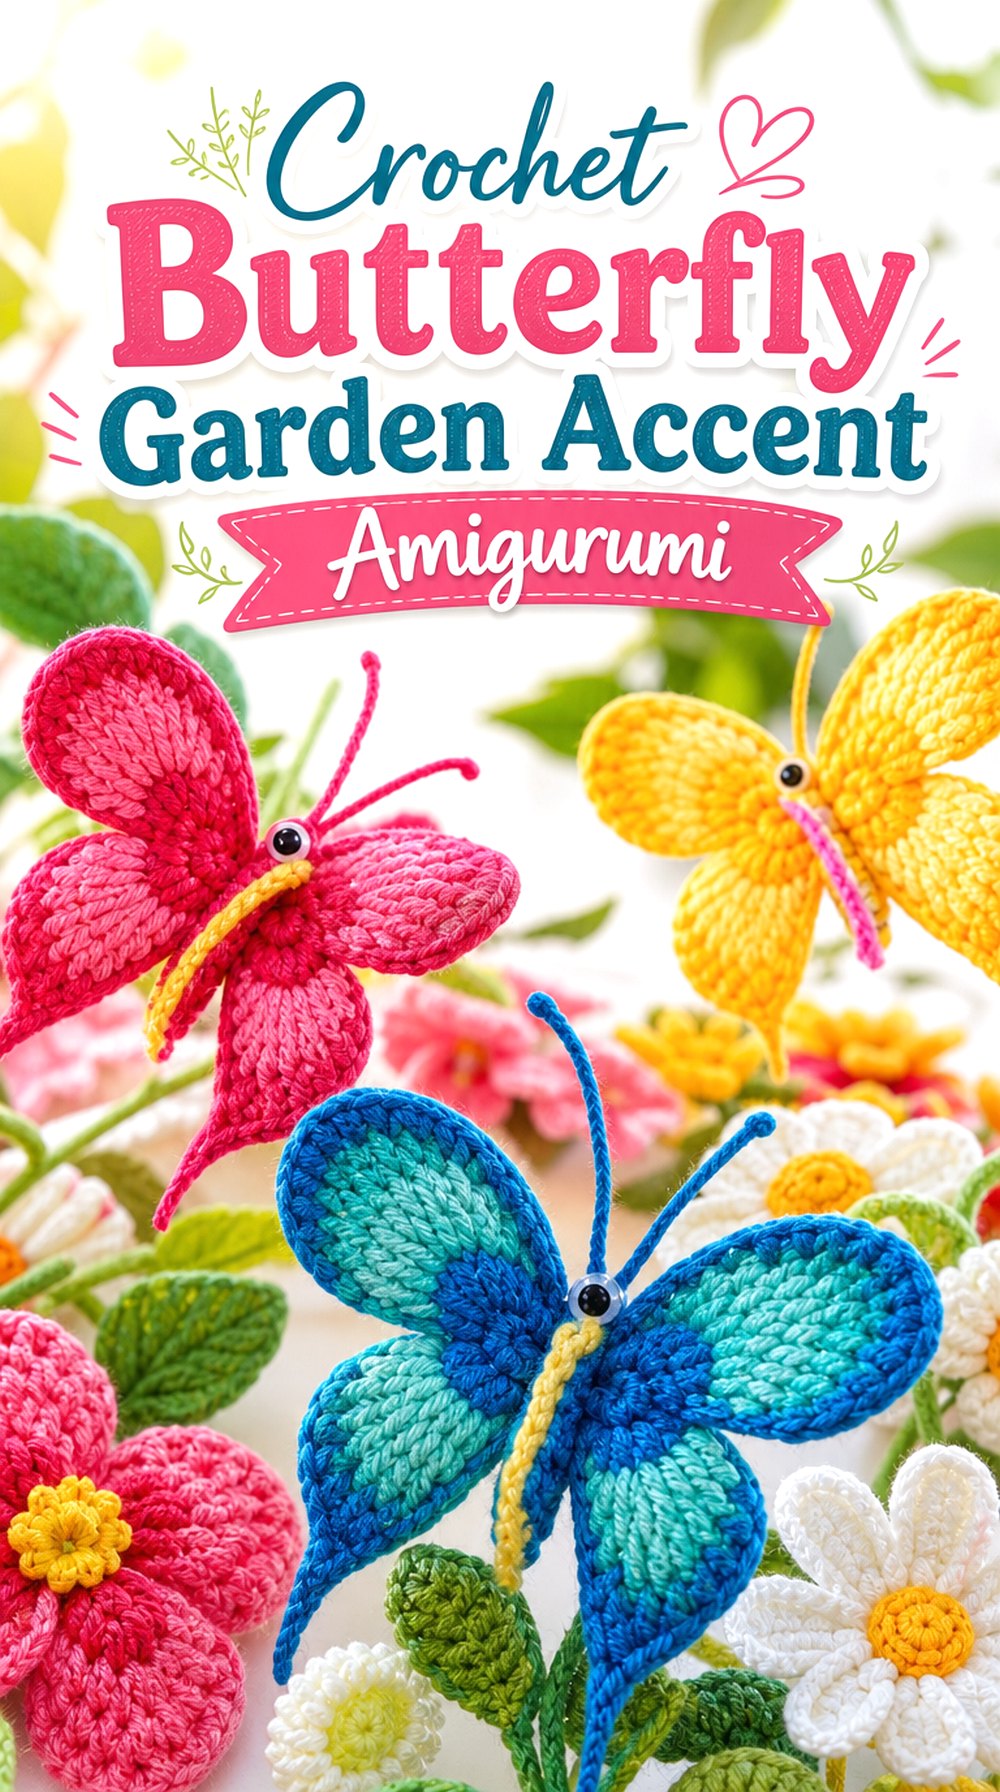
A butterfly brings the most open, decorative silhouette in this collection. Unlike the stuffed ground bugs, this design can work as a garden accent beside crochet flowers or as a light-looking piece in a spring display. Its wing shape makes it visually different even when placed near other small insects.
Readers choosing this project should look at how the wings are shaped and how the body sits between them. Since a butterfly is often viewed from the front, neat symmetry and clean finishing matter more than bulk or standing shape.
Check the Wing Symmetry
Butterfly amigurumi depends heavily on balanced wings. Before following the project closely, study the finished view and notice whether the wings spread flat, curve slightly, or sit more upright. Symmetry matters because even a small difference between sides can stand out when the butterfly is used as a visible garden accent.
Think About Display Placement
This butterfly may be useful as a decorative piece near crochet flowers, but the best placement depends on its final structure. A flatter butterfly may sit well on a surface, while a more dimensional one may need support. Check whether the tutorial shows how it is displayed, attached, or finished before planning its final use.
Confirm Any Small Features
Small bodies, antennae, and facial details can change the look of a butterfly quickly. Readers should check what is included in the creator’s materials and finishing section before starting. If the project will be handled by children or attached to another item, confirm how the small features are secured and whether any safety guidance is provided.
Original Tutorial and Creator Credit
Creator: Natagor Finlayson
Crochet Long Wing Dragonfly Amigurumi
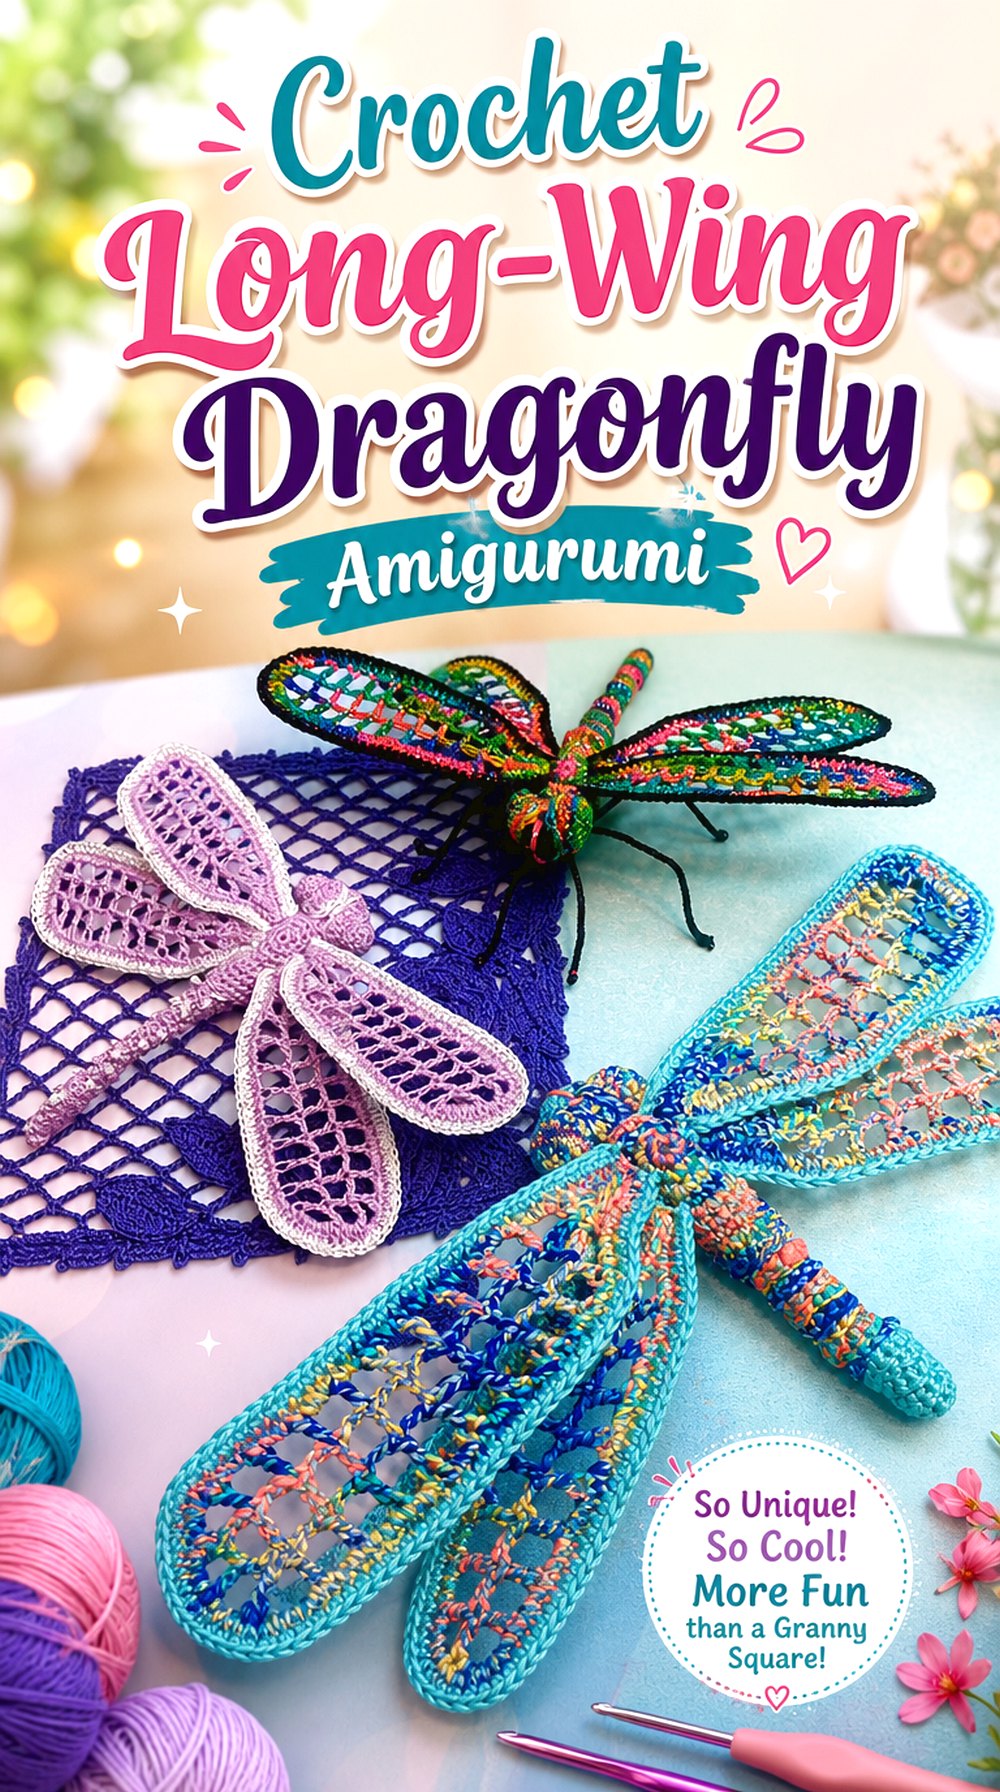
A dragonfly gives the tiny garden collection a long, airy shape that feels different from rounder bugs. The extended body and wing focus can add direction to a display, especially when placed across a shelf or near handmade flowers.
This idea may suit readers who want a more delicate-looking insect rather than another compact plush shape. The main points to watch are the length of the body, the wing placement, and how the finished piece holds its shape when resting or being displayed.
Watch the Long Body Proportion
The dragonfly’s shape relies on a narrow, lengthened body, so proportion matters more than bulk. A body that is too short may lose the dragonfly look, while one that is too long may be harder to display neatly. Use the finished view as a scale guide and compare the body length to the wings before continuing.
Check How the Wings Sit
Dragonfly wings are a key part of the design, and their position affects the final outline. Look at whether the wings spread to the sides, overlap slightly, or sit in separate layers. This helps readers decide whether the finished piece will look best lying flat, pinned into a display, or placed near other garden amigurumi.
Prepare for Detailed Sections
This project may need more attention during small shaping and finishing than a simple round bug. Readers who prefer slower instruction should be ready to pause during close-up parts and keep a simple progress note. That makes it easier to return to the same place without trying to reconstruct the creator’s exact counts from memory.
Original Tutorial and Creator Credit
Creator: Weaving Wyrd Studio
Crochet Curved Caterpillar Amigurumi
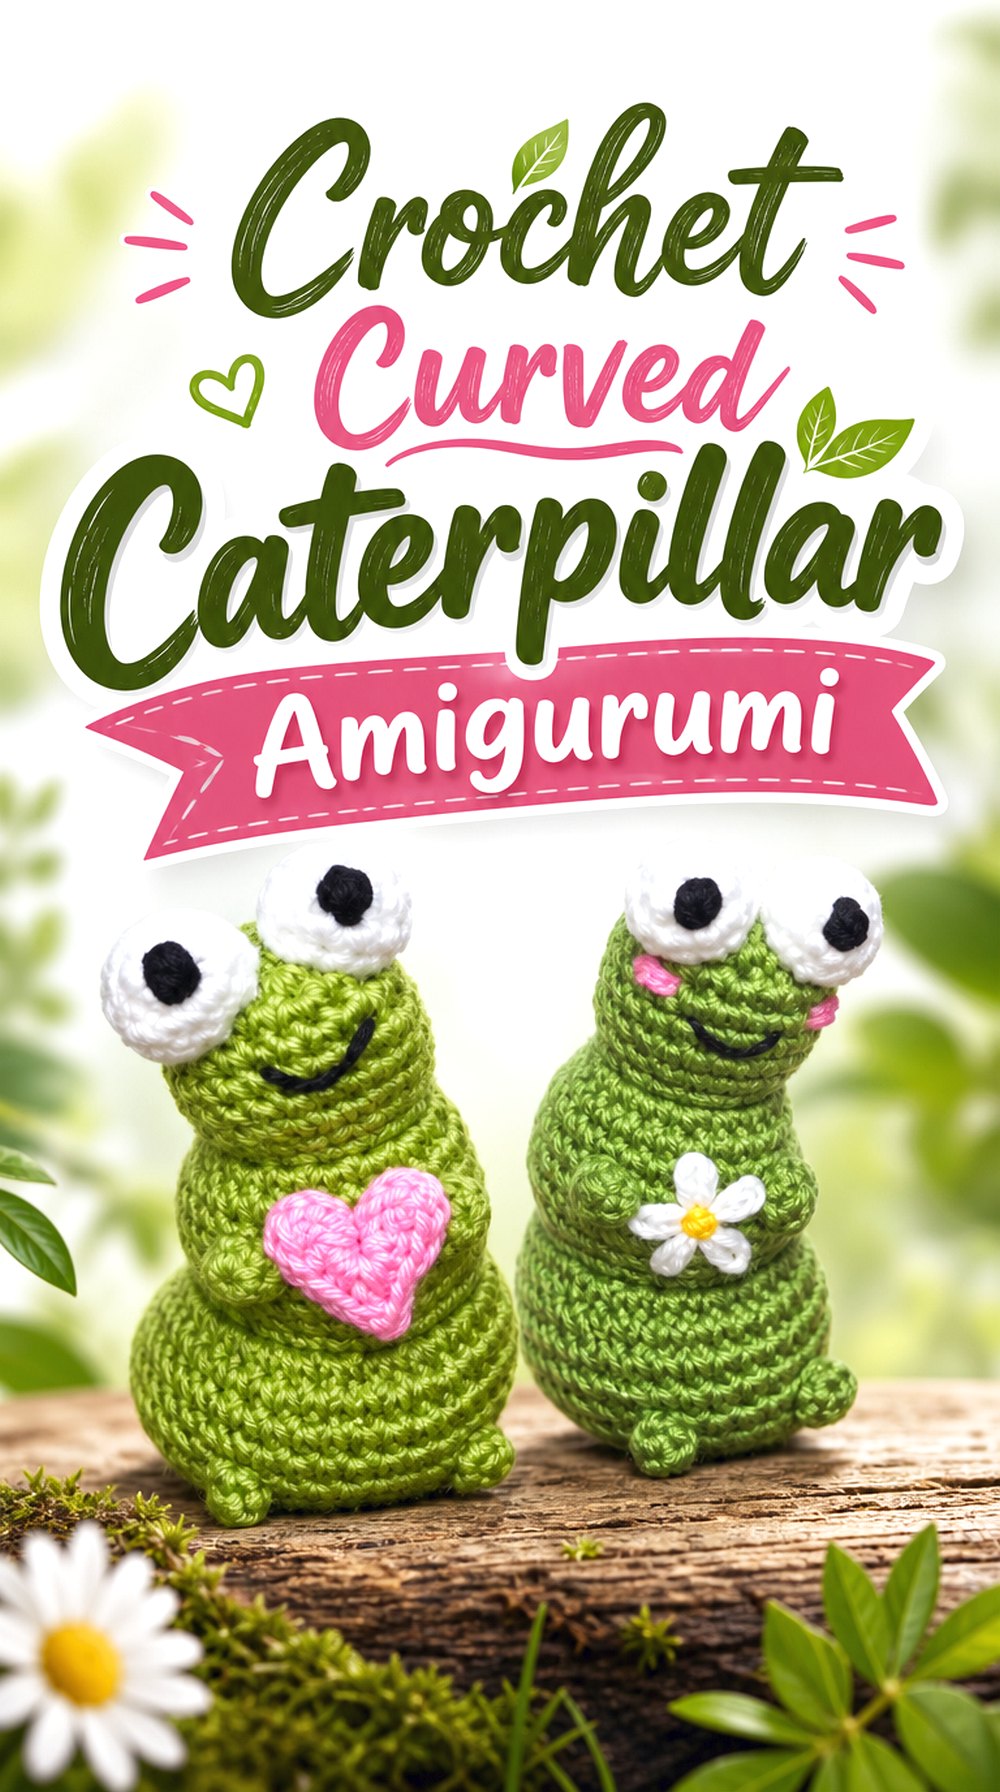
A caterpillar adds a soft, segmented shape to the garden set and works well as a low display piece beside leaves or flowers. Its longer body makes it different from the ladybug and bee, while the curved form can help the finished collection feel more active.
This design may appeal to readers who like character amigurumi with a playful body line. Before choosing it, look at the finished length, the face placement, and whether the body shape is shown clearly enough for the size of garden scene you want to build.
Notice the Body Curve
The curve is what makes a caterpillar feel lively rather than just long. Check the finished view to see whether the body bends gently or sits straighter. A stronger curve may need more display space, while a straighter caterpillar can tuck beside other pieces more easily on a small shelf or tabletop.
Compare the Segment Size
Segment balance matters on a caterpillar because each part affects the final rhythm of the body. Readers should watch for how even the sections appear and how the finished caterpillar sits when complete. If the segments vary too much, the project may still look handmade and sweet, but it may not match a very tidy display style.
Confirm Keychain or Pocket Use
The creator’s description mentions the finished caterpillar can be a keychain or pocket toy. Readers planning that kind of use should check the source for any attachment details and consider whether the finished size matches their needs. For a display-only garden set, the same caterpillar can simply become a soft ground-level accent.
Original Tutorial and Creator Credit
Creator: Olga Garkusha
Crochet Tiny Ant Amigurumi
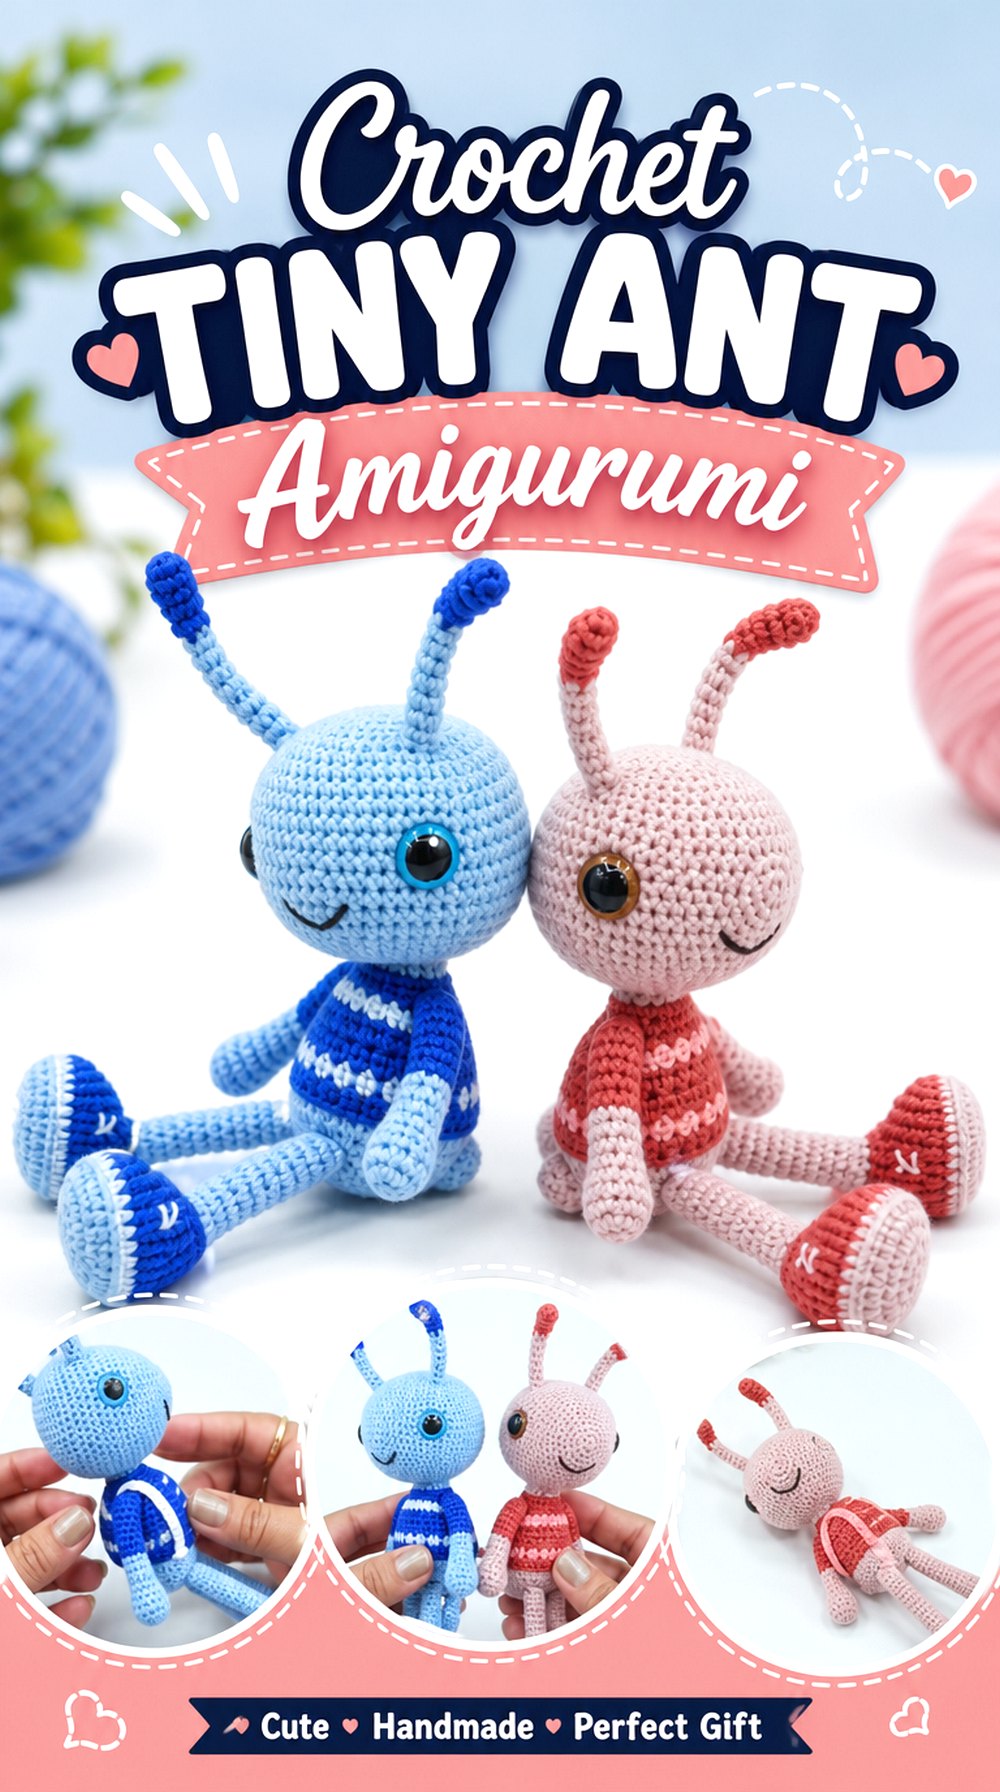
An ant brings a narrow, ground-crawling shape into the collection. It can sit between larger bugs and help the garden scene feel more complete because it fills the small-scale space that rounder amigurumi may leave open.
This project is especially useful when the collection needs contrast in body structure. Instead of broad wings or a plump body, the ant shape is about small connected sections and a recognizable crawling outline. Readers should check how the tiny parts are formed, joined, and finished before deciding where it belongs in the display.
Check the Small Body Sections
An ant usually depends on separated body sections to read clearly. Look at the finished project and decide whether the sectioned shape is visible enough at the size you want. Tiny crochet pieces can lose detail quickly, so clear body separation helps the ant stand apart from a simple black or dark stuffed shape.
Think About Leg and Antenna Details
Legs and antennae can make the ant more recognizable, but they also create small finishing points. Check whether those details are crocheted, sewn, or added separately. Readers making the ant for display may focus on neat placement, while anyone planning frequent handling should pay close attention to how firmly small details are attached.
Review the Written Support
The video description mentions a written pattern link, so readers who like checking instructions outside the video should review what the creator provides. Availability and terms can vary, so confirm the current link before relying on it. Use the YouTube tutorial for the exact construction details and the creator’s preferred sequence.
Original Tutorial and Creator Credit
Creator: Crochetwithsumi
Crochet Garden Beetle Amigurumi
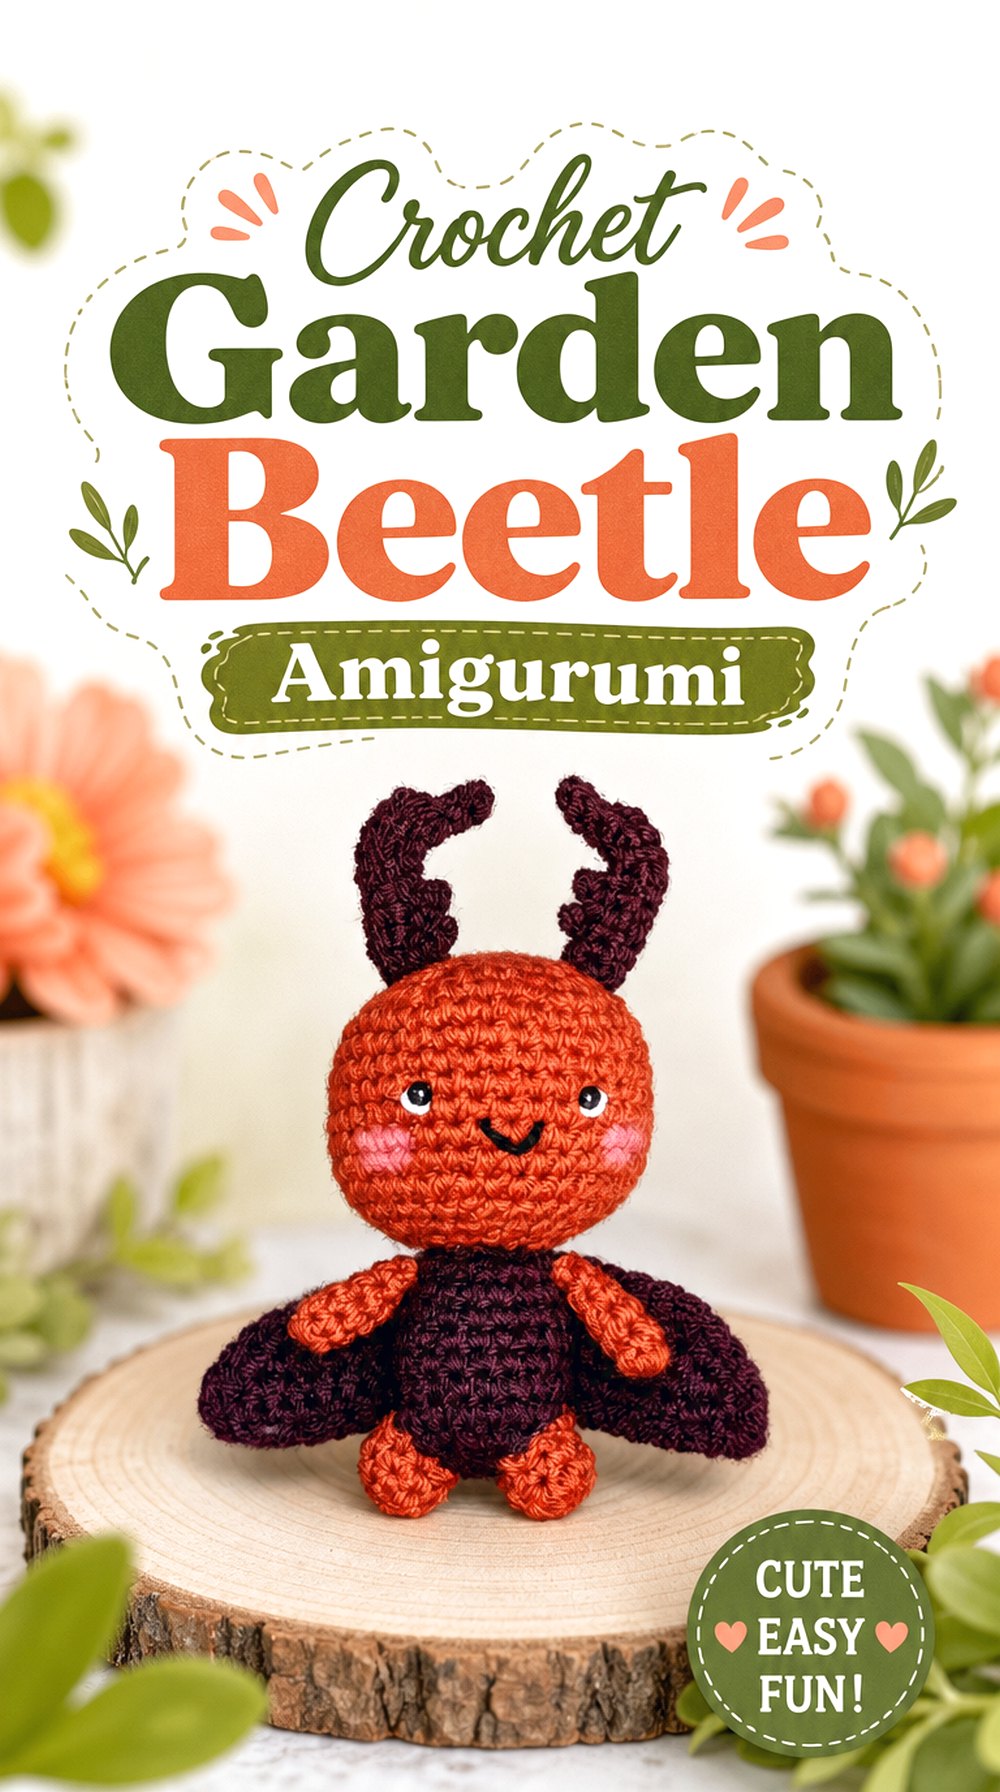
A beetle gives the garden collection a sturdy little bug with a different body language from the bee, butterfly, or dragonfly. It can work as a grounded accent near the front of a display, especially when paired with taller or winged pieces behind it.
This idea is useful when the set needs another compact insect that is not as round as a ladybug. Readers should pay attention to the shell shape, small details, and whether the finished beetle is shown from enough angles to understand the final outline.
Consider the Shell Shape
The beetle’s shell is the main feature that separates it from the other garden bugs. A clear top shape helps it read as a beetle even without extra decoration. Check the finished view closely and notice whether the body looks smooth, segmented, flat, or more raised before choosing it for a carefully arranged set.
Look for Multiple Views
Small beetle amigurumi can look different from the top, side, and front. If the source shows several angles, use them to judge how the piece will sit in a display. A beetle meant to be viewed from above may be ideal for a tabletop garden, while a front-facing shelf scene may need a more visible face.
Check What Is Included
The available search information does not list detailed materials for this beetle source, so readers should check the YouTube page and full guide before buying supplies. This is especially important for small features, stuffing, eye choices, and finishing tools. Confirm the creator’s notes rather than assuming the same materials used for other bug amigurumi will match.
Crochet Soft Spider Amigurumi
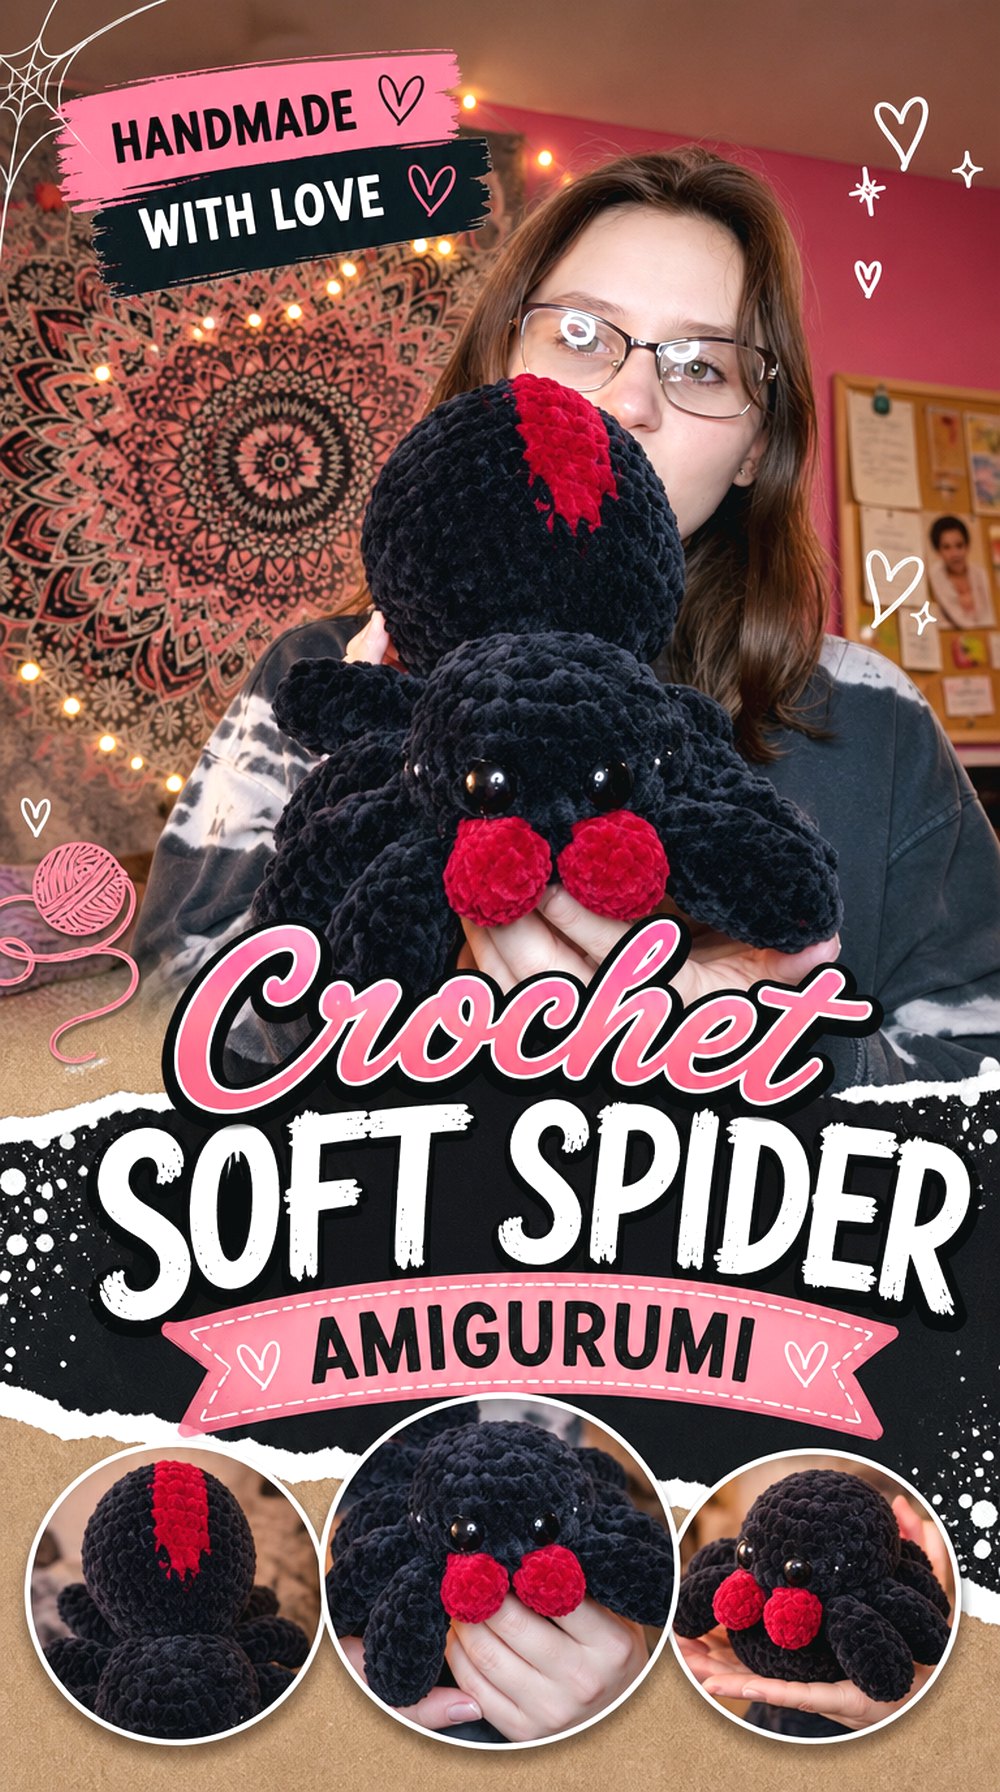
A spider adds a many-legged shape to the tiny garden collection and gives the set a slightly different mood from the cheerful flying bugs. It can sit near the edge of a shelf, beside a crochet leaf, or as a small corner character in a handmade scene.
This project is a good contrast piece because the outline depends on legs more than wings or body markings. Readers choosing it should watch how the legs are spaced, how the body is stuffed, and whether the finished spider suits a cute garden look rather than a seasonal Halloween-only display.
Inspect the Leg Spacing
Leg spacing is the first detail to check on a spider amigurumi. Even placement helps the finished piece look intentional, especially when it is viewed from above. Since small legs can shift the overall outline, readers may want to compare the left and right sides during finishing rather than waiting until the entire spider is complete.
Decide on Display Mood
A crochet spider can feel cute, spooky, or somewhere in between depending on color, face, and size. For a tiny garden collection, look for a softer expression and a scale that does not overpower the other insects. The goal is to make it feel like part of the garden scene, not a separate Halloween decoration.
Confirm the Final Assembly View
Because the spider has multiple small parts, the final assembly view is important. Check whether the creator shows how everything lines up at the end and whether the finished spider sits evenly. Readers who prefer very clear finishing guidance should review that section before committing to the project.
Original Tutorial and Creator Credit
Creator: Hobbi Happi
Conclusion
For a balanced tiny garden collection, start by choosing different silhouettes rather than several bugs with the same body shape. The ladybug and beetle keep the set grounded, while the bee, butterfly, and dragonfly add wing detail. The caterpillar stretches the display horizontally, the ant fills small spaces, and the spider adds a many-legged contrast.
Readers who want a softer display may begin with the ladybug, bee, butterfly, and caterpillar. For a fuller bug scene, use the original tutorials linked above for exact construction details and creator-specific instructions.
FAQs
How do I choose which crochet bug amigurumi to make first?
Start with the bug shape that best fits your display plan. A ladybug or beetle can work well as a compact shelf accent, while a butterfly or dragonfly adds width and wing detail. For a longer garden scene, the caterpillar can help fill space between smaller bugs.
Should all the crochet bugs be the same size?
They do not need to match exactly, but the scale should feel intentional. A slightly larger butterfly or dragonfly can make sense because of the wings, while an ant may look better smaller. Check each creator’s size information, and when it is missing, compare the finished piece on screen before starting.
Can these crochet bug amigurumi projects be used as toys?
Do not assume every amigurumi bug is suitable for play, especially when small eyes, legs, antennae, or sewn details are involved. Check the creator’s safety notes and material choices. For children, avoid making safety claims unless the tutorial clearly provides age guidance and secure finishing information.
What should I check before changing yarn or hook size?
Changing yarn or hook size can change the finished bug’s scale, firmness, and detail. For a tiny garden collection, that can make one piece look too large or too soft beside the others. Review the creator’s material list first, then decide whether the new size still fits your display plan.
Can I sell finished crochet bugs made from these tutorials?
Check each creator’s terms before selling finished items. Some creators state permissions clearly, while others may not. Do not assume that a YouTube tutorial automatically allows selling. Look for license wording, credit requirements, pattern-use limits, and any local rules that apply to handmade toy or decor sales.