Crochet corset back sweaters can range from true long-sleeve open-back garments to fitted corset bodices adapted with sleeves, cardigans, mesh panels, or sweater-length bodies. The most important differences are not simply color: back-opening width, shoulder support, sleeve weight, bodice structure, fabric stretch, and lacing placement can completely change how the garment fits and feels.
The ideas below deliberately cover several construction directions. Some linked tutorials already teach an open-back or sleeved corset garment. Others teach a corset, tie-back top, bustier, or sweater structure that can serve as the foundation for a compatible corset-back sweater adaptation. When combining ideas, use the original creator’s construction for the part they actually teach and confirm your own measurements before altering the remaining garment.
Quick List
- Crochet Open-Back Corset-Laced Sweater
- Crochet Ribbed Lace-Up Corset-Back Sweater
- Crochet Puff-Sleeve Corset-Back Sweater
- Crochet Mesh Long-Sleeve Corset-Back Sweater
- Crochet Romantic Corset-Back Sweater with Full Sleeves
- Crochet Straight-Neck Corset-Back Pullover Sweater
- Crochet Bustier-Front Corset-Back Sweater
- Crochet Buttoned-Waist Open-Back Corset Sweater
- Crochet Color-Block Tie-Back Corset Sweater
- Crochet Filet Lace Corset-Back Sweater
- Crochet Made-to-Measure Corset-Back Sweater
- Crochet Ruffle-Hem Corset-Back Sweater
- Crochet Halter-Yoke Corset-Back Sweater
- Crochet Cross-Laced Halter Corset Sweater
- Crochet Chunky Backless Corset-Laced Sweater Vest
- Crochet Mohair Bow-Back Corset Sweater
- Crochet V-Stitch Corset-Back Cardigan Sweater
- Crochet Cup-Shaped Lace-Up Corset-Back Sweater
- Crochet Tube-Bodice Corset-Back Shrug Sweater
- Crochet Waist-Cincher Corset-Back Layering Sweater
- Crochet Motif-Panel Corset-Back Sweater
- Crochet Structured-Waist Corset-Back Sweater
Plan the Back Opening Before You Plan the Lacing
Corset lacing works best when the two back edges are already positioned where you want them. It can give a garment some adjustability, but it cannot reliably compensate for shoulders that are too narrow, armholes that pull, or a front panel that does not fit the bust.
Decide first how much of the back you want exposed and where you want the opening to begin and end. A higher opening can retain more upper-back support, while a deeper opening makes the lacing a stronger visual feature and may change underlayer options. Also check whether the edges receiving the ties feel stable enough to resist stretching.
Treat the lacing as one part of the fit system rather than a replacement for accurate sweater measurements. Wearable planning should account for body measurements, intended ease, fabric stretch, shoulder behavior, garment weight, and edging tension.
Match Yarn Behavior to the Sweater You Want
A corset-back sweater asks the same yarn to handle several jobs. The body may need drape, the sleeves need comfortable movement, and the lacing edges should remain controlled enough that repeated tightening does not pull them badly out of shape.
Dense, firm fabric can make the corset effect look more defined, but using that same density throughout large sleeves may create a heavier garment. Open mesh produces a lighter-looking sweater, yet the edges around the lacing may need more attention because open fabric can distort differently under tension. Fuzzy yarn can soften the entire silhouette but may hide crisp edging or intricate eyelet details.
If substituting yarn, compare the resulting fabric rather than matching fiber names alone. Swatch, handle the fabric, and consider how its weight and stretch change after it has been allowed to relax.
Check the Fit in the Right Order
For this style, start with the parts the corset closure cannot fix. The shoulders should sit where intended, the armholes should allow movement, and the front should provide the coverage and ease you want. Only after those areas look right should the back opening and lacing be used to refine the waist or back fit.
Try-on checkpoints are particularly valuable before adding heavy or dramatic sleeves. Sleeve weight can pull on the shoulder line and widen an open back that looked balanced when the bodice was unfinished. Also check the garment while moving your arms rather than judging it only while standing still.
If adapting a sleeveless corset tutorial, do not assume that adding sleeves is simply a finishing detail. The armhole shape, shoulder support, total garment weight, and seam or joining points all become part of the adaptation.
Crochet Open Back Corset Laced Sweater
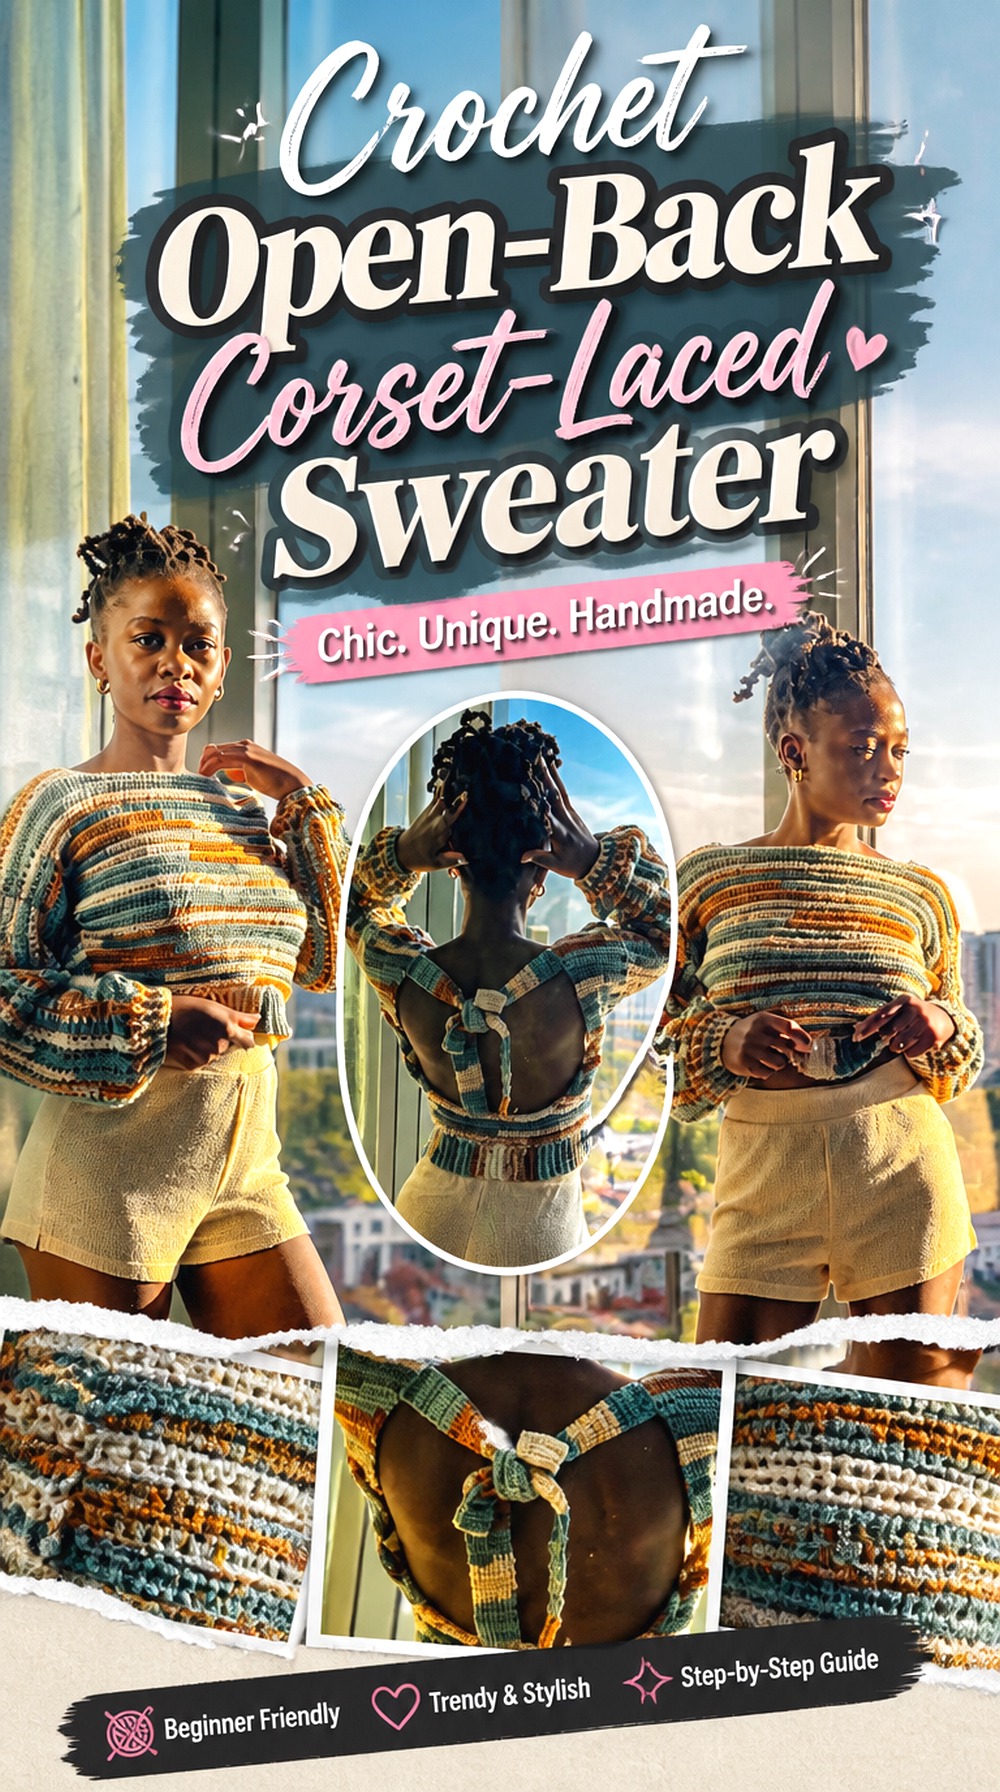
This idea starts with a true open-back crochet sweater rather than a separate corset top. That makes it one of the most direct foundations in the collection for readers who want a conventional sweater silhouette with the back turned into the statement feature. The linked tutorial establishes the open-back sweater construction; corset-style crossing ties can then be treated as a deliberate adaptation if the finished edges are suitable.
Compared with converting a strapless or halter bodice, this direction preserves much more of the familiar sweater framework. It is especially useful when sleeves and upper-body coverage matter as much as the decorative back.
Stabilize the Edges Before Adding Crossed Ties
Lacing repeatedly transfers tension into the two back edges. Before turning an open sweater into a corset-laced version, inspect how those edges behave when gently pulled. If they stretch much more than the rest of the garment, simply adding long ties may exaggerate the opening instead of controlling it.
A neat, stable finishing edge can make the crossed lacing look more intentional and help the two sides remain visually balanced.
Let the Original Shoulder Fit Stay in Charge
Do not tighten the lacing until the sweater appears to fit through the upper body. If pulling the cords is required to move the shoulders into position, the underlying sweater fit needs attention first.
The better goal is a sweater that already sits comfortably at the shoulders, with the back ties controlling the opening rather than carrying the whole garment.
Test the Back Gap While Moving
Check the opening with your arms relaxed, raised, and reaching forward. An open back can widen when the shoulder blades move, especially once sleeves are involved.
That movement test gives a more useful picture of how much lacing flexibility you need than a static mirror check. It also helps you decide whether you prefer closely crossed ties or a visibly wider corset gap.
Crochet Ribbed Lace Up Corset Back Sweater
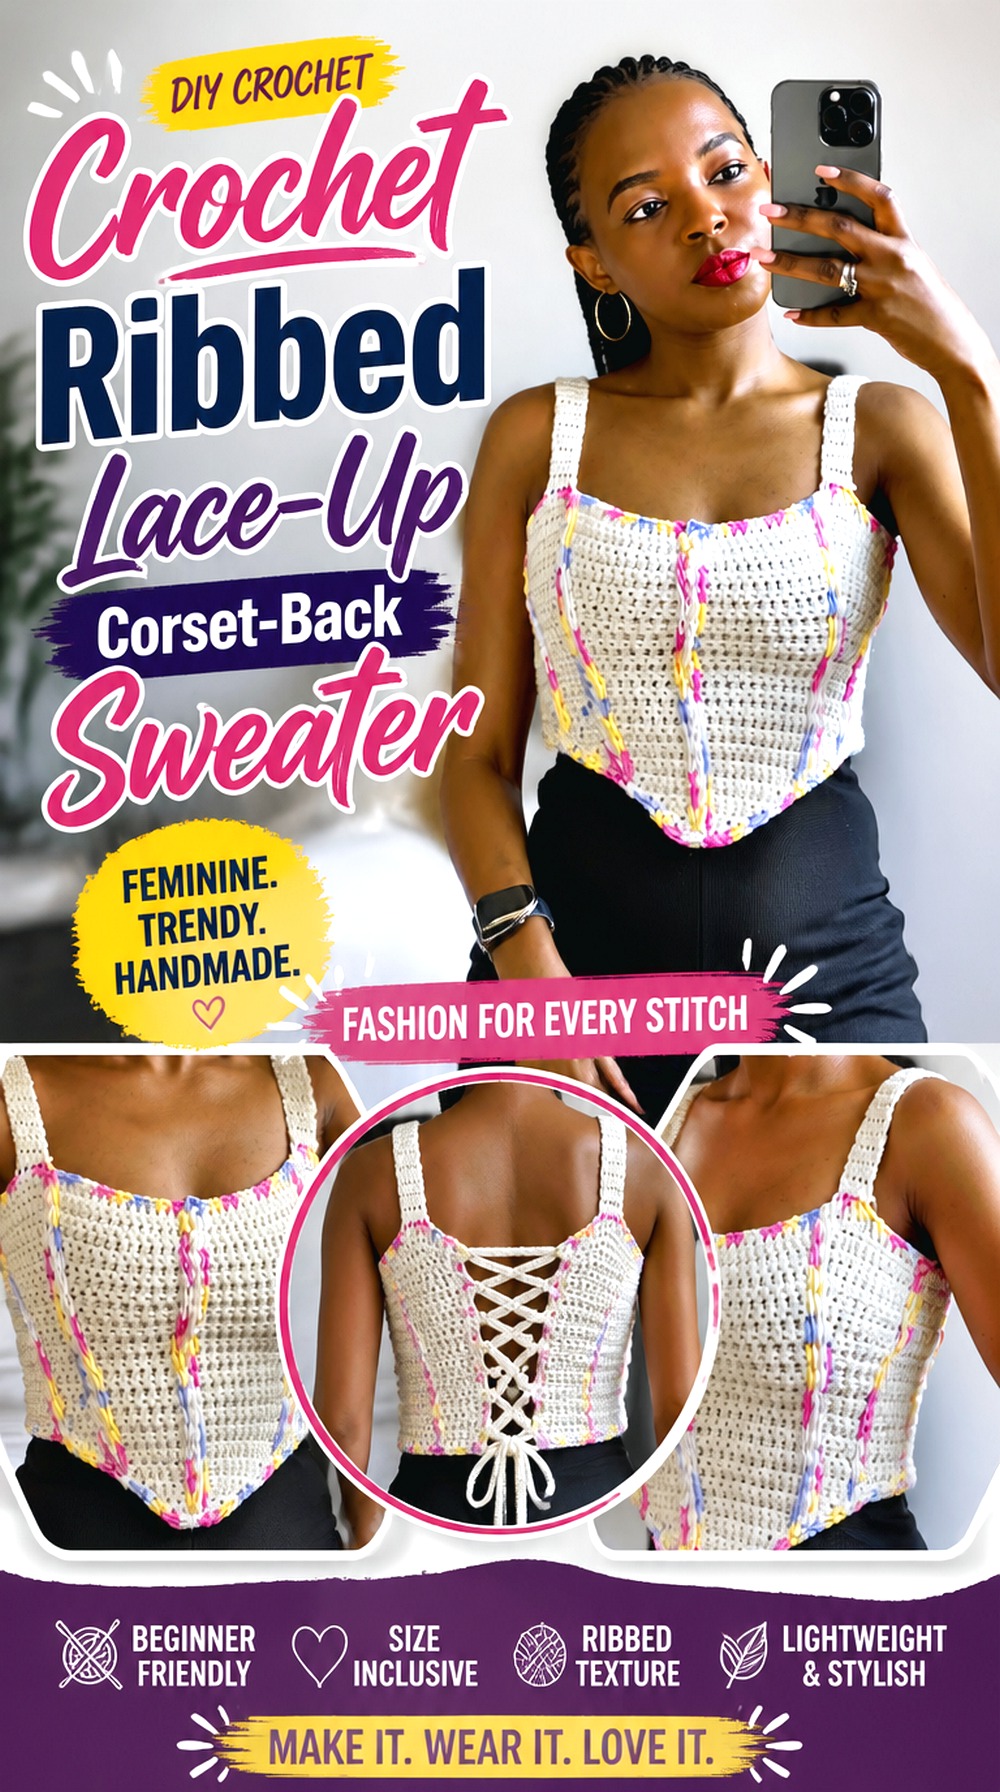
Ribbing gives this sweater direction a more defined surface than a smooth or highly open stitch pattern. The source tutorial already features a textured corset top with a lace-up back, making its bodice an especially relevant fit reference. The sweater version extends that visual language into sleeves and additional body coverage rather than changing the central corset feature.
This approach suits readers who want the lacing and the fabric texture to share attention. A restrained yarn color can emphasize the raised lines, while highly variegated yarn may make subtle ribbing less obvious. The sleeve adaptation should be planned around the bodice’s existing arm and shoulder structure.
Keep the Ribbing From Competing With the Back Closure
Texture can provide useful visual structure, but too many additional details around the lacing can make the back feel crowded. Decide whether the ribbing or the crossed cord should be the dominant feature.
Before finishing the garment, view it from several feet away. That simple check makes it easier to see whether the texture still reads clearly without overwhelming the corset opening.
Match Sleeve Weight to a Fitted Bodice
A relatively close-fitting bodice can react noticeably to heavy sleeves. If your sleeve fabric is much denser than the original corset section, the added weight may pull at the upper edges or change how the back gap sits.
Build enough of a sleeve to evaluate its weight before committing to two full sleeves, particularly if you are also changing the original yarn.
Original Tutorial and Creator Credit
Creator: AC Crochets
Crochet Puff Sleeve Corset Back Sweater

A fitted corset body paired with rounded puff sleeves creates a deliberate contrast between a defined torso and more volume at the upper arm. The linked tutorial already combines a crochet corset top with puff sleeves, so this is one of the closer source matches in the article. Extending the body slightly or developing the sleeve treatment into a sweater-weight layer can move the finished look further from a warm-weather top.
The main planning question is proportion. Very full sleeves can visually dominate a short fitted body, while a longer torso can make the contrast less dramatic. Check the finished silhouette before automatically adding more sleeve volume.
Sleeve Fullness Changes the Shoulder Balance
A puff sleeve draws attention to the outer shoulder line. That can look striking beside a narrow lace-up back, but it also means uneven sleeve volume becomes easy to notice.
Compare both sleeves while they are still easy to adjust. Look at fullness, length, and how each sleeve meets the bodice rather than evaluating the cuffs alone.
Give the Corset Section Enough Visual Definition
If the sleeves are the most dramatic element, the waist can disappear visually unless the corset portion retains a clear shape. A defined lower edge, controlled back opening, or distinct texture can keep the bodice from becoming secondary.
This does not require making the waist excessively tight. The goal is visual separation between the fitted center and the fuller sleeves.
Check Underarm Movement Before Finishing
Volume does not automatically mean mobility. A sleeve can look loose at the upper arm while still restricting movement where it joins the bodice.
Try the garment on before completing decorative finishing and raise your arms naturally. If the join pulls the corset body upward, address the underlying fit rather than expecting the lacing to hold everything down.
Original Tutorial and Creator Credit
Creator: 🧶Mihankushea🧶
Crochet Mesh Long Sleeve Corset Back Sweater
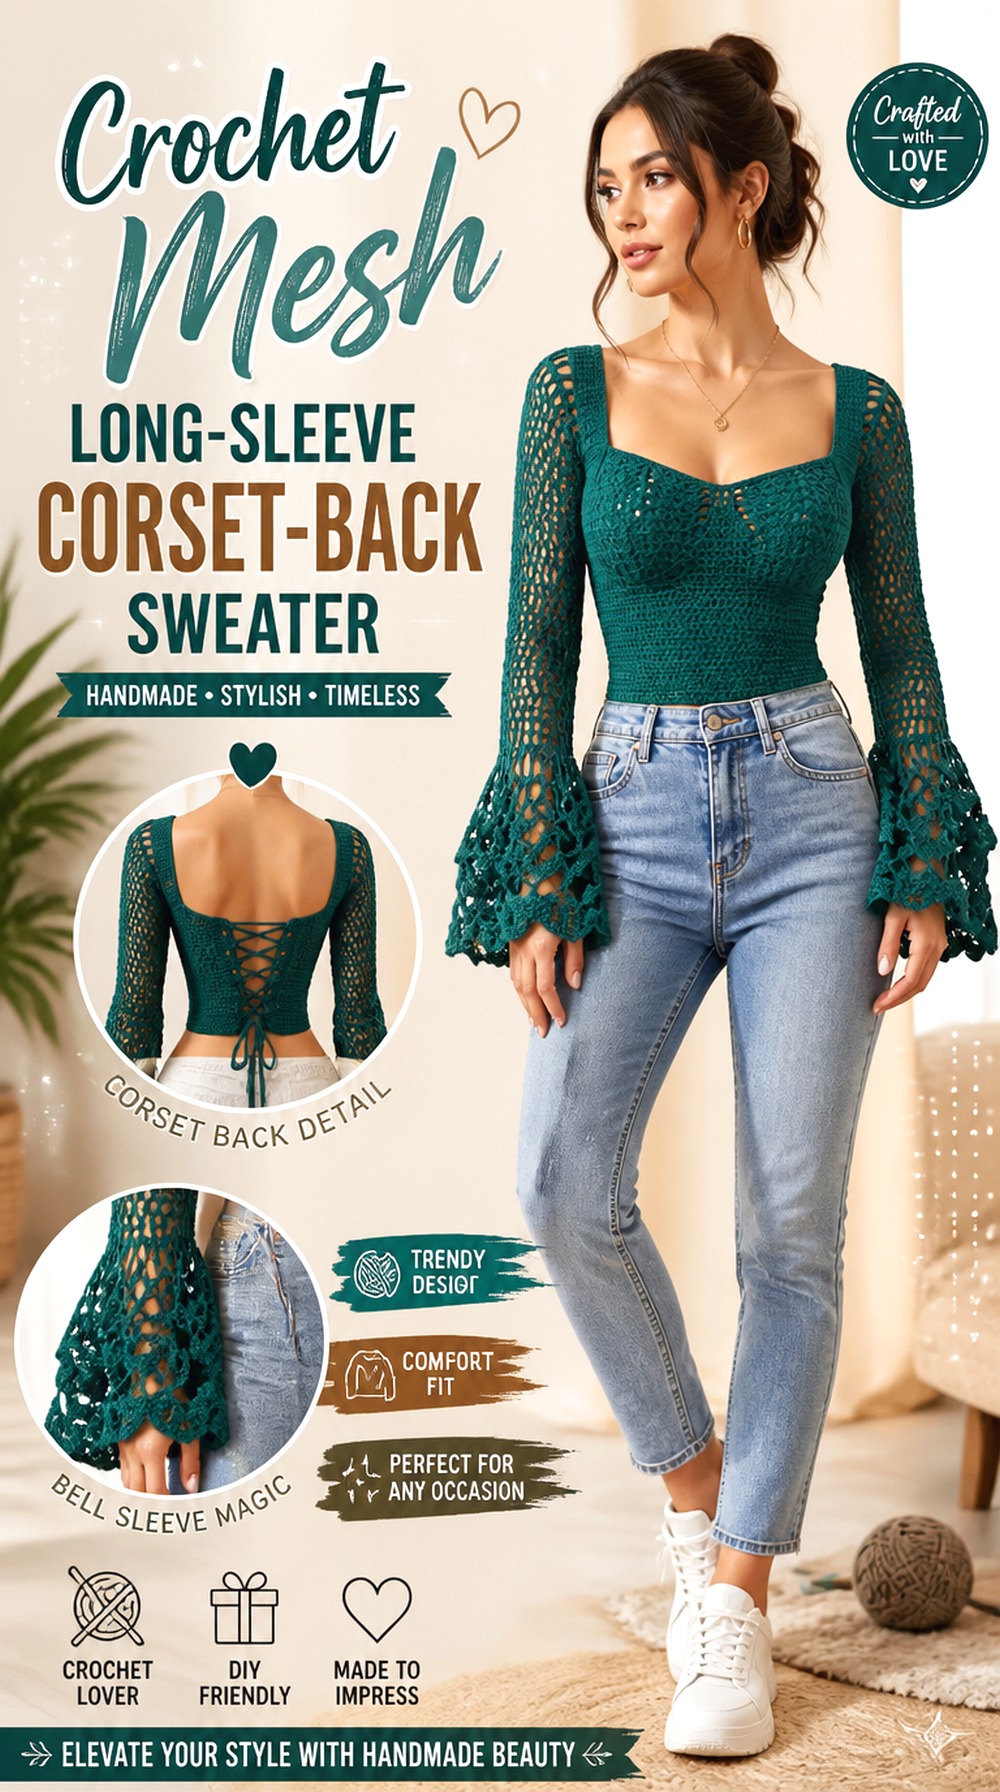
This direction shifts the corset sweater toward a lighter, more open fabric. The source specifically teaches a corset top with long mesh sleeves, giving readers a useful reference for combining close body shaping with significantly more openness over the arms. Turning that concept into a sweater-length piece can create additional torso coverage without losing the airy character.
Mesh also makes the underlayer part of the finished outfit. Instead of treating transparency as an afterthought, decide whether you want the garment worn over a camisole, fitted longline layer, bralette, or another piece that intentionally shows through.
Open Fabric Makes the Underlayer Part of the Design
The color and neckline beneath mesh can change the sweater almost as much as the yarn itself. A high-contrast underlayer emphasizes every opening, while a closer color produces a quieter result.
Try the partially finished garment over the type of layer you actually plan to wear. That reveals much more than judging the crochet against bare skin or a work surface.
Protect the Lacing Area From Excess Stretch
The back closure needs more control than a loose mesh sleeve. If you adapt an open stitch pattern into the back edges as well, watch for elongated openings or edges that deform when the ties are tightened.
You do not need the entire sweater to have equal density. A more stable border around the corset opening can coexist with softer mesh elsewhere.
Watch the Transition From Fitted Body to Sleeve
The contrast between a fitted torso and open sleeve is part of this project’s appeal, so the join between them deserves attention. A sudden change in stretch or density can make the armhole look stiff even when both sections look attractive separately.
Assess that transition before adding decorative cuffs or other finishing details.
Original Tutorial and Creator Credit
Creator: Myzayi Yunus
Crochet Romantic Corset Back Sweater with Full Sleeves

This option keeps the feminine fullness of a puff-sleeve corset but pushes the finished garment toward a more substantial sweater silhouette. Chenda DIY’s tutorial supplies the corset-and-puff-sleeve foundation; the editorial adaptation is to consider additional sleeve length or torso coverage while preserving the fitted center.
It differs from the previous puff-sleeve idea through proportion rather than color. Here, the goal is a fuller garment with the bodice functioning as a defined middle section, not a cropped corset with sleeves added around it. Longer sleeves increase yarn weight, so the upper-body fit deserves another check after the garment begins to gain weight.
Longer Sleeves Need a Second Fit Check
A bodice that sits perfectly before the sleeves are finished can settle differently afterward. Added fabric may pull downward at the shoulders and slightly change the corset opening.
Pause once one sleeve reaches substantial length and compare the worn fit with the sleeveless version. It is much easier to respond then than after every edge has been completed.
Keep the Lower Body From Becoming Too Busy
Full sleeves, corset shaping, and back lacing already create several visual focal points. If you extend the torso, a relatively straightforward lower section can keep the garment coherent.
Before adding ruffles, extra ties, or dense surface decoration, consider whether the silhouette already has enough movement from the sleeves and crossed back.
Original Tutorial and Creator Credit
Creator: Chenda DIY
Crochet Straight Neck Corset Back Pullover Sweater
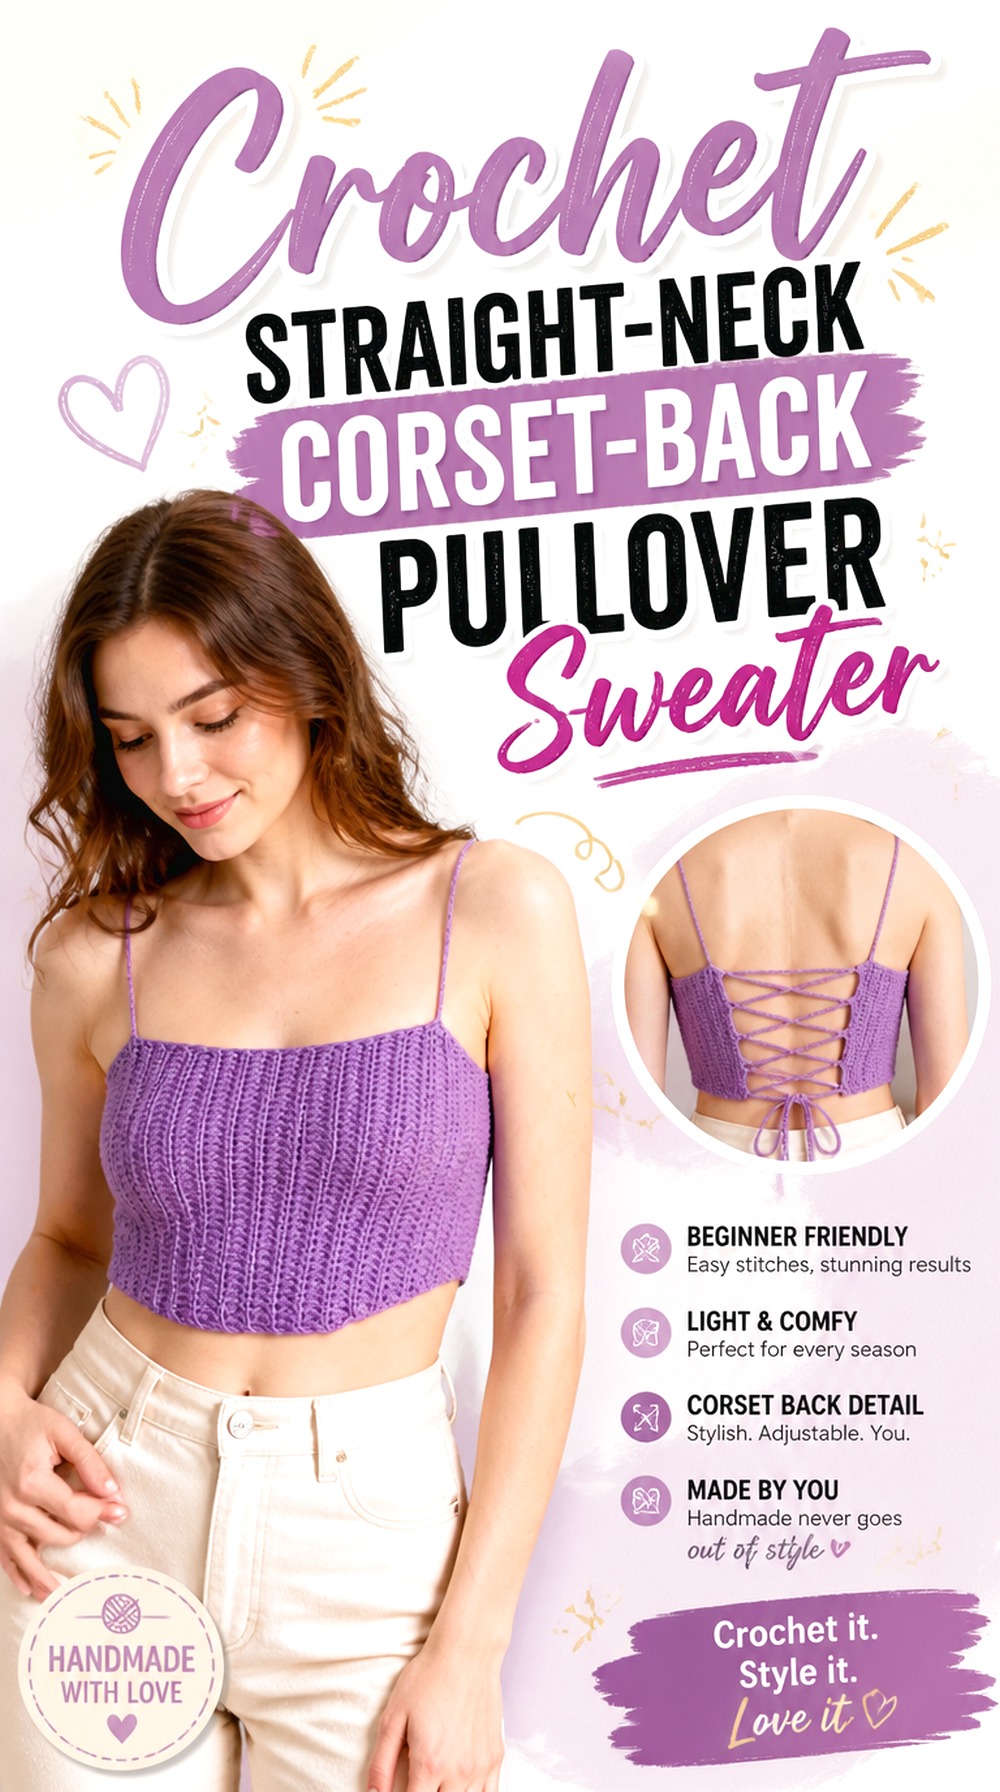
A clean corset bodice can become the visual center of a pullover-style sweater without needing exaggerated sleeve volume or open mesh. Tara’s tutorial supplies the corset-top foundation, while the pullover treatment is an adaptation rather than something taught in the original video.
This is a useful direction for readers who prefer a simpler front view. Keep the neckline visually clean, carry the body farther down the torso if desired, and let the lace-up back provide the strongest decorative feature. If you introduce sleeves, plan their attachment around the original bodice shape instead of assuming a standard sweater armhole will automatically fit the corset construction.
A Simple Front Makes Back Details More Important
With fewer decorative elements on the front, uneven back edging or irregular lacing will stand out more. Before adding the cord, compare the two back edges for length and shape.
If one side has stretched during handling, correct that difference before lacing rather than tightening one area more aggressively to disguise it.
Do Not Force a Pullover Sleeve Onto a Corset Armhole
A sleeveless corset and a pullover distribute support differently. When adding sleeves, confirm that there is enough structure around the shoulder and underarm to carry them comfortably.
The source should remain your guide for the corset construction; use a genuinely compatible sleeve method for the adaptation rather than inventing stitch counts from appearance alone.
Original Tutorial and Creator Credit
Creator: Tara
Crochet Bustier Front Corset Back Sweater
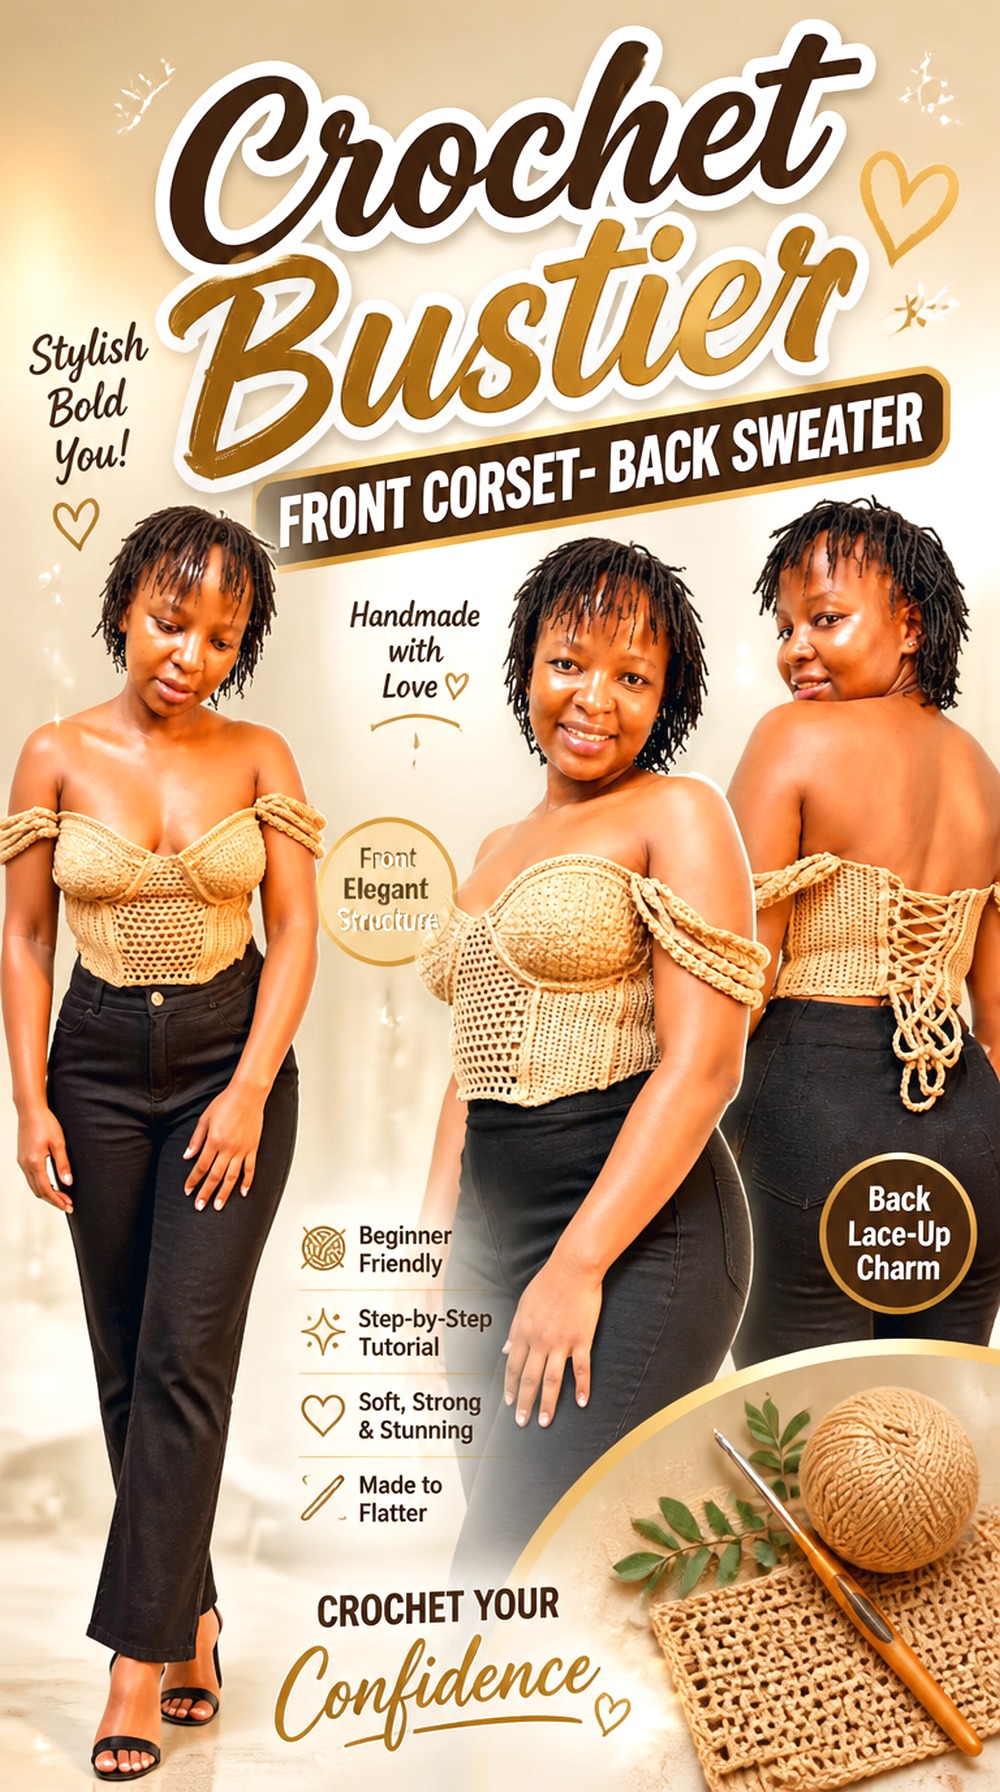
A bustier-shaped front gives the sweater more deliberate upper-body shaping than a rectangular or boxy panel. LaDenser Crochets’ tutorial teaches a bustier corset top, providing a useful foundation for readers who want the front silhouette to remain strongly corset-inspired even after sleeves or additional body length are introduced.
The sweater adaptation works best when those additions support rather than hide the bodice architecture. A bulky neckline or oversized front ribbing, for example, could compete with the shaped bustier front. Consider a simpler sleeve or upper-edge treatment if you want that front construction to remain visible.
Preserve the Bustier Shape When Adding Length
Extending the garment downward should not automatically mean continuing every shaping line unchanged. First decide where you want the visibly fitted corset section to end and where the sweater body should begin to relax.
That division helps prevent the entire torso from becoming equally tight when only the bustier portion was meant to look structured.
Judge Coverage Before Choosing an Underlayer
Bustier shapes can create different neckline and side coverage from a standard sweater front. Look at the finished source garment from more than one angle before planning your version.
If you expect to wear the sweater over another top, check that the underlayer’s neckline and armholes work with the bustier rather than showing unintentionally in awkward places.
Original Tutorial and Creator Credit
Creator: LaDenser Crochets
Crochet Buttoned Waist Open Back Corset Sweater
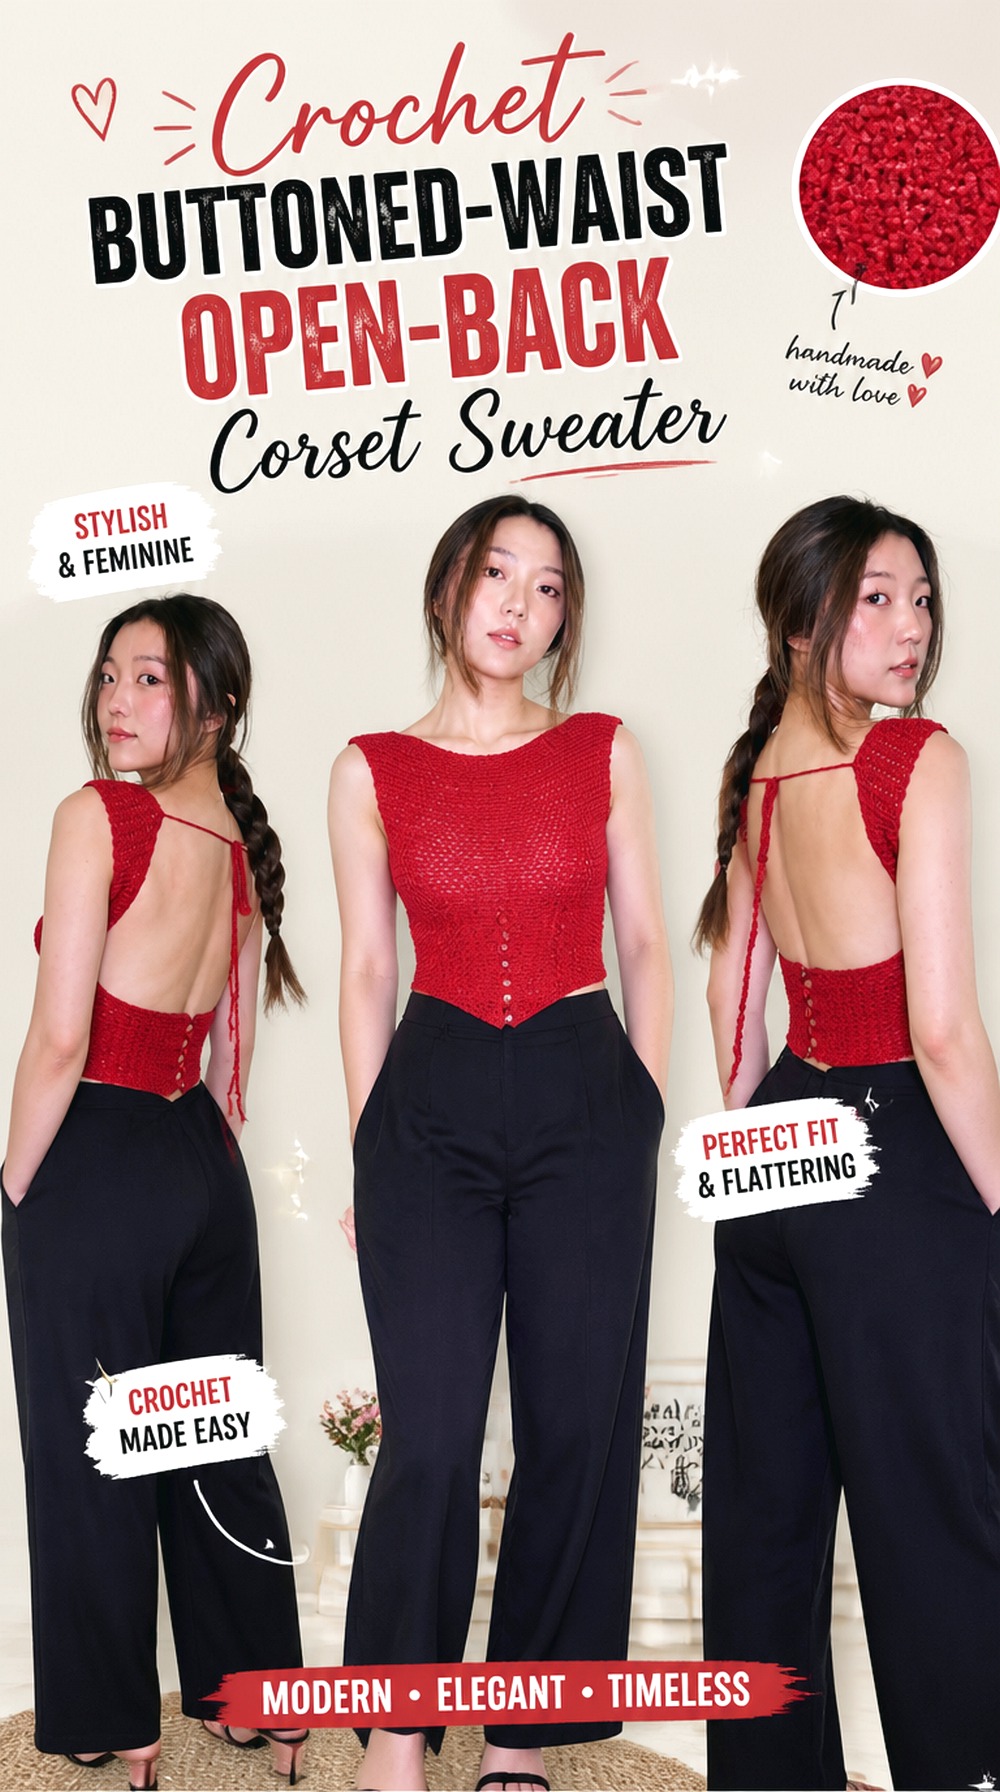
This idea uses an open-back, sleeved crochet top with a defined waistband and button details as the base, making it one of the more sweater-like sources in the collection. Yaejiyea’s tutorial includes the waistband, button-related construction, front panel, sleeves, and open-back chains. The corset direction comes from emphasizing those back ties as an intentional crossed closure.
The defined waist makes this garment distinct from a sweater whose back opening continues freely to the hem. It can suit readers who want the lower torso visually anchored while leaving more openness above it.
The Waistband Can Anchor the Entire Back Opening
A structured lower band gives the lacing a clear stopping point. That can prevent the open-back feature from looking visually disconnected from the rest of the sweater.
When trying the garment on, check whether the waistband sits level before judging the crossed ties. A tilted band can make perfectly even lacing appear unbalanced.
Buttons and Corset Lacing Need Visual Hierarchy
Buttons plus back ties create two closure details in one garment. Decide which one should attract attention first.
Using a quieter tie treatment can let the buttons remain noticeable, while a strongly contrasting corset cord shifts attention toward the back. Neither is automatically better; the important part is making the combination intentional.
Do the Movement Check Above the Fixed Waist
A more secure waistband can stay in place while the upper open back moves substantially with the shoulders. Reach forward and lift your arms before deciding how tightly to lace the upper section.
Enough flexibility should remain for normal movement without requiring the lower band to distort.
Original Tutorial and Creator Credit
Creator: yaejiyea
Crochet Color Block Tie Back Corset Sweater

A tie-back top offers a useful starting point when you want the sweater’s adjustability to come from separated back sections rather than a completely closed rear panel. Jana’s tutorial teaches the tie-back top itself; sleeves or greater torso coverage are adaptation choices for the sweater version.
Color blocking can add another layer of structure, but it should reinforce the garment shape rather than function as the only difference. Consider placing a color change where the fitted bodice transitions into sleeve or lower-body fabric so the construction remains easy to read from both front and back.
Put Color Changes Where They Clarify Shape
A corset-back sweater already contains strong lines from the opening and ties. Randomly adding several color sections can weaken that visual structure.
Instead, use color boundaries to emphasize meaningful divisions such as the waist, sleeve, cuff, or upper bodice. Lay the work flat periodically to make sure corresponding sections still look balanced.
Confirm the Tie-Back Fit Before Adding Sleeve Weight
Finish enough of the original tie-back structure to understand how the body fits before attaching substantial sleeves. Otherwise, you may be trying to evaluate two changes at the same time.
Once the bodice sits comfortably, sleeves can be planned around that known fit rather than being used to compensate for it.
Original Tutorial and Creator Credit
Creator: jana
Crochet Filet Lace Corset Back Sweater
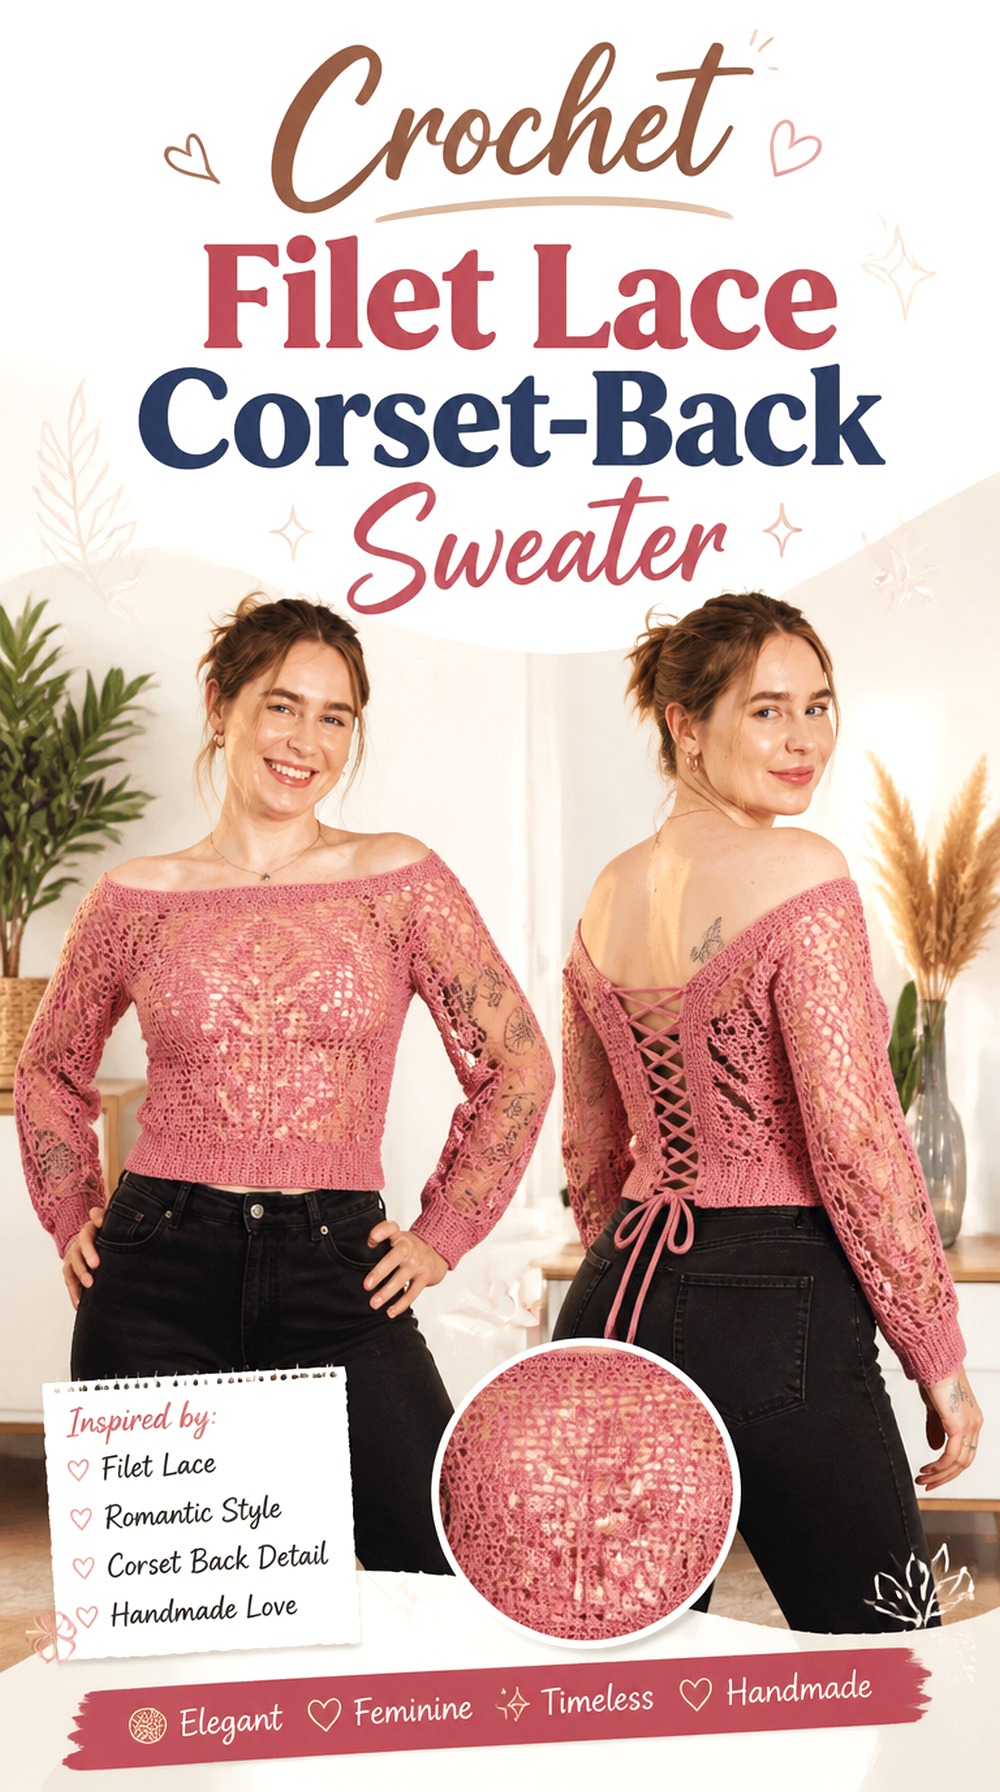
Filet crochet gives a corset-back sweater a visibly lighter surface than ribbing or dense fabric. Katie Joslin’s tutorial teaches a filet tie-back top, making it a useful base for readers who want the openwork to continue the airy feeling of the back closure.
A sweater adaptation could add sleeves while keeping that open texture as a central design feature. Because filet fabric relies on clearly defined open and filled spaces, check how your chosen yarn displays the pattern. A very fuzzy yarn can soften those edges, while a smoother yarn generally allows the geometry to remain easier to see.
Keep Openwork Aligned Across a Larger Garment
Small alignment differences become more noticeable when filet fabric extends into a sleeve or longer body. Before joining large sections, compare their relaxed dimensions and pattern direction.
If one piece has stretched more than another, address that before assembly. Corset lacing should not be expected to straighten unrelated openwork distortion.
Plan Coverage Before You Commit to the Back Opening
Filet plus an open corset back can produce much more visible skin or underlayer than either feature alone. Decide early whether that is the intended result.
Trying a swatch over your likely base layer is a simple way to evaluate both opacity and color contrast before making the full garment.
Original Tutorial and Creator Credit
Creator: Katie Joslin
Crochet Made to Measure Corset Back Sweater

For a fitted sweater, measurement-led construction can be more useful than starting with a visually similar garment that does not suit your proportions. FTK Crochet’s corset tutorial focuses on a corset top foundation that can inform the fitted middle of a sweater adaptation.
This direction is less about a specific decorative sleeve and more about building the central garment around the wearer’s measurements first. Once the corset portion is established, sleeves and additional body length should be treated as separate fit decisions. Keep notes on your own measurements and fabric behavior so you are not relying on memory when the adaptation moves beyond the original tutorial.
Record the Fit You Actually Use
Write down the measurements and fit choices that apply to your version, especially if you change yarn or add length. That record becomes valuable when you later need to position sleeves, determine symmetry, or reproduce the opposite side.
Do not replace the creator’s sizing guidance with guessed universal numbers; record your own decisions alongside the source.
Lacing Should Refine, Not Create, the Entire Fit
Leave the corset opening enough room to function as an adjustable detail, but avoid making the garment dramatically oversized with the expectation that the ties will pull it into shape.
A moderate, intentional back gap generally behaves more predictably than using lacing to compensate for large sizing errors elsewhere.
Original Tutorial and Creator Credit
Creator: FTK Crochet
Crochet Ruffle Hem Corset Back Sweater
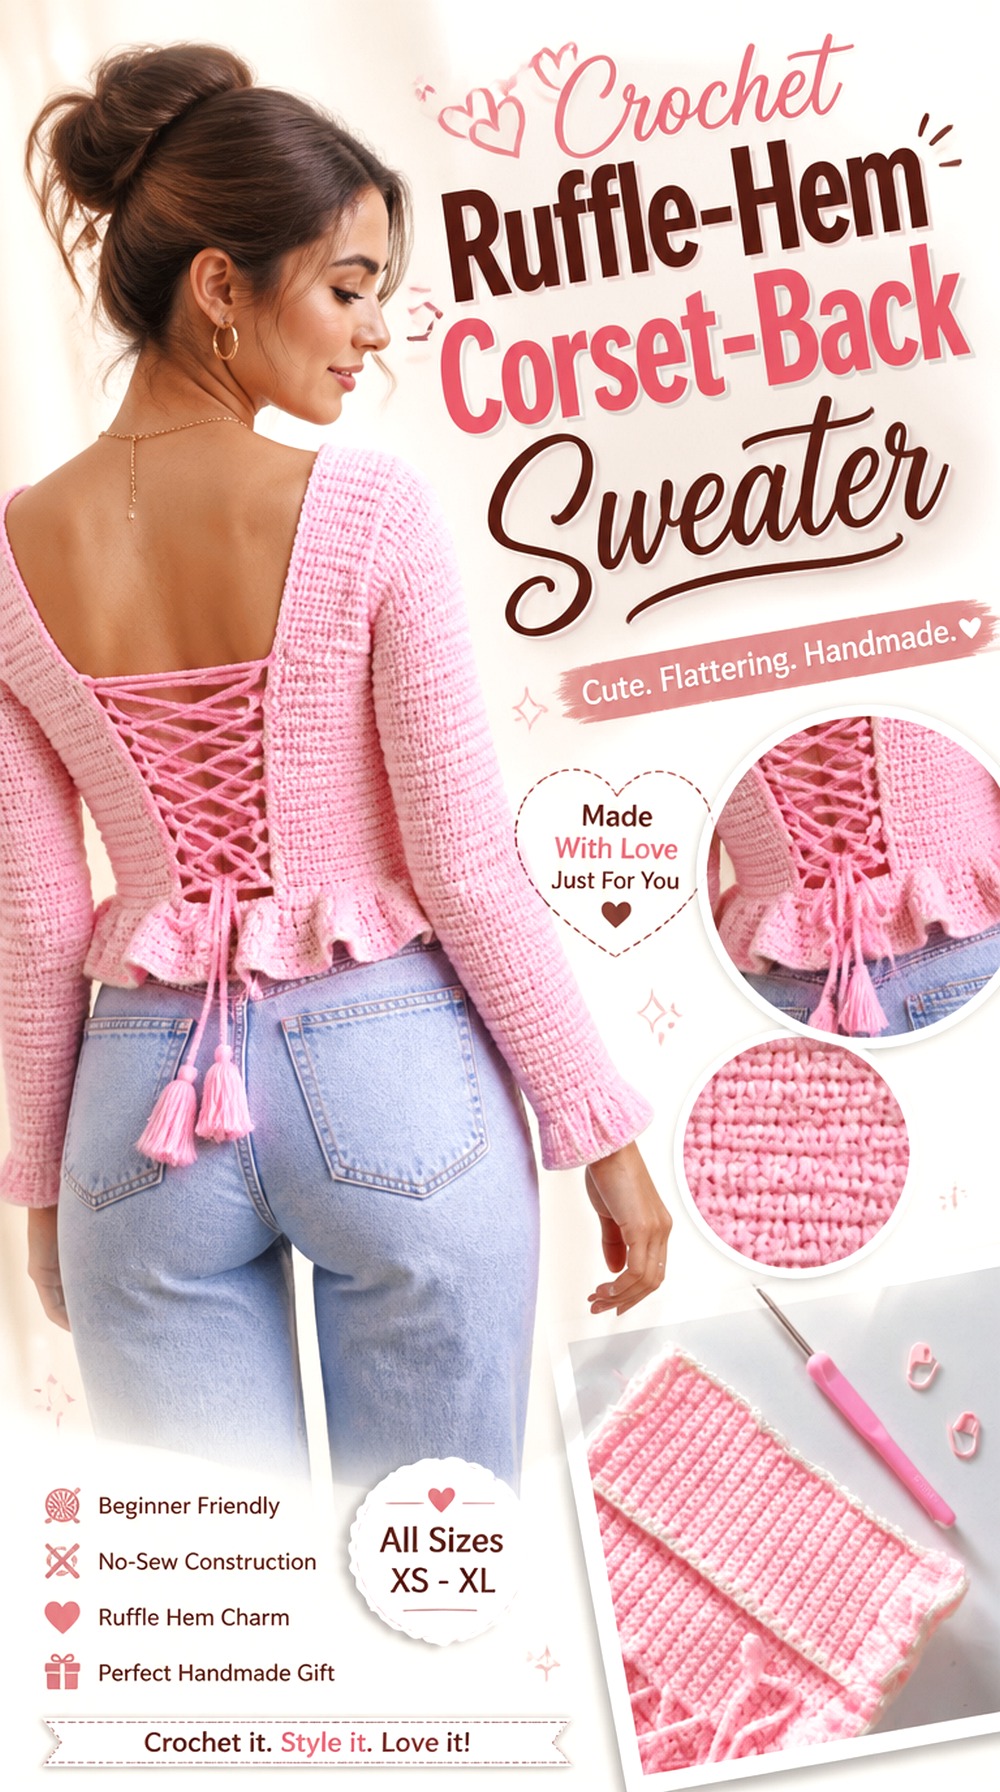
A ruffled lower edge softens the transition between a fitted corset body and the rest of the outfit. Archisdiary’s source tutorial includes a lace-up corset construction and ruffled lower treatment; adding compatible sleeves turns that fitted top concept into the sweater idea described here.
This works best when the ruffle remains a deliberate hem feature rather than being repeated everywhere. With corset lacing already creating movement at the back, additional ruffles at the cuffs, neckline, and shoulders could quickly change the balance. Decide whether the hem should remain the single soft finishing detail.
Keep the Ruffle From Shortening the Visual Torso
A full hem can visually widen the point where it begins. If you want the sweater to appear longer through the middle, compare the body both before and after the ruffle starts.
You may prefer a modest flare or a lower placement rather than letting the decorative edge dominate a short corset section.
Finish the Lacing Edges Before Evaluating the Frill
The back opening affects how the waist circumference appears when worn. Finalize the stable corset edges and test the lacing before deciding whether the lower ruffle has the right amount of visual fullness.
That order gives you a more realistic view of the finished silhouette.
Original Tutorial and Creator Credit
Creator: archisdiary🌸
Crochet Halter Yoke Corset Back Sweater

A halter corset creates an unusually open shoulder line for a sweater adaptation. The Happy Unraveler’s tutorial specifically teaches an open-back corset halter, so the corset feature itself is already established. To interpret it as a sweater, consider a compatible sleeve layer or extended shoulder treatment rather than hiding the halter shape entirely.
This option differs from a standard pullover because the upper body remains visually open and the neckline carries more of the garment’s identity. It may work particularly well as a layering sweater over a fitted base, allowing the corset and halter structure to stay visible without depending on it for all coverage.
Preserve the Halter Line Instead of Covering It
If you add sleeves, avoid turning the upper garment into a conventional crew-neck shape unless that is your explicit goal. The halter line is what separates this direction from the other fitted corset sweaters.
A detached-looking sleeve or carefully planned shoulder connection can retain more of that open neckline.
Check Neck Support Against Added Garment Weight
A lightweight halter top and a sweater with substantial sleeves do not place the same demand on the upper garment. Do not assume the original neck support should carry a much heavier adaptation unchanged.
Assess where the extra weight is transferred and keep the shoulders comfortable rather than making the neck tie do all the work.
Original Tutorial and Creator Credit
Creator: The Happy Unraveler
Crochet Cross Laced Halter Corset Sweater
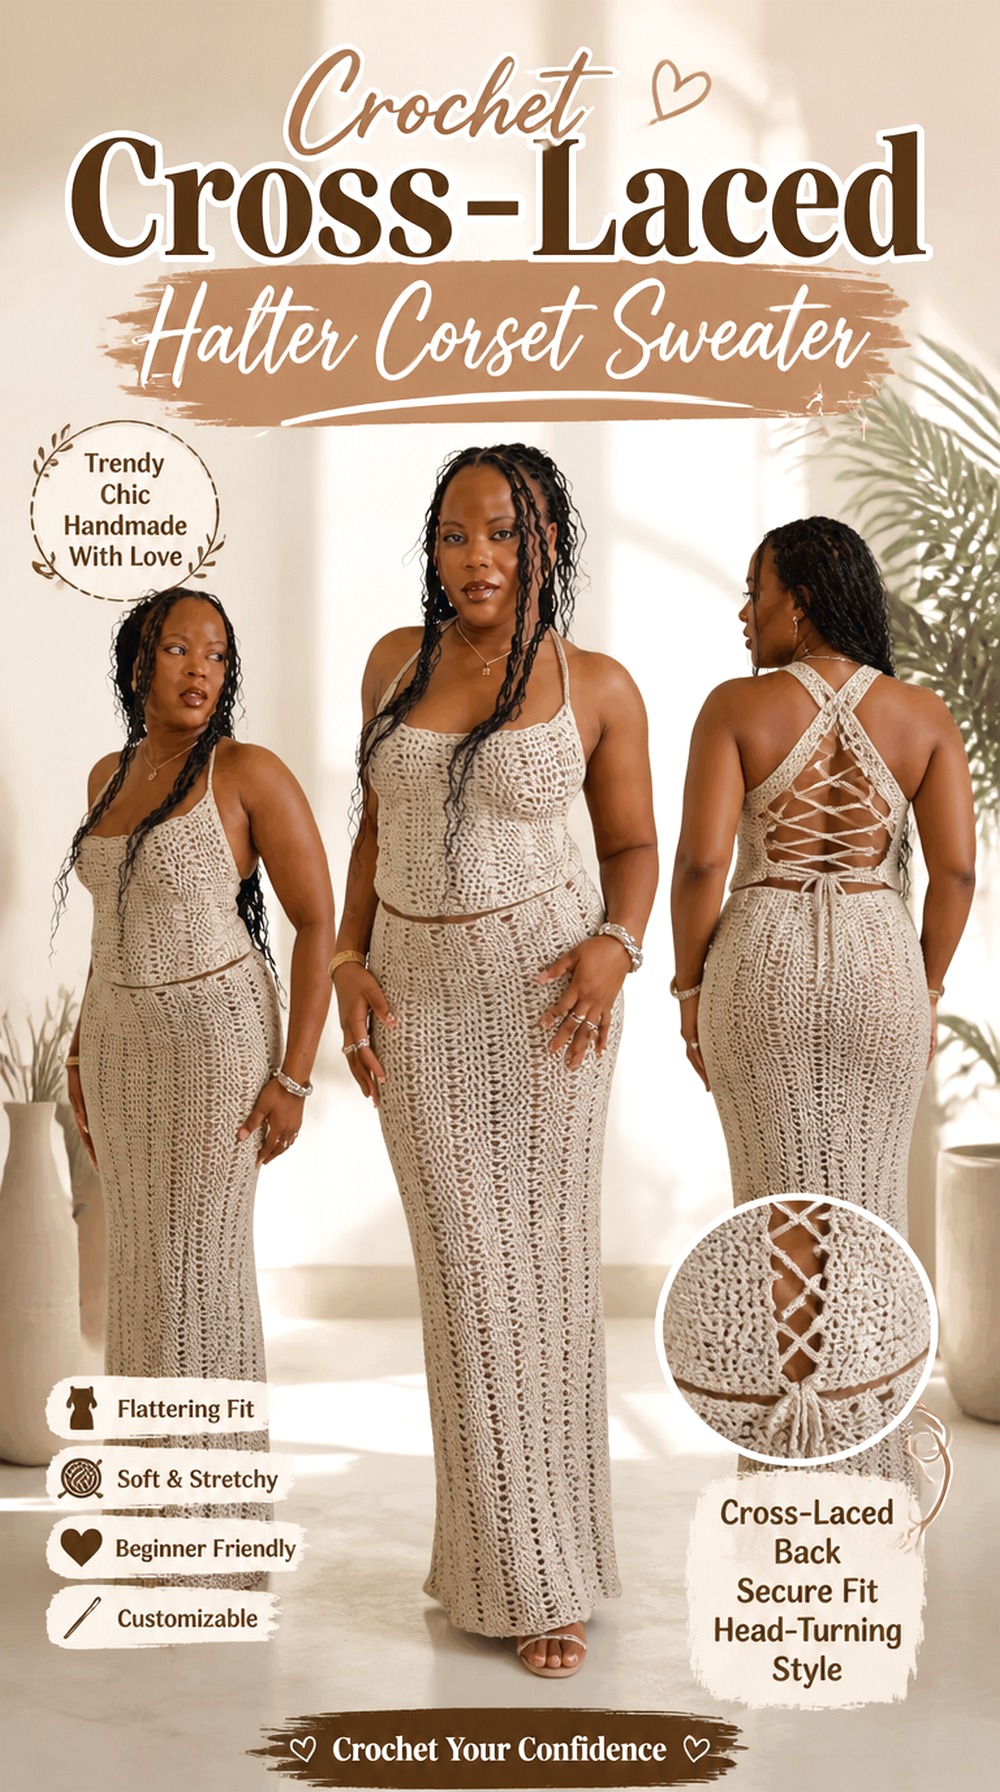
This version puts the crossing back closure ahead of sleeve drama. Astoldbysia’s tutorial is specifically titled as a corset-back halter top, providing a strong source for the laced rear treatment. The sweater idea builds outward from that construction with additional arm or torso coverage while keeping the crossed back recognizable.
It suits readers who want a more visibly corseted back rather than a loose tie-back bow. Because the original is a halter, the same caution applies when adding weight: extra crochet should be supported by a compatible sweater structure, not simply hung from the original neck area.
Decide How Much Back Gap You Want to Preserve
Corset lacing does not need to pull the two edges together completely. A visible, even opening can make the crossed cords easier to read and provide room for adjustment.
Test several lacing tensions while wearing the garment and choose the one that balances appearance with unrestricted movement.
Keep Any Added Sleeves Visually Secondary
With a strong crossed back and halter neckline, exaggerated sleeves could create three competing focal points. A simpler sleeve treatment can make the corset feature easier to appreciate.
This is especially useful if you plan contrasting lacing or a clearly defined back border.
Original Tutorial and Creator Credit
Creator: astoldbysia
Crochet Chunky Backless Corset Laced Sweater Vest
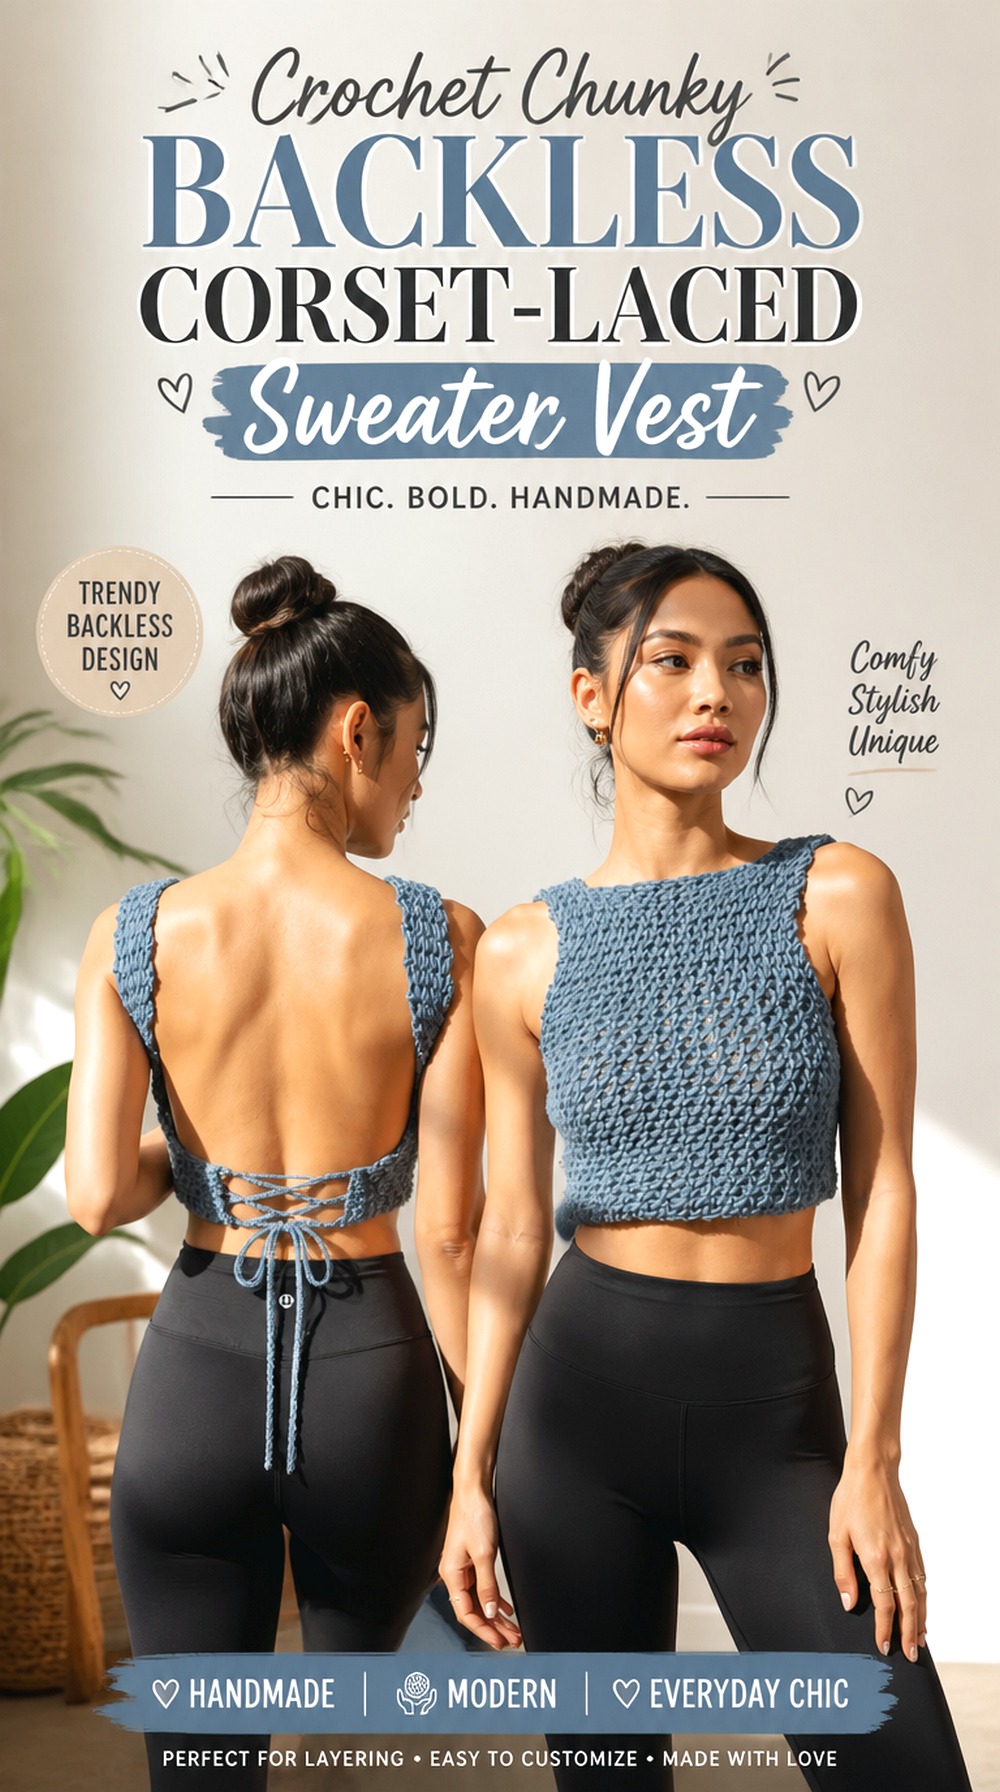
A sweater vest belongs naturally in this collection because it removes sleeve engineering while still allowing a substantial sweater-like fabric and an open back. Nikita Nightingale’s tutorial teaches a backless crochet tank top, which can serve as the construction inspiration for a heavier sweater-vest interpretation with corset-style lacing.
This direction gives you a useful middle ground: more coverage and visual weight than a tiny corset top, but fewer structural variables than a full long-sleeve sweater. It can also be layered over a shirt, fitted turtleneck, or dress, making the back opening decorative even when you do not want exposed skin.
A Vest Makes Layering Part of the Fit
Do not size the piece only for wearing directly against the body if you intend to put it over shirts. Try your fabric over an underlayer similar in thickness to what you will actually wear.
A corset back can accommodate some variation, but the armholes and shoulders still need enough room for the added layer.
Heavier Yarn Changes the Character of the Opening
A thicker fabric can make an open back feel more structured, yet it can also make the two lacing edges bulkier. Check whether your cord can pass and move cleanly without bunching the edge.
The most decorative lacing is not useful if adjusting it distorts the surrounding fabric.
Original Tutorial and Creator Credit
Creator: Nikita Nightingale
Crochet Mohair Bow Back Corset Sweater

Corset backs do not have to use narrow crisscross cord. A wide bow closure can create a softer interpretation of the adjustable-back idea, particularly in fuzzy or haloed yarn. Miu’s tutorial teaches a mohair bow top with shaping and a back-connected bow treatment; the sleeved sweater described here is an adaptation of that foundation.
This direction is distinct because it favors softness over hard visual structure. Instead of emphasizing a long row of eyelets, the back can finish with broader ties or a bow that gently adjusts the garment. Keep the added sweater fabric light enough that the closure is not forced to support excessive weight.
Fuzzy Yarn Can Hide Small Finishing Details
A halo can make a sweater look soft and cohesive, but it may blur tiny loops, textured borders, or closely spaced eyelets. If the back closure needs to remain visually clear, make a sample edge before committing to a highly detailed treatment.
A simpler tie can sometimes read better than intricate finishing in fuzzy yarn.
A Wide Bow Behaves Differently From Thin Lacing
Broad ties distribute tension differently and occupy more space at the back. Check the bow while sitting as well as standing, particularly if it falls near the waist.
You may prefer the bow higher or lower depending on where it feels comfortable and where it remains visible beneath outerwear.
Original Tutorial and Creator Credit
Creator: miu
Crochet V Stitch Corset Back Cardigan Sweater

A V-stitch cardigan brings significantly more drape and open texture into the corset-back concept. MJ’s Off The Hook Designs teaches a top-down seamless V-stitch cardigan with both shorter tie-front and long-sleeve styling options. The corset back is the adaptation here, not part of the original cardigan.
This is a useful choice for readers who want a recognizable cardigan framework rather than building outward from a corset top. Because the sweater already has an established yoke and sleeves, any back modification should respect that construction. A deep cutout should not interrupt areas that are doing essential work to support the yoke.
Do Not Remove Back Fabric Before Understanding the Yoke
Top-down construction distributes shaping across the upper garment. Before converting any portion into an opening, identify which areas are necessary for shoulder and sleeve stability.
A decorative lower-back opening is very different from cutting through the structural upper yoke. Preserve the construction that makes the cardigan fit.
Open V-Stitch Fabric Needs Controlled Lacing Points
An airy stitch pattern may not provide an ideal place for repeated pulling by itself. Consider how the lacing forces will reach the surrounding fabric.
Stable finished edges can let the sweater retain its drape while giving the closure a more controlled anchor.
Keep the Cardigan Identity Visible
If the front already has an open or tied treatment, the back does not need excessive embellishment. A restrained corset opening can create an interesting front-to-back relationship without making every edge adjustable.
Decide whether the front tie or rear lacing is the main closure before choosing contrasting cords.
Original Tutorial and Creator Credit
Creator: MJ’s Off The Hook Designs
Crochet Cup Shaped Lace Up Corset Back Sweater

This sweater direction keeps pronounced cup shaping at the front while shifting the corset closure toward the back. Cherilyn Q’s tutorial teaches a made-to-measure lace-front corset crop top with cups and eyelets. Relocating or reinterpreting that lacing for the back is an editorial adaptation, so use the creator’s tutorial for the shaped corset construction rather than assuming the closure can simply be mirrored stitch for stitch.
The benefit of this idea is a clearly fitted front paired with a decorative back. Sleeves should remain compatible with the existing side and upper-body structure, especially because cup shaping makes the front less interchangeable with a standard sweater panel.
Relocating Lacing Changes More Than the View
A closure placed at the front may be easier to reach and can interact differently with bust shaping. Moving the visual idea to the back changes how the garment is put on and how tension is distributed.
Plan the new opening independently instead of copying front eyelet placement onto the rear without checking fit.
Let the Cups Determine the Front Fit First
Back lacing can alter torso circumference, but it cannot correct cups that are incorrectly positioned or provide the wrong amount of coverage.
Evaluate the front first, then use the back treatment to fine-tune the surrounding torso fit.
Original Tutorial and Creator Credit
Creator: Cherilyn Q
Crochet Tube Bodice Corset Back Shrug Sweater
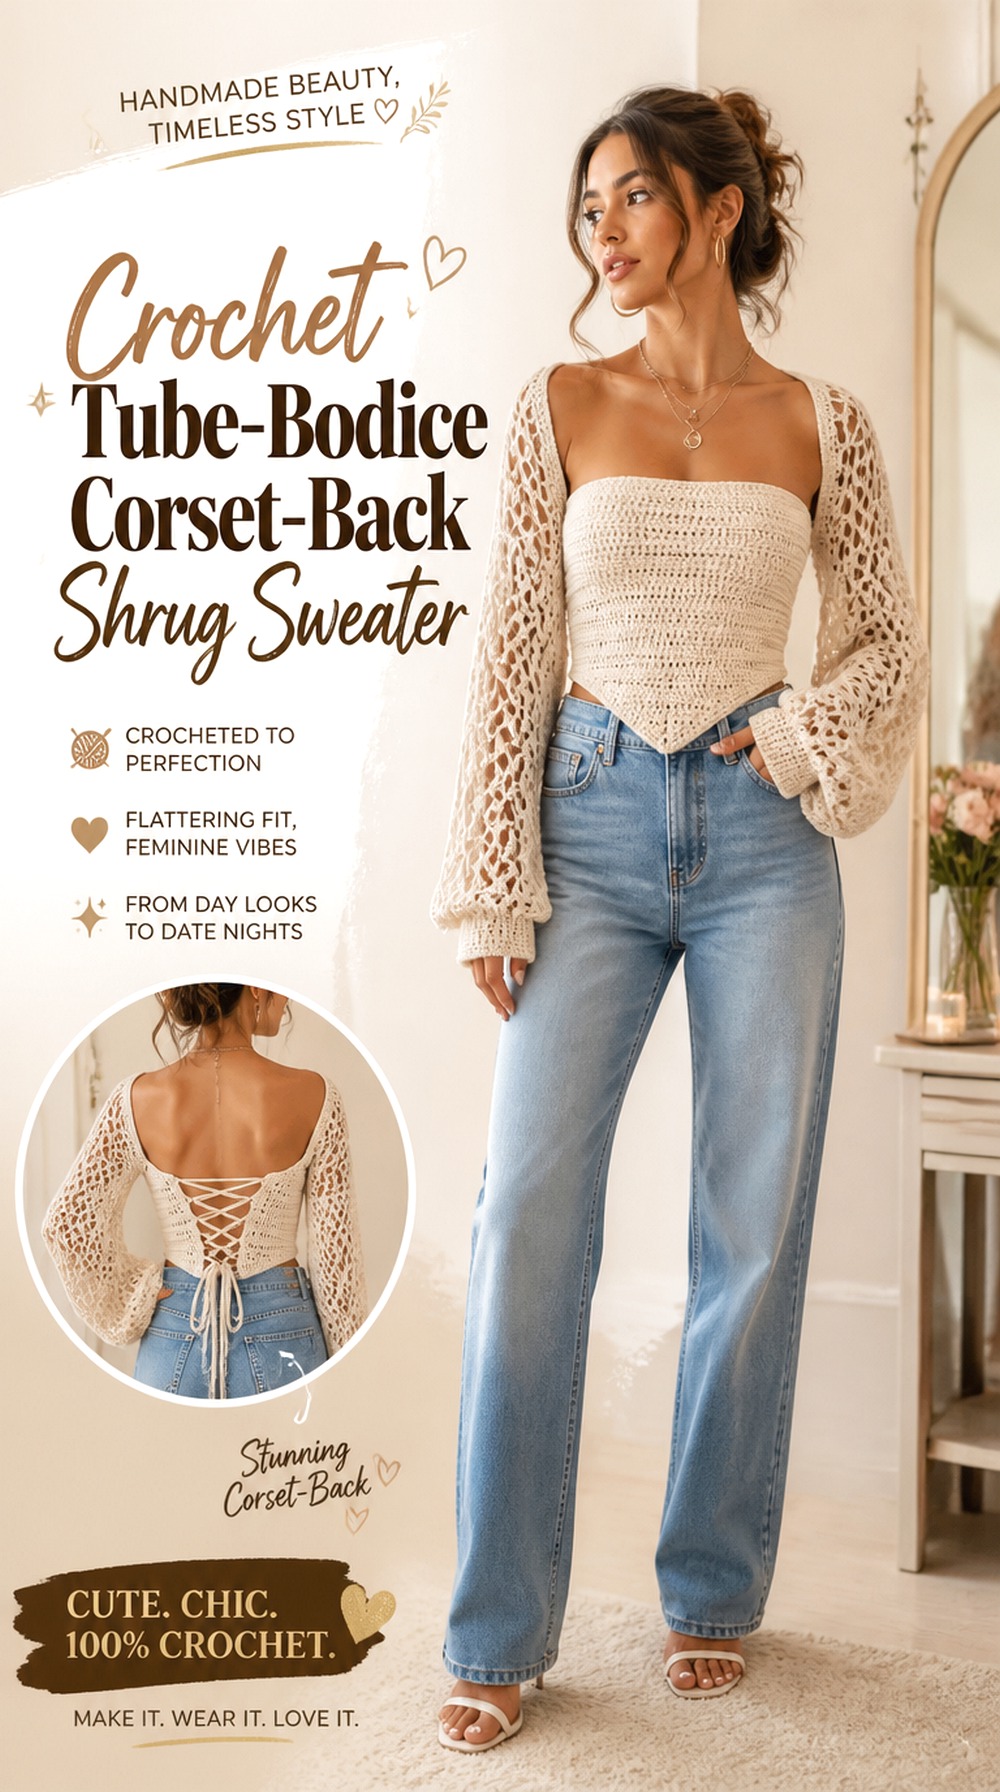
This idea separates the fitted body and sweater-like sleeve effect more clearly than most options in the list. Crystal Handicrafts’ source teaches a corset tube top. That strapless bodice can inspire the central fitted section, while a compatible shrug or sleeve structure supplies the sweater layer.
The advantage is styling flexibility: the corset body can remain visually clean across the shoulders while the sleeve component adds coverage. The challenge is that two pieces can shift independently. If you want them to look like one integrated sweater, pay close attention to where the shrug sits relative to the upper edge of the corset.
Keep the Shrug From Hiding the Back Feature
A low or bulky shrug edge can cover the very lacing that distinguishes the project. Test the two components together before finishing decorative borders.
From the rear, there should be enough visual separation to understand both the corset closure and the sleeve layer.
Strapless Fit Still Has to Work Independently
Do not rely on the shrug to hold up a tube bodice that does not fit securely as designed. The two pieces should each function according to their own construction.
Review the original tube-top tutorial carefully and confirm how the bodice fit is established before adding the sweater layer.
Original Tutorial and Creator Credit
Creator: Crystal Handicrafts
Crochet Waist Cincher Corset Back Layering Sweater

Instead of making the whole sweater closely fitted, this concept concentrates the corset shaping around the waist. Katy’s Crafted & Co. teaches a garment described as a corset top or corset belt, making it useful inspiration for a waist-focused layer.
For a sweater version, the fitted corset section can visually sit over or integrate with a softer upper garment. That creates a different silhouette from a bustier sweater because the strongest definition is lower on the torso. It is also useful for readers who like corset styling but do not want close shaping across the entire chest.
Decide Whether the Corset Is Integrated or Layered
A removable waist piece offers more styling flexibility and avoids forcing one fabric to provide both soft sweater drape and firm waist definition. An integrated version looks more unified but requires careful planning where the two structures meet.
Choose that relationship before purchasing yarn rather than after both pieces are finished.
Place the Waist Feature Where It Actually Suits the Torso
A visually narrow section should correspond with where you want the garment to change shape. Do not assume another person’s corset height will place the feature correctly on you.
Compare the source’s finished piece with your own torso proportions and use the tutorial for its intended construction details.
Original Tutorial and Creator Credit
Creator: Katy’s Crafted & Co.
Crochet Motif Panel Corset Back Sweater
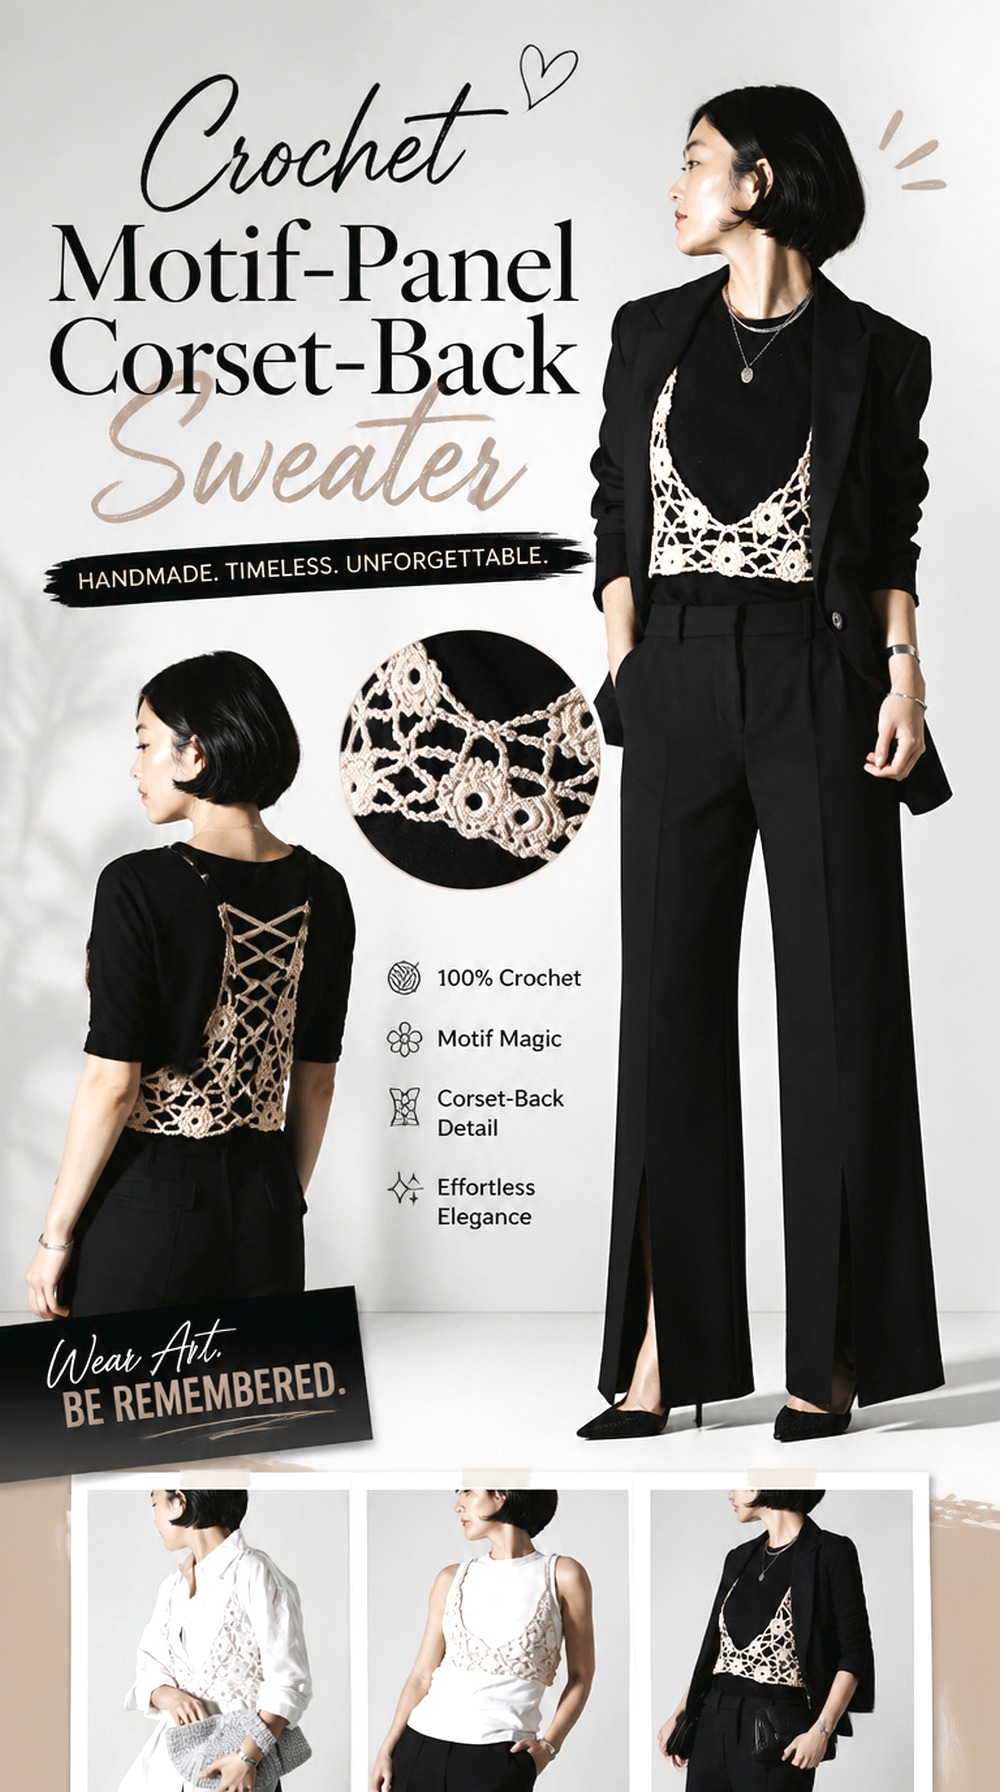
A motif-based bustier creates a very different surface from smooth ribbing, filet grids, or plain fitted panels. The superstory crochet tutorial teaches a bustier built with continuous motif detail and presents it as a layering piece. For this sweater idea, that motif section becomes the decorative center beneath or between simpler sleeve and upper-body fabric.
The contrast works best when the motifs stay legible. If sleeves use equally elaborate patterning, the garment may lose its clear focal point. Keeping at least part of the sweater quieter allows the motif corset section to look intentional rather than simply busy.
Block and Compare Motifs Before Building Around Them
Motif dimensions matter when another garment section must connect to them. Compare the finished, relaxed dimensions of repeated pieces before deciding where a sleeve or sweater panel will meet them.
Small motif inconsistencies that seem harmless in a standalone decorative piece can become more noticeable once surrounded by straight garment edges.
Give the Motifs a Simpler Frame
A relatively plain sleeve or upper yoke can function like a visual frame around the patterned corset body. This also makes it easier to see where the fitted center ends and the sweater portion begins.
If you introduce a lace-up back as well, keep the cord treatment simple enough that it does not compete with the motif surface.
Original Tutorial and Creator Credit
Creator: 슈퍼스토리 크로셰 superstory crochet
Crochet Structured Waist Corset Back Sweater
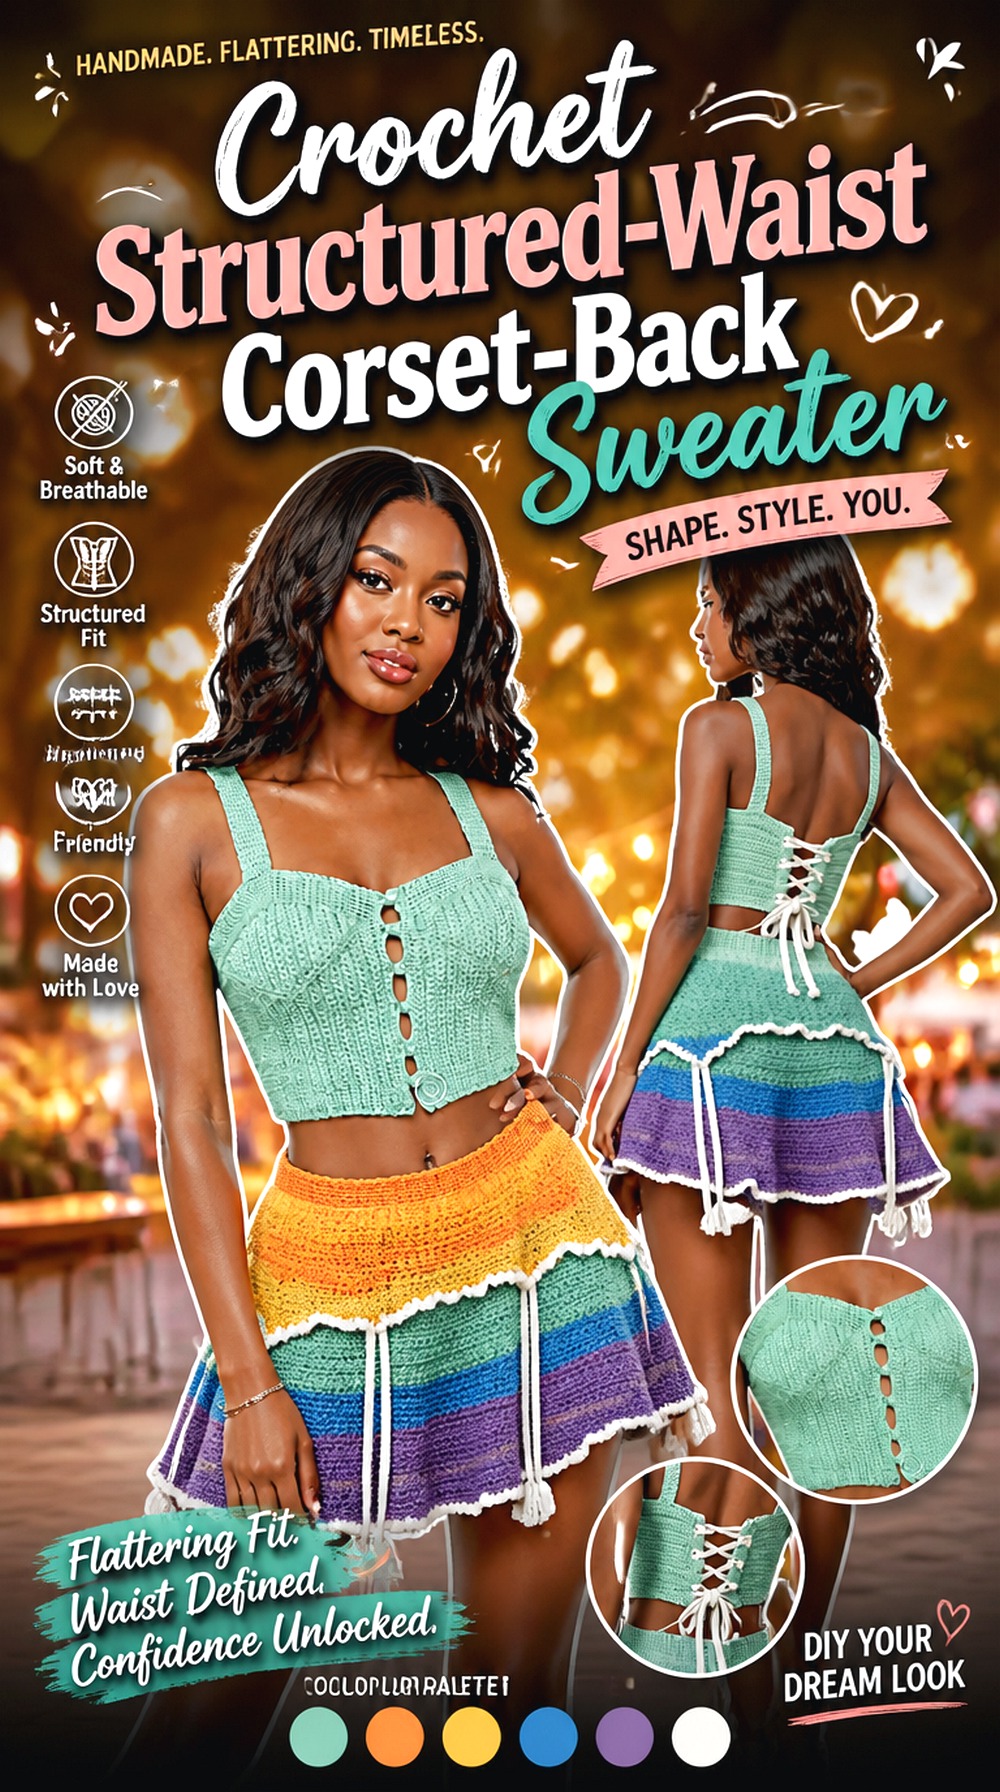
The final idea emphasizes a clearly shaped waist and clean corset structure rather than open mesh or oversized sleeves. Nitah Crochets’ tutorial teaches a fitted crochet corset top, making it a strong bodice reference for a sweater whose central feature is waist definition. Sleeves and additional length remain adaptations.
This direction suits readers who want the corset effect to come primarily from silhouette. A restrained sleeve, clean neckline, and well-defined back opening can keep attention on the fitted middle. The source also contains correction information in its video description, so review the creator’s current notes before beginning rather than relying on an earlier viewing or saved memory of the tutorial.
Read the Creator’s Current Notes Before Starting
Corrections matter more in fitted garments because a seemingly small change can affect alignment or fit later. Review the description alongside the video before purchasing or cutting any optional finishing materials.
If you return to the project after a break, check those notes again rather than assuming nothing has changed in the accompanying information.
Let Waist Shaping Come From Construction, Not Extreme Lacing
Corset-style appearance does not require pulling the back cord as tightly as possible. A well-shaped garment should already follow the intended silhouette before aggressive tension is added.
Use the lacing to personalize the gap and fit while keeping enough room for comfortable breathing and normal torso movement.
Recheck Shoulder Position After Adding Sleeves
Once sleeve weight is present, put the sweater on again and verify that the waist remains where you planned it. Downward pull through the shoulders can subtly shift a short fitted bodice.
Correct structural fit issues before completing final borders or decorative lacing.
Which Crochet Corset Back Sweater Direction Should You Choose?
For the closest route to a conventional sweater, start with the open-back sweater, buttoned-waist open-back top, or V-stitch cardigan foundations. They already solve more of the sleeve and shoulder construction before the corset adaptation begins.
For a stronger corset silhouette, the ribbed, bustier-front, cup-shaped, made-to-measure, or structured-waist ideas put fitted bodice construction first. Puff sleeves create the most dramatic fitted-versus-full proportion, while mesh and filet versions feel visually lighter.
The halter, tube-bodice, bow-back, motif, and waist-cincher options are better viewed as more substantial adaptations. Choose them when that specific neckline, layering method, texture, or closure is the reason you want the sweater—not because lacing seems like a universal shortcut to custom fit.
Conclusion
The most successful crochet corset back sweater idea is the one whose underlying construction already matches the fit you want. Choose an open-back sweater or cardigan base when dependable shoulders and sleeves are the priority. Start from a corset or bustier when waist definition and a fitted front matter more. Puff sleeves add volume, mesh and filet fabric keep the garment visually light, while motifs, bows, and waist-cincher treatments shift the corset idea toward decorative layering.
Whatever direction you choose, establish the shoulders, bust, armholes, and basic torso fit before depending on the lacing. Then use the original tutorials for their exact construction details and treat any sweater conversion as a separate adaptation that deserves its own measurements and fit checks.
Frequently Asked Questions
Can I turn any crochet sweater into a corset-back sweater?
Not automatically. A sweater needs enough remaining structure to support its shoulders, sleeves, and upper body after the back is opened. Removing fabric from a constructionally important yoke can cause more problems than creating a lower-back opening in a panel-style garment. Before altering a sweater, identify what holds the sleeves and shoulders in position and preserve those areas unless you have a compatible alternative construction.
How much should a crochet corset back close when laced?
There is no universal ideal gap. The opening depends on the garment design, your measurements, the amount of intended adjustability, and how the surrounding fabric stretches. An intentional visible gap can work perfectly well. What matters is that the edges remain balanced and the garment fits through the shoulders, bust, and armholes without needing extreme lacing tension to pull those areas into place.
Should I choose stretchy yarn for a corset-back sweater?
Some stretch can make a wearable comfortable, but excessive stretch around the lacing edges can cause the opening to grow or distort. Consider the whole fabric rather than searching for one universally correct fiber. A softer, drapier yarn may suit sleeves while a stable finished border helps the back closure. If substituting yarn, make and handle a sample so you can judge how it reacts to tension.
Can I add sleeves to a crochet corset top tutorial?
Yes as an adaptation, but sleeves introduce additional structural questions. A corset top may not have the same shoulder or armhole construction as a sweater, and sleeve weight can alter the bodice fit. Establish the corset fit first, then choose a sleeve construction that is genuinely compatible with the available armhole and shoulder support. Do not infer stitch counts or sleeve dimensions solely from a finished photograph.
How do I stop the lacing edges from stretching out?
First determine whether the fabric itself is stable enough for repeated tension. A carefully finished edge may help distribute pulling more evenly, but the correct treatment depends on the garment. Also avoid using the lacing to correct a sweater that is substantially too large. Excessive pulling places more force on the edge and can exaggerate stretching rather than creating a clean corset shape.
What should I wear underneath an open-back crochet sweater?
That depends on the opening, stitch density, neckline, and your preferred coverage. A camisole, fitted tank, bralette, long-sleeve base layer, or dress can all produce different results. Check the sweater over the intended underlayer while it is still in progress. With mesh, filet, or widely spaced crochet, the underlayer’s color becomes part of the finished visual effect.
Should I block a corset-back sweater before adding the final lacing?
It is useful to understand how the finished fabric behaves before deciding the final lacing tension. Crochet can change in width, length, drape, or edge behavior after the finishing process appropriate for the yarn. Follow the fiber and creator’s care guidance, then evaluate the back opening in its settled state. That reduces the chance of carefully adjusting laces around fabric dimensions that later change.