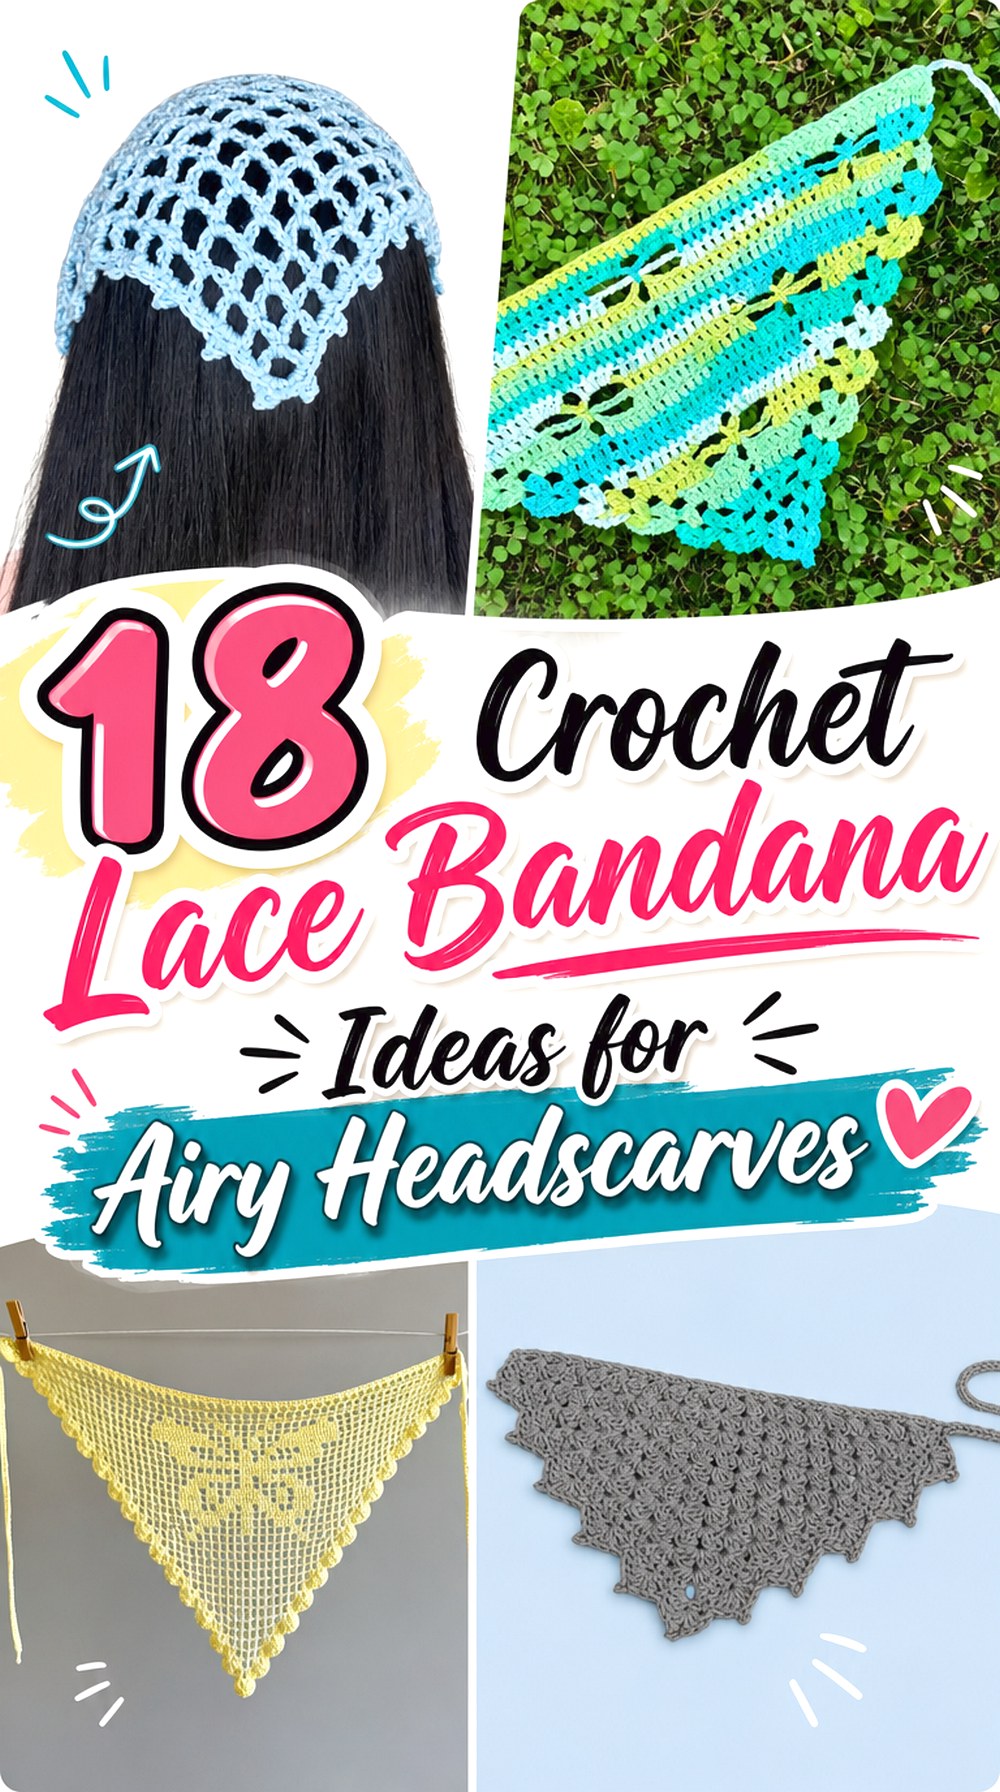

Crochet lace bandanas can range from barely-there mesh to detailed floral motifs, geometric filet work, textured picots, and open granny clusters. Those differences affect more than appearance. The amount of open space changes coverage, yarn choice changes drape, and the depth of the triangle determines whether the finished piece feels like a small hair accent or a fuller headscarf.
These 18 ideas deliberately use different construction and finishing approaches rather than repeating one triangle in different colors. You can compare joined motifs with continuous lace, narrow ties with more substantial straps, simple mesh with image-based openwork, and delicate thread-scale fabric with heavier textured options. Each idea also points to an original YouTube tutorial for the creator’s exact construction details.
Quick List
- Crochet Diamond-Grid Lace Bandana
- Crochet Floral Multi-Wear Lace Bandana
- Crochet Intricate Openwork Triangle Bandana
- Crochet Fine-Scale Lace Headscarf Bandana
- Crochet Joined Daisy-Motif Lace Bandana
- Crochet Dragonfly Openwork Bandana
- Crochet Heart-Square Lace Bandana
- Crochet V-Stitch Picot Bandana
- Crochet Wide-Mesh Triangle Bandana
- Crochet Cluster-and-Shell Lace Bandana
- Crochet Lace-Edge Bandana with Tie Options
- Crochet Textured Picot Kerchief Bandana
- Crochet Filet Triangle Scarf Bandana
- Crochet Classic Filet Lace Bandana
- Crochet Color-Carry Granny Lace Bandana
- Crochet Floral Summer Openwork Bandana
- Crochet Linked-Filet Scallop Bandana
- Crochet Fine-Yarn Granny Lace Bandana
Choose Lace Density by the Coverage You Want
“Lace” can describe very different fabrics. Large mesh openings leave much of the hair visible and make the bandana function primarily as a decorative layer. Filet, V-stitch, and granny-based openwork place more crochet between the holes, so the triangular silhouette can appear more substantial while still retaining an airy look.
Also consider where the detail sits. A mostly solid center with a lace border behaves differently from a triangle made entirely from open mesh. Joined floral squares create another effect because the motif boundaries become part of the finished structure. Before choosing a tutorial, look at the finished bandana against the wearer’s hair and decide whether you want obvious coverage, visible negative space, or a balance between the two.
Check Triangle Depth and Ties Before Finishing
Head circumference alone does not describe how a bandana will fit. Two triangles can have a similar upper width but dramatically different depths. A shallow point leaves more hair exposed, while a deeper triangle extends farther toward the back of the head.
Before completing a border, hold the unfinished piece where you intend to wear it. Check whether the upper corners reach a comfortable tying position without pulling the lace out of shape. Then look at the point separately. Tie construction matters too: slim cords stay visually light, while wider straps can create a more noticeable knot and distribute tension over a broader area. If the tutorial offers adjustable sizing, use actual placement as the checkpoint instead of assuming one universal bandana dimension.
Yarn Choice Can Hide or Highlight the Lace
Smooth yarn generally makes diamonds, flowers, filet grids, shells, and picots easier to distinguish because individual stitches remain visible. A fuzzy yarn can soften those outlines, which may be attractive for simple mesh but can obscure a detailed motif. Thickness also changes the apparent scale of every opening.
Drape deserves equal attention. A fabric that feels stiff in a swatch may sit away from the head rather than following its curve, while very loose openwork can stretch more when the ties are pulled. If you substitute a different yarn weight or hook, do not assume the tutorial’s number of rows will still produce the same fit. Test the growing triangle against its intended placement and follow the care instructions for the actual fiber you choose.
Crochet Diamond Grid Lace Bandana
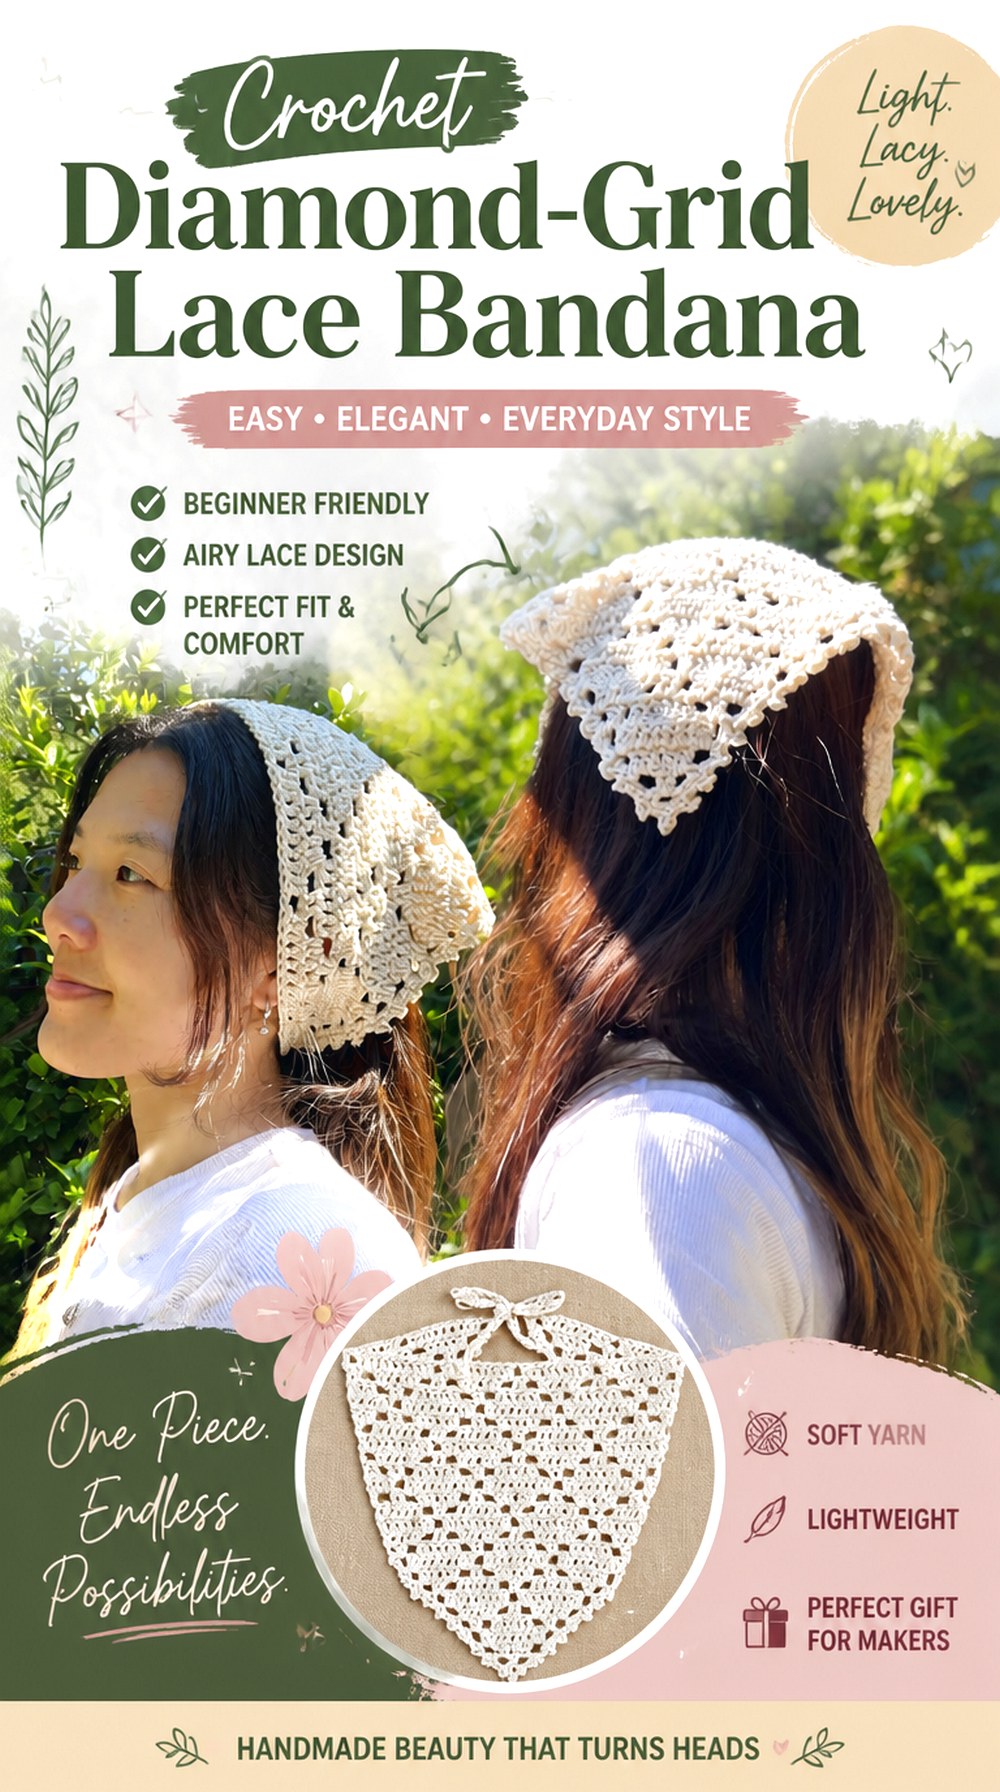
Diamond-shaped negative space gives this bandana a distinctly geometric identity. Instead of treating holes as simple gaps between stitch groups, the open sections become a repeating graphic pattern across the triangle. VivCrochets also presents picots as an optional finishing detail, so the sharper diamond geometry can either remain clean or gain a more decorative perimeter.
This is a useful choice when you want a recognizable lace pattern without assembling separate motifs. It also rewards careful visual checking because an irregular opening is more obvious inside a repeated geometric grid than it might be in free-looking mesh.
Let the Diamonds Remain the Main Feature
Highly textured or fuzzy yarn can blur the straight visual boundaries that make this design distinctive. If you are changing materials, work enough fabric to reveal a complete section of the lace before deciding whether the yarn suits it.
A smooth solid shade is not mandatory, but it gives the geometry less competition. Multicolor yarn can work when its changes are gradual enough that the diamond pattern still reads clearly.
Watch Both Sloping Edges While the Grid Expands
Repeated geometry gives your eye natural lines to follow. That makes it easier to notice when one edge is growing at a different angle from the other.
Lay the triangle flat periodically instead of evaluating only the active row. If one side repeatedly pulls inward or flares outward, investigate tension and stitch placement before adding substantially more fabric. A decorative border should finish a balanced triangle rather than disguise major shaping problems.
Decide Whether Picots Add or Compete
The tutorial allows the diamond bandana to be finished with or without picots. That creates a genuine styling choice rather than a mandatory decorative step.
If your yarn already has strong color changes or noticeable texture, a quieter edge may keep attention on the diamonds. With a restrained solid yarn, picots can echo the small pointed shapes within the lace and make the outer silhouette more ornate.
Crochet Floral Multi Wear Lace Bandana
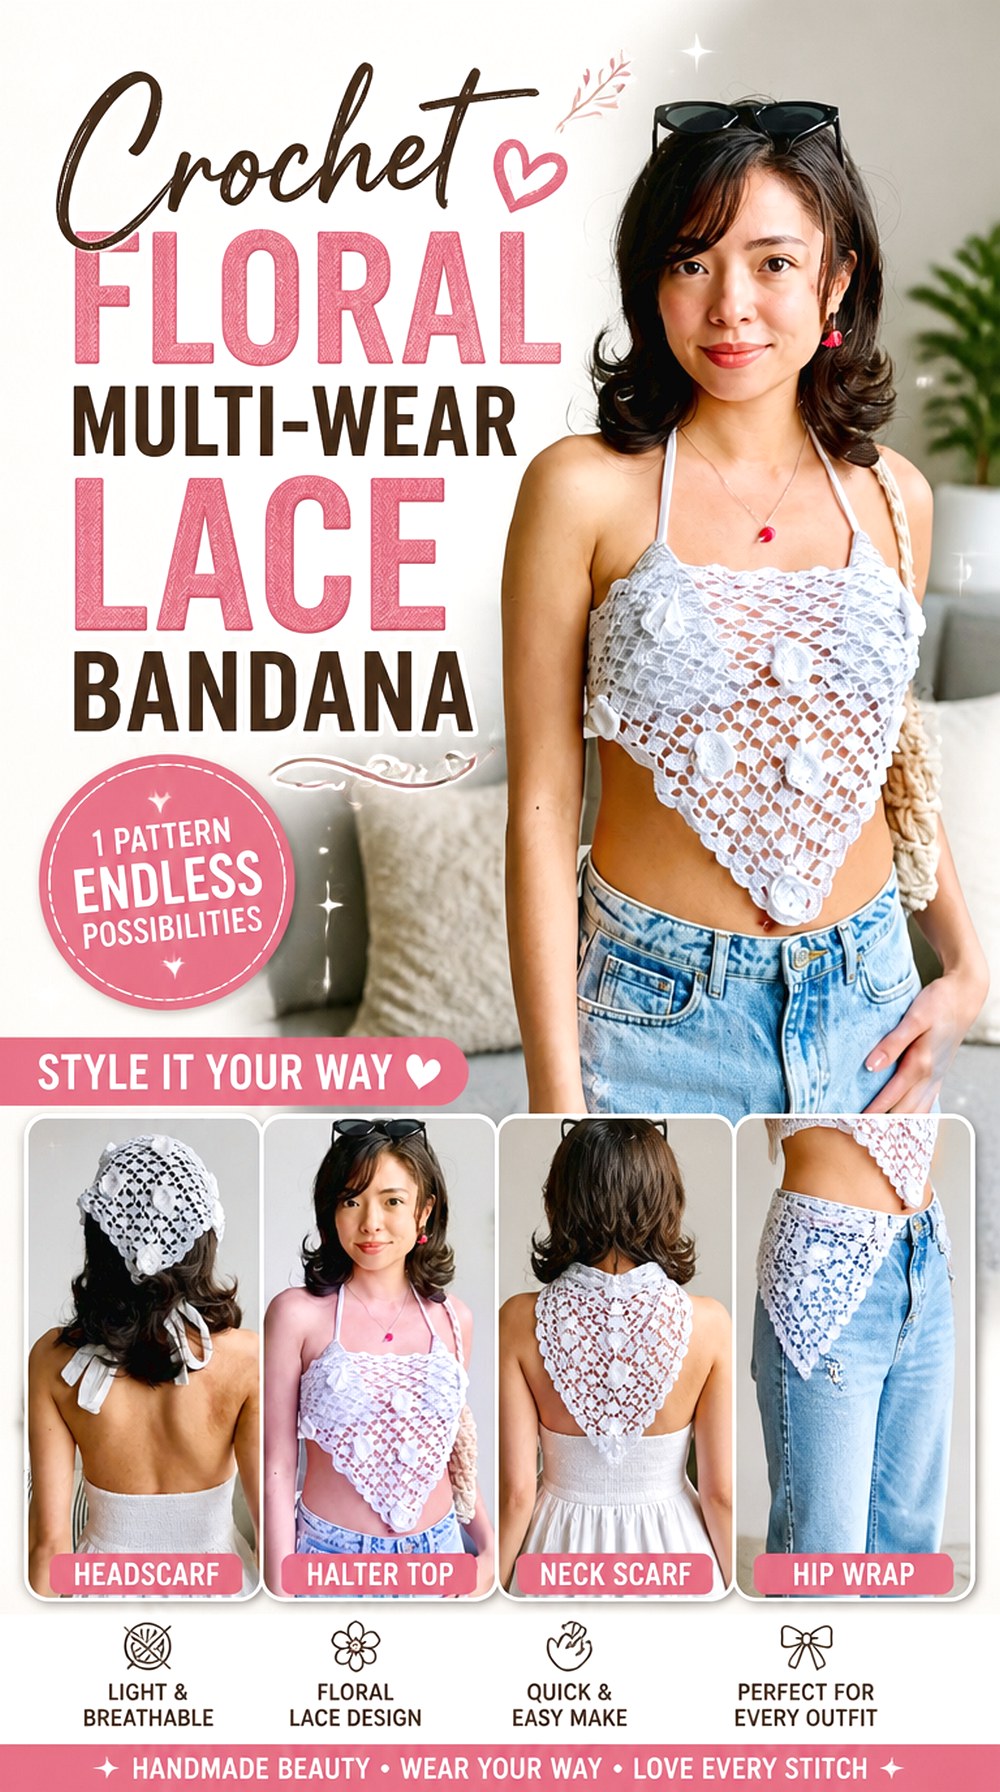
This fine floral lace design moves beyond a compact hair kerchief and into small-scarf territory. The petpetcrochets tutorial combines an open lace body, shell edging, ties, and added floral details, and the creator demonstrates the finished piece as an accessory that can be styled in several ways.
That versatility is the main reason this idea belongs separately from simpler triangle bandanas. More width can create additional styling possibilities, but it also means more fabric is gathered when worn on the head. Choose it when the scarf-like quality is part of the appeal rather than when you only want minimal hair coverage.
Decide Which Wearing Style Sets the Size
A bandana intended only for the head can stop at a compact proportion. A piece meant to double as another type of accessory benefits from additional width and drape.
Decide which use matters most before treating “larger” as automatically better. Test how much fabric gathers at the back of the head as well as how the piece hangs when worn more loosely. The ideal dimensions for one arrangement may feel excessive in another.
Fine Floral Details Need Clear Separation
This tutorial uses lace-weight cotton thread in the demonstrated project. Fine yarn allows small decorative elements to remain relatively delicate rather than turning them into oversized features.
If substituting thicker yarn, expect the visual scale to change. Work enough of the lace to judge whether the flowers, shell border, and open body still look like separate design elements instead of merging into one heavy texture.
Give the Shell Border Room to Settle
A decorative border can influence the way a light triangle hangs. If the edging is tighter than the lace body, it may pull the perimeter inward; if significantly looser, it can wave.
Look at the finished edge while the fabric is relaxed rather than stretched. Blocking may help open lace according to the fiber’s care requirements, but it should refine the shape rather than rescue a strongly distorted border.
Original Tutorial and Creator Credit
Creator: petpetcrochets
Crochet Intricate Openwork Triangle Bandana
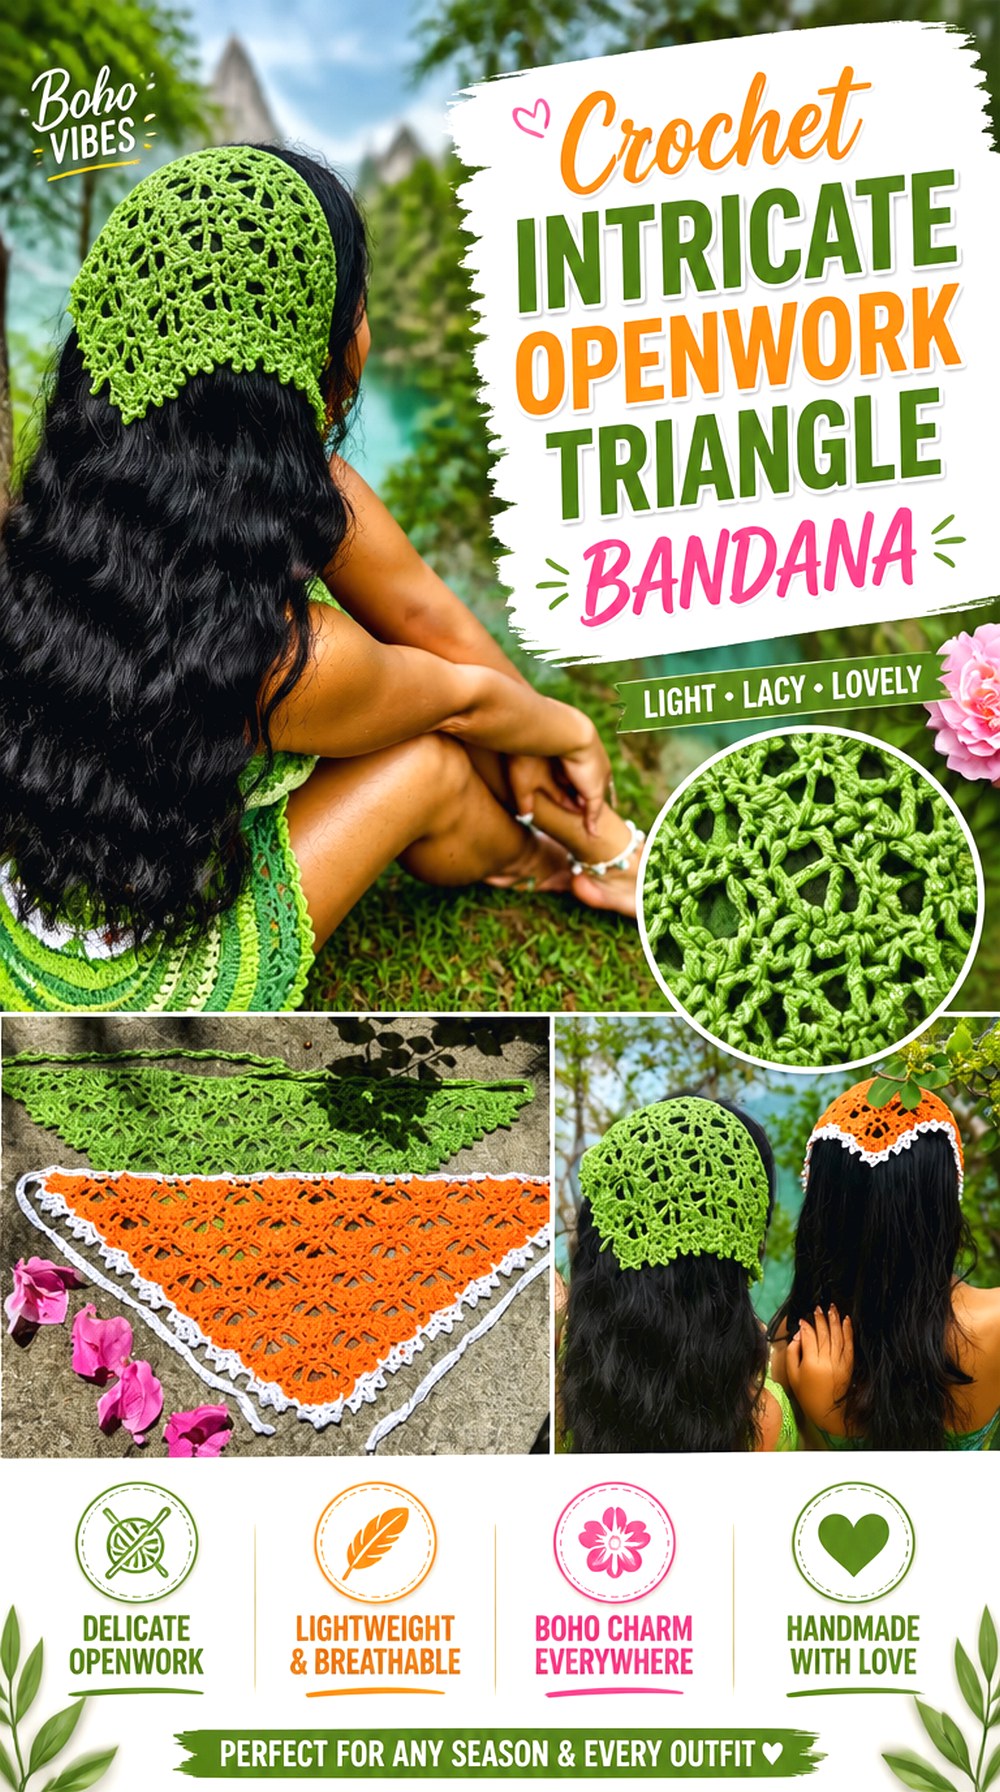
Crochet Corner Ph presents this project specifically as a lace bandana and an advanced crochet tutorial. That makes it a stronger match for readers who want the stitch work itself to provide the visual complexity rather than relying mainly on color changes, separately joined squares, or an ornamental border.
The detailed openwork makes this a statement headscarf even in a single shade. It also changes the selection process: this is the project to choose because you want to follow a more involved lace structure, not because you need the fastest path to a basic triangle. Check the full tutorial format against your preferred learning style before committing.
A Practice Section Can Save Frustration Later
When lace involves more varied stitch placement, work enough of the repeat to understand how the open spaces relate before deciding the yarn and hook combination is right.
The main questions are practical: Can you clearly identify where the repeat begins again? Do the openings remain visible? Is the yarn easy to work without splitting? Solving those issues early is easier than discovering them after most of the triangle is complete.
Keep Color from Fighting Detailed Openwork
A complicated lace structure already contains visual movement. Fast-changing variegated yarn may divide the surface into competing patches and make the stitch pattern harder to see.
A solid or gently shifting shade lets the open spaces provide more of the design. If you prefer strong color, compare the fabric from normal viewing distance rather than examining only individual stitches close to the hook.
Use the Finished Triangle as the Fit Reference
Complexity does not change the basic fitting requirement: the piece still needs enough upper width to sit comfortably and enough depth to create the head coverage you want.
Do not continue adding lace solely because another repeat looks appealing. Pause before finishing, position the triangle on the head, and judge width and depth separately. Extra decorative fabric can change both the appearance and the way the bandana gathers.
Original Tutorial and Creator Credit
Creator: Crochet Corner Ph
Crochet Fine Scale Lace Headscarf Bandana
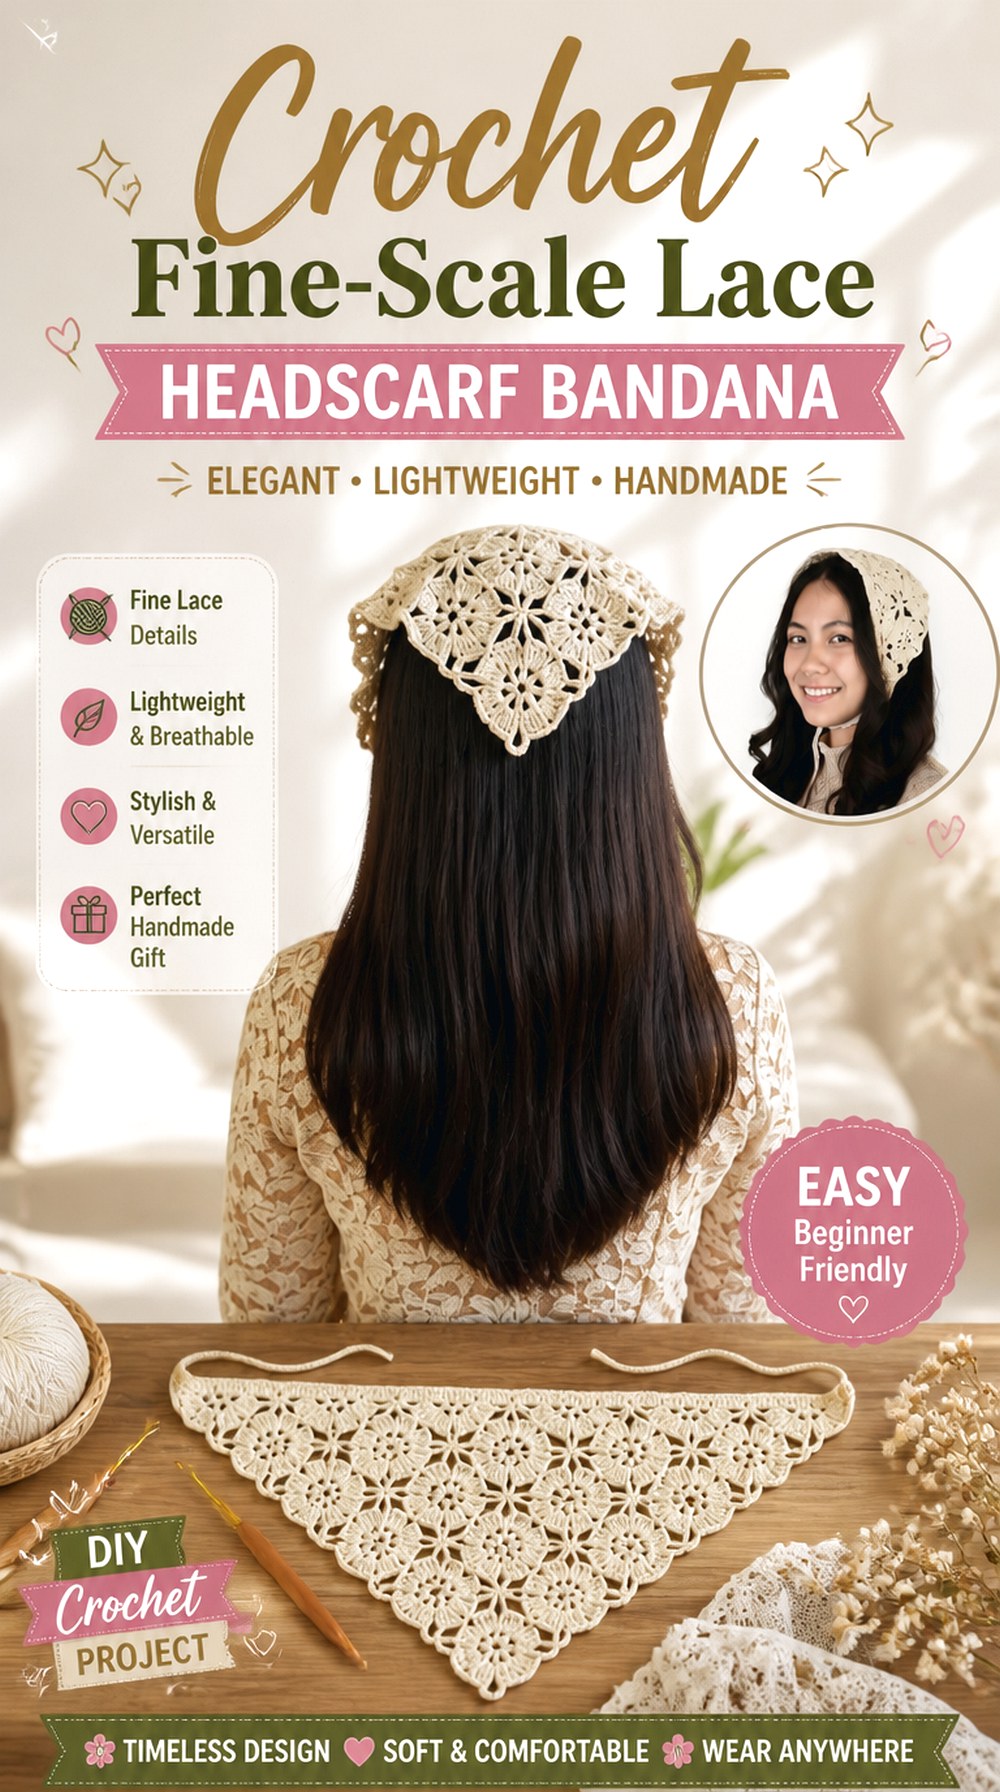
The Crochet Channel’s tutorial demonstrates a lightweight lace bandana using 4-ply milk cotton and a small hook. That finer scale creates a different impression from chunky mesh or wide granny clusters: the openwork reads more like a delicate textile spread across the head.
Choose this direction when you want lace to remain noticeable without oversized holes dominating the design. Because the stitches are smaller, yarn definition matters. A material with a strong halo may soften the appearance considerably, while a smooth yarn can preserve the detail. If substituting materials, judge the actual growing triangle rather than expecting the demonstrated proportions to transfer unchanged.
Small Openwork Benefits From Crisp Stitch Definition
Fine lace contains less visual room between neighboring stitches, so excessive fuzz can hide the boundaries of the repeat. Make a small sample if you are considering a dramatically different fiber.
Look at the sample both flat and against hair. A pattern that appears clear against a white tabletop may look much subtler once the background changes.
Check Tie Fit Without Stretching the Lace Body
Light fabric can be tempting to pull tightly because it feels flexible. Instead, the upper corners should already reach a comfortable tying position before strong tension is applied.
If the bandana only fits when the openwork is noticeably distorted, consider whether the triangle needs more width. Ties should secure the piece rather than compensate for insufficient body size.
Original Tutorial and Creator Credit
Creator: The Crochet Channel
Crochet Joined Daisy Motif Lace Bandana
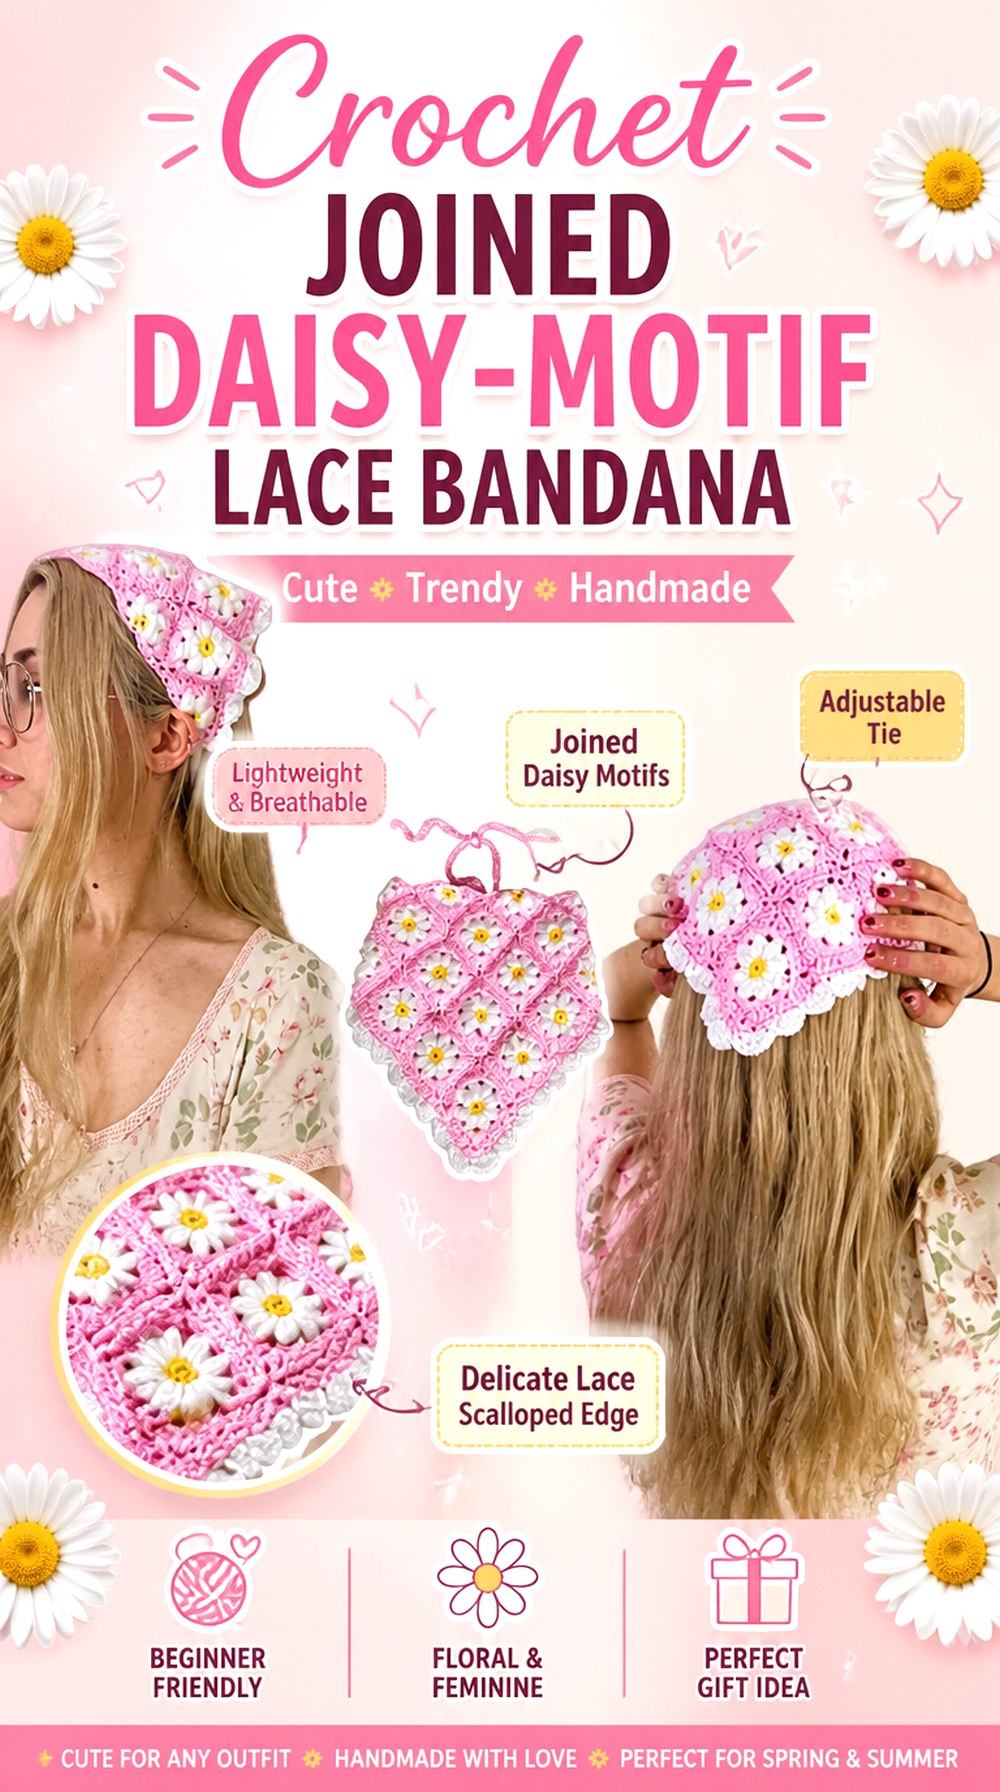
Instead of building one continuous triangle, this idea uses daisy components as visible structural units. The cosybearcrochet tutorial covers daisy squares, daisy triangles, assembly, and the final border and straps. The joins therefore become part of the bandana’s appearance rather than disappearing inside a continuous lace repeat.
This option makes sense when the floral motif matters as much as the headscarf silhouette. It also gives you different planning decisions: motif dimensions need to agree before assembly, color placement can be planned before joining, and the outer triangular units need to create a smooth enough perimeter for the finishing edge.
Match Motif Size Before Final Assembly
Two squares made from the same instructions can still vary if tension changes between sessions or colors. Compare the completed pieces before committing to the entire layout.
If one motif is noticeably larger, joining it under tension can make the surrounding fabric buckle. Correcting the difference—or remaking a clearly mismatched unit—usually produces a cleaner result than asking the final border to flatten an uneven patchwork triangle.
Plan Daisy Color Placement on a Flat Surface
Modular construction gives you the advantage of rearranging pieces before joining. Use it. Lay the motifs in the intended triangle and check whether the flower centers and backgrounds feel balanced from left to right.
This matters especially when using several colors. Random placement can work, but it should look intentional once the entire headscarf is visible, not just attractive one square at a time.
Triangular Motifs Control the Outer Silhouette
The tutorial incorporates daisy triangles as well as full squares. Those partial motifs help the patchwork resolve into a wearable bandana shape.
Before finishing, inspect the sides where full and partial units meet. If the perimeter has abrupt steps or inconsistent tension, address those joins before adding a decorative edge that could emphasize them.
Original Tutorial and Creator Credit
Creator: cosybearcrochet
Crochet Dragonfly Openwork Bandana
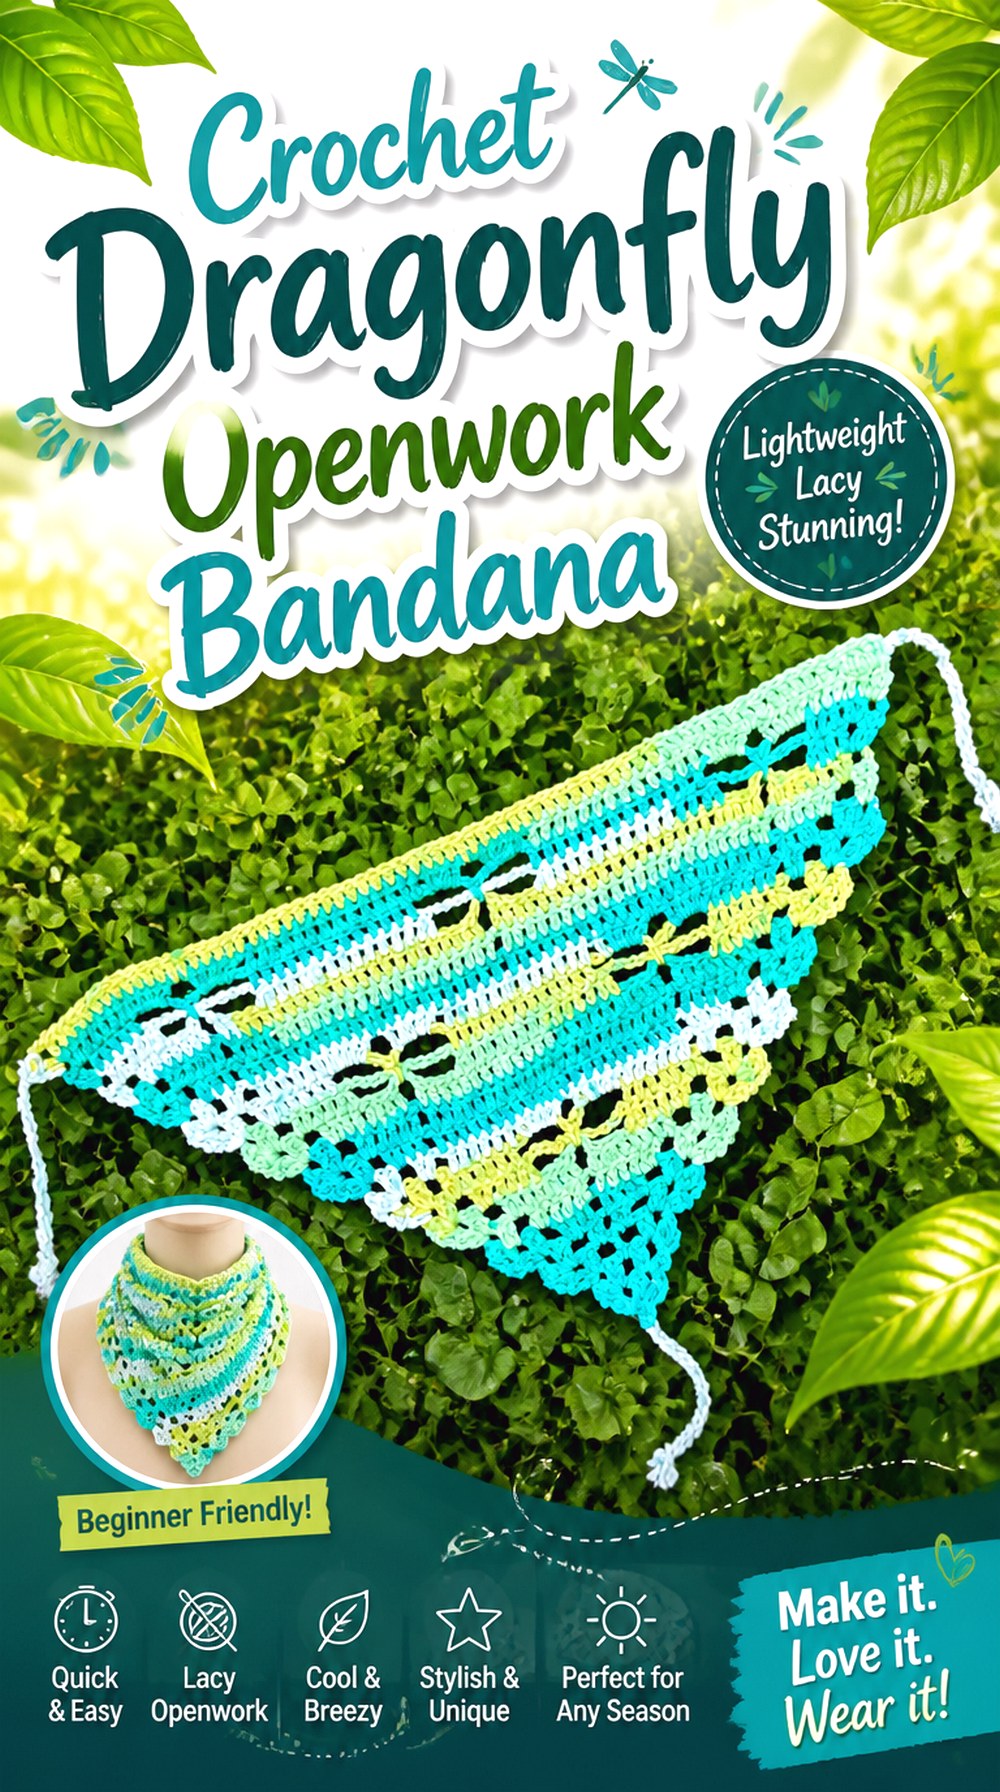
A dragonfly motif gives this bandana a recognizable image rather than a purely repeating lace texture. Monica Mabry’s tutorial identifies the project as a dragonfly bandana and uses a combination that includes shell stitches alongside basic crochet techniques.
This idea is useful when you want the negative space and stitch placement to form a focal design. That makes it fundamentally different from all-over mesh: the viewer should be able to recognize the dragonfly instead of simply noticing open fabric. The central image also makes tension and symmetry important because distortion is easier to see in a figurative motif than in an intentionally repetitive net.
Judge the Dragonfly from Normal Viewing Distance
Detailed motifs can look clear while they are only inches from your face but become ambiguous once the bandana is worn. Lay the triangle down periodically and step away from it.
If the image is difficult to recognize, first check whether the surrounding open spaces are proportionate and whether the yarn is obscuring definition. A smoother material may show a graphic motif more clearly than a fuzzy one.
Keep the Center Motif Visually Centered
A focal image naturally draws attention to the middle of the bandana. If the two sides grow unevenly, the finished piece can look off-balance even when the difference is relatively small.
Compare both sloping edges and the position of the dragonfly before finishing. The goal is for the motif to sit naturally with the point of the triangle when worn rather than appearing pulled toward one side.
Decoration Beyond the Motif Should Stay Selective
The dragonfly already supplies a strong theme. Additional tassels, beads, contrasting borders, and frequent color changes can compete with the image.
If customization is the goal, change one variable first—perhaps the border or a carefully chosen color treatment—and reassess. Leaving some visual quiet around the motif can make the openwork easier to appreciate.
Original Tutorial and Creator Credit
Creator: Monica Mabry
Crochet Heart Square Lace Bandana
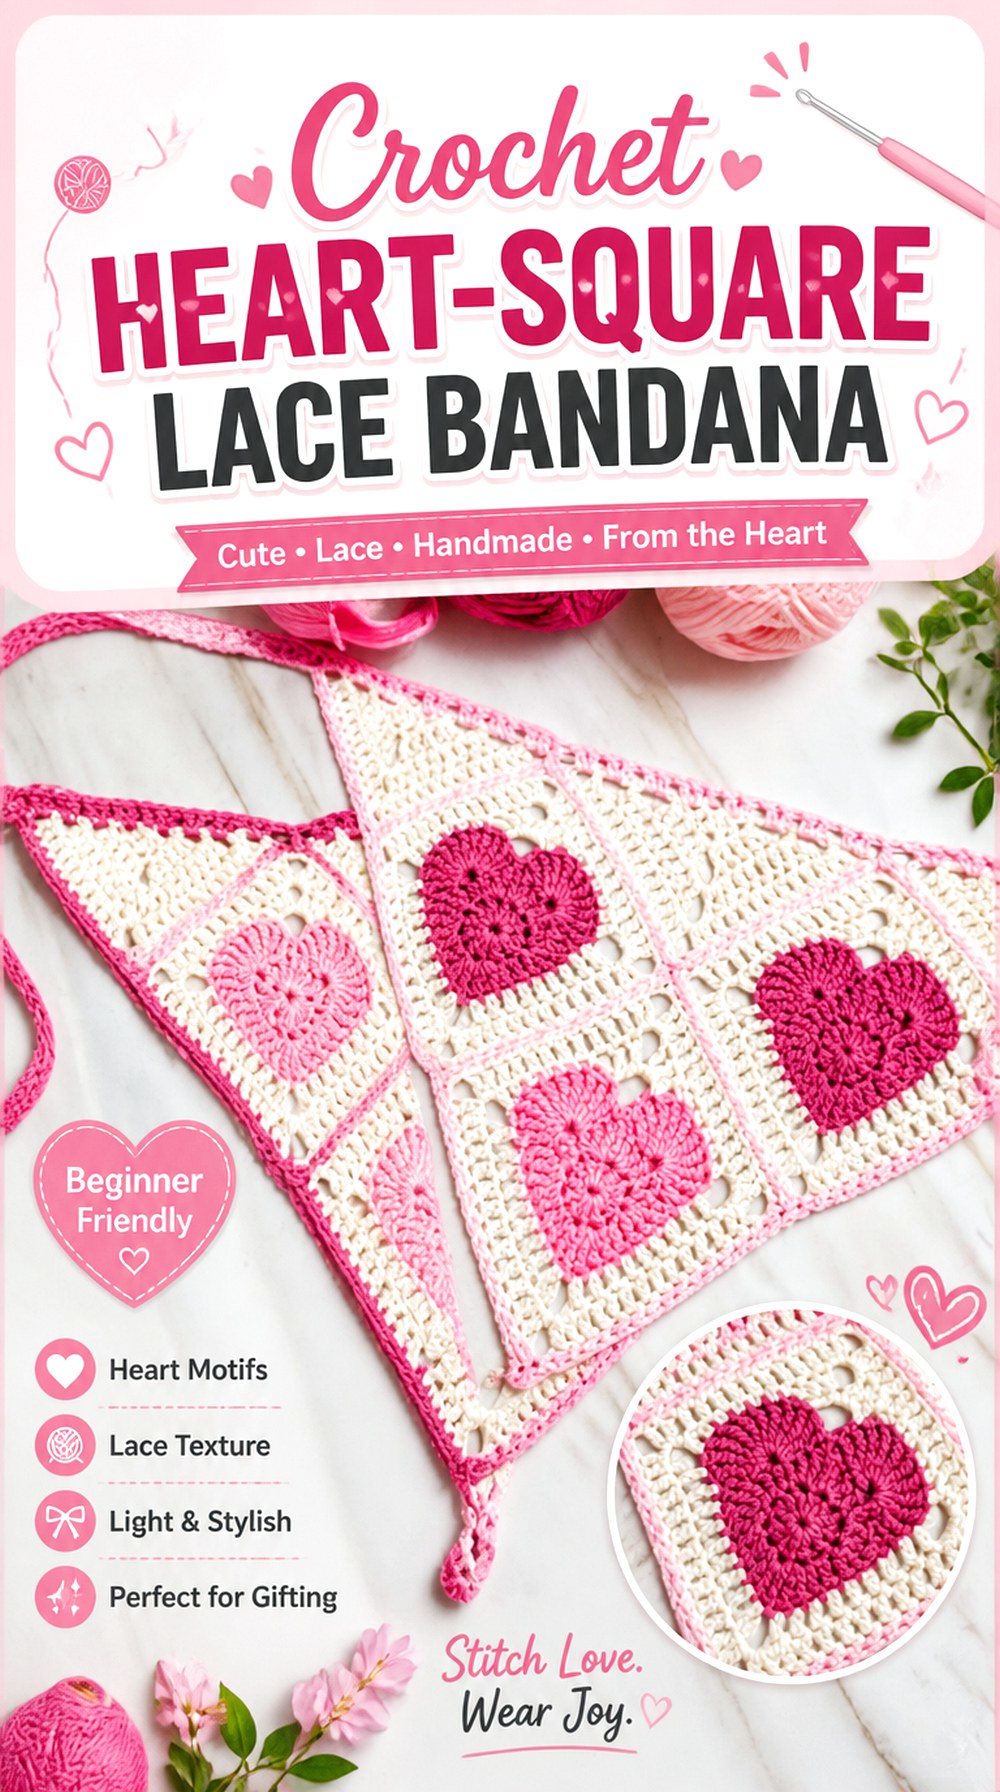
La Tía Ni’s design builds a bandana from joined granny squares with heart designs in their centers, then adds the border and ties. That modular construction produces a patchwork look quite different from a heart motif drawn into a continuous filet grid.
This is a good option when you want each heart to function as a discrete decorative unit. It also makes color planning particularly useful because the heart, square background, and joining areas can be separated visually. Before assembling everything, compare motif size and orientation carefully so the hearts point consistently and the overall triangle forms cleanly.
Preview Every Heart’s Direction Before Joining
A heart has an obvious top and bottom, which means accidental rotation is more noticeable than it would be with a symmetrical granny square.
Lay the entire proposed bandana on a table before sewing or joining the units. Check the hearts from the same viewing direction the finished scarf will use. This simple checkpoint can prevent discovering a reversed motif only after several neighboring pieces are attached.
Contrast Determines How Quickly the Hearts Read
The tutorial demonstrates a multicolor approach. You can make the motif subtler or stronger depending on how clearly the heart color separates from its surrounding square.
For a quieter look, keep the shades closer in value. For hearts that remain immediately identifiable from a distance, use clearer contrast. Test two completed motifs side by side before committing to a larger color sequence.
Invisible-Looking Joins Still Affect Flexibility
The tutorial includes joining the squares as part of the construction. Even a visually discreet join can feel firmer than the motif fabric itself.
After connecting a few units, flex the joined section gently. If the seam is much tighter than the squares, the completed bandana may resist curving naturally around the head. Consistent, relaxed joining tension matters as much as neat appearance.
Original Tutorial and Creator Credit
Creator: La Tía Ni
Crochet V Stitch Picot Bandana
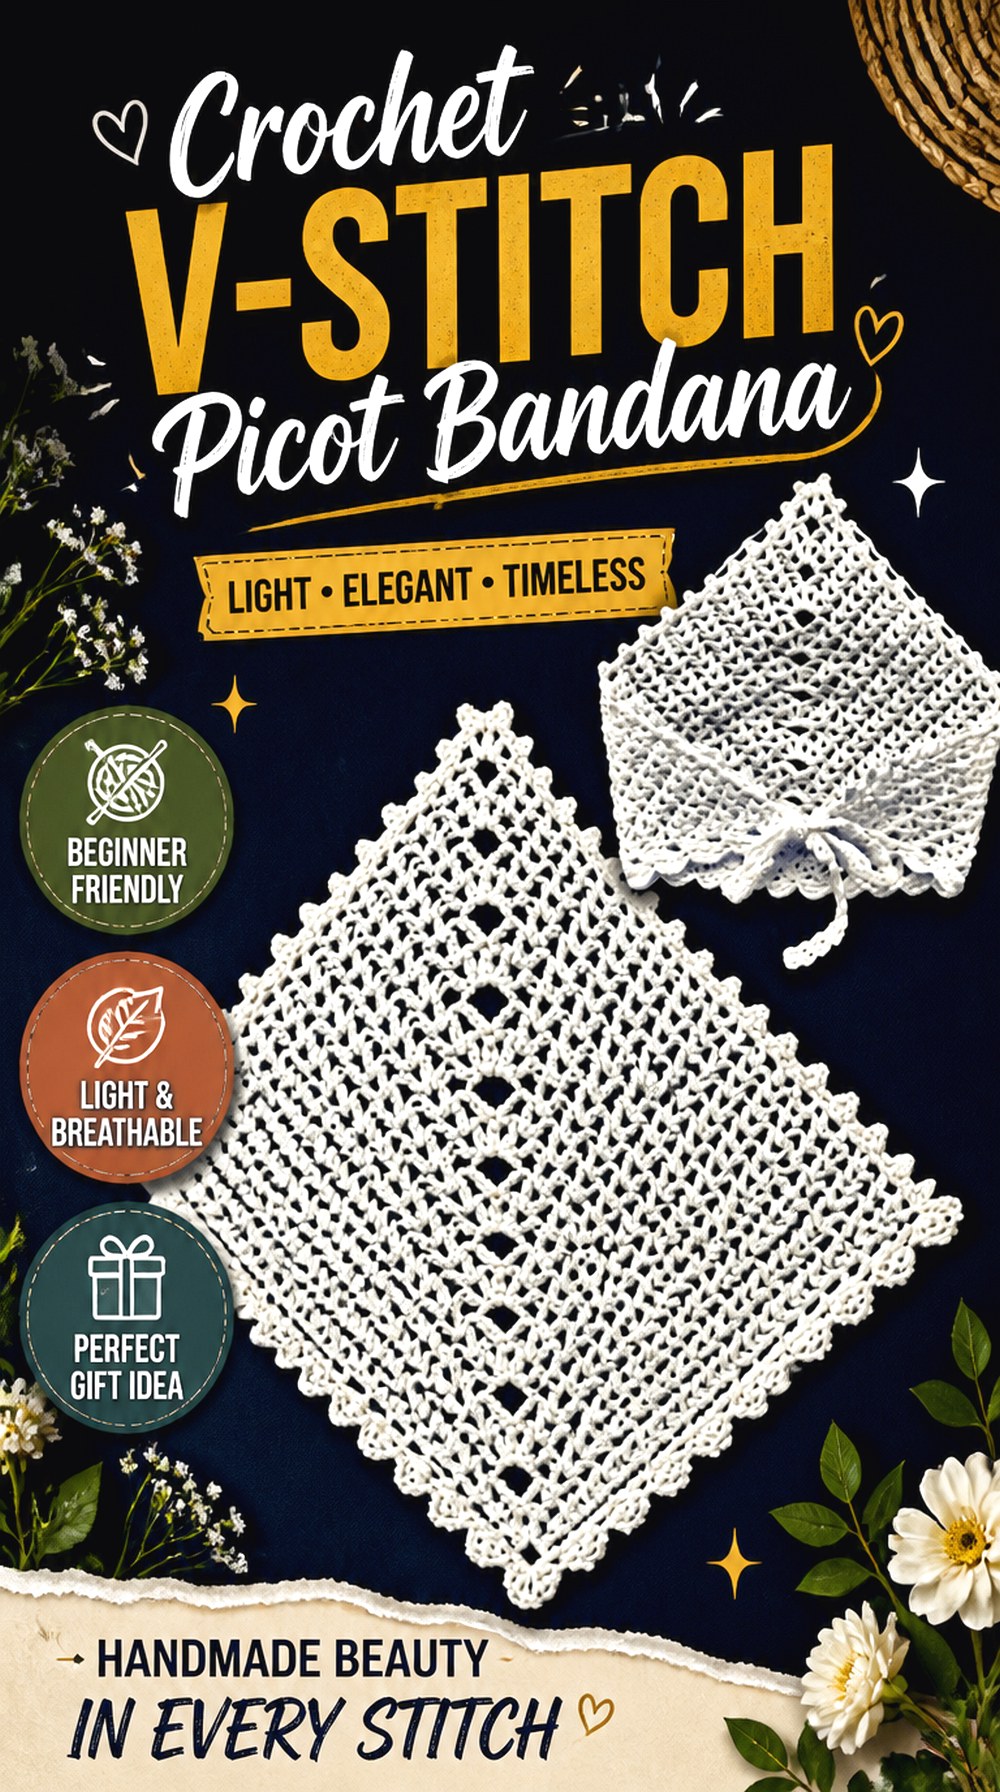
Repeated V-stitches create orderly openings across this triangle, while picots along the side edges and a scalloped lower finish add smaller-scale decoration. Shyler crochets also uses substantial straps in the demonstrated design.
The combination makes this bandana more structured visually than simple chain mesh. The V shapes provide a regular lace rhythm, the picots sharpen the perimeter, and the scallops make the lower edge a distinct design feature. Choose this idea when you want several types of lace detail to work together while the overall triangular construction remains easy to recognize.
The V-Shapes Make Uneven Tension Visible
Because similar openings repeat row after row, inconsistent size can interrupt the pattern quickly. Compare the Vs near the edges with those in the center rather than judging each stitch group in isolation.
If the openings gradually change because the triangle is shaping, that can be intentional. Randomly tight or loose sections, however, are worth correcting before the decorative edging is added.
Thick Ties Change the Finished Proportion
Shyler crochets pairs the lace triangle with sturdy straps. That creates more visual weight around the knot than the thin cords found on several other ideas here.
Consider your hairstyle and preferred tying position. Wider ties can suit an obvious bow or substantial knot, while someone wanting the fastening to disappear beneath the hair may prefer a slimmer bandana construction.
Original Tutorial and Creator Credit
Creator: Shyler crochets
Crochet Wide Mesh Triangle Bandana
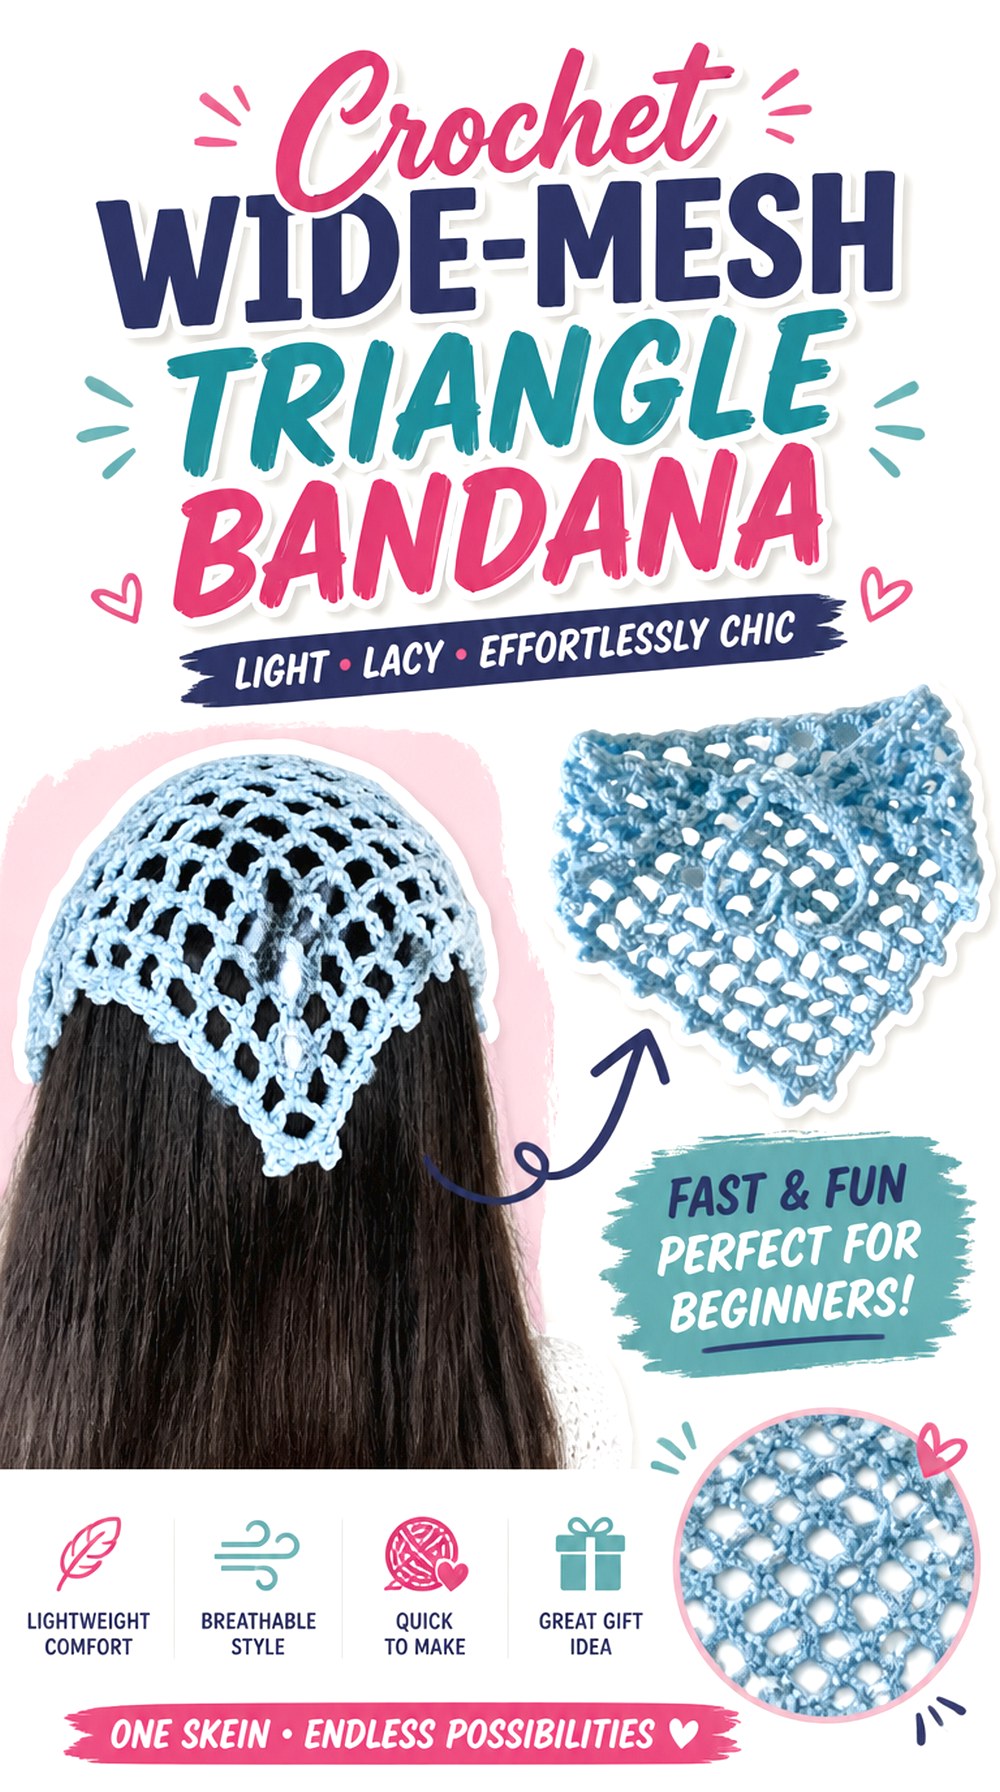
ElyseCrochets uses a mesh construction to create a lightweight triangular bandana. Compared with filet or joined motifs, the open spaces are the dominant visual feature rather than a background for pictures or flowers.
This approach suits readers who want an accessory that leaves plenty of hair visible and feels visually light. Mesh also makes yarn thickness especially influential: changing the material changes both the strand thickness and the apparent size of the holes. If you want true openness, judge how the fabric looks against the hair rather than relying only on how airy it appears while lying on a light tabletop.
Opening Size Sets the Overall Mood
Large spaces produce a more obvious net-like look. Smaller spaces make a mesh construction appear finer and more textile-like, even when the underlying idea remains similar.
When substituting yarn or hook, make enough fabric to see several openings together. One loop cannot tell you whether the finished scale will feel delicate, graphic, or overly coarse for the look you want.
Avoid Using the Ties to Force the Mesh Smaller
Open fabric can stretch visibly when pulled. If the triangle has to be drawn tight for the straps to meet, the openings may distort around the temples and upper edge.
Fit the body first. The corners should reach the desired tying area comfortably, and the straps should mainly secure that position. This preserves the regular look of the mesh when worn.
Original Tutorial and Creator Credit
Creator: ElyseCrochets 💌
Crochet Cluster and Shell Lace Bandana
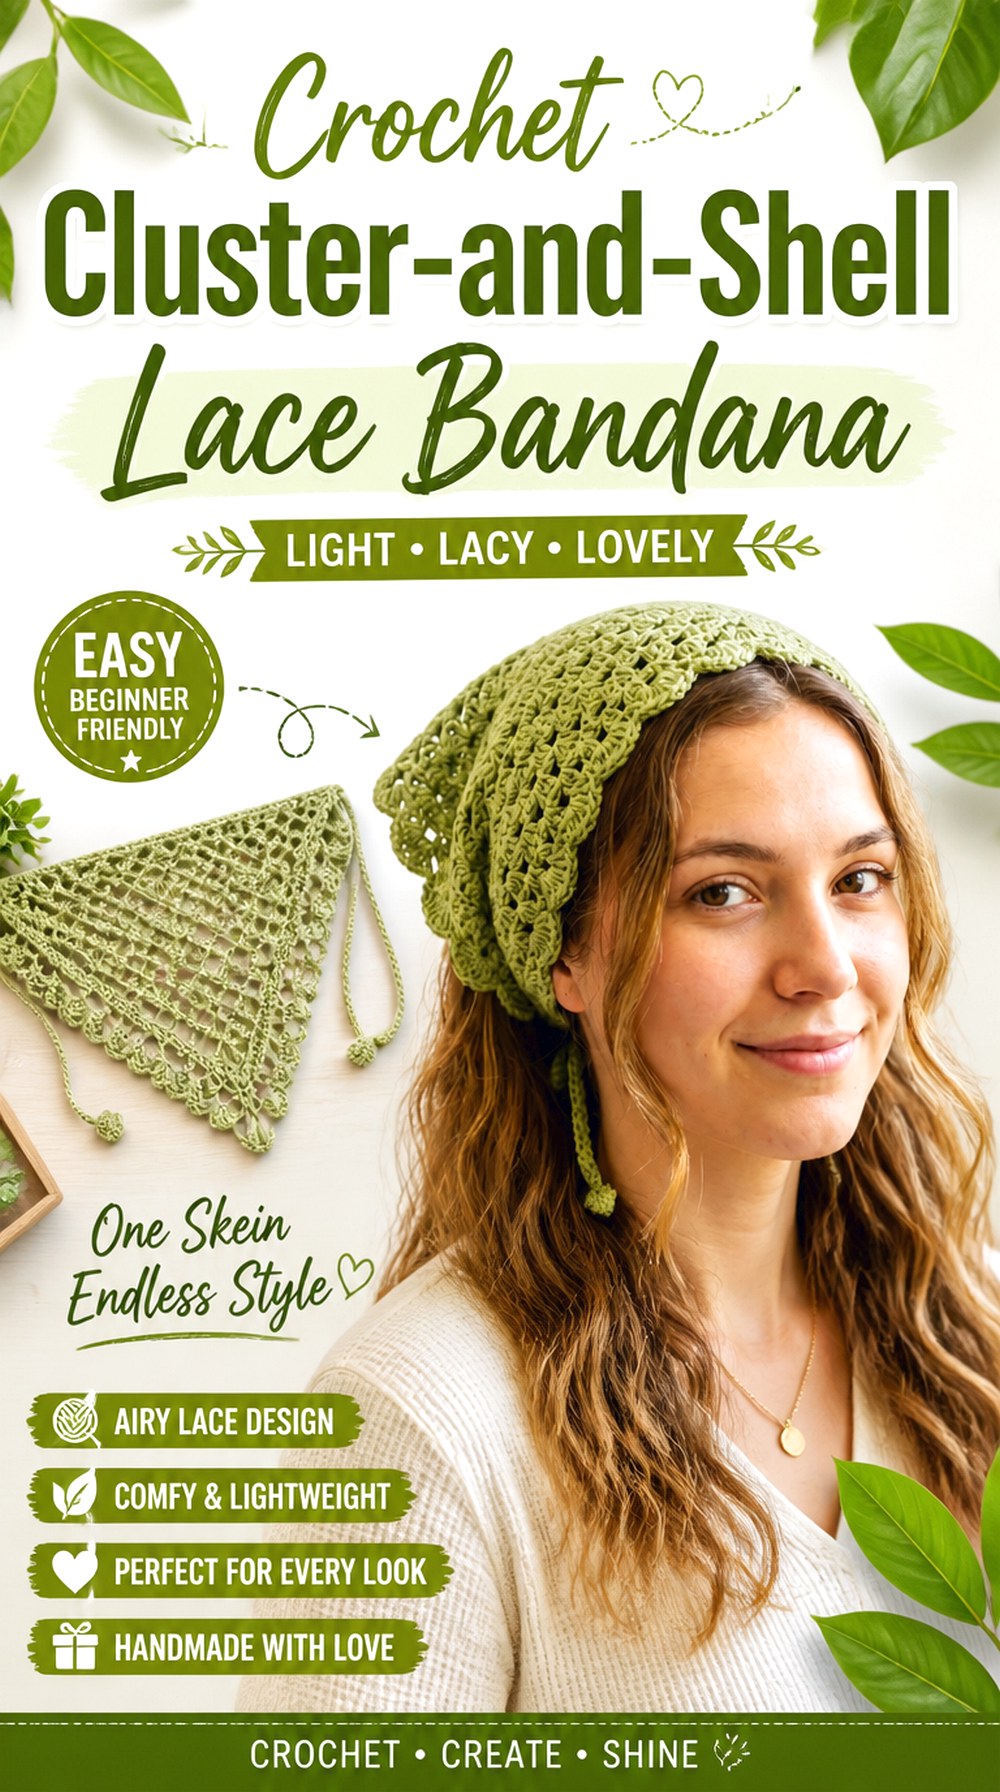
This Happy stockist tutorial combines a cluster-pattern body with shell edging and crocheted cords. The result offers a useful middle ground between full mesh and a nearly solid kerchief: clustered stitches provide more visual substance, while the shell border gives the perimeter its lace-like character.
Choose this style if you prefer decorative edges to extremely large openings across the entire headscarf. The shell finish also makes border tension a particularly important checkpoint. A clean body can still end up looking wavy if the edge receives too much fabric, while an overly tight shell border can pull the triangle inward.
Clusters Give the Center More Visual Weight
Grouped stitches create stronger solid areas than simple chain mesh. That means this bandana may read more clearly against the hair while still retaining regular openings between sections.
If you want an especially light appearance, use color and yarn scale to support the open spaces instead of adding additional dense embellishment. If coverage matters more, the clustered construction may already provide the balance you need.
Check the Shells Before Completing Both Sides
A shell border should follow the existing triangle without forcing a new edge shape. After working a representative section, lay it flat and compare it with the unbordered portion.
If the shells are producing obvious waves or pulling the edge inward, address spacing or tension at that stage. Waiting until the entire perimeter is finished makes correction much more tedious.
Original Tutorial and Creator Credit
Creator: Happy stockist
Crochet Lace Edge Bandana with Tie Options
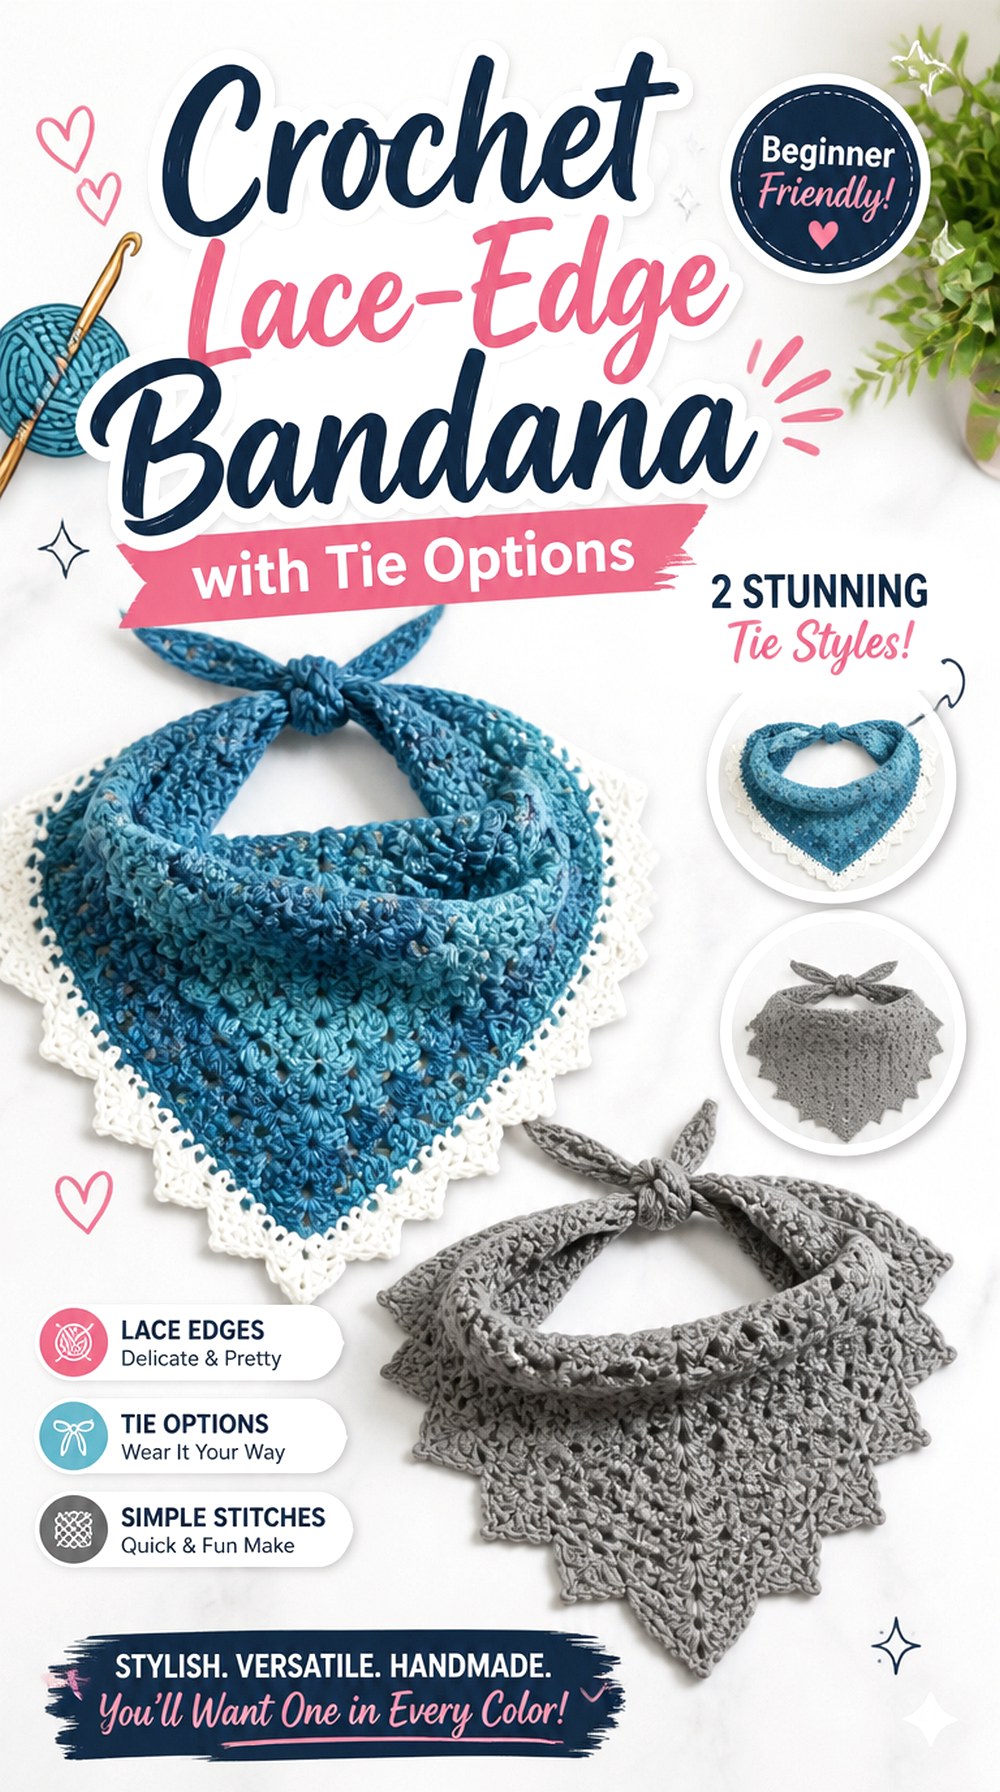
Ashten Stitches makes the decorative edge a major feature and demonstrates both thicker and thinner strap approaches. That creates a practical alternative to bandanas where every row of the body is highly open.
The design is worth considering if you want lace detail around the silhouette but a clearer central fabric area. It also makes tie choice an explicit part of the finished look rather than an afterthought. A broad tie can become visible styling, while a narrow one keeps attention on the triangular piece. Think about your preferred knot and hairstyle before choosing between them.
Let Your Hairstyle Choose the Strap Profile
A wide tie can create a noticeable bow and spread pressure over a larger area, but it also occupies more space beneath loose hair. Thin ties are visually lighter and easier to hide, yet they create a smaller contact area.
Neither is automatically better. Consider whether the fastening should be a visible design element or simply hold the lace-edged triangle in place.
Fit the Main Triangle Before Adding the Border
The border adds detail but should not be expected to solve an undersized center. Test where the unbordered triangle reaches at the temples and how far the point falls at the back.
If the body already feels too small, address size before the final lace treatment. If it feels too large, adding another decorative edge will only increase the finished visual scale.
Original Tutorial and Creator Credit
Creator: Ashten Stitches
Crochet Textured Picot Kerchief Bandana
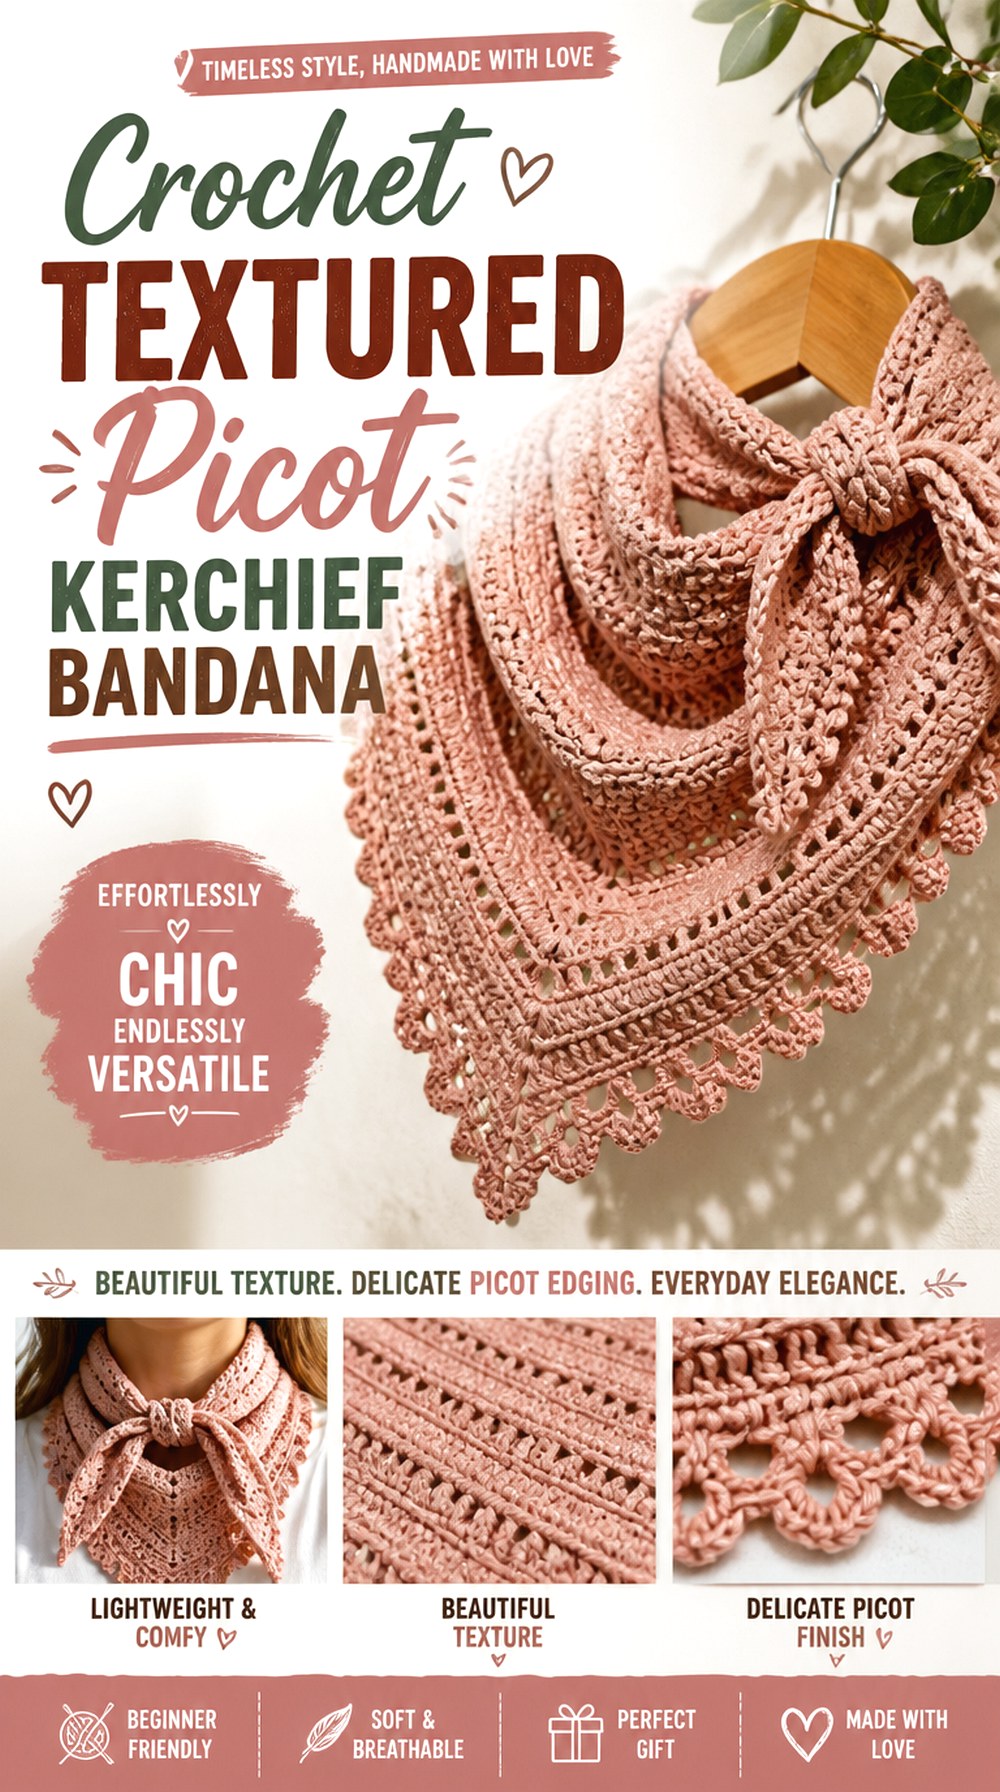
The Turtle Trunk’s Picot Bandana emphasizes texture rather than large transparent openings. The accompanying pattern information describes a triangular, textured design offered in multiple sizes, with a full video tutorial available.
Within a lace-focused collection, this serves as the higher-coverage alternative. Small pointed details can create a delicate surface and edge without turning the entire center into mesh. Choose it when you like lace-inspired texture but want a stronger fabric presence over the hair. Because the effect depends on repeated small details, yarn with enough definition to show the picots will make the surface easier to read.
Picot Texture Works Without Oversized Holes
Lace does not have to mean large open spaces. Repeated small points can create visual delicacy while maintaining a more substantial center.
That makes this idea useful when you want the bandana to remain easy to see against any hair color. It can also be a better direction when you simply prefer texture over the very transparent appearance of wide mesh.
Select Size by Where the Corners Land
The creator provides several size options rather than assuming one universal fit. Even so, think about placement rather than relying only on a size label.
Check where the two upper corners sit relative to your ears and where you want the back point to fall. Hairstyles and preferred coverage can make two people with similar head measurements prefer different finished proportions.
Original Tutorial and Creator Credit
Creator: The Turtle Trunk
Crochet Filet Triangle Scarf Bandana
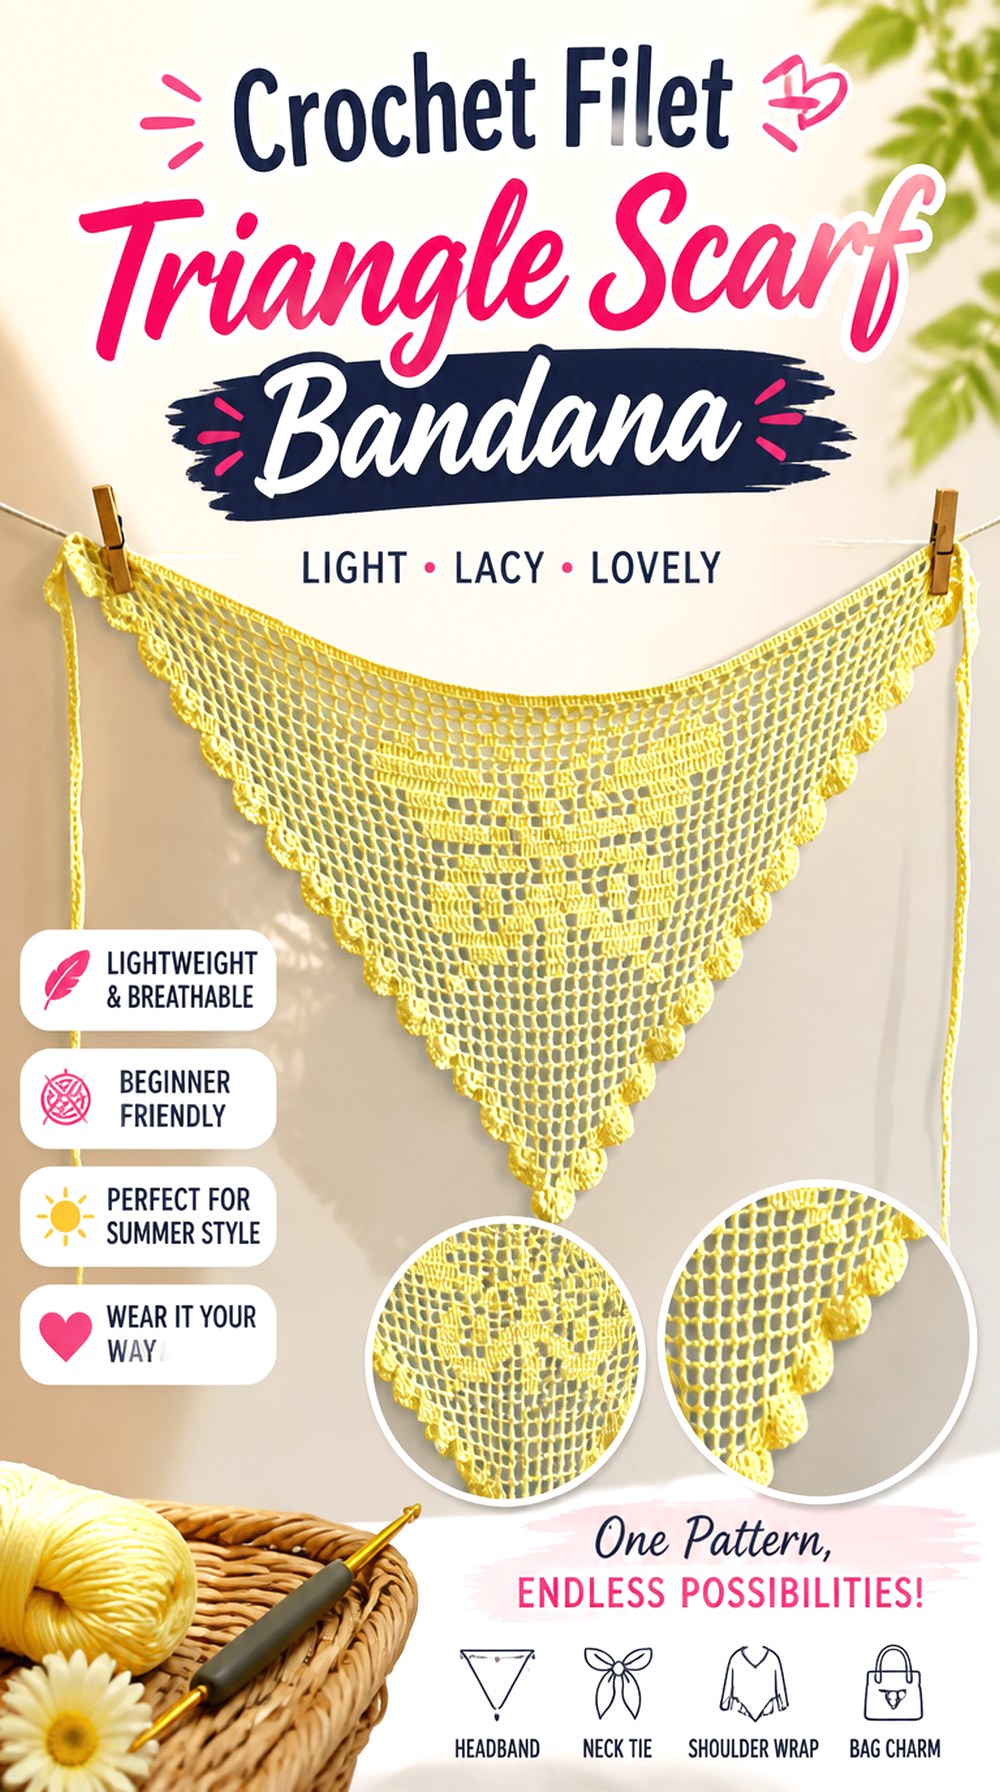
DIYGuru approaches the concept as a filet crochet triangle scarf that can also be worn as a headscarf, bandana, shawl, or hip scarf. The tutorial includes chart-reading guidance, blocking, ties, and decorative edging.
That broader scale is what separates this from a compact filet kerchief. Choose it if you want a piece whose usefulness extends beyond the head. The trade-off is extra fabric when it is worn in its smallest configuration. A material with good drape becomes particularly important because a larger triangle must fold and gather comfortably rather than standing stiffly away from the body.
Chart Reading Is Part of the Appeal
The tutorial explicitly includes guidance on working from the chart. That makes this a good choice if you want to become more comfortable connecting a visual grid with the growing crochet fabric.
Marking progress can help keep your place, but resist translating the entire design into a new written pattern. Use the creator’s chart and video for the exact construction.
Extra Width Should Have a Purpose
A multi-wear scarf can justify more width because the fabric may need to wrap around the hips or shoulders as well as the head. If you only want a compact bandana, that additional scale may create unnecessary bulk at the knot.
Before making the full version, decide whether the alternative styling options are genuinely useful to you. That decision can guide how closely you want to follow the demonstrated dimensions.
Test Drape Vertically, Not Only Flat
Large lace can look perfect on a table but behave differently when gravity pulls on it. Hold a developing section vertically and observe whether the fabric falls softly or stays rigid.
This check is especially useful when replacing the demonstrated cotton with another yarn. A scarf-bandana benefits from a material that can transition between flat triangular display and gathered wearable arrangements.
Original Tutorial and Creator Credit
Creator: DIYGuru
Crochet Classic Filet Lace Bandana
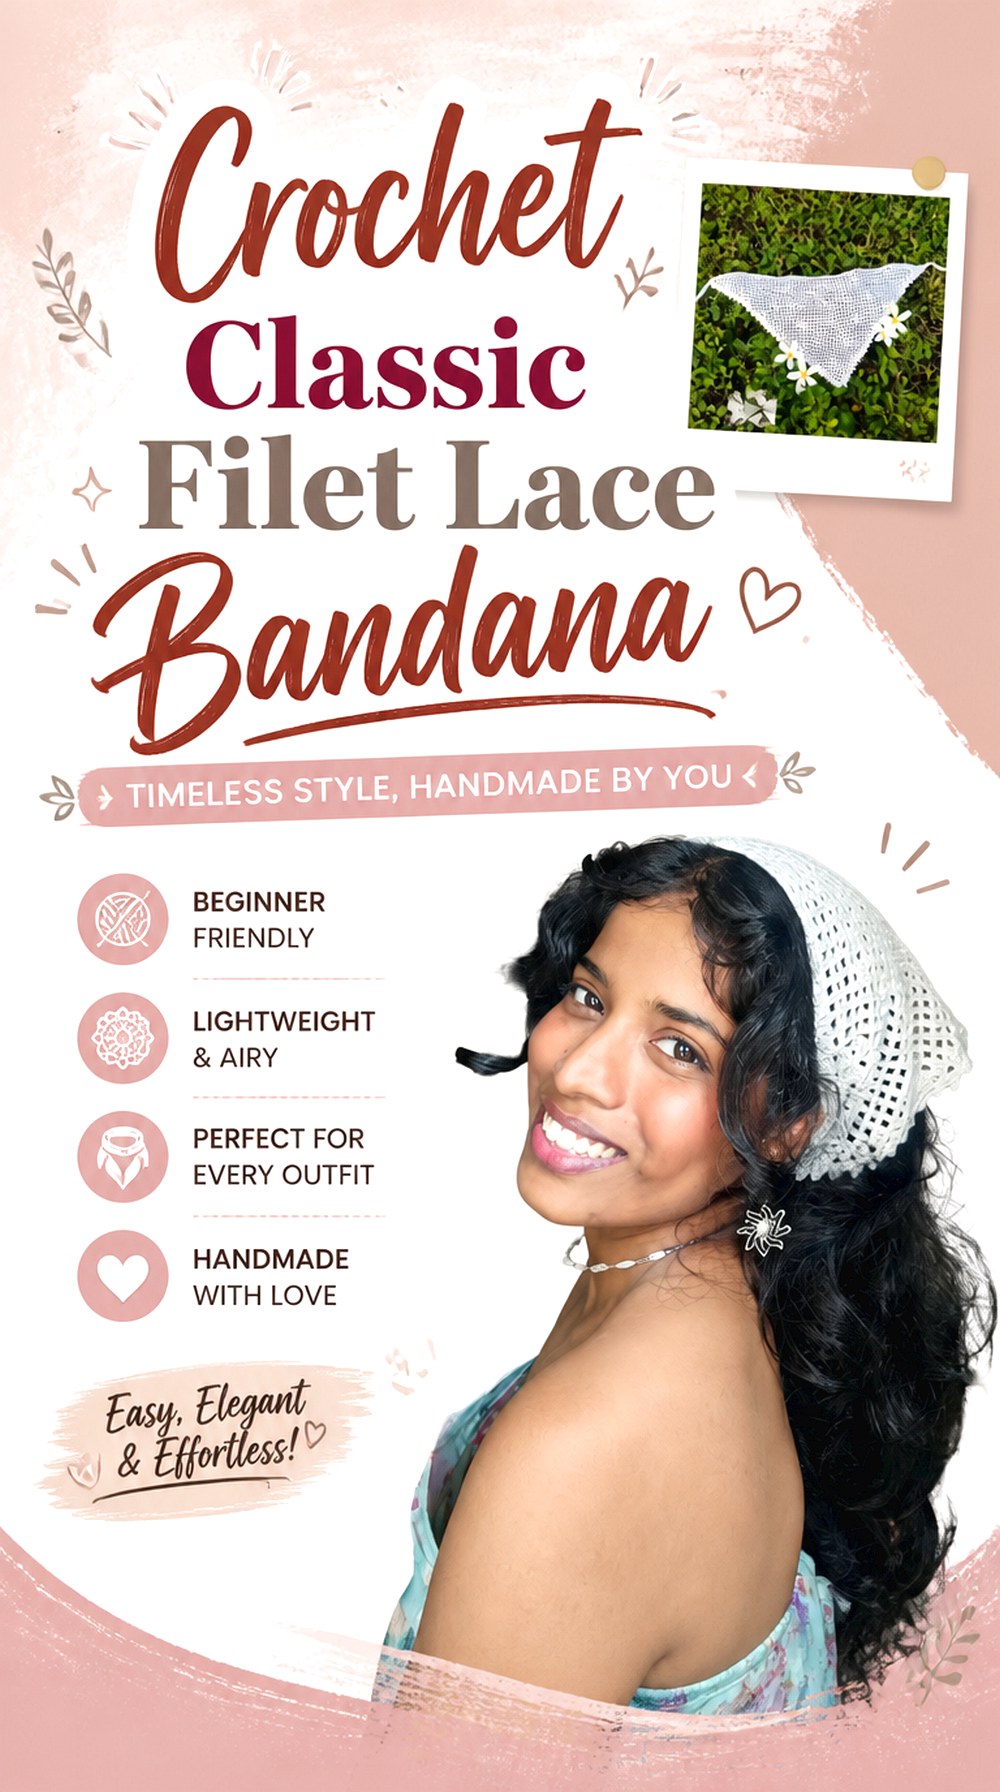
Croshico- Crochet with Rave🌻 focuses specifically on a filet crochet bandana, finishing the triangle with ties and a picot border. Compared with the larger multi-wear scarf above, this is a more headwear-focused way to explore the grid-like character of filet crochet.
Choose this project when you want the orderly alternation of open and more solid areas to create the lace effect without a separately joined motif layout. Filet also makes mistakes visually noticeable, because an opening in the wrong position can interrupt the expected grid. Checking the fabric every few rows can prevent a small placement error from traveling far through the triangle.
Filet Openings Need Consistent Proportions
The recognizable grid effect depends on neighboring spaces looking reasonably similar. If some openings become dramatically taller or narrower, the fabric can lose its orderly appearance.
Occasionally spread the work without stretching it and compare several adjacent sections. That broader view can reveal tension changes that are harder to notice while concentrating on the active stitch.
A Picot Border Adds a Second Scale of Detail
The tutorial finishes with a picot edge. Filet creates larger structural openings, while picots introduce much smaller decorative points around the perimeter.
That contrast can work especially well in a solid yarn. If you use a highly variegated colorway, decide whether the color changes plus the grid plus the picots create more visual information than you want in such a small accessory.
Original Tutorial and Creator Credit
Creator: Croshico- Crochet with Rave🌻
Crochet Color Carry Granny Lace Bandana
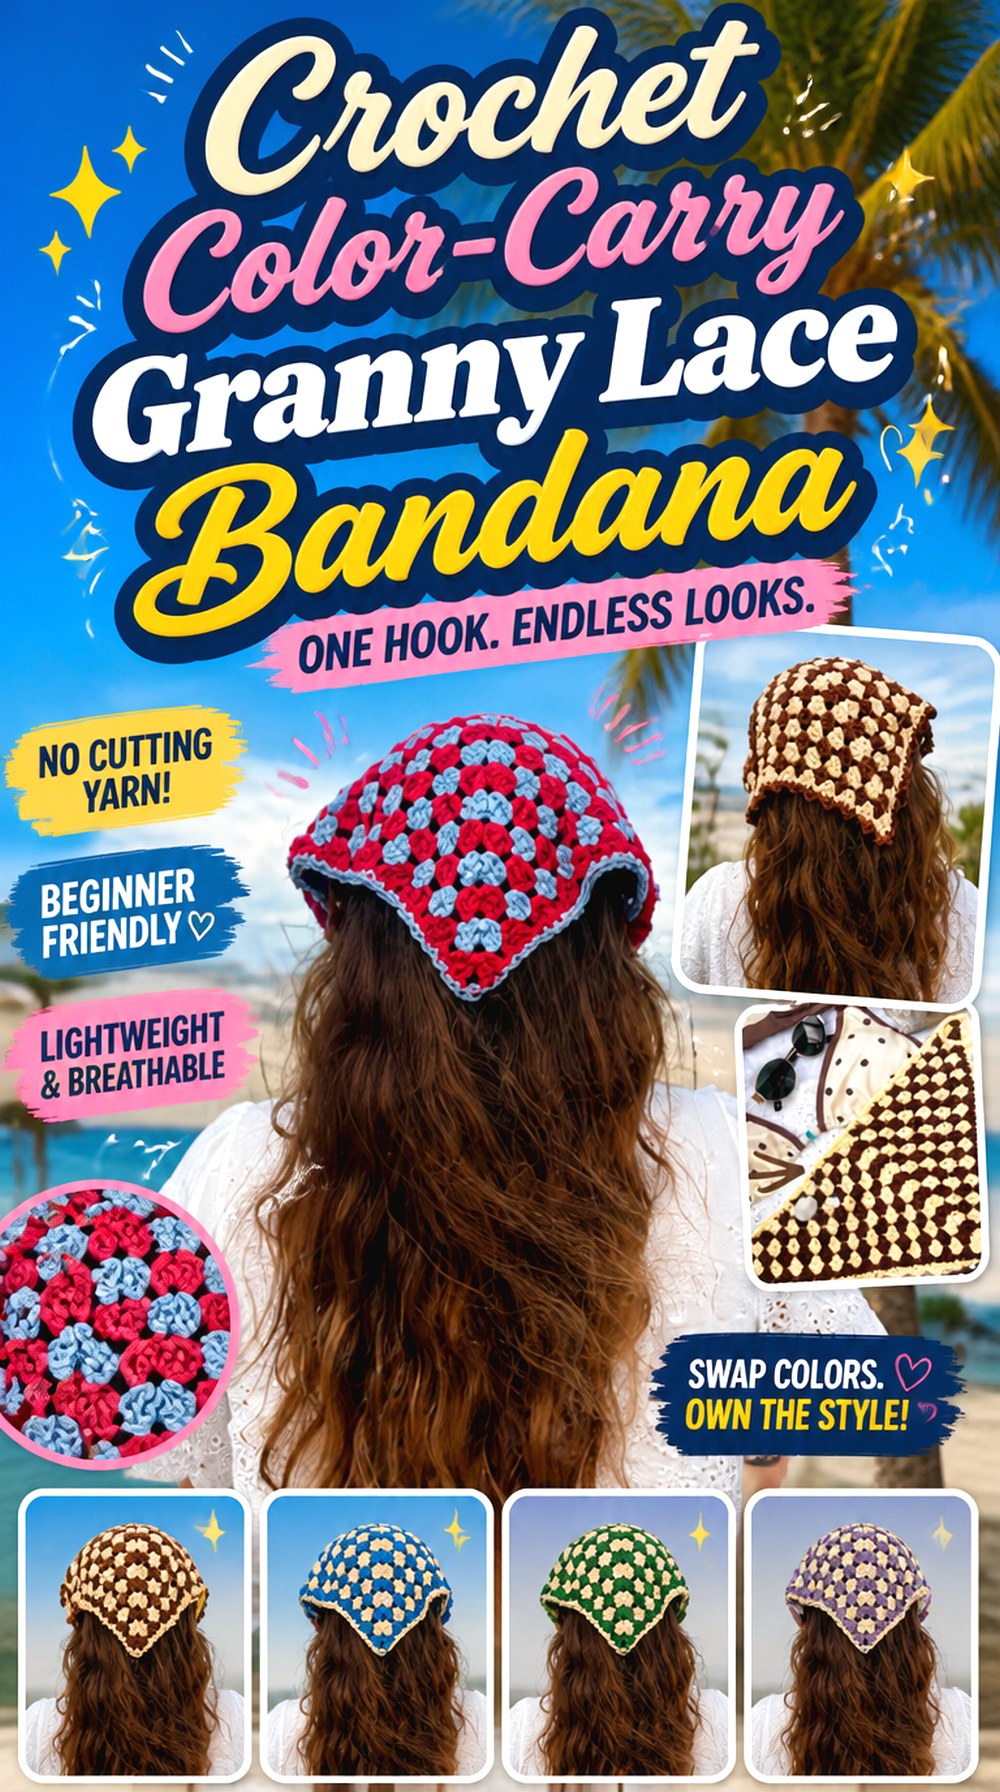
Feeling Funky Co uses a granny-stitch triangle but makes the color-change method part of the project’s identity: the tutorial demonstrates changing colors between rows without cutting the yarn each time. It also includes a picot/ruffled border and ties.
This design earns a separate place because the interest comes from both open granny texture and how repeated color changes are managed. It suits readers who want stripes but dislike creating a new loose end after every row. The border provides another decision point; with already-busy stripes, you may prefer to keep later embellishment restrained so the triangle does not become visually crowded.
Carrying Yarn Changes the Edge Management
A color that remains attached between rows needs to travel neatly enough that the unused strand does not become a distracting feature at the perimeter.
Watch the side edges as carefully as the center clusters. If the carried yarn is pulling one side tighter, the final triangle can become uneven even though the individual granny rows look correct. Consistent handling matters before the border covers or frames that area.
Choose a Stripe Rhythm Before Starting
Because the technique supports frequent color changes, it can be tempting to make every row different. Decide whether you want regular alternation, larger bands, or a deliberately irregular sequence before the triangle becomes large.
A simple plan helps distribute strong colors and reduces the chance that one shade unintentionally dominates the point, center, or upper edge.
Let the Ruffled Edge Earn Its Place
The tutorial includes a decorative picot-style border. With multicolor granny rows already creating movement, an elaborate edge may either complete the playful look or push it beyond your preferred level of detail.
Lay the body against the yarn intended for the border before finishing. That visual preview can tell you whether contrast or continuity will work better.
Original Tutorial and Creator Credit
Creator: Feeling Funky Co
Crochet Floral Summer Openwork Bandana
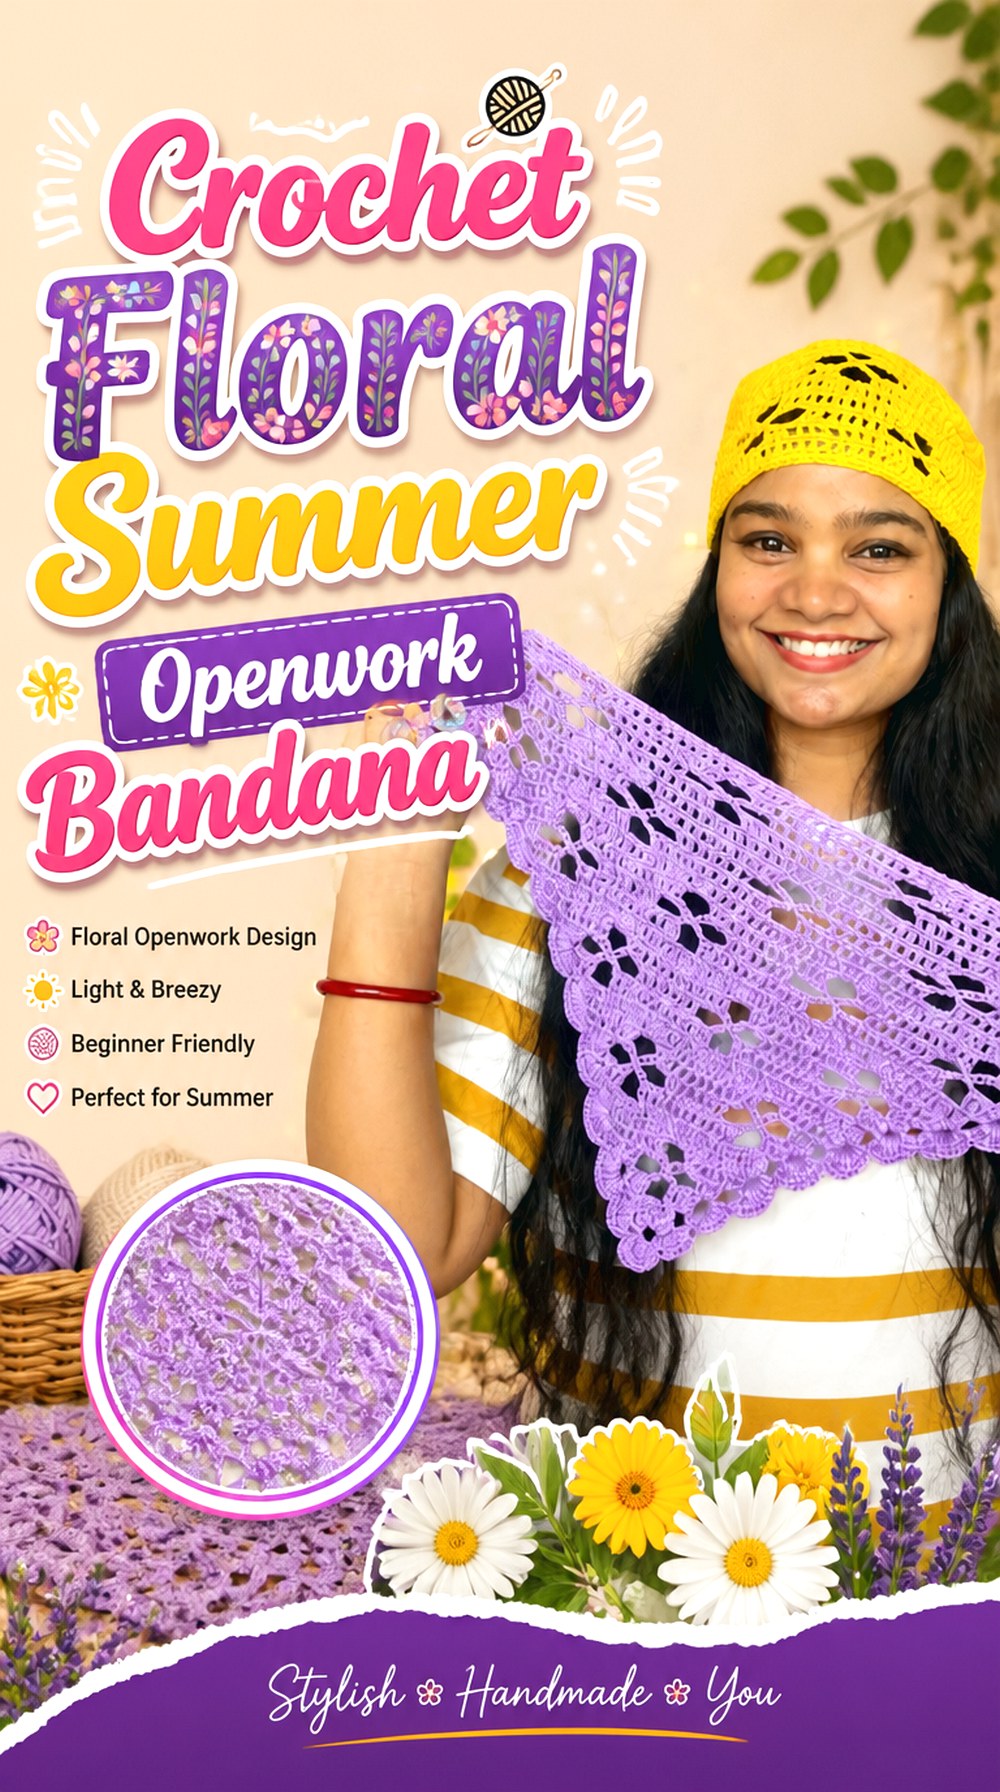
Crochet by Amrita’s tutorial centers on a flower bandana intended as a light summer accessory and incorporates basic crochet stitches along with taller stitch work. Its floral character makes it a softer alternative to the strict geometry of diamond and filet designs.
Choose this direction when you want the openwork to read as decorative flowers rather than a repeated net. Because floral shapes rely on curves and varied stitch heights, they can change noticeably when yarn thickness is altered. Before making a substitution, work enough of the design to see whether the flower forms remain clear at the new scale.
Look for the Flower Shape Before Adding More Rows
Once a floral section is complete, view it as a motif rather than a collection of individual stitches. The petal-like areas should be visually distinct enough to justify choosing this project over ordinary mesh.
If the shape is disappearing, check tension and yarn definition before assuming the later sections will automatically make it clearer.
Keep the Floral Fabric Flexible Enough to Wear
Decorative stitch groups can add more yarn to certain parts of an open fabric. If those areas become stiff, the headscarf may not follow the curve of the head as comfortably as a simpler mesh.
Let a completed section hang from your hand as well as lie flat. That quick drape check helps reveal whether the chosen yarn is supporting the intended light accessory feel.
Original Tutorial and Creator Credit
Creator: Crochet by Amrita
Crochet Linked Filet Scallop Bandana
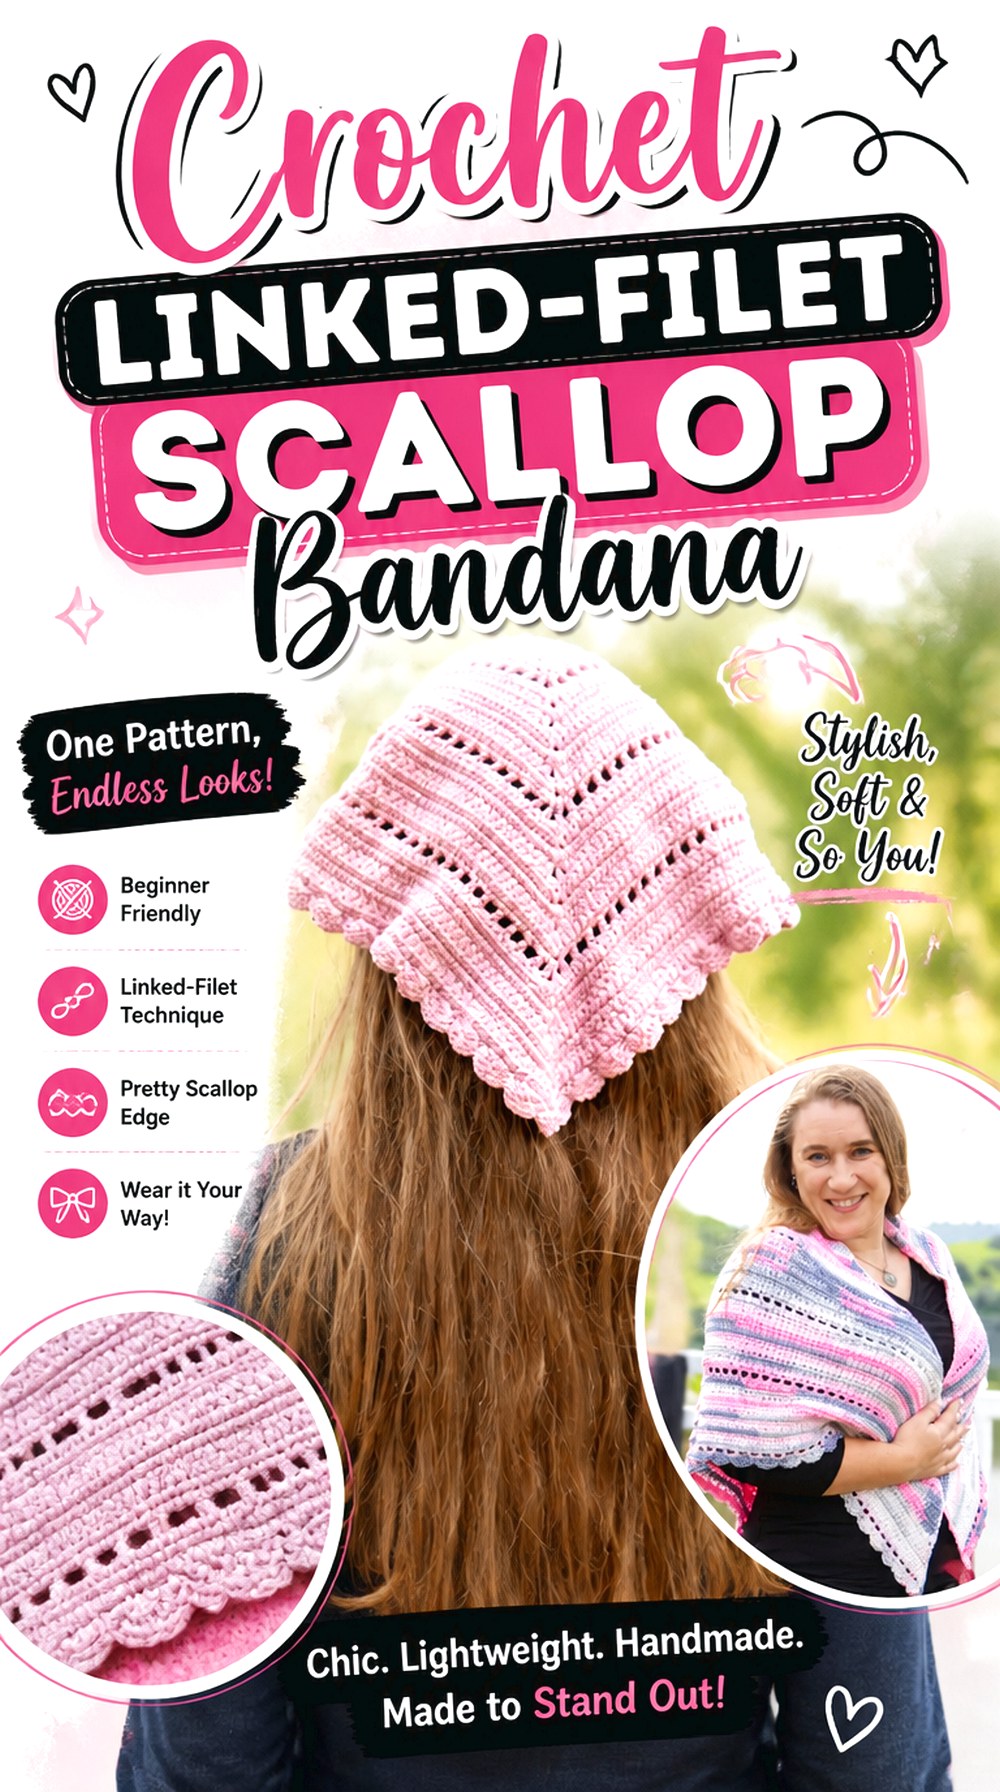
Nicki’s Homemade Crafts combines linked crochet, filet crochet, and a scalloped shell border in the same triangular bandana concept. The mixture creates intentional changes in fabric density rather than making every row equally open.
This is a useful choice when pure mesh feels too transparent but a solid kerchief feels too plain. The linked sections create stronger visual structure, the filet areas introduce negative space, and the scalloped perimeter adds decorative contrast. Those changes in density can also affect drape, so the fabric should be evaluated as a whole rather than judging each stitch family separately.
Mixed Density Can Shift the Way the Triangle Hangs
More substantial crochet sections contain more yarn than open filet areas. When several fabric types share a small triangle, those differences can influence how the point falls.
Before completing the edge, hold the bandana by its upper corners and let it hang naturally. Check whether the center remains balanced or whether one section appears to pull the fabric out of alignment.
The Scallops Need a Stable Base Edge
A shell border looks cleanest when the underlying triangle already has reasonably even sides. Trying to cover irregular shaping with larger decorative scallops can make the unevenness more obvious.
Work a short portion of the border and inspect it before continuing. If it immediately ruffles or contracts, revisit spacing or tension rather than relying entirely on blocking afterward.
This Tutorial Also Shows How Scale Changes the Same Concept
The creator presents a triangle shawl and head-bandana kerchief using the same broader stitch concept. That makes the video useful for observing how a triangular lace idea behaves at different accessory scales.
Use that comparison for understanding proportion, while still following the creator’s exact bandana instructions when making the smaller headwear version.
Crochet Fine Yarn Granny Lace Bandana
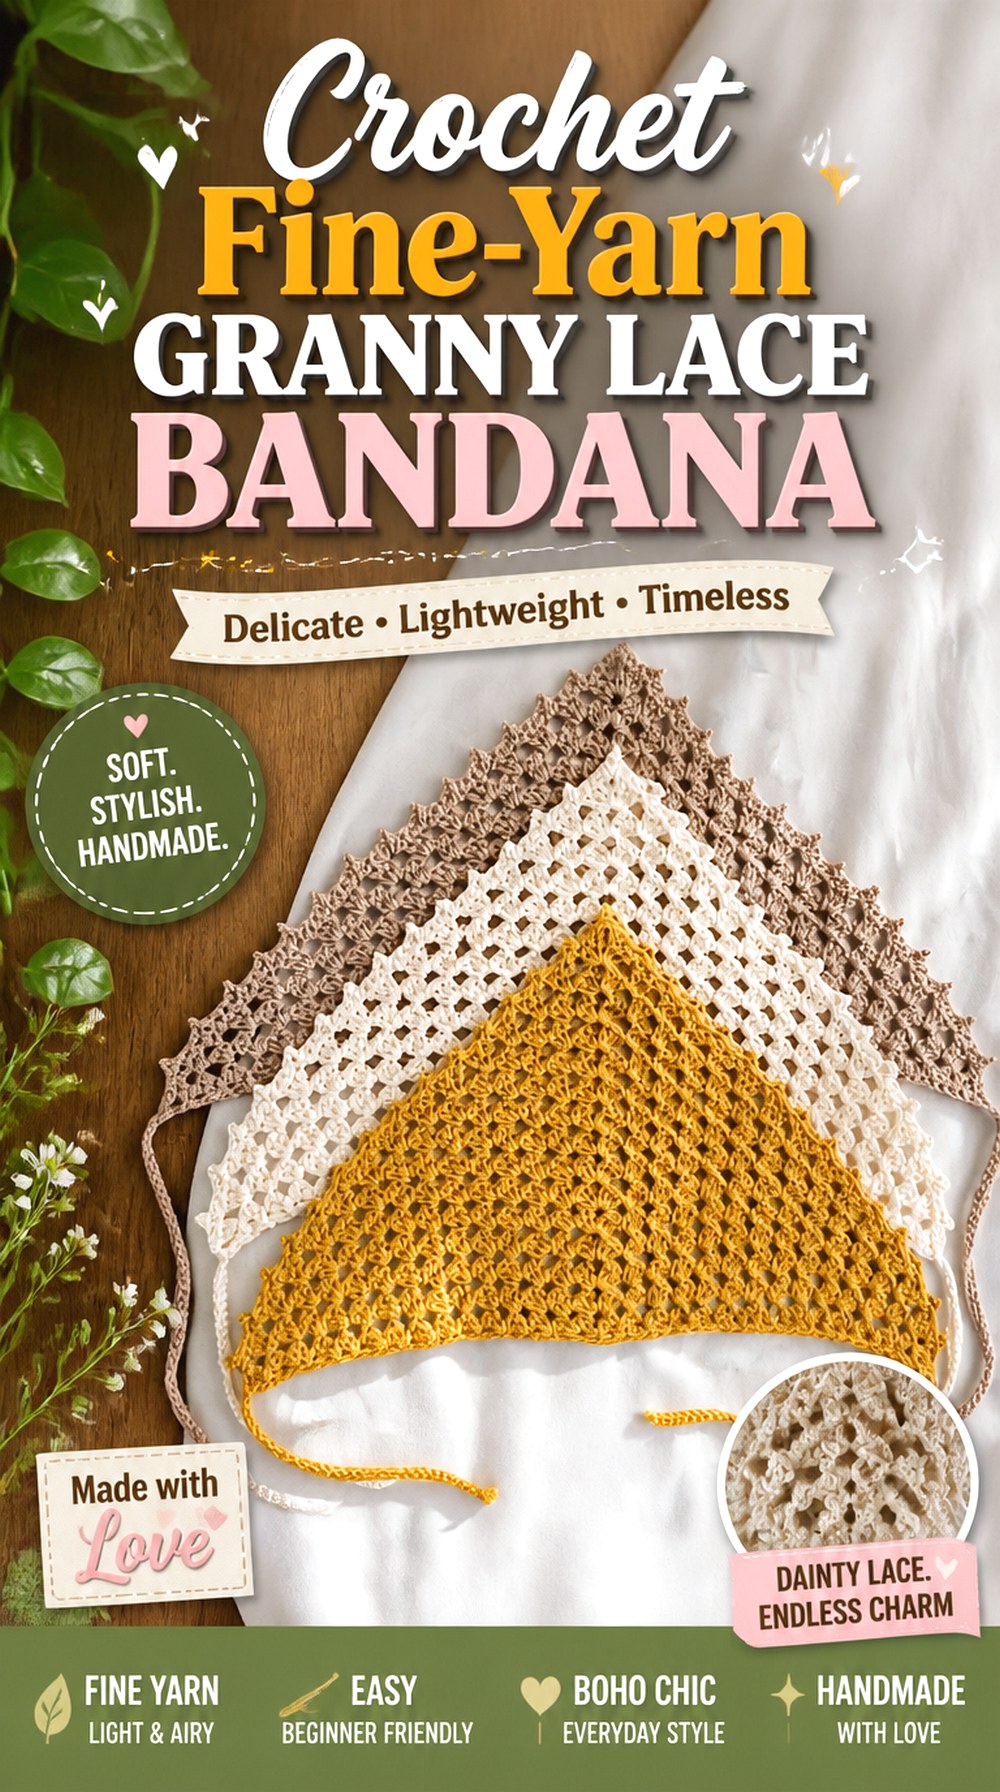
HayHay Crochet’s granny triangle uses fine yarn and includes optional picot edging, which gives familiar granny clusters a lighter scale than many worsted-weight versions. Instead of learning a completely different lace family, this idea shows how familiar clustered construction can become more delicate when the yarn, spacing, and border are handled differently.
Choose it if you like the rhythm of granny crochet but want an accessory that feels less visually bulky. The open spaces between clusters provide the lace effect, while the optional picots let you decide how decorative the outside edge should become.
Finer Clusters Keep the Open Spaces Prominent
When the yarn is relatively fine, the gaps between granny groups occupy more of the visual surface. A much thicker substitution enlarges the clusters as well as the triangle, which can shift the balance toward a chunkier look.
If you change yarn weight, stop based on actual head coverage rather than assuming the demonstrated row count will still create the same proportions.
Treat Picots as a Styling Option
The accompanying pattern information identifies the picot edging as optional. That gives you an easy way to simplify the perimeter without changing the main granny triangle.
For a solid, understated yarn, picots can add a small amount of decorative movement. With strong stripes or self-changing yarn, a plain edge may allow the granny openings and color to remain the dominant features.
Original Tutorial and Creator Credit
Creator: HayHay Crochet
Which Crochet Lace Bandana Style Should You Choose?
For maximum openness, the Crochet Wide-Mesh Triangle Bandana puts negative space first. The Crochet Diamond-Grid Lace Bandana, Crochet Classic Filet Lace Bandana, and Crochet Dragonfly Openwork Bandana are better choices when you want the holes to create recognizable geometry or imagery.
For floral detail, choose between continuous openwork and modular construction. The Crochet Floral Multi-Wear Lace Bandana behaves more like a small lace scarf, while the Crochet Joined Daisy-Motif Lace Bandana and Crochet Heart-Square Lace Bandana emphasize individual joined units.
If you prefer more coverage, look toward the Crochet Textured Picot Kerchief Bandana, Crochet Cluster-and-Shell Lace Bandana, or Crochet Lace-Edge Bandana with Tie Options. For familiar repetition with an airy result, the two granny-lace ideas offer a gentler transition into decorative headwear.
Conclusion
The most useful way to choose among these 18 crochet lace bandana ideas is to start with structure rather than color. Mesh gives the greatest transparency; filet and diamond designs make negative space graphic; floral and heart motifs become focal points; and picot, cluster, or lace-edged versions keep more fabric through the center.
Next, compare triangle depth, upper width, tie style, and yarn scale. Those details determine how the bandana actually sits and how much hair remains visible. Once you have chosen the construction that fits your preferred coverage and styling, follow the original creator’s tutorial for the exact stitches, shaping, assembly, and finishing details.
Frequently Asked Questions
What type of yarn works well for a crochet lace bandana?
Smooth yarn is useful when the design relies on diamonds, flowers, filet squares, V-stitches, or other shapes that need clear definition. Several tutorials here use cotton or cotton-containing yarns, but that does not make one fiber universally correct for every project.
Consider both definition and drape. If you substitute a different thickness, expect the opening size and finished dimensions to change, and fit the actual triangle instead of copying the source’s row count automatically.
How do I know when a crochet lace bandana is large enough?
Check width and depth separately. Place the long upper edge where you want it to sit and make sure the corners reach a comfortable tying area without stretching the lace aggressively. Then check how far the triangular point extends down the back of the head.
A deeper triangle is not necessarily a better fit; it simply gives more coverage. Make the final sizing decision before an elaborate border or ties make the piece harder to adjust.
Should a crochet lace bandana be blocked?
Blocking can help open lace, settle minor waviness, and make geometric or floral motifs easier to read, but the correct method depends on the yarn fiber. Follow the care information for the material you actually used.
Blocking should refine a basically sound triangle. It is not a reliable fix for severely uneven shaping, a much-too-tight border, or large differences between joined motifs. Correct those structural issues before finishing whenever possible.
Why is my lace bandana ruffling around the edge?
First determine where the waviness begins. If the body lies flat and the problem starts only after a shell, picot, or other border is added, border spacing or tension deserves attention. If the main triangle already ruffles, the issue may originate earlier in the shaping or general tension.
Do not assume every ripple will disappear during blocking. Work a short section of decorative edging first and inspect how it behaves before completing the entire perimeter.
Can I replace the yarn in a bandana tutorial with a thicker yarn?
You can sometimes substitute materials, but a thicker yarn changes more than warmth. It enlarges stitches, openings, motifs, and the overall triangle, and it can make a delicate lace design look much heavier.
Instead of following the original size by row count alone, evaluate the growing band’s actual width and depth. For motif-based projects, also check whether the larger flowers, hearts, or geometric openings still suit the scale you want before making every component.
How can I keep delicate lace from stretching when I tie the bandana?
Make the triangle large enough that its upper corners naturally reach the tying area. The straps should secure the bandana, not pull an undersized lace body into position. Stretching openwork firmly every time it is worn can distort the holes and alter the edge shape.
Tie style also matters. Slim cords create a lighter appearance, while broader straps distribute tension differently and may form a bulkier knot. Choose the fastening based on both fit and hairstyle rather than appearance alone.