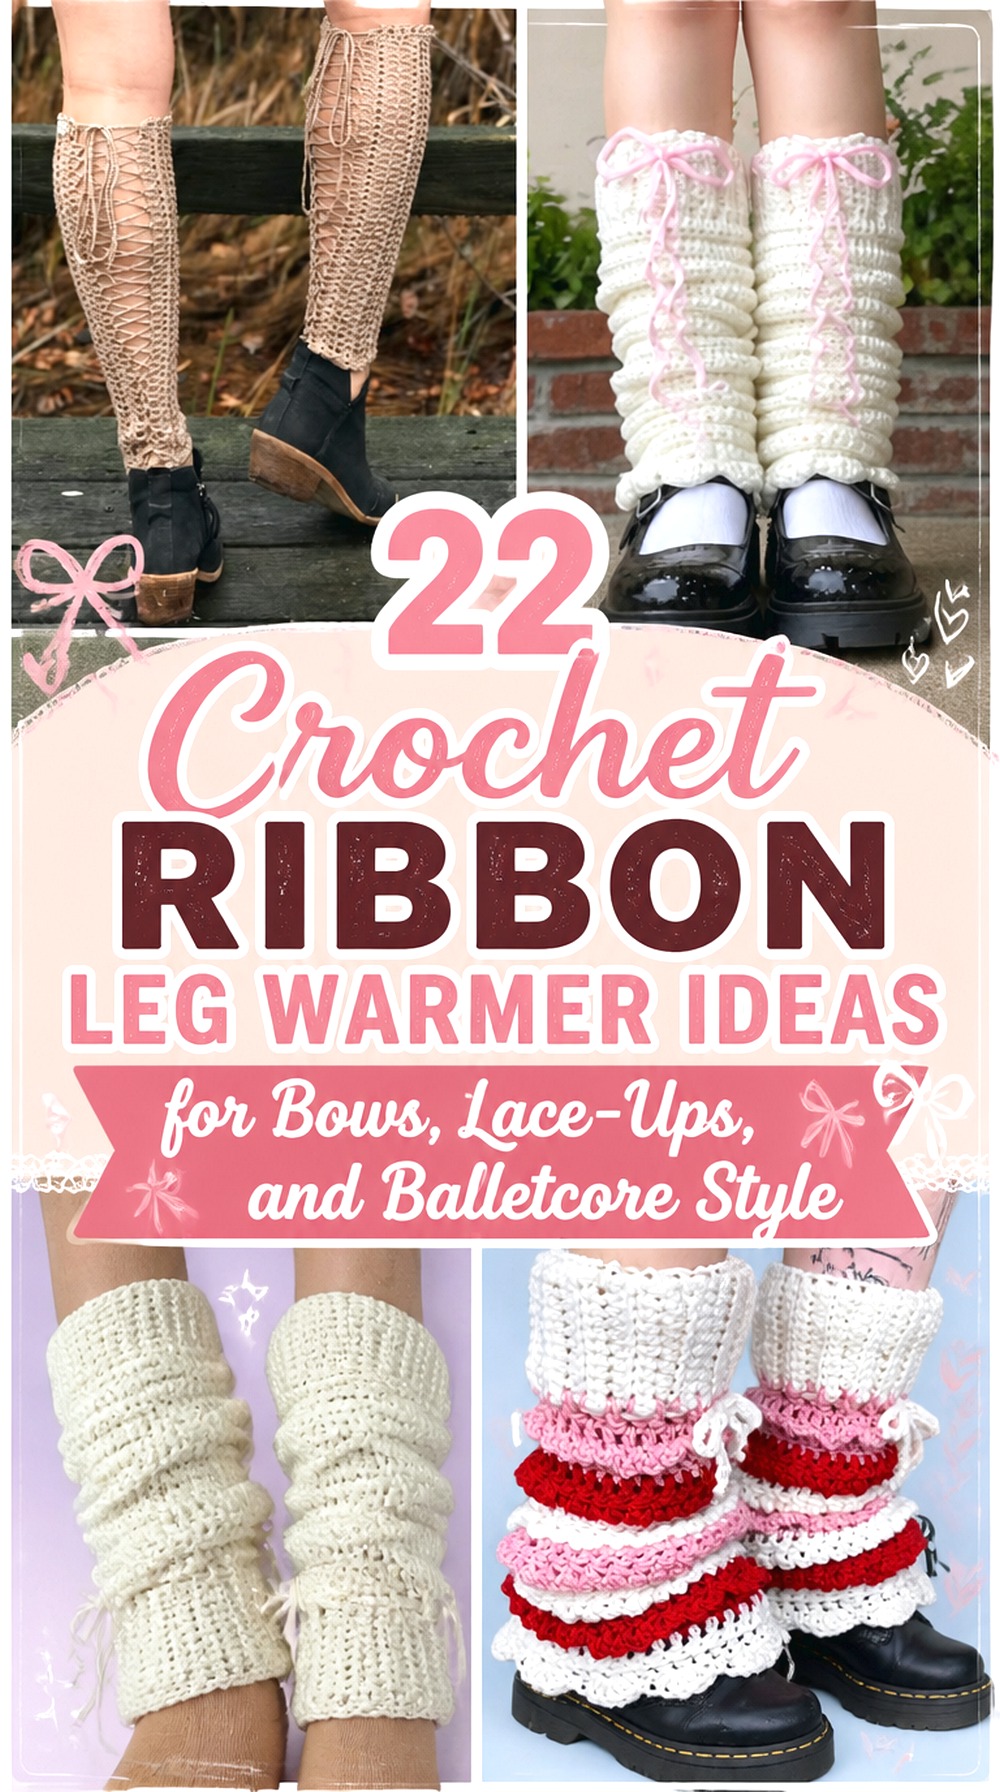

Ribbon can completely change the personality of crochet leg warmers. A small bow can make a plain ribbed pair feel delicate, while full corset lacing creates a much stronger statement. This collection also includes ruffled tops, flower accents, shell texture, chunky over-shoe shapes, thigh-high coverage, short boot cuffs, and cleaner everyday styles.
Some tutorials below already include bows, ties, ribbon, or lace-up construction. Others provide a distinct leg-warmer base that can be finished with a removable ribbon accent. When ribbon is an adaptation rather than part of the original tutorial, keep the crochet construction and fit guidance from the creator intact and treat the ribbon as decoration rather than an unverified structural replacement.
Quick List
- Crochet Double-Bow Ribbed Leg Warmers
- Crochet Pom-Pom Ribbon Panel Leg Warmers
- Crochet No-Sew Bow-Detail Leg Warmers
- Crochet Statement Bow Cuff Leg Warmers
- Crochet Lace-Up Flared Ribbon Leg Warmers
- Crochet Corset-Lace Openwork Leg Warmers
- Crochet Ruffle-Top Tie Leg Warmers
- Crochet Thigh-High Ribbon-Accent Leg Warmers
- Crochet Flower-and-Ribbon Leg Warmers
- Crochet Almond-Texture Ribbon-Cuff Leg Warmers
- Crochet Shell-Stitch Ribbon-Threaded Leg Warmers
- Crochet Chunky Over-Shoe Ribbon Leg Warmers
- Crochet Faux-Knit Ballet Ribbon Leg Warmers
- Crochet Striped Contrast-Ribbon Leg Warmers
- Crochet Feather-Stitch Ribbon Boot Cuffs
- Crochet Lace Boot Cuffs with Ribbon Bows
- Crochet Slouchy Ribbon-Top Leg Warmers
- Crochet Custom-Fit Ribbon-Loop Leg Warmers
- Crochet Minimal Side-Bow Leg Warmers
- Crochet Ribbed Outer-Bow Leg Warmers
- Crochet Classic Tube Leg Warmers with Removable Ribbon
- Crochet Size-Range Ribbon-Cuff Leg Warmers
Add Ribbon Without Taking Away the Stretch
Ribbon and crochet fabric behave differently. Ribbing and many crochet fabrics can expand around the calf, but woven ribbon generally does not stretch the same way. A ribbon tied tightly around a stretch-dependent upper cuff can therefore undo the very flexibility that keeps the warmer comfortable.
For decorative versions, consider placing a bow on one side, threading ribbon through an open section without pulling it tight, or making the ribbon removable. Full corset lacing needs more thought because the lacing can affect circumference as well as appearance. Check the fit with the crochet fabric relaxed, then again after the ribbon is added. Fit, stretch, shoe clearance, and trim placement are more useful planning points than appearance alone.
Choose the Leg-Warmer Shape Before Choosing the Bow
A ribbon detail that works on a short boot cuff may feel awkward on a thigh-high warmer. Start with the silhouette. Straight ribbed tubes give you a clean canvas for small bows. Flared bottoms naturally suit corset-style lacing because the wider hem already creates visual drama. Slouchy pairs look better when the ribbon does not prevent the fabric from gathering, while chunky warmers need trims with enough visual presence to avoid disappearing into the texture.
Footwear matters too. A bow positioned exactly where a boot shaft presses against the leg can become uncomfortable or disappear completely. If you plan to wear the warmers mainly with boots, compare the finished warmer length with the height of the footwear before fixing any permanent ribbon placement.
Let Yarn and Ribbon Do Different Jobs
The yarn determines most of the warmth, stretch, texture, and drape, while the ribbon is usually better treated as a surface detail or adjustable accent. Smooth ribbon gives strong contrast against fuzzy or textured yarn. A matte tie can look quieter against pronounced shells, cables, or almond-style texture.
Also consider care before attaching anything permanently. Yarn and ribbon may have different washing instructions, and decorative bows can become crushed or twisted. When practical, removable ties make cleaning and reshaping easier. Before cutting ribbon permanently, lace or pin a temporary length into position, put on the warmer with the intended shoes, and check that the tails do not drag, catch under heels, or interfere with walking.
Crochet Double Bow Ribbed Leg Warmers
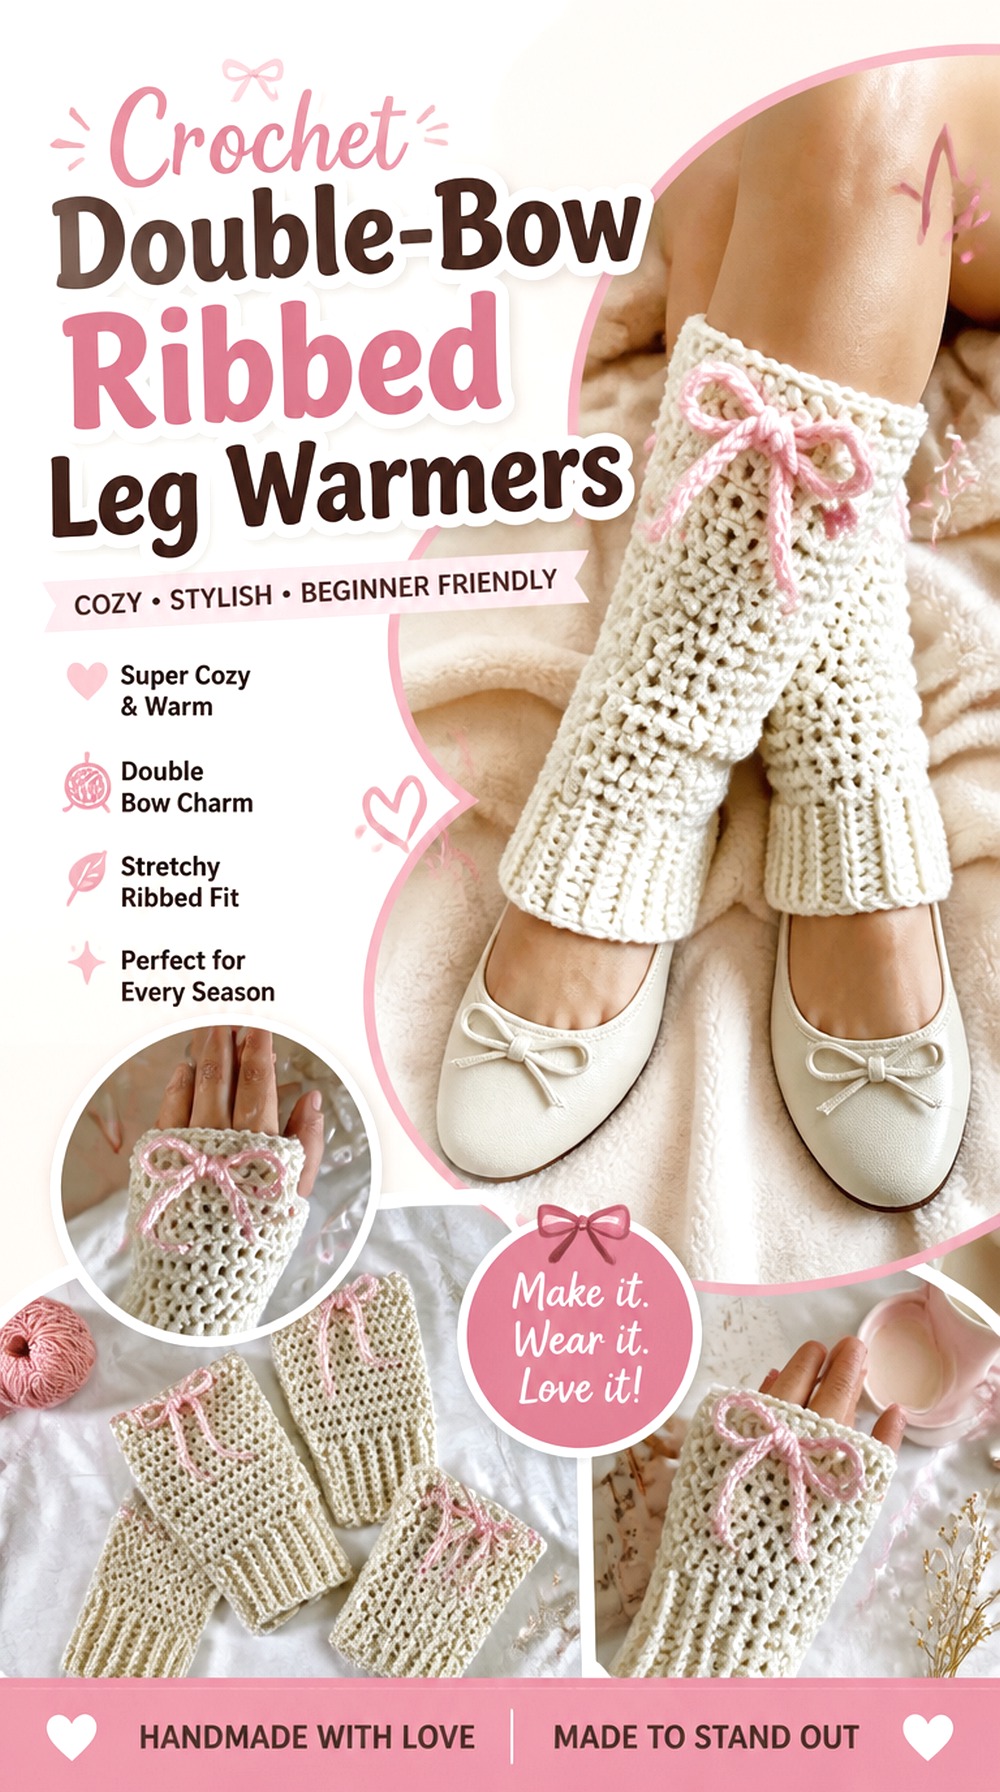
This version puts bows at the center of the design rather than treating them as a last-minute trim. A ribbed leg warmer gives the pair a relatively clean background, allowing two neat bow accents to stand out without competing with heavy surface texture. It is a useful direction for coquette, ballet-inspired, or soft winter styling.
The strongest reason to choose this approach is balance. Instead of running ribbon the full length of the leg, you can concentrate the decoration near a cuff or another visible point. That keeps the leg warmer recognizable as a practical wearable while making the ribbon treatment obvious.
Two Bows Need Balanced Placement
Before permanently securing the bows, place both warmers side by side and mark where each center should fall. Small differences become much more noticeable when matching decorations are involved. You can mirror the bows on the outer calves or place both toward the front, but decide on that orientation before attaching anything.
Also try the warmers on. A visually centered bow when the warmer is lying flat may rotate once the ribbed fabric stretches around the leg.
Keep the Decorative Tie Separate From Grip
The upper ribbing should still be responsible for the basic fit. If a non-stretch ribbon is pulled tightly enough to hold the warmer up by itself, it can create a noticeably firmer band than the surrounding crochet.
A removable or lightly secured bow lets the ribbing expand normally. This is particularly useful if the pair will be worn over both bare legs and thicker tights, because the underlying crochet has more room to accommodate that change.
Crochet Pom Pom Ribbon Panel Leg Warmers
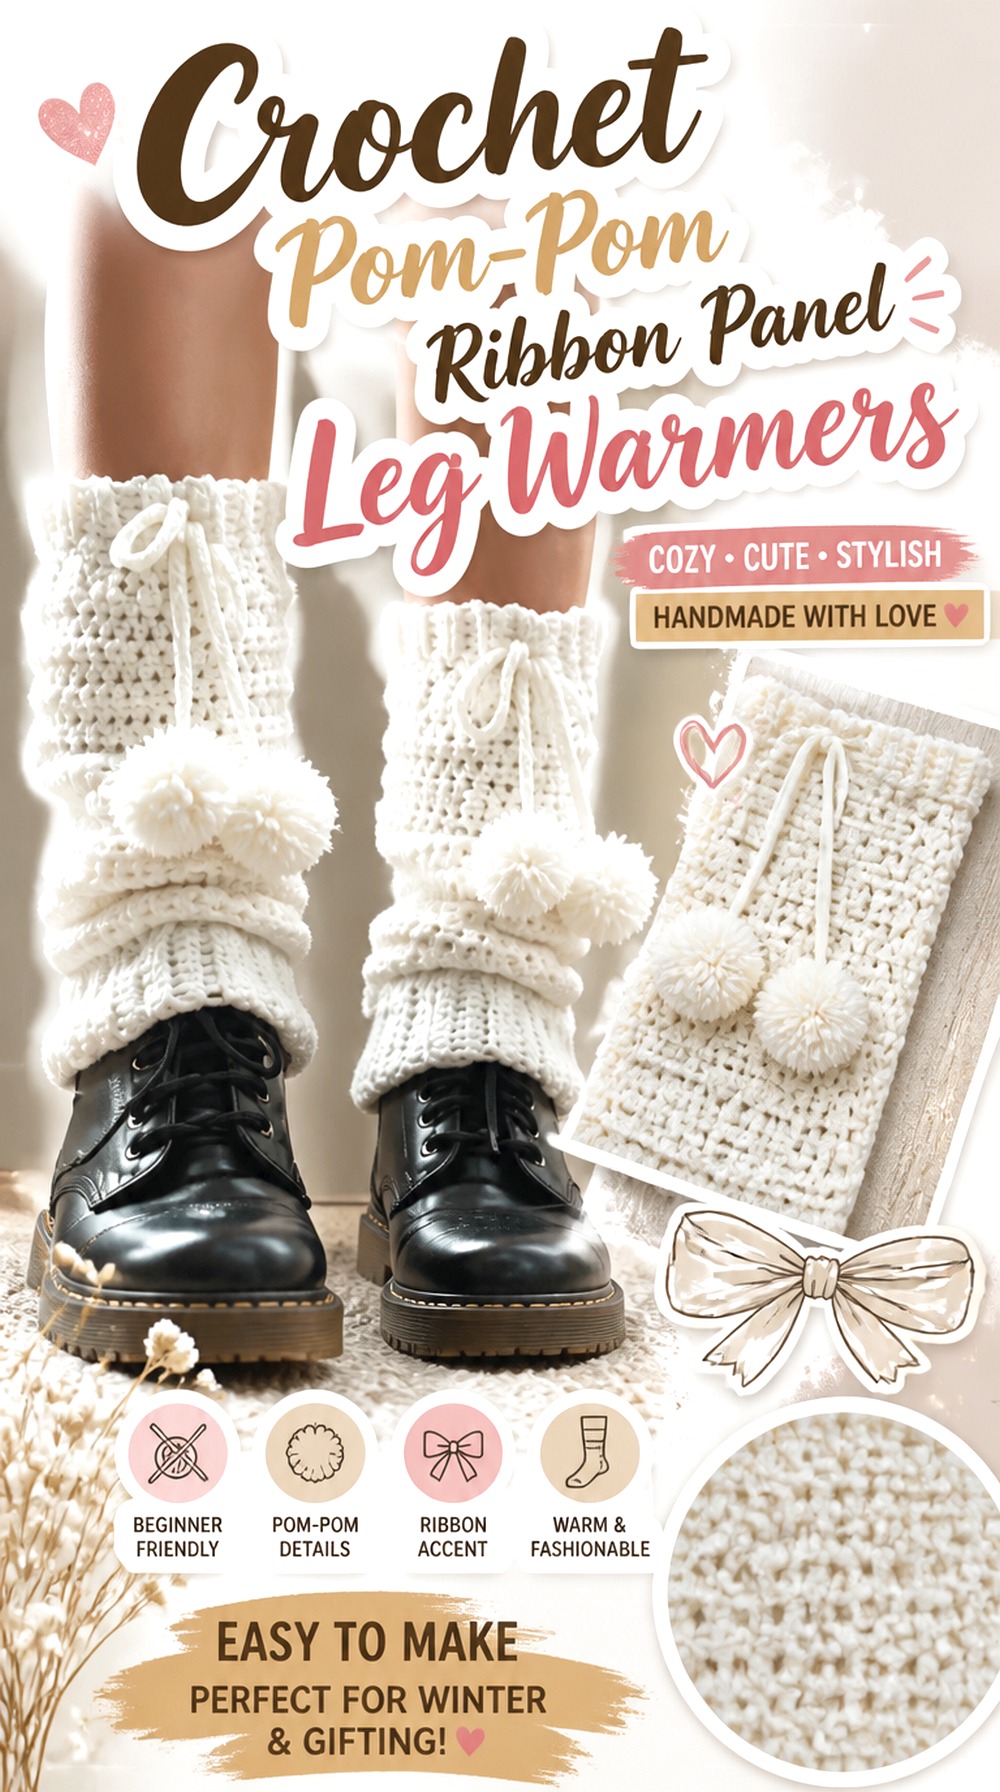
For a more playful version, combine ribbon with pom-poms instead of relying on bows alone. The extra movement makes this pair noticeably different from the cleaner ribbed ideas, and the front-panel construction shown in the source gives the decoration a natural area to occupy. It works especially well when the leg warmers are intended to remain fully visible rather than disappear beneath tall boots.
Because there are several decorative elements, restraint becomes useful. A simple base yarn lets the ribbon and pom-poms create the focal point. If the yarn itself is strongly variegated or highly textured, the smaller details can become visually lost.
Treat the Ribbon as Part of the Front Panel
The source tutorial specifically includes a ribbon stage after constructing and joining the leg-warmer sections. That makes the ribbon more integrated with the finished design than a bow simply sewn onto a completed tube.
When adapting the look, keep the ribbon path aligned with the panel instead of allowing it to wander around the leg. A straight, intentional placement makes the design look organized and also makes it easier to duplicate on the second warmer.
Pom-Poms Add Movement—and Snag Risk
Pom-poms make the pair lively, but their placement matters around shoes, buckles, and zippers. Before committing to long dangling ties, wear the unfinished warmer with the footwear you expect to use most often.
If the pom-poms repeatedly brush the floor or get trapped against the shoe opening, shortening the decorative drop can preserve the same look with less interference. The objective is visible movement without turning the trim into an obstacle.
Original Tutorial and Creator Credit
Creator: kayti krochets
Crochet No Sew Bow Detail Leg Warmers
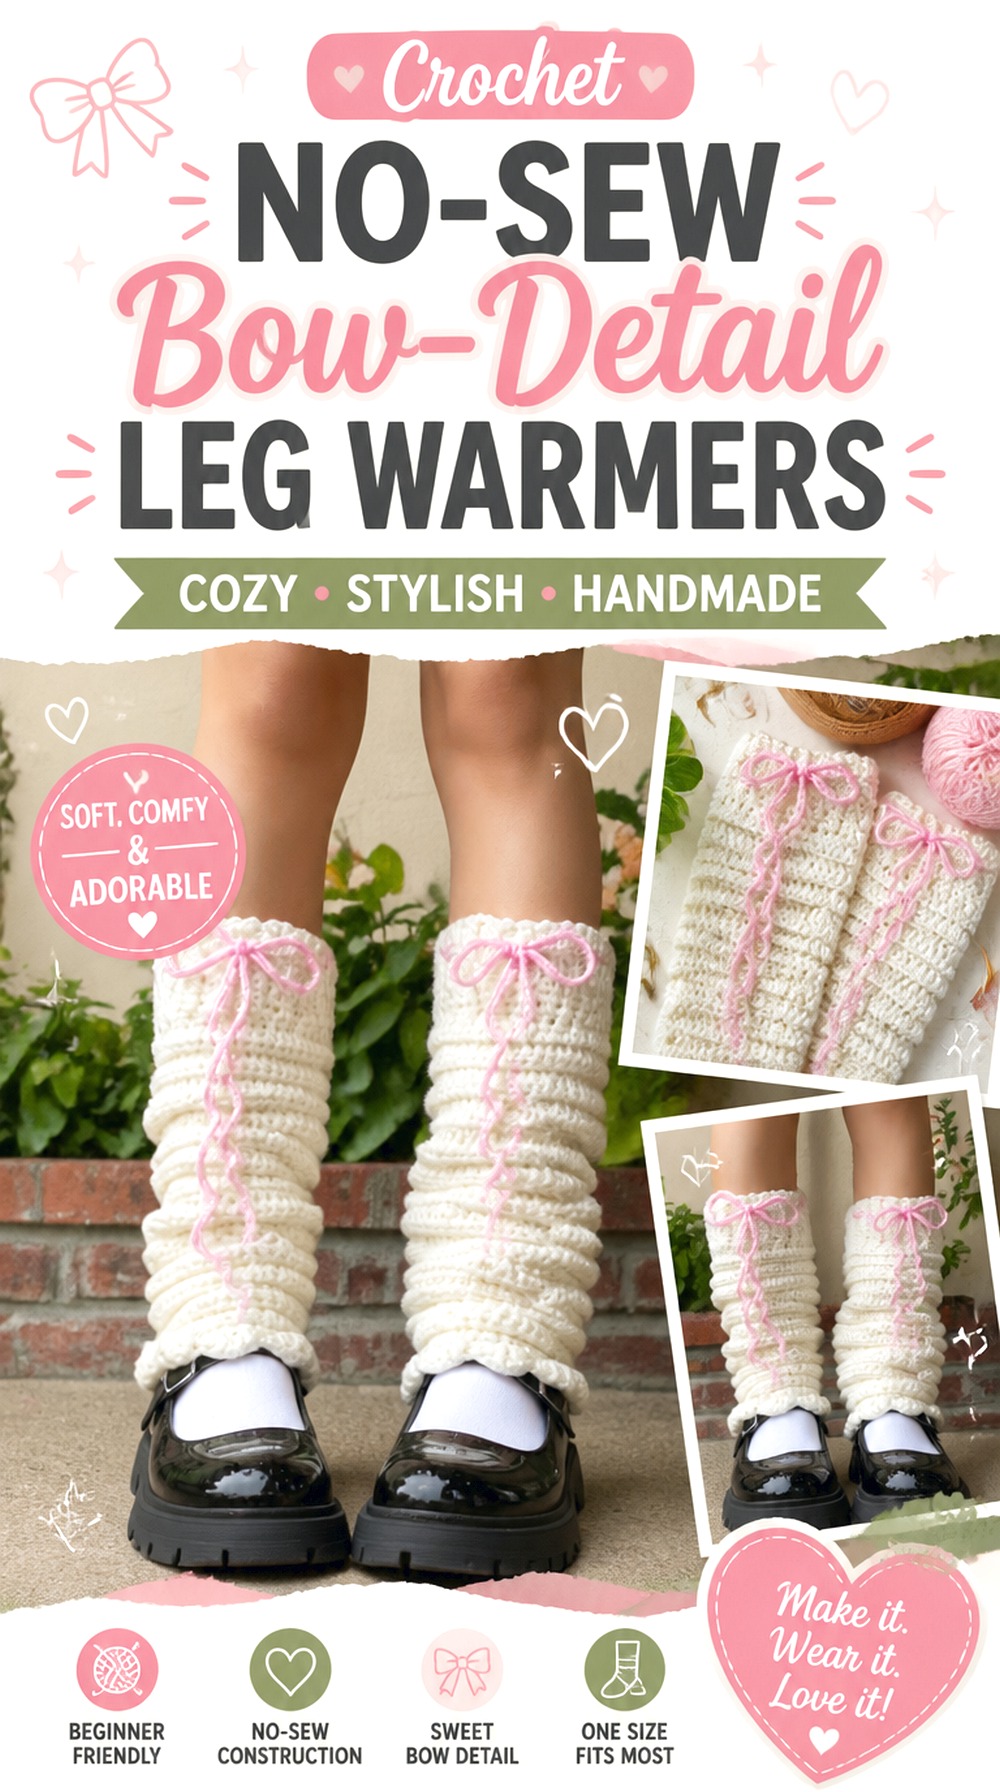
A no-sew bow-focused design is appealing when you want the romantic look without a collection of separately attached embellishments. The tutorial uses a straightforward wraparound form and finishes with a scalloped edge, creating a softer outline than a plain rectangular cuff. That combination makes the project well suited to a subtle coquette look rather than full corset styling.
The bow detail can remain close to the crochet itself, which is helpful when you do not want long ribbon tails hanging around the ankle. It also gives readers another route to the ribbon aesthetic: the visual language of a bow without requiring a separate satin tie.
The Flat-Panel Shape Makes Placement Predictable
When a warmer begins as a flat piece, you can assess decoration before the fabric wraps around the leg. Lay the piece flat and identify which portion will become the outside or front-facing area once worn.
This is a good moment to decide whether an additional narrow ribbon accent is really necessary. A built-in bow already creates a focal point, and adding several more trims can make the simple silhouette feel crowded.
Scalloped Edges Need Room to Show
A decorative lower edge works best when footwear does not completely cover it. If you intend to pair this design with boots, compare where the scallops fall against the boot opening before adjusting the warmer’s height.
For ballet flats, sneakers, or lower shoes, the shaped edge can remain fully visible. In that case, keeping any bow or ribbon higher on the leg helps preserve a little visual space between the two details.
Original Tutorial and Creator Credit
Creator: Meldy Crochet
Crochet Statement Bow Cuff Leg Warmers
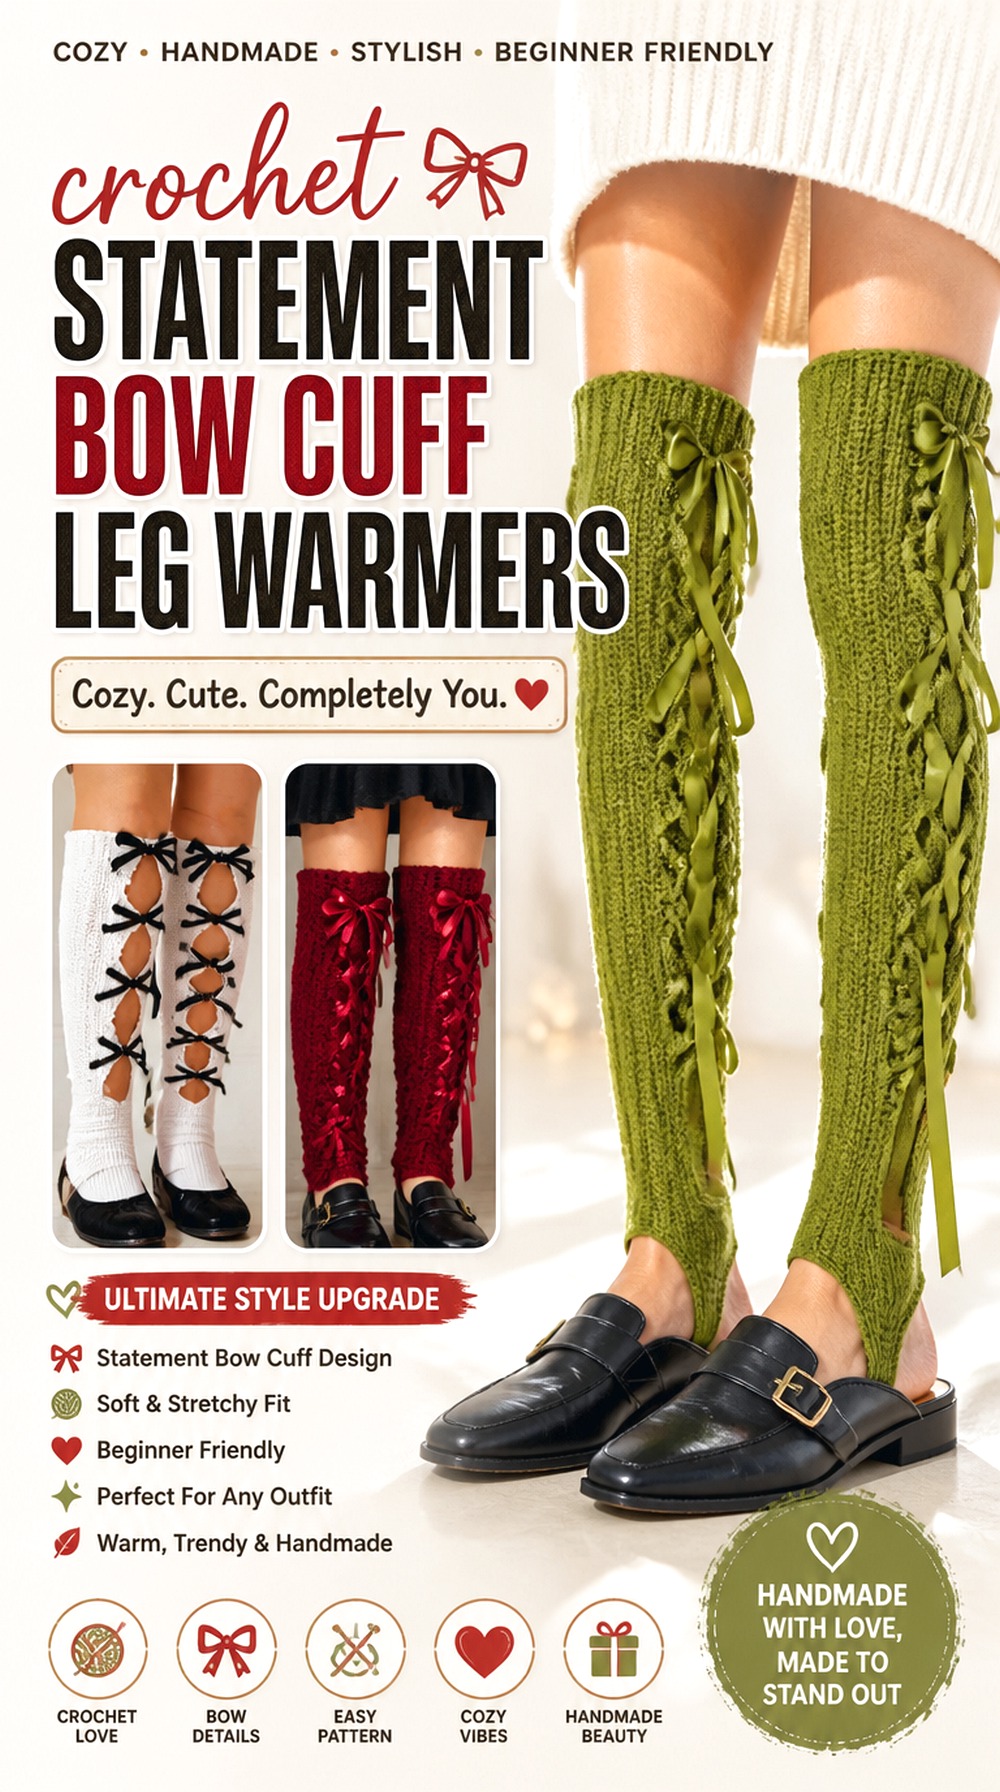
One substantial bow can create a cleaner statement than several tiny ones. This idea keeps most of the leg warmer visually simple and concentrates attention near the cuff, making it useful for outfits where the bow should be immediately noticeable. A monochrome treatment can feel softer, while contrast between the warmer and bow produces a sharper focal point.
The source is specifically a bow leg-warmer tutorial, so it makes a strong starting place when the bow—not elaborate stitch texture—is the reason you want to make the project. It is also a useful reference before experimenting with detachable fabric ribbon in place of, or alongside, a crochet bow.
One Large Bow Needs a Stable Anchor
A large bow has more visual and physical weight than a narrow tie. Pin or temporarily place it before fastening so you can see whether the cuff folds, twists, or rotates under the decoration.
The outer calf is often easier to display than the back of the leg, but the right position depends on how the finished warmer sits. Test the location while standing rather than deciding entirely from a flat-lay arrangement.
Choose a Cuff Height That Clears Your Shoes
A large bow very close to the ankle can collide with boot openings or high-top sneakers. Moving the focal point higher may improve visibility and reduce rubbing without changing the warmer itself.
Conversely, a cuff bow can work nicely with low shoes where there is no competing shaft. Decide on the footwear relationship first, particularly if the bow will be permanently attached rather than removable.
Original Tutorial and Creator Credit
Creator: kiara’s hooks
Crochet Lace Up Flared Ribbon Leg Warmers
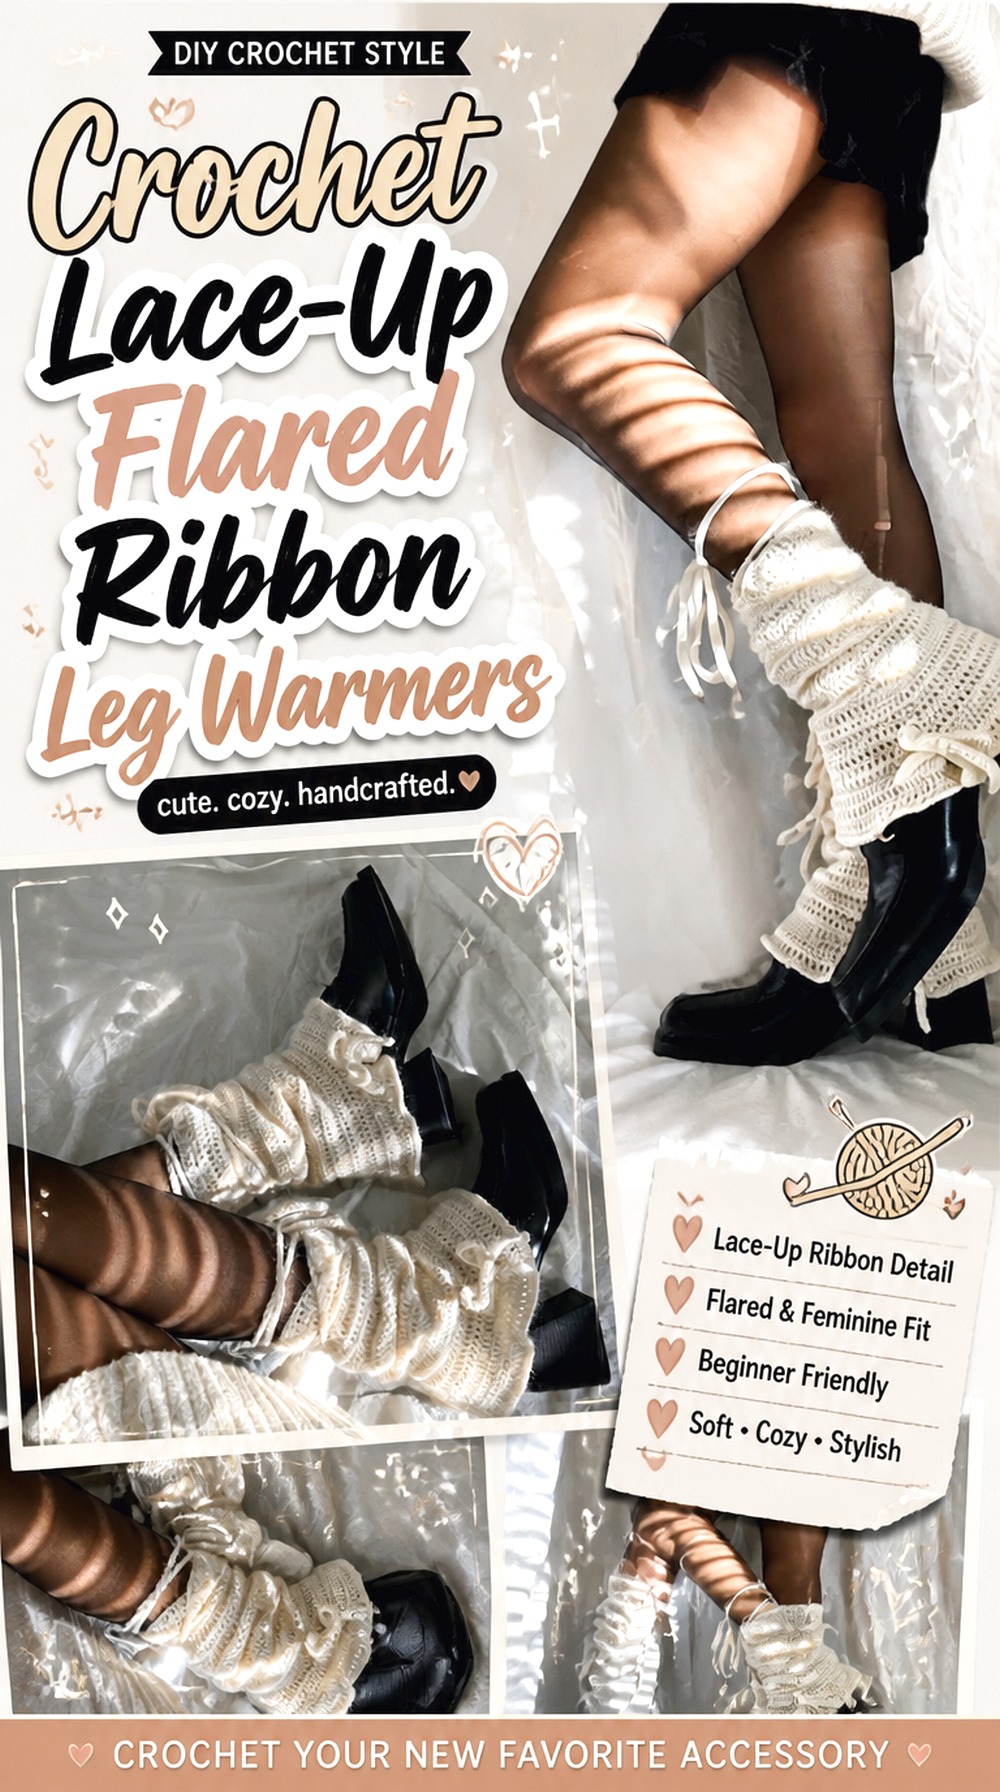
Full-length lace-up detail creates one of the strongest ribbon looks in this collection. Instead of attaching a decorative bow to a finished tube, this design uses an intentionally laced silhouette with a flare toward the bottom. The result reads more like a styled fashion accessory and less like a conventional winter warmer.
The flare also changes how the pair interacts with shoes. It can frame lower footwear or spread over the top of a shoe rather than fitting closely around the ankle. This is an especially good option when you want the crisscross detail itself to remain visible from several angles.
Lacing Can Adjust Appearance, Not Replace Good Sizing
Corset-style lacing gives some visual flexibility, but the crocheted base still needs to suit the leg. If the fabric is much too narrow, pulling the ribbon tighter can distort openings and edges rather than producing a better fit.
Try the crocheted section on before trimming the ribbon. The lacing should finish the design and fine-tune how it sits, not carry all of the tension required to keep the warmer in place.
The Flare Needs Space Around Footwear
A straight leg warmer and a flared warmer require different shoe clearance. Put on the intended footwear while checking the lower edge. A dramatic flare may look attractive over slim shoes but bunch against a tall or wide boot shaft.
If footwear variety matters, prioritize a flare that can fall naturally rather than one that depends on a single pair of shoes to hold its shape.
Mirror the Lacing Direction on the Pair
Crisscross ribbon makes asymmetry easy to spot. Once the first warmer is laced, use it as a visual reference for the second rather than relying on memory.
Check where the ribbon begins, which direction the first cross travels, and where the final bow lands. Mirrored or deliberately matching lacing gives the finished pair a much more intentional appearance.
Original Tutorial and Creator Credit
Creator: by red bean
Crochet Corset Lace Openwork Leg Warmers
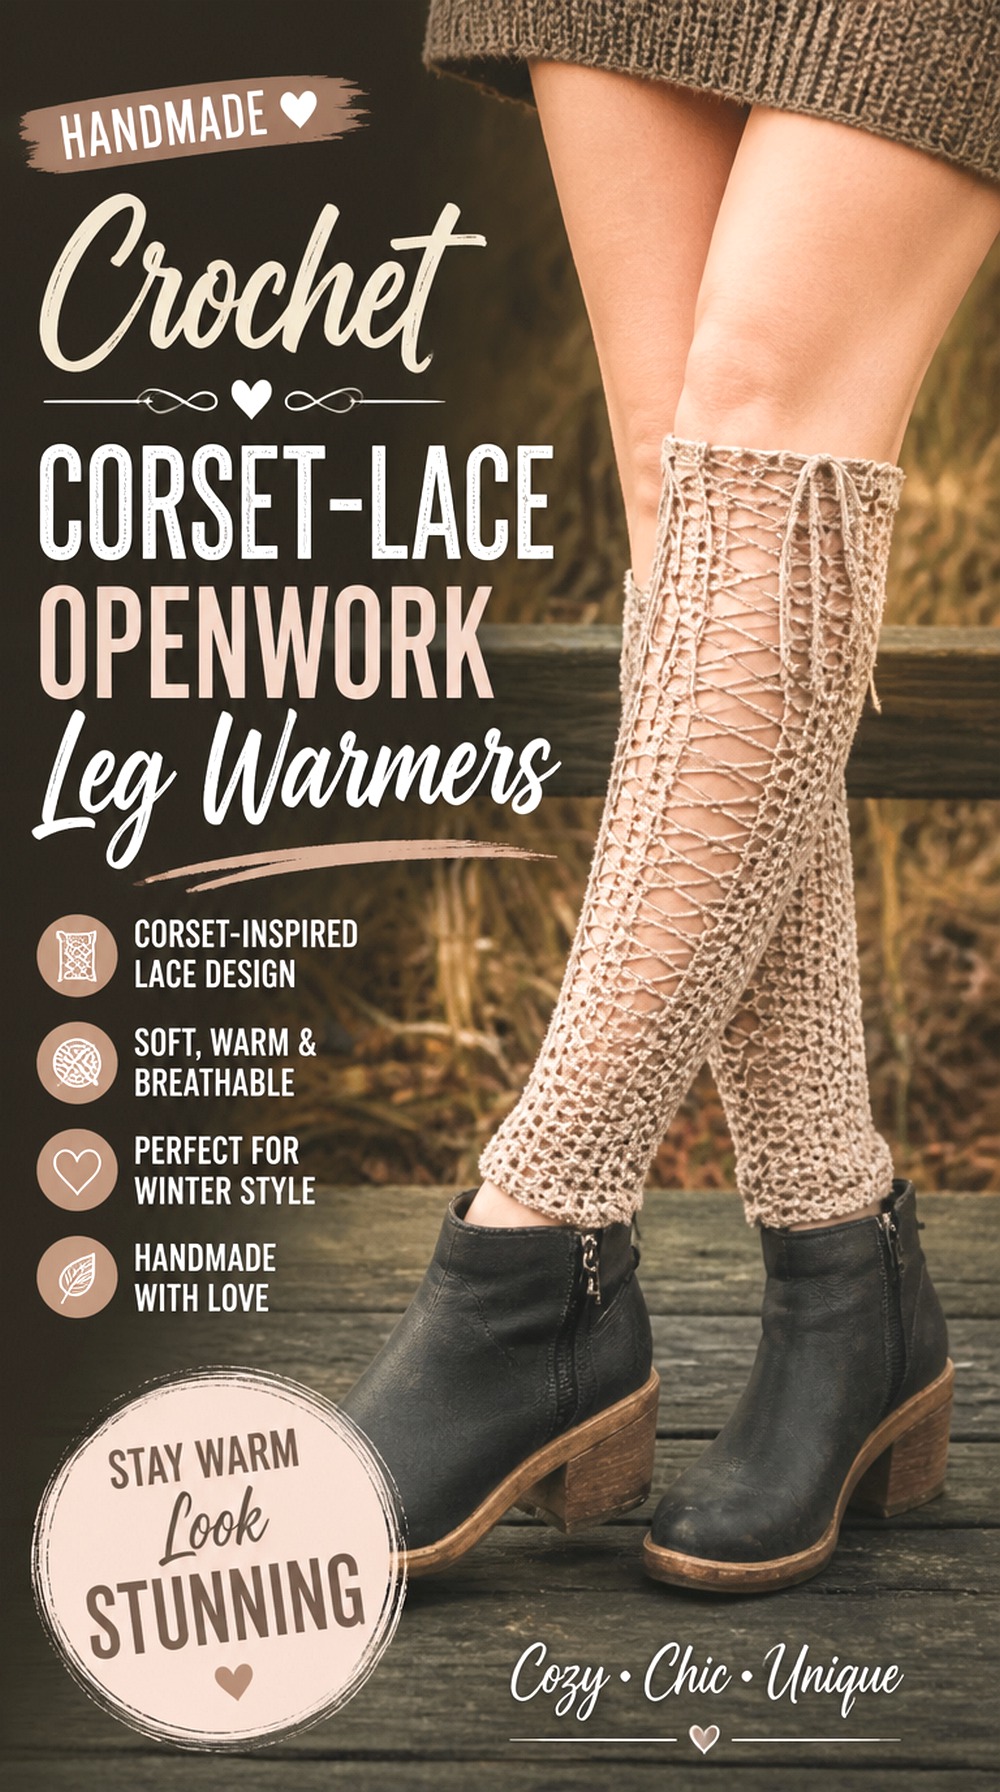
This version approaches lacing through a more openly textured crochet fabric. The tutorial describes lacey leg warmers with an adjustable corset-style cross-back tie, so the opening and lacing are part of the project’s identity rather than an embellishment added afterward. Compared with the denser flared pair above, the visible spaces give this design a lighter, more intricate surface.
The cross-back placement is also a meaningful change. It shifts the strongest decorative feature away from the center front and lets the warmer look comparatively restrained from one angle while becoming much more dramatic from another.
Openwork Makes the Ribbon Structural-Looking
When ribbon crosses open crochet, it becomes visually connected to the construction even if the fabric itself supplies most of the support. That makes ribbon width and softness important aesthetic choices.
A heavy-looking tie can dominate delicate openwork, while a very fine ribbon may disappear. Before cutting the final length, thread a temporary sample through several openings and view it from normal standing distance rather than only close up.
Cross-Back Lacing Changes How the Warmer Sits
Back lacing is attractive, but it also occupies an area that may press against a boot or chair when sitting. Try the warmer with your usual clothing and footwear before deciding how large the final knot or bow should be.
A flatter tie may be preferable for practical wear, while a larger bow makes sense when the warmer is primarily being styled with lower footwear and the lacing is meant to show.
Test the Tie Before Long Wear
Do not assume a ribbon that feels comfortable for a few seconds will remain comfortable when the leg moves and the crochet stretches. Wear the unfinished lacing loosely for a short fit check and bend the knee and ankle normally.
If the ribbon creates a rigid band or puckers the fabric, loosen the lacing rather than forcing the crochet into a narrower shape.
Original Tutorial and Creator Credit
Creator: Zays Crochet & Macrame
Crochet Ruffle Top Tie Leg Warmers
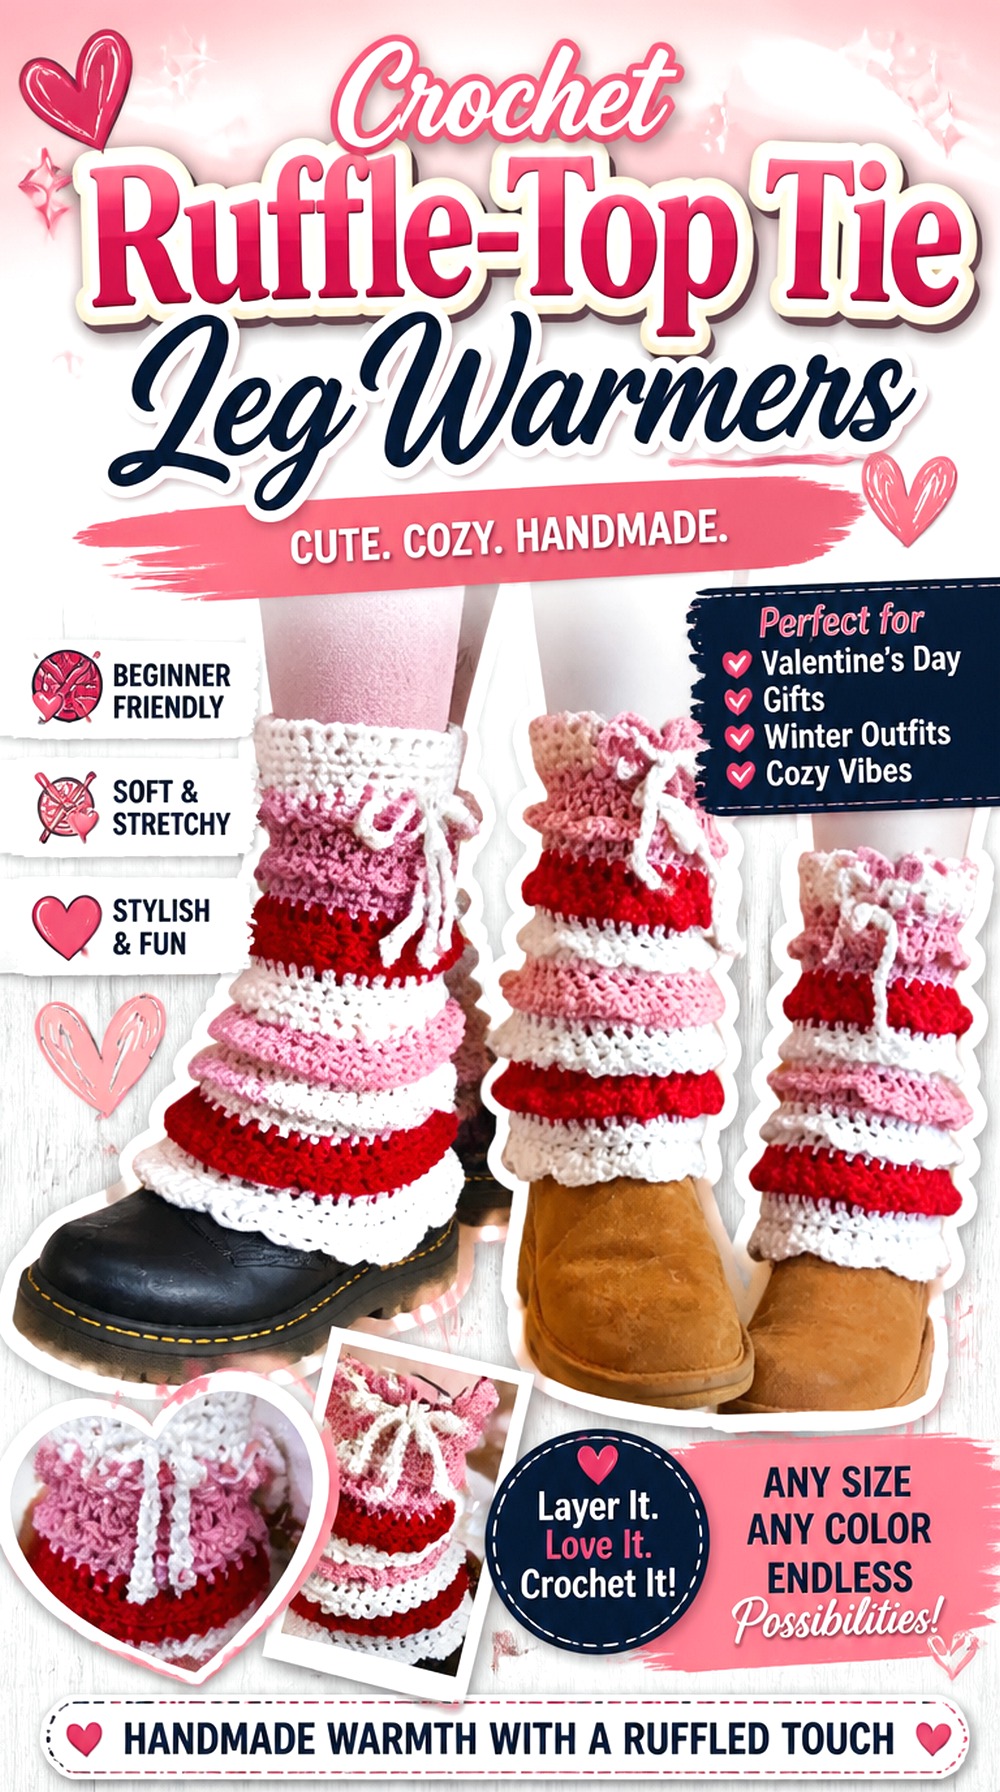
Ruffles shift ribbon leg warmers toward a softer, more romantic silhouette. Instead of relying on a straight cuff, this idea frames the upper or lower edge with extra movement and then uses a tie to reinforce the decorative direction. The source tutorial describes optional ruffles, ties, and made-to-measure sizing, making it a useful foundation for a personalized ribbon-style pair.
This shape can work particularly well when the warmers are worn with skirts, dresses, or visible tights because the decorative top becomes part of the outfit. If worn beneath tall boots, however, much of that detail may disappear.
Ruffles and Ties Compete for Visual Space
A wide ruffle already changes the outline of the leg. Adding an oversized ribbon immediately beside it can make the cuff look crowded, especially with textured or multicolored yarn.
Before fastening a final tie, compare a smaller bow with a longer trailing version. If the ruffle is meant to be the main feature, the ribbon can act as a quiet finishing line rather than another equally strong focal point.
Made-to-Measure Fit Matters More at the Upper Edge
A decorative upper section only looks relaxed if the underlying fit is doing its job. The source presents the design as made to measure, so take advantage of that approach rather than trying to compensate for an oversized cuff with a tightly pulled tie.
Ribbon should not become a substitute waistband for the leg warmer. Keep enough freedom for normal movement and for any layers worn underneath.
Keep Tie Ends Practical
Long tails enhance the romantic styling, but they should remain well above the floor and away from moving footwear. Check length while standing and walking in the shoes you intend to pair with the project.
For everyday wear, a shorter bow can preserve the same visual idea with less chance of catching. Longer tails can be reserved for styling where movement and footwear allow them to remain clear.
Original Tutorial and Creator Credit
Creator: Melody Yarn Tinka
Crochet Thigh High Ribbon Accent Leg Warmers
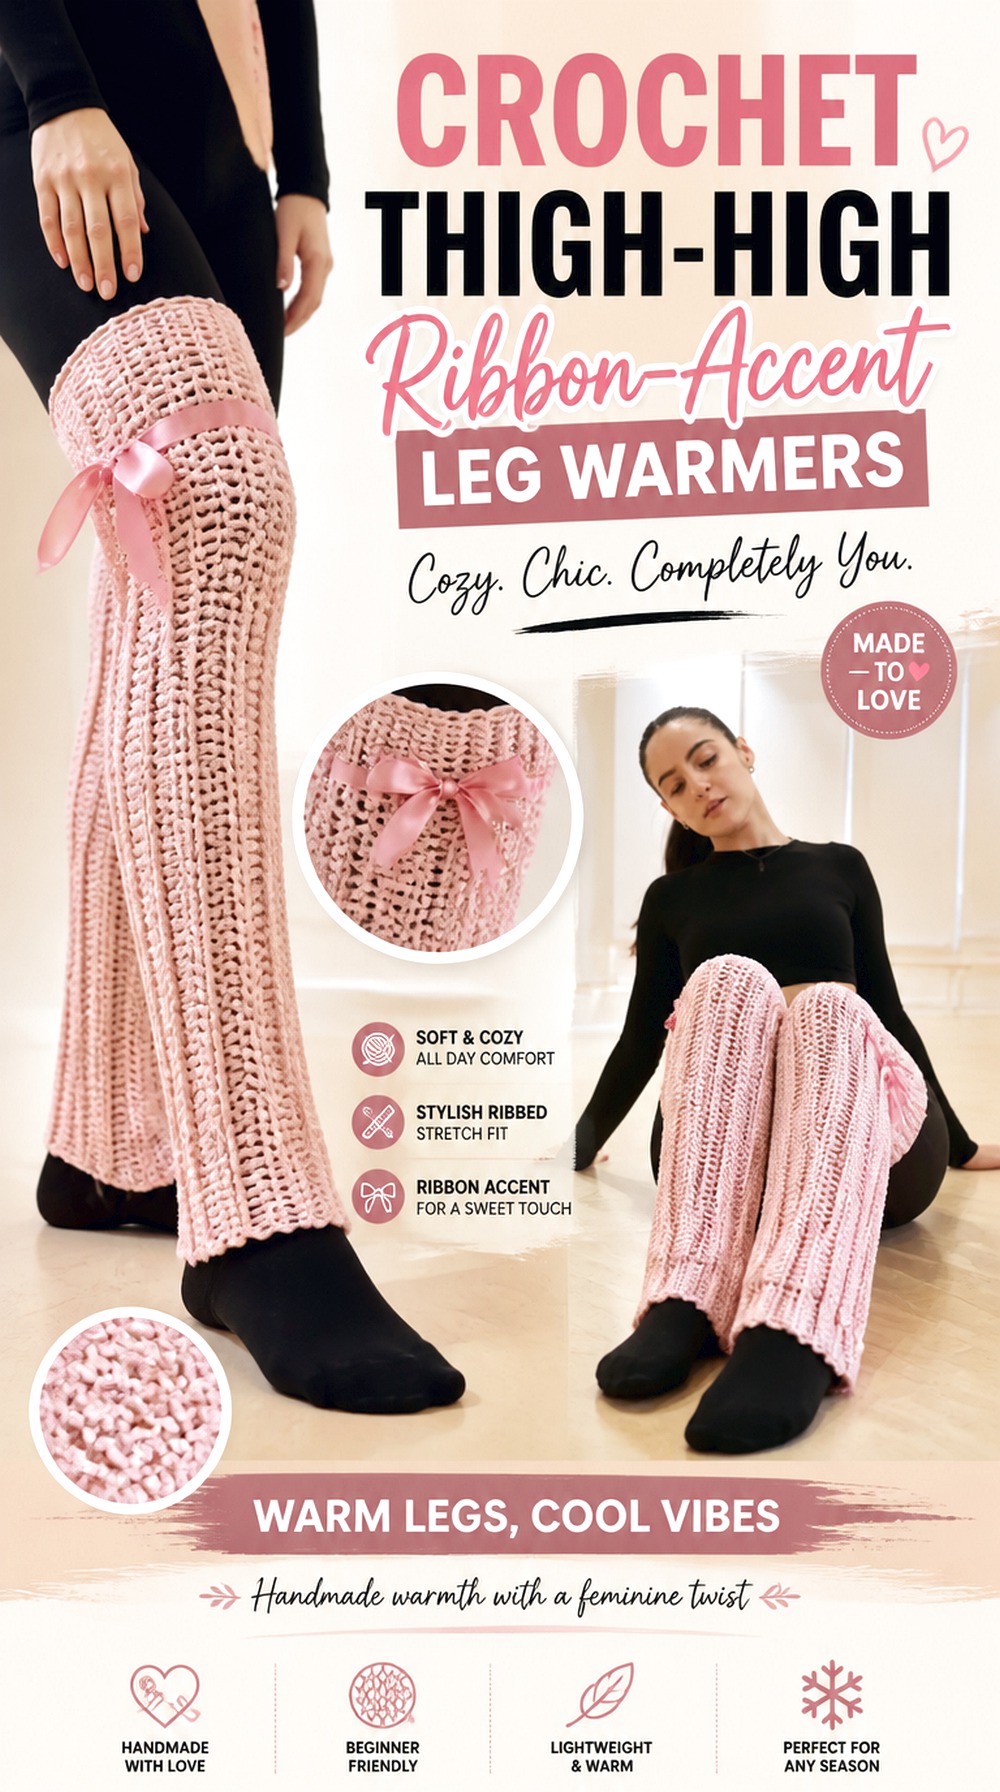
Thigh-high coverage creates a very different planning problem from a calf-length pair. More fabric means more opportunities for gravity, stretch, and movement to change the fit. Cassandra Paz’s tutorial also incorporates a heel gap, making the finished form closer to an athleisure or dance-inspired layer than a standard open-ended tube.
For a ribbon adaptation, keep the tie decorative unless you have deliberately planned the upper support. A pair this long can look striking with small bows placed near the upper outside edge, but aggressively cinching the top with non-stretch ribbon may make the warmer less comfortable.
Thigh-High Length Magnifies Slip and Stretch
A small amount of fabric movement that is barely noticeable on an ankle cuff can become obvious over a thigh-high length. Check the tutorial’s measurement and fit sections carefully before adding decoration.
If the crocheted pair already needs its intended method of support, do not expect a decorative bow to correct the underlying fit. Finish the base warmer first, assess how it behaves, and only then decide where ribbon can sit without fighting the fabric.
A Heel Gap Changes Shoe Compatibility
The heel opening is a functional difference rather than a decorative one. Preview how the finished warmer sits around the foot before planning ribbon near the ankle.
Low-profile footwear may leave the shaping visible, while some boots can cover it entirely. If the ribbon treatment is intended to be seen, the upper leg often provides a more reliable display area than the foot section.
Use Ribbon as Decoration Unless It Is Designed for Support
The tutorial discusses its own approach to keeping the thigh-high warmer positioned. A separate decorative ribbon should not automatically replace that method.
Treat bows as styling accents unless you have independently confirmed that a different closure is appropriate. This keeps the visual customization separate from the part of the construction responsible for secure, comfortable wear.
Original Tutorial and Creator Credit
Creator: Cassandra Paz
Crochet Flower and Ribbon Leg Warmers
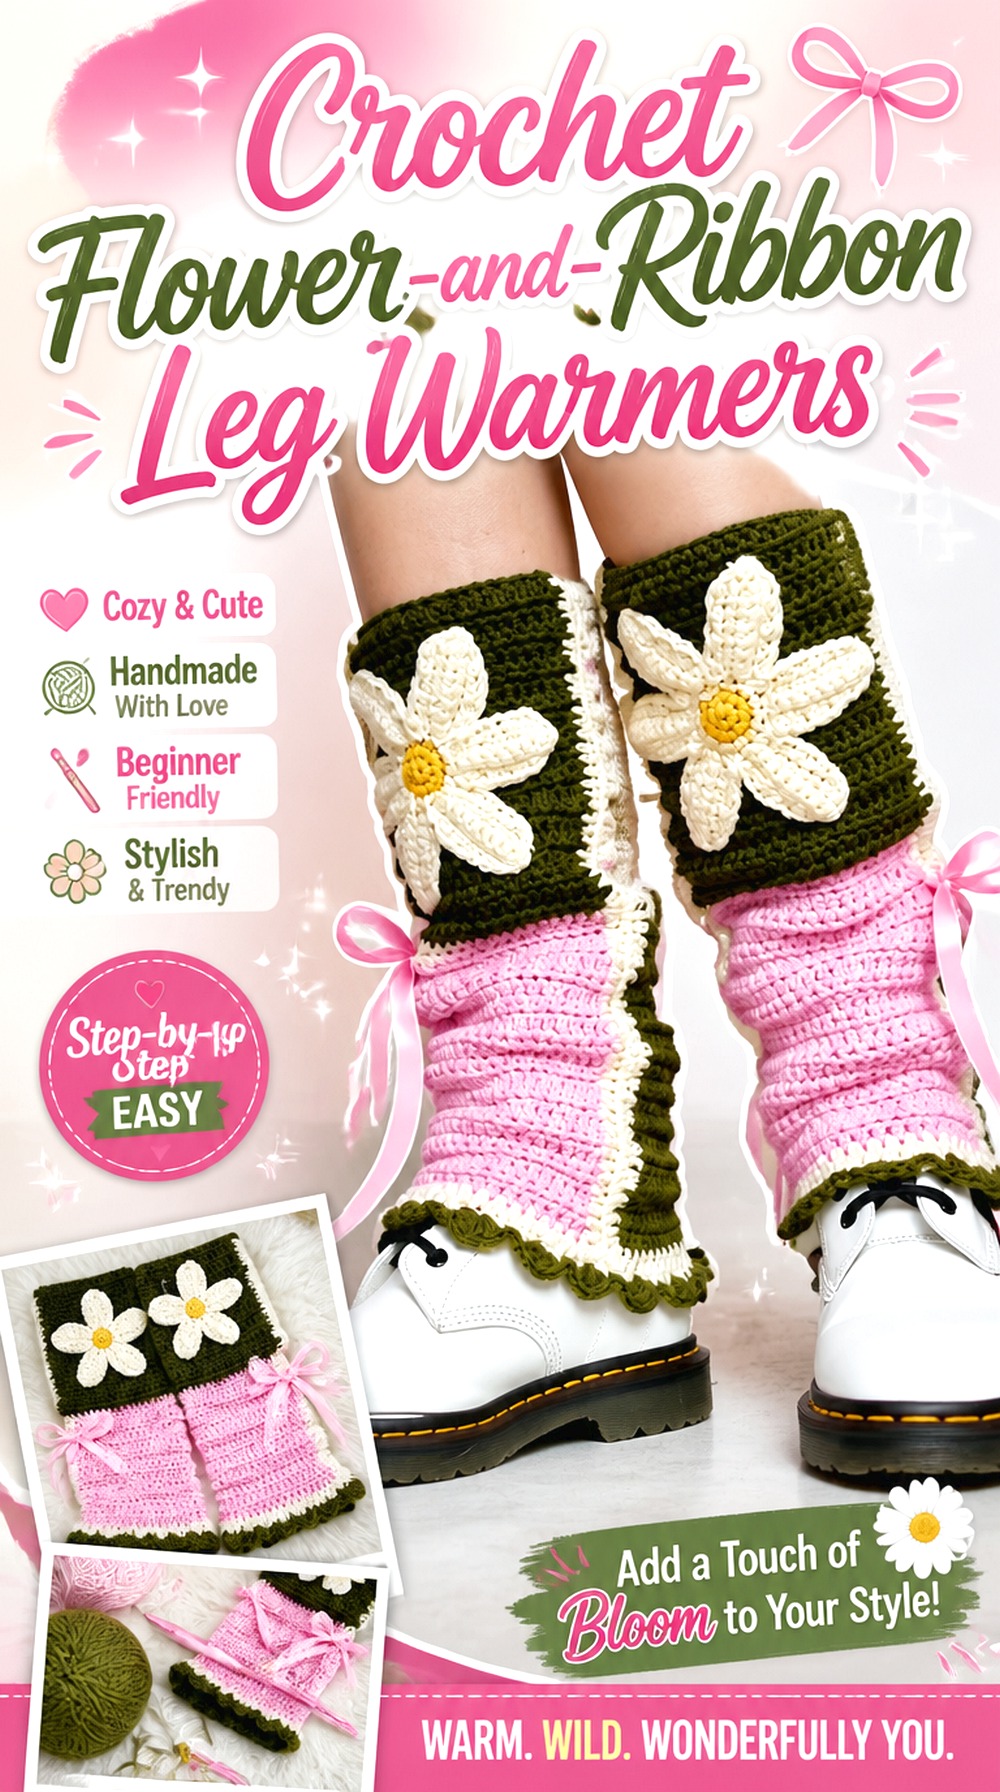
Flowers introduce a three-dimensional focal point that immediately separates this idea from bows placed on plain ribbing. The source tutorial is specifically for crochet flower leg warmers, so the floral element belongs to the finished design rather than being an unrelated embellishment. A narrow ribbon can then be used as a supporting accent—perhaps a small tie close to the flower or a restrained cuff detail.
The key is hierarchy. Flowers, bows, and textured crochet all draw attention. Choosing one dominant feature and allowing the other to support it creates a clearer finished look than spreading equally large decorations over the whole warmer.
Let the Flower Be the Focal Point
Place the warmer on the leg before deciding where a ribbon should go relative to the flower. A bow immediately over a dimensional motif can hide petals and make both details harder to read.
A better visual separation may come from positioning ribbon slightly above, below, or beside the flower. Pin the proposed trim first and look at the pair from several feet away before making anything permanent.
Keep Ribbon Away From Bulky Petal Joins
Three-dimensional motifs can create thicker attachment areas. Threading ribbon through or directly behind those points may cause the tie to twist or sit unevenly.
Use an open section of crochet or a smoother cuff area instead. This protects the flower’s shape and lets the ribbon lie flatter, especially if you want matching bows to sit at the same angle on both legs.
Original Tutorial and Creator Credit
Creator: Bowerbird Collected
Crochet Almond Texture Ribbon Cuff Leg Warmers
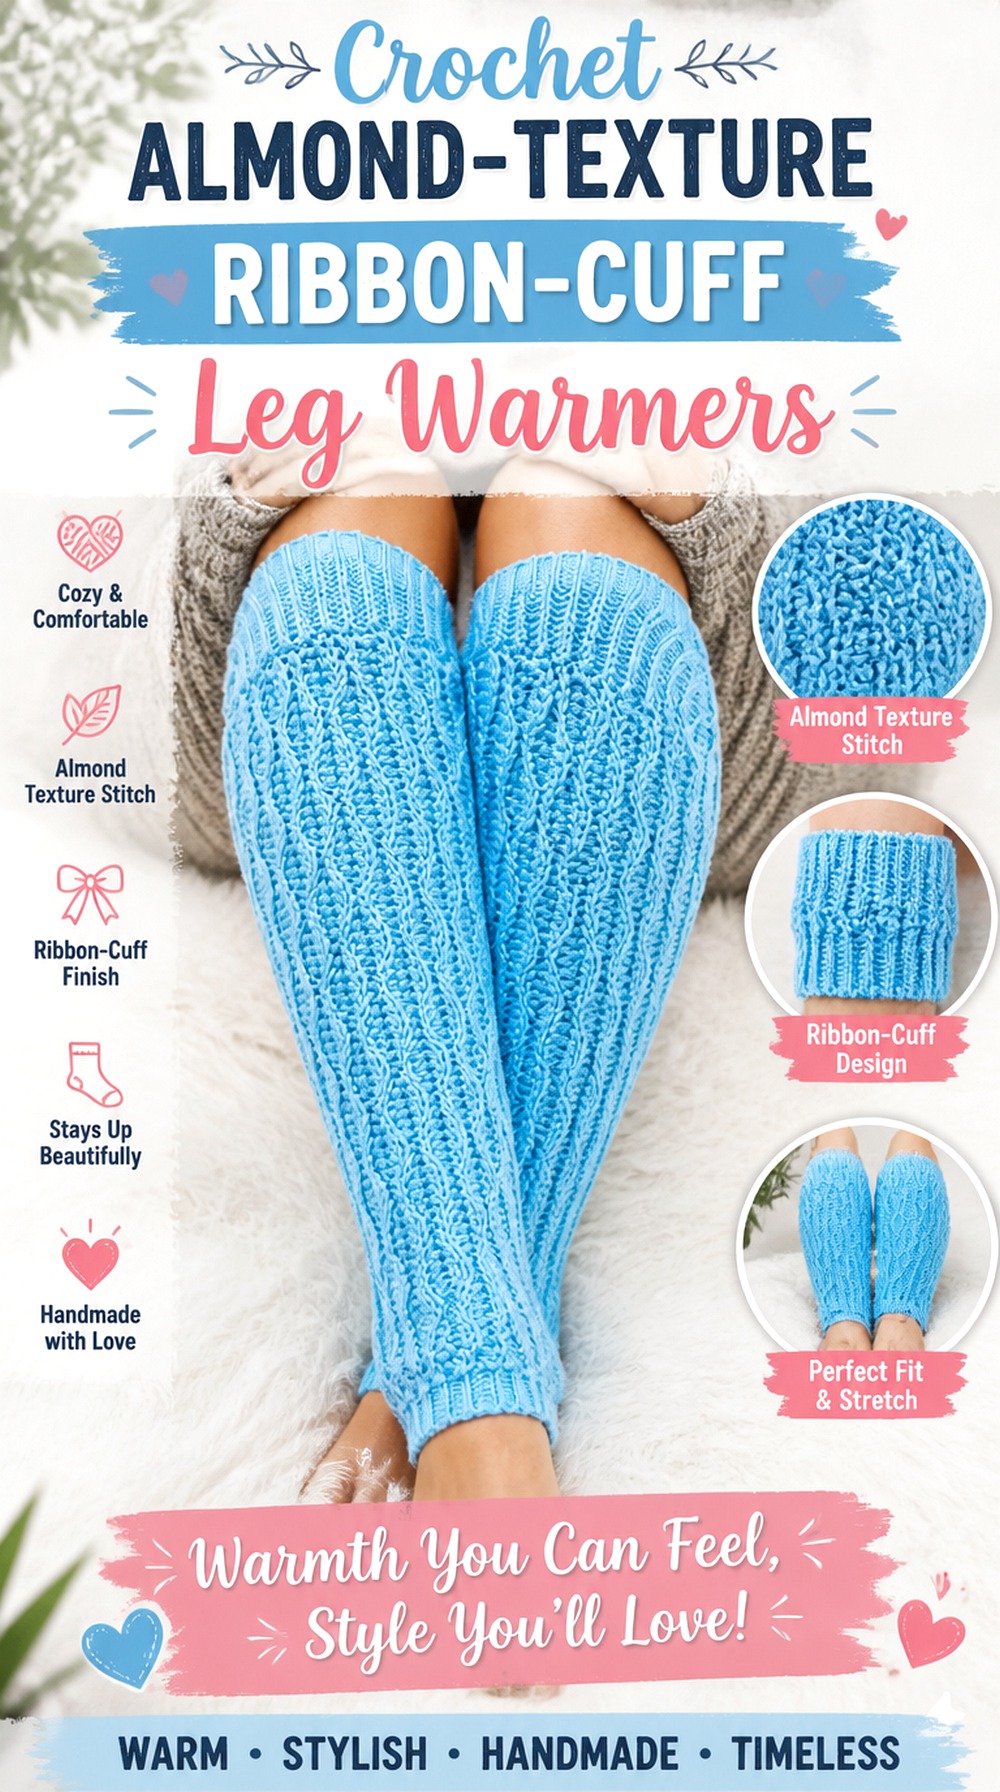
Almond stitch creates enough surface interest that this version does not need elaborate lacing from top to bottom. A small cuff bow or short threaded ribbon can add the requested romantic detail while leaving the textured body visible. That makes it a strong middle ground between minimal ribbed warmers and heavily decorated corset styles.
The TCDDIY tutorial focuses specifically on almond-stitch leg warmers. Use the video for the original construction, then consider the ribbon as an optional styling adaptation. Keeping that distinction clear means you can enjoy the texture without pretending the creator’s tutorial contains an unrelated ribbon step.
Almond Texture Deserves a Quiet Ribbon
Pronounced texture catches light and creates its own pattern. A large multiloop bow placed directly over the body can hide the feature that makes this warmer different.
Try a narrower tie near a plain cuff instead. Solid ribbon can also provide contrast against the repeating texture without adding another pattern. If the yarn is variegated, a quieter ribbon is particularly useful for preventing the surface from becoming visually overloaded.
Cuff Placement Keeps the Texture Visible
A cuff is a natural transition zone between the leg and the textured body, so it is often a better place for a removable ribbon than the middle of an almond-stitch section.
Check whether the chosen cuff area needs to stretch substantially. If it does, attach a bow at one point or thread the ribbon loosely instead of circling the entire cuff with a tight, non-stretch band.
Original Tutorial and Creator Credit
Creator: TCDDIY
Crochet Shell Stitch Ribbon Threaded Leg Warmers
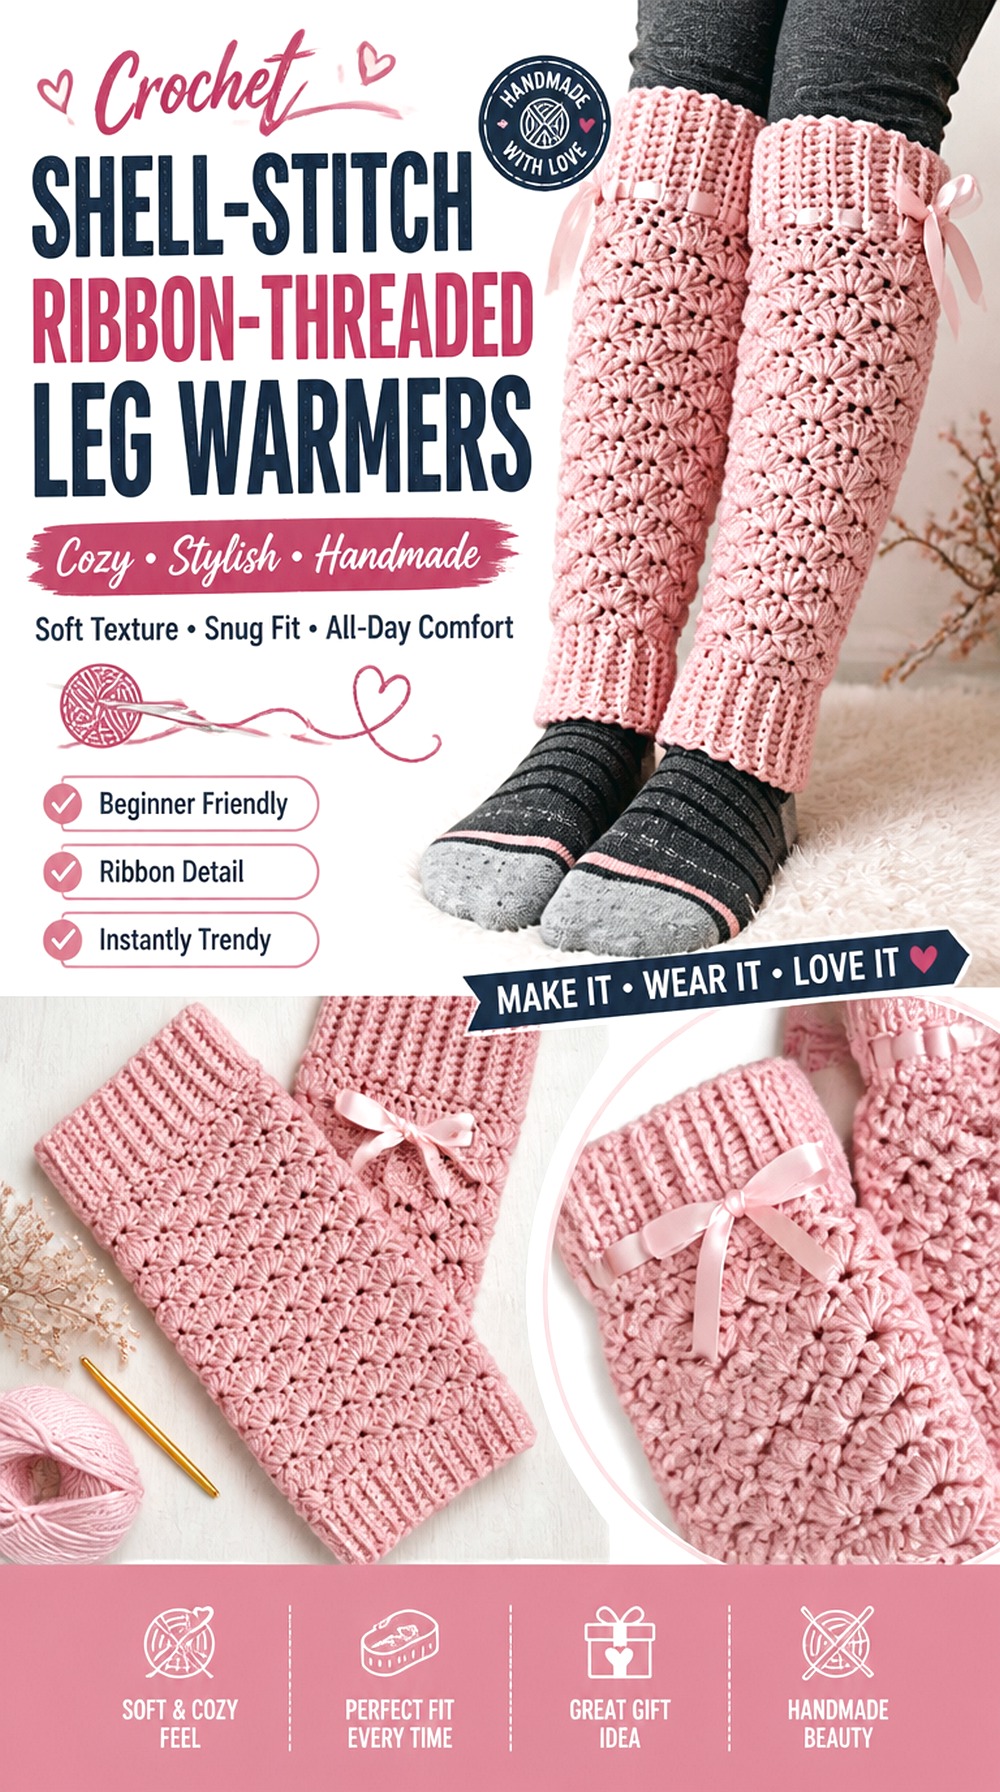
Shell stitch offers a natural route to a ribbon-laced look because the finished surface has more visual openness than dense ribbing. The original Let’s All Crochet project combines shell texture with ribbed sections and allows the leg-warmer size to be customized. For this article, the ribbon-threaded treatment is an optional adaptation rather than a step claimed from the tutorial.
This idea suits readers who like lacing but do not necessarily want a deliberate corset opening. A ribbon can travel through selected open areas or remain limited to one side, creating a softer interpretation of the crisscross trend.
Shell Openings Can Become Natural Ribbon Paths
Do not assume every decorative gap is suitable for threading. First complete enough of the warmer to understand where the shell pattern naturally opens and how those spaces align vertically.
Pass a temporary ribbon through several candidate openings without tightening it. The best route should look deliberate while allowing the shells to retain their shape. If the path pulls the motifs sideways, choose a different placement.
Threading Too Tightly Can Collapse the Shells
Shell texture depends on its spread and rhythm. Drawing ribbon firmly through the fabric can gather those sections and make the warmer look narrower or puckered.
Keep the ribbon loose enough that the crochet remains in its normal resting shape. If adjustment is the goal, it is safer to rely on the sizing guidance of the original project and reserve the ribbon primarily for visual effect.
Choose Side Lacing for Easier Shoe Pairing
Running ribbon down one outside edge can give the impression of lace-up construction without placing a bow directly over the front of a boot.
Mark the outside orientation of each warmer before threading so the finished pair mirrors correctly. This small planning step is particularly useful with shell fabric, where rotating the warmer later may shift the texture and ribbon path together.
Original Tutorial and Creator Credit
Creator: Let’s All Crochet
Crochet Chunky Over Shoe Ribbon Leg Warmers
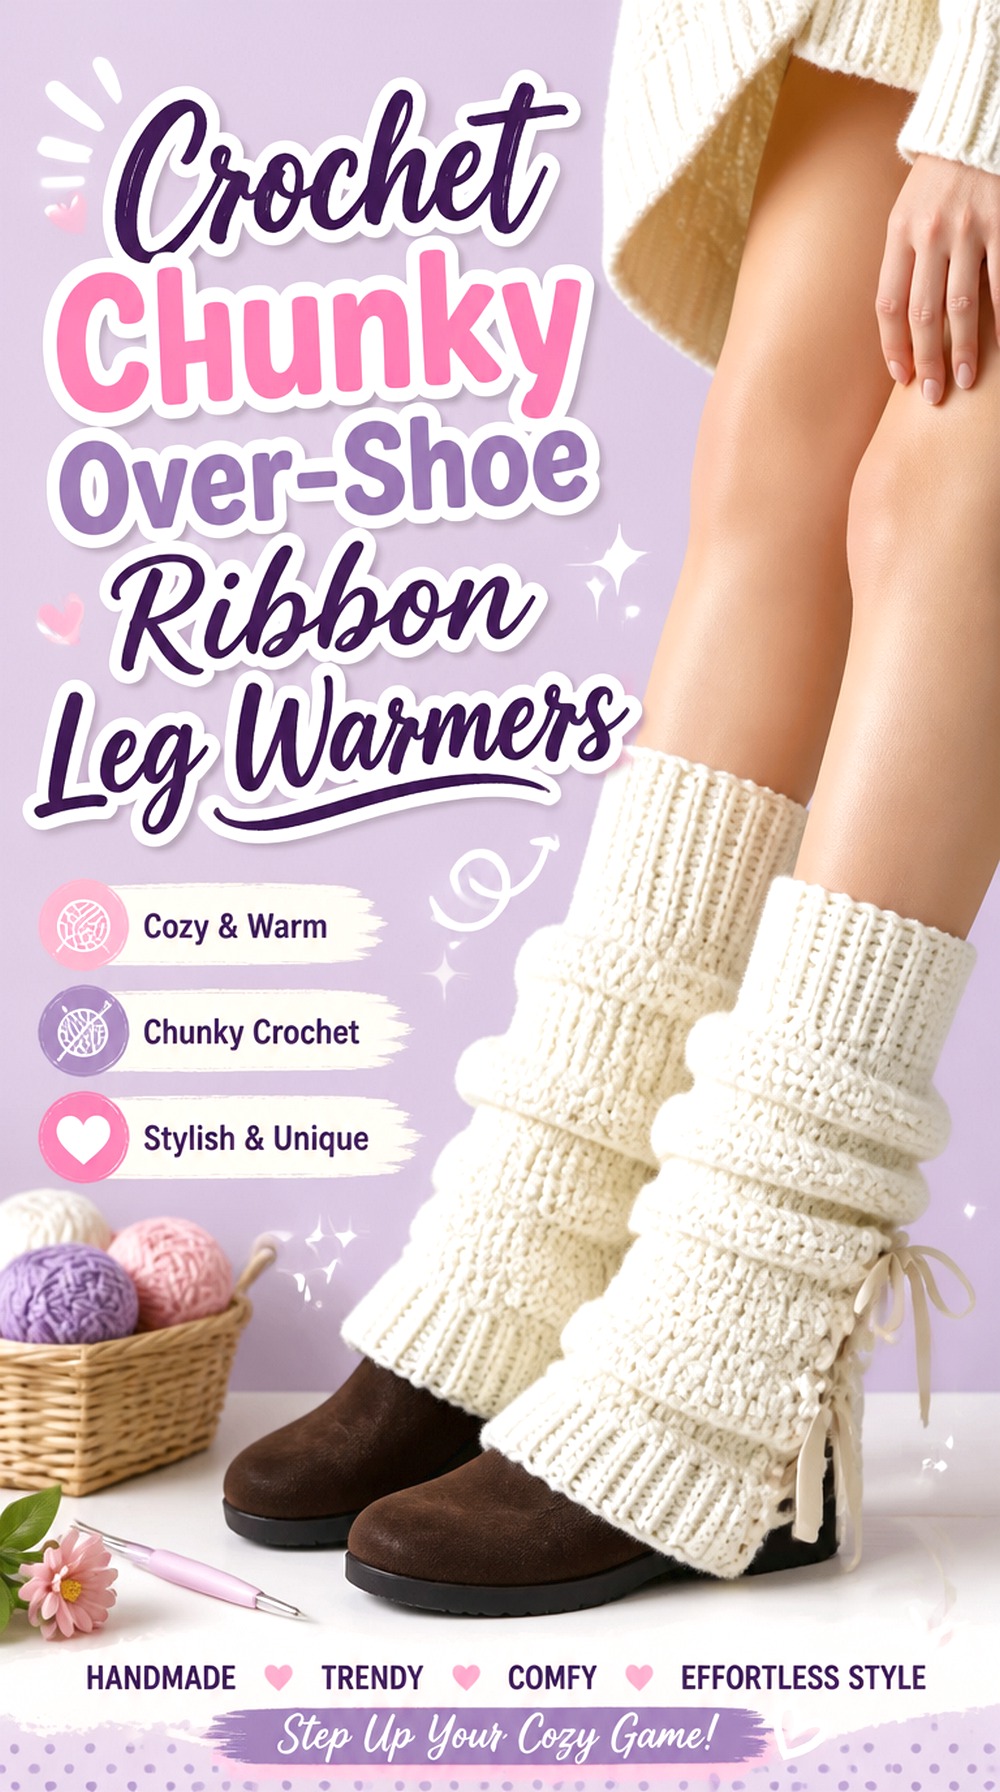
Chunky leg warmers change the silhouette through volume. The source project’s lower section is shaped to sit broadly around footwear, making it a useful contrast to slim ballet-style tubes and delicate openwork pairs. A ribbon accent should respect that scale rather than looking like a tiny afterthought against a substantial crocheted surface.
This is a good option when warmth and visible texture are part of the styling goal. Instead of running narrow ribbon through the entire chunky body, a larger bow near the upper section can provide a defined focal point while leaving the expanded lower shape free to drape over shoes.
Chunky Fabric Needs Wider Visual Proportion
Before buying ribbon, hold several possible widths or substitute strips against the finished fabric. A very narrow tie can disappear next to thick stitches, particularly when yarn and ribbon are close in color.
The answer is not necessarily an enormous bow. A moderate, clean ribbon with enough visual presence may balance the fabric better. Contrast in finish—smooth ribbon against chunky yarn—can also make the accent easier to see.
Over-Shoe Volume Changes the Best Bow Position
The lower portion is already the widest and most active part of this silhouette. Adding long ribbon tails at the ankle can create unnecessary competition with the flare and footwear.
The upper cuff usually offers a calmer zone for decoration. Try the finished warmer with sneakers, boots, or the intended shoes before deciding; the lower edge should be able to sit naturally without ribbon getting trapped beneath it.
Original Tutorial and Creator Credit
Creator: nat’s record
Crochet Faux Knit Ballet Ribbon Leg Warmers
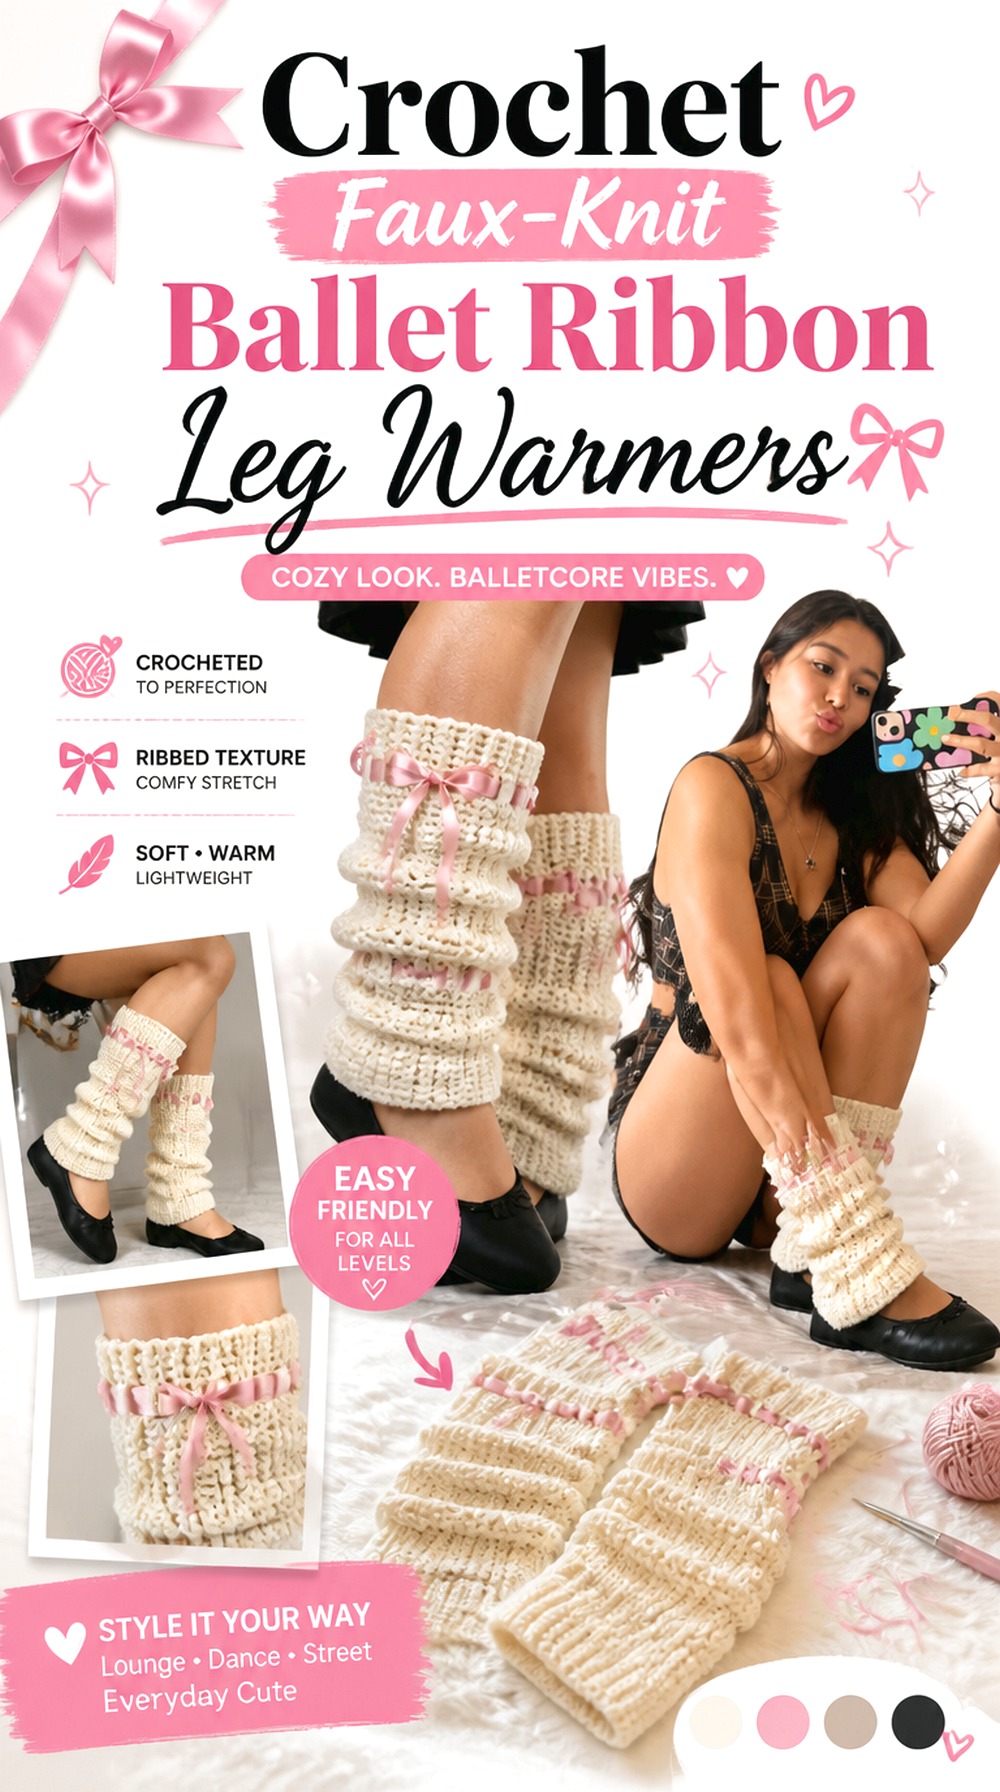
A faux-knit ribbed surface gives ribbon leg warmers a quieter, more streamlined background. Kae Neebs’ tutorial uses ribbing to create a knit-like effect and also discusses shaping the finished project with steam. That makes this source particularly useful when the goal is an understated ballet-inspired pair rather than heavy lace or multiple embellishments.
For the ribbon adaptation, think of the tie as a removable styling layer. A narrow bow at the upper outside calf or a loosely wrapped ballet-style accent can soften the linear ribbing without permanently hiding it.
Ballet Ribbon Works Best as a Removable Accent
Long wraparound ribbons create a recognizable ballet-inspired line, but a non-stretch tie should not be wound tightly enough to compress the crochet.
Experiment with a temporary length first and leave the warmer’s original ribbed construction responsible for the fit. A removable approach also allows the same pair to shift between minimal everyday styling and a more decorative outfit without rebuilding the base.
Steam-Shaped Ribbing Should Not Be Cinched
The source includes steaming tips for the ribbed leg warmers. Once the fabric has been finished and shaped according to the creator’s guidance, avoid pulling a ribbon so tightly that it creates new bunching or folds.
Look at the rib lines after tying the bow. If they bend sharply toward the ribbon, the tie is influencing the fabric more than intended and should be loosened.
Original Tutorial and Creator Credit
Creator: Kae Neebs
Crochet Striped Contrast Ribbon Leg Warmers
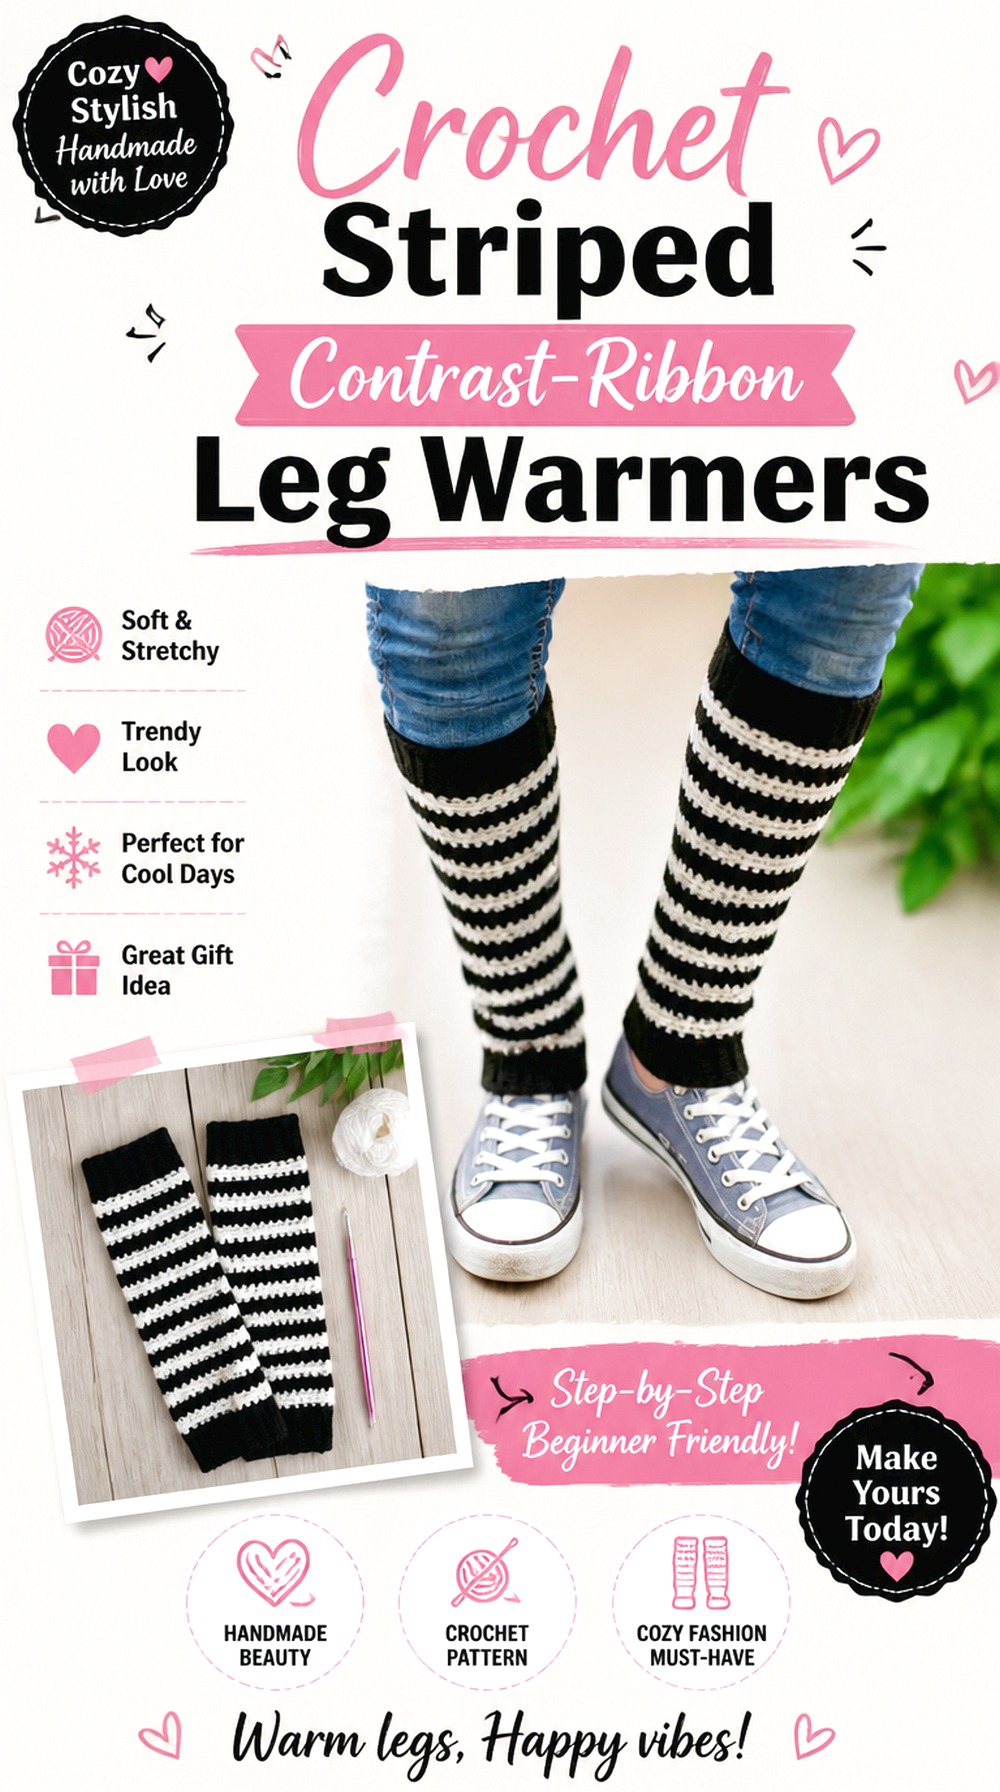
Stripes create built-in horizontal movement, so ribbon needs a clear role. Instead of adding several colors of trim, use one ribbon shade to visually connect the stripes or deliberately contrast with all of them. The DoodabsDesigns tutorial is specifically for striped crochet leg warmers, making it a reliable source for the base design while the ribbon remains an optional editorial adaptation.
This approach is well suited to readers who want color to matter as much as the bow. It also shows how a ribbon-leg-warmer idea can feel graphic or sporty rather than exclusively delicate and pastel.
Contrast Ribbon Can Unify Busy Stripes
Lay the finished warmer beside possible ribbon colors rather than choosing from the yarn balls alone. Once stripes alternate across a larger surface, the balance can look different.
A ribbon matching one repeated stripe can tie the palette together. A completely contrasting shade creates a stronger focal point. Either can work, but using several unrelated ribbon colors may make the finished pair harder to coordinate with shoes and clothing.
Keep Bow Placement Consistent Across Color Changes
Horizontal stripes create visible reference lines, which means mismatched bow height is particularly noticeable. Use the same stripe or transition point on each warmer as your placement reference.
This avoids relying on total length alone, especially if the pair relaxes slightly differently before finishing. Once both bows are pinned at corresponding stripe positions, try the warmers on and check that they still appear level.
Original Tutorial and Creator Credit
Creator: Crochet DoodabsDesigns
Crochet Feather Stitch Ribbon Boot Cuffs
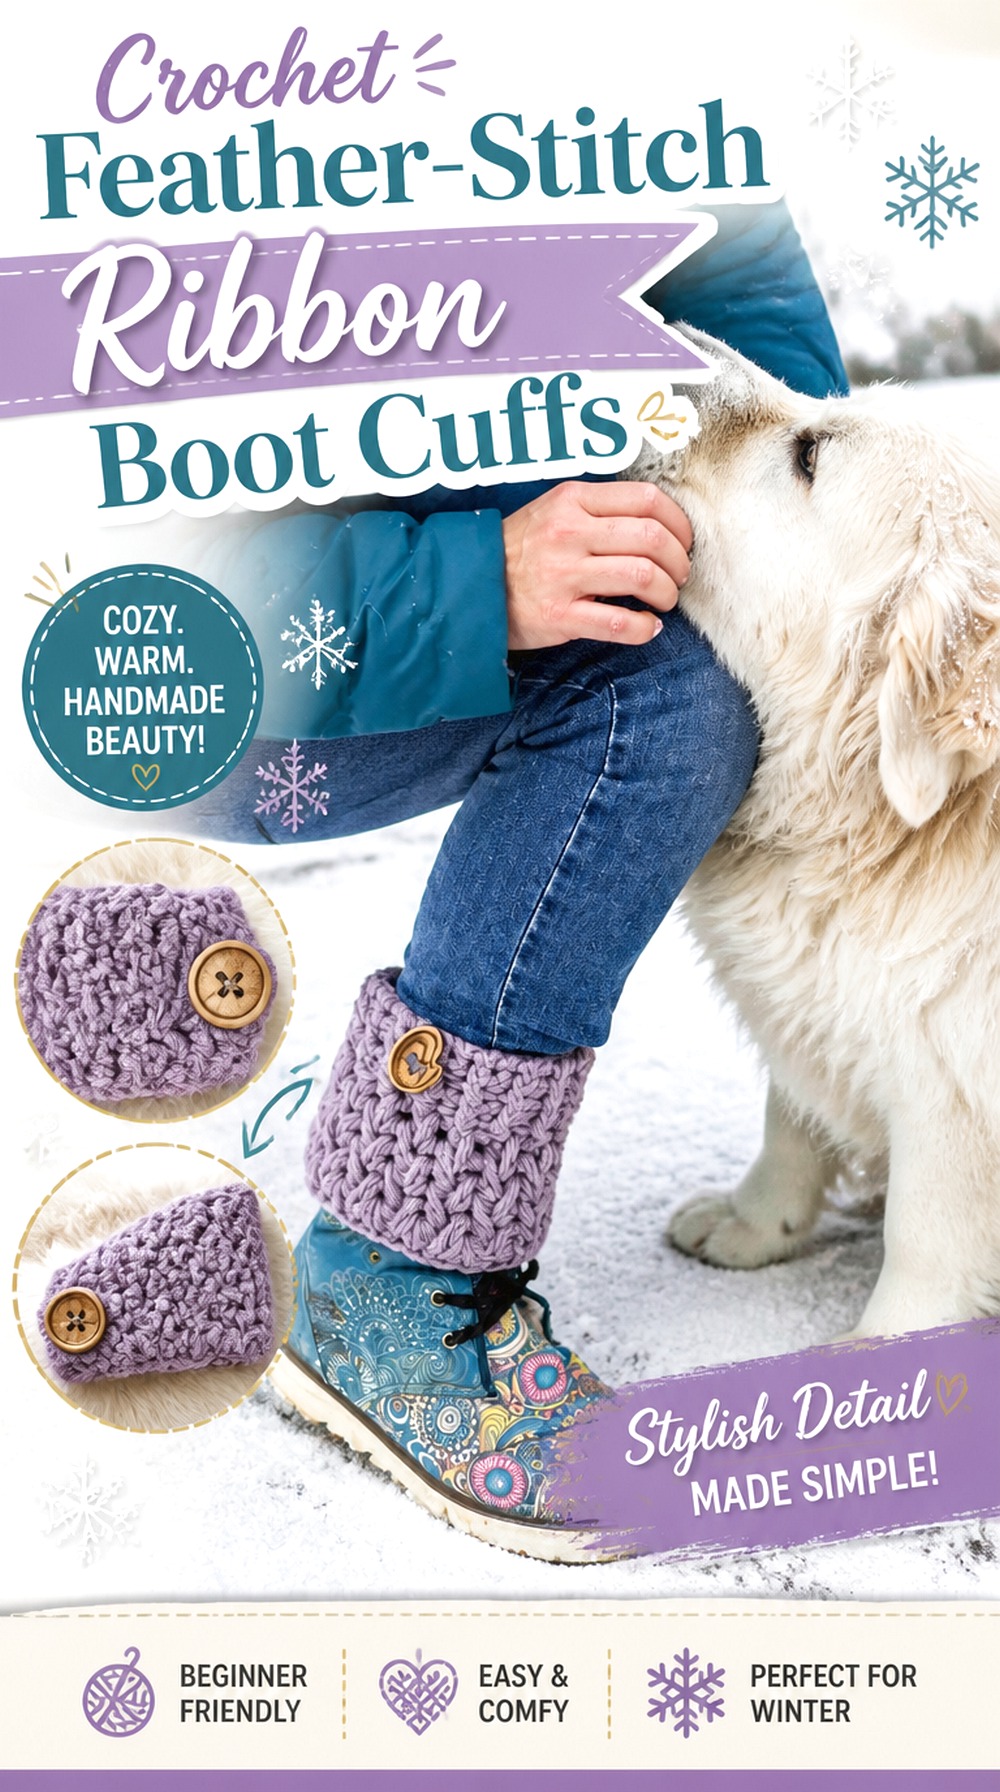
Short boot cuffs are a different project scale entirely. The Crochet Crowd tutorial combines chunky ribbing, feather stitch, and sewn-on buttons in a compact design intended to sit around the boot area. For a ribbon-focused adaptation, use the tutorial for the original cuff and consider a removable small bow as an alternative styling layer rather than pretending ribbon appears in the source.
This is especially useful for readers who like the ribbon trend but do not want full calf coverage. Because less crochet is visible, every detail near the top edge has greater visual impact.
Short Cuffs Put the Trim Close to the Boot
Try the finished cuff with the intended boots before choosing a ribbon position. A bow that looks well placed in a flat photograph may fall directly beneath the boot shaft or rub where the footwear bends.
An outer-side placement can keep the accent visible without interfering with the front of the boot. Keep tails short enough that they stay above moving hardware such as zippers or buckles.
Buttons and Ribbon Should Not Crowd the Same Edge
The original tutorial includes buttons, which already provide a focal point. If you keep them, a large ribbon immediately beside them can make a small cuff feel overloaded.
Choose whether the button or the bow should dominate. A tiny detachable ribbon can complement the existing detail, while a larger ribbon may work better only if you intentionally simplify other embellishments.
Original Tutorial and Creator Credit
Creator: The Crochet Crowd
Crochet Lace Boot Cuffs with Ribbon Bows
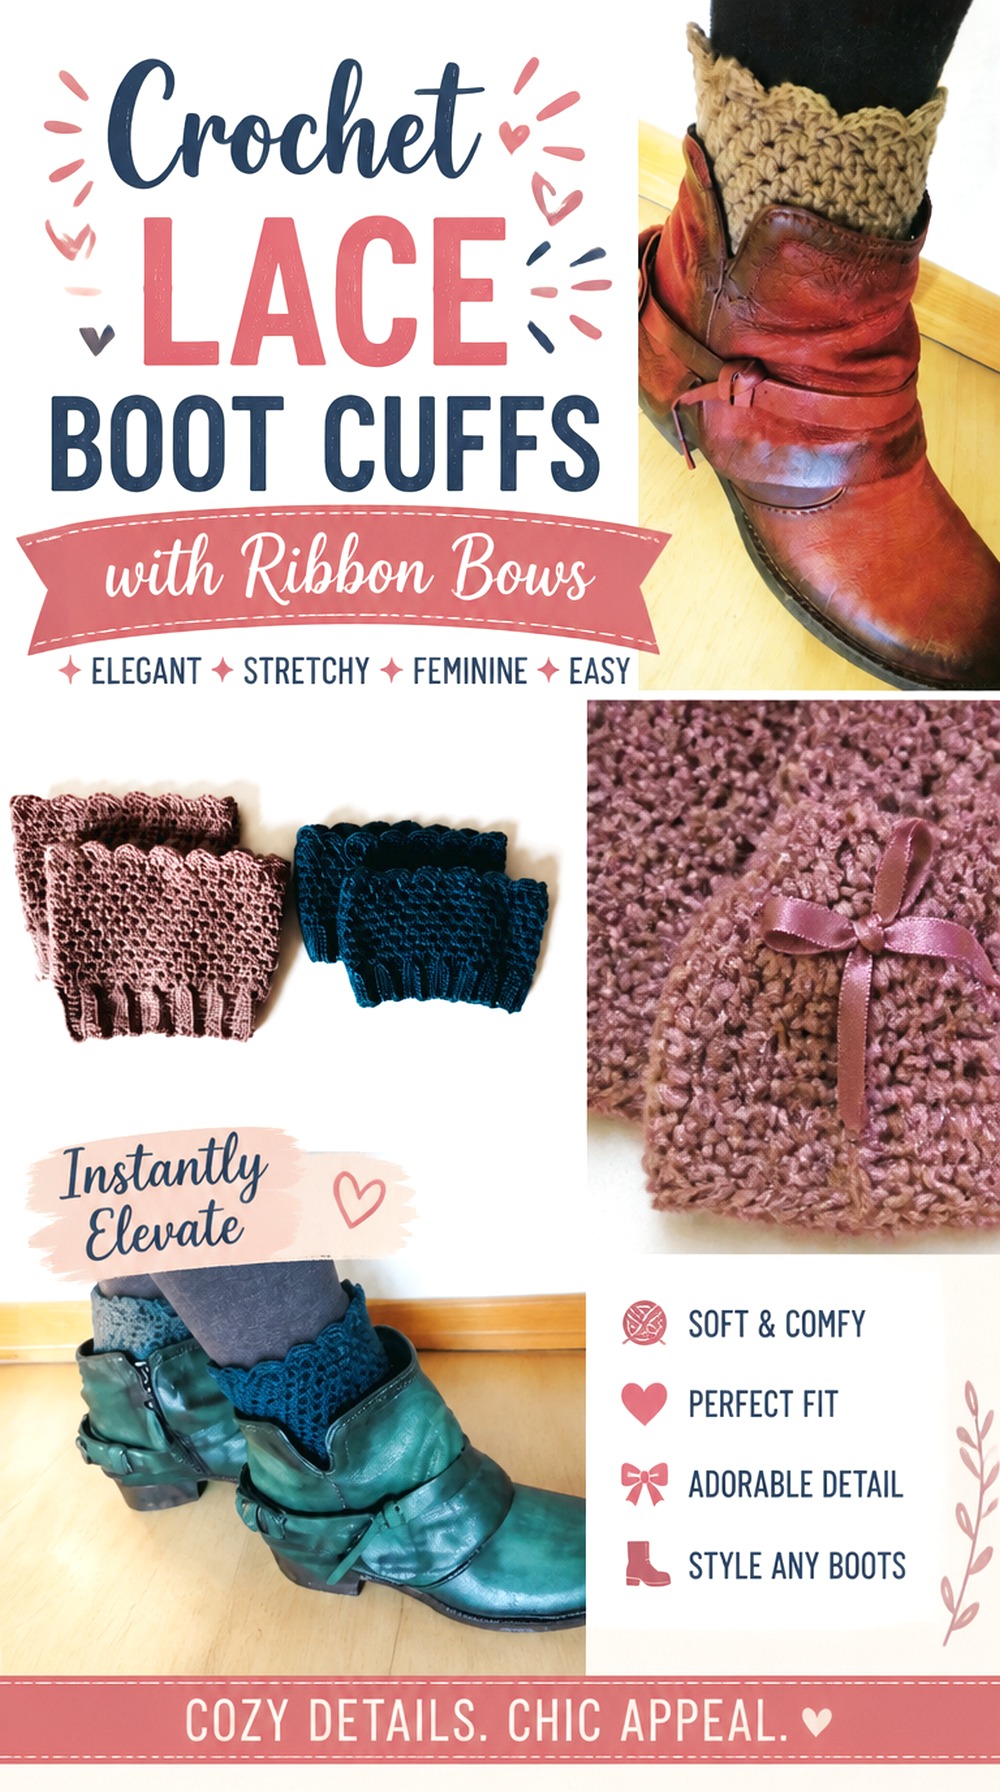
This second short option has a lighter character than the chunky feather-stitch cuffs. The so0onita tutorial focuses on crochet boot cuffs or short leg warmers, giving you a compact base that can be styled with a delicate ribbon bow without the commitment of knee-high coverage.
A small bow at the outer side can make the cuff feel dressier while still allowing the crochet texture to remain visible. This approach is particularly useful when you want just a narrow decorative edge above boots rather than a substantial accessory covering most of the lower leg.
Lace Texture Benefits From a Small Bow
Fine or open texture can be overwhelmed by a large stiff ribbon. Start with a temporary narrow tie and judge it against the scale of the stitches.
The bow should create a focal point without covering a substantial part of the cuff. If most of the texture disappears behind the loops, reducing the bow size usually preserves more of the crochet work and keeps the finished design better balanced.
Check Where the Boot Shaft Meets the Trim
Short cuffs live directly at the boundary between footwear and leg, so placement cannot be planned in isolation. Put on the boot and mark the portion of the crochet that actually remains exposed.
That visible zone is the safest place to evaluate a bow. It prevents you from carefully positioning an embellishment only to discover that the shoe hides it or presses it uncomfortably against the leg.
Original Tutorial and Creator Credit
Creator: so0onita
Crochet Slouchy Ribbon Top Leg Warmers
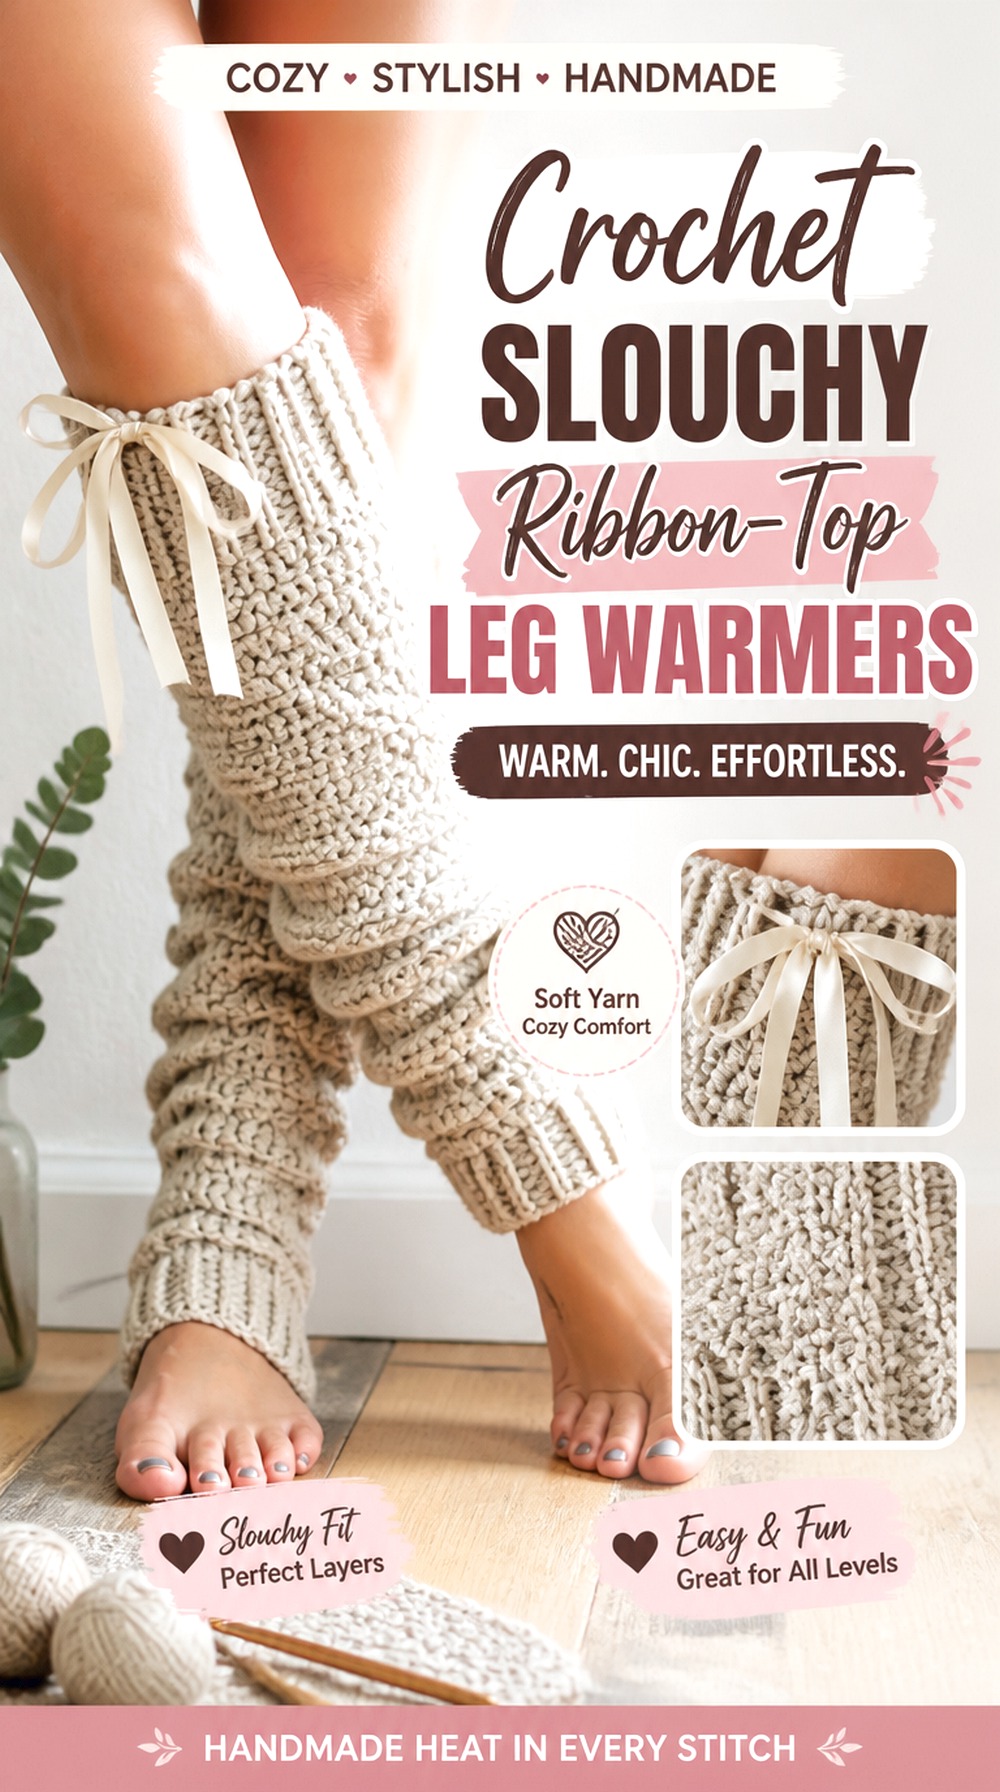
A slouchy warmer needs enough freedom for the fabric to gather naturally. Sigoni Macaroni’s tutorial offers a modern crochet leg-warmer base with guidance for resizing, making it useful for a ribbon adaptation where the tie stays near the top rather than controlling the entire body.
The finished idea can be comparatively understated: one ribbon bow at the cuff, with the lower fabric allowed to fold and gather on its own. This separates it from corset styles, where ribbon creates vertical structure, and from chunky flares, where the lower edge dominates the silhouette.
Slouch Needs Freedom Below the Top Cuff
After completing the base warmer, push it into the amount of slouch you actually like before deciding where the ribbon should sit. The folds change the apparent length and can rotate a side bow forward or backward.
If the decorative placement only works when the warmer is perfectly straight, it may not remain where expected during wear. Plan around the relaxed shape instead.
A Top Ribbon Should Sit Looser Than a Closure
If the crochet cuff already provides stretch and hold, a ribbon wrapped completely around it should not be tightened as though it were a drawstring.
A small bow fixed at one point preserves the ribbing’s elasticity more reliably. If you do thread ribbon through an opening, leave enough ease that the upper edge can expand normally when the warmer is pulled on.
Original Tutorial and Creator Credit
Creator: Sigoni Macaroni
Crochet Custom Fit Ribbon Loop Leg Warmers
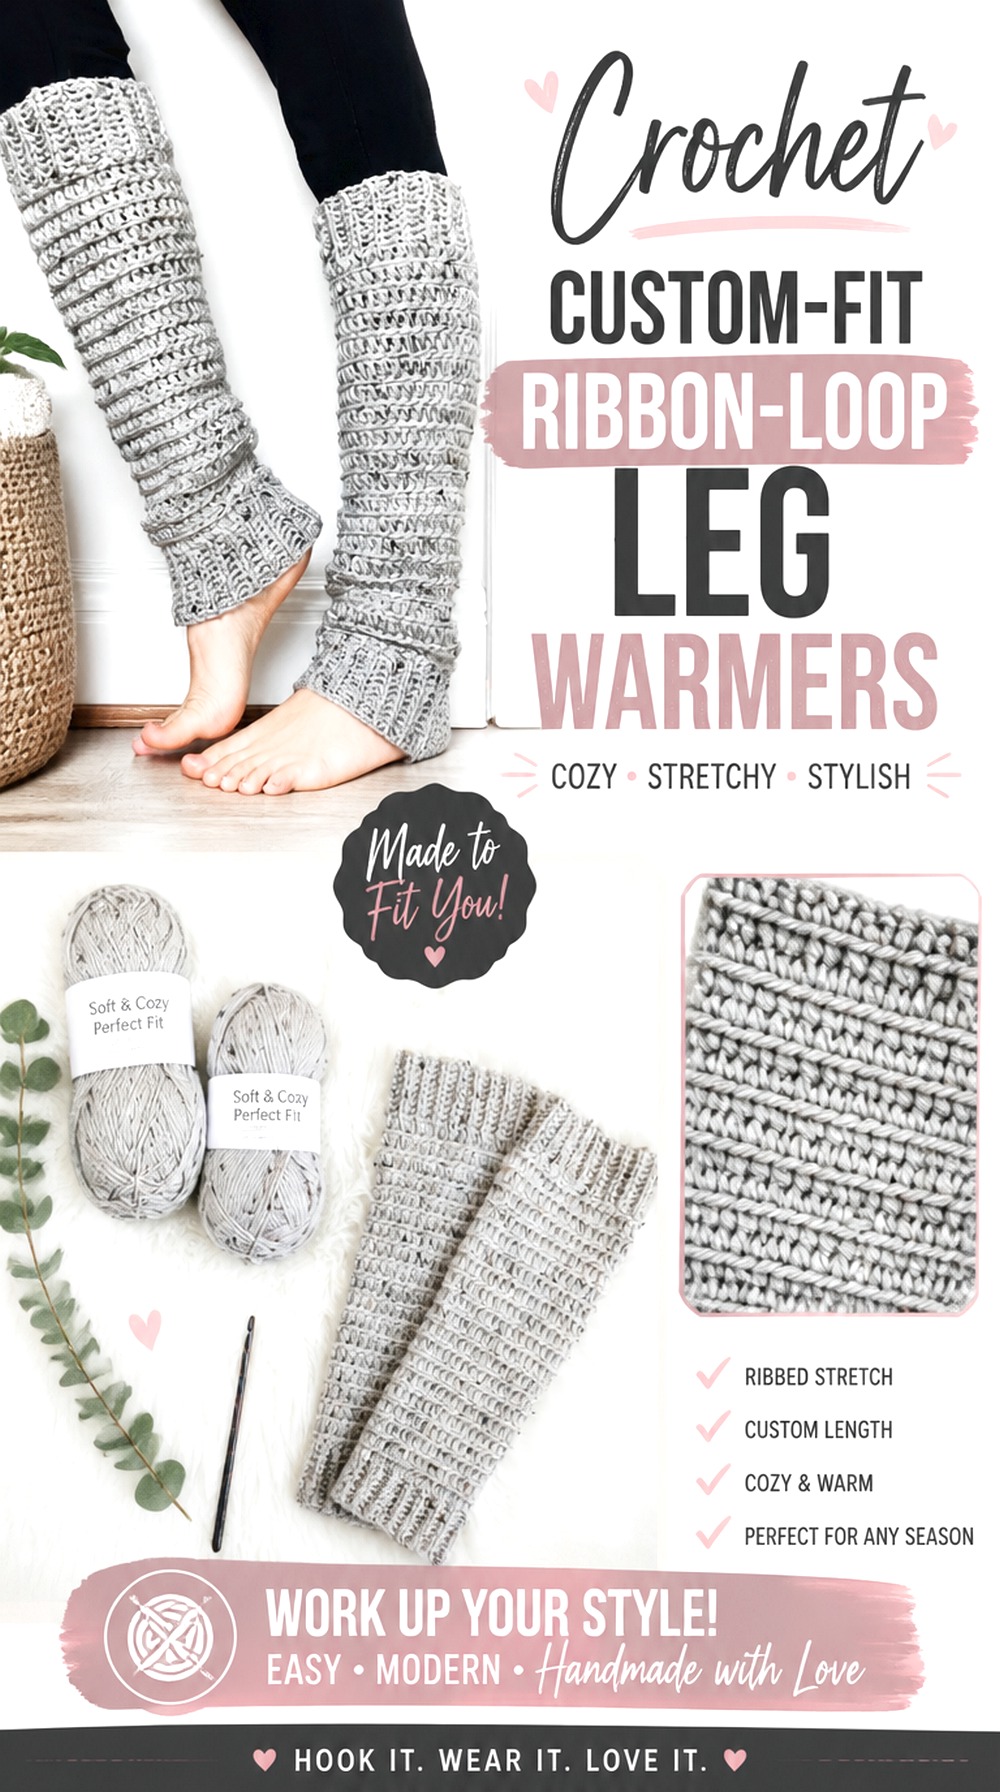
For readers who want to prioritize fit before decoration, the Ned & Mimi tutorial is a useful foundation. The video demonstrates an adult size, while the associated pattern includes additional sizing information. That makes this idea a good candidate for a restrained ribbon loop placed only after the actual leg-warmer dimensions have been settled.
A simple loop or small side tie works well because it does not compete with the practical sizing focus. Instead of designing the warmer around a dramatic closure, you establish the base fit first and use ribbon to identify a side seam, cuff, or other quiet detail.
Measure Before Deciding Where Ribbon Will Sit
Ribbon placement should be based on the finished or nearly finished warmer rather than an imagined location from the starting chain. Length, stretch, and the way the fabric sits around the calf can all change the visually ideal position.
Once the warmer fits as intended, put it on and mark the outer calf. That mark is more reliable than estimating the center while the crochet is lying flat.
Seamed Construction Gives You a Natural Accent Line
Where a project has a visible or identifiable join, that line can become an intentional reference for decoration. A bow positioned opposite the seam creates a clear front or outside orientation; positioning it along the seam can instead make the join part of the design.
Either approach is preferable to attaching matching trims without first deciding how each warmer will face when worn.
Check Pair Symmetry Before Finishing
Set the two completed bases together before cutting final ribbon lengths. Confirm that the chosen attachment points are at equivalent heights and that the intended outer sides are correctly mirrored.
Only after that comparison should permanent ribbon ends be trimmed or secured. It is much easier to correct positioning while the decorative element is still temporary.
Original Tutorial and Creator Credit
Creator: Ned & Mimi
Crochet Minimal Side Bow Leg Warmers

Not every ribbon leg warmer needs lacing, ruffles, flowers, and layered trim. A minimal tube with one small side bow can be easier to combine with everyday clothes and makes a useful contrast to the more theatrical options in this collection. The omazingpaige tutorial provides a clear basic leg-warmer construction that can serve as the base for this restrained adaptation.
The advantage is flexibility. Leave the ribbon removable and the same pair can look plain with boots, softly decorated with a skirt, or more ballet-inspired when paired with a longer tie.
Small Side Bows Suit a Cleaner Silhouette
Use a temporary pin or yarn marker to identify the outside calf while wearing the completed warmer. Positioning the bow there keeps the center front uncluttered and often makes the detail visible from both front and side angles.
A smaller bow also reduces the chance that the trim becomes the heaviest-looking part of an otherwise simple project. The goal is an accent rather than a new structural feature.
Keep the Base Fabric Doing the Fit Work
Because this ribbon treatment is an adaptation, follow the original tutorial for how the leg warmer itself is sized and assembled. Do not tighten the decorative bow until it becomes necessary for keeping the warmer in place.
If the base feels loose, revisit the fit rather than relying on ribbon to cinch it. That preserves comfort and makes the decoration easier to remove or change later.
Original Tutorial and Creator Credit
Creator: omazingpaige
Crochet Ribbed Outer Bow Leg Warmers
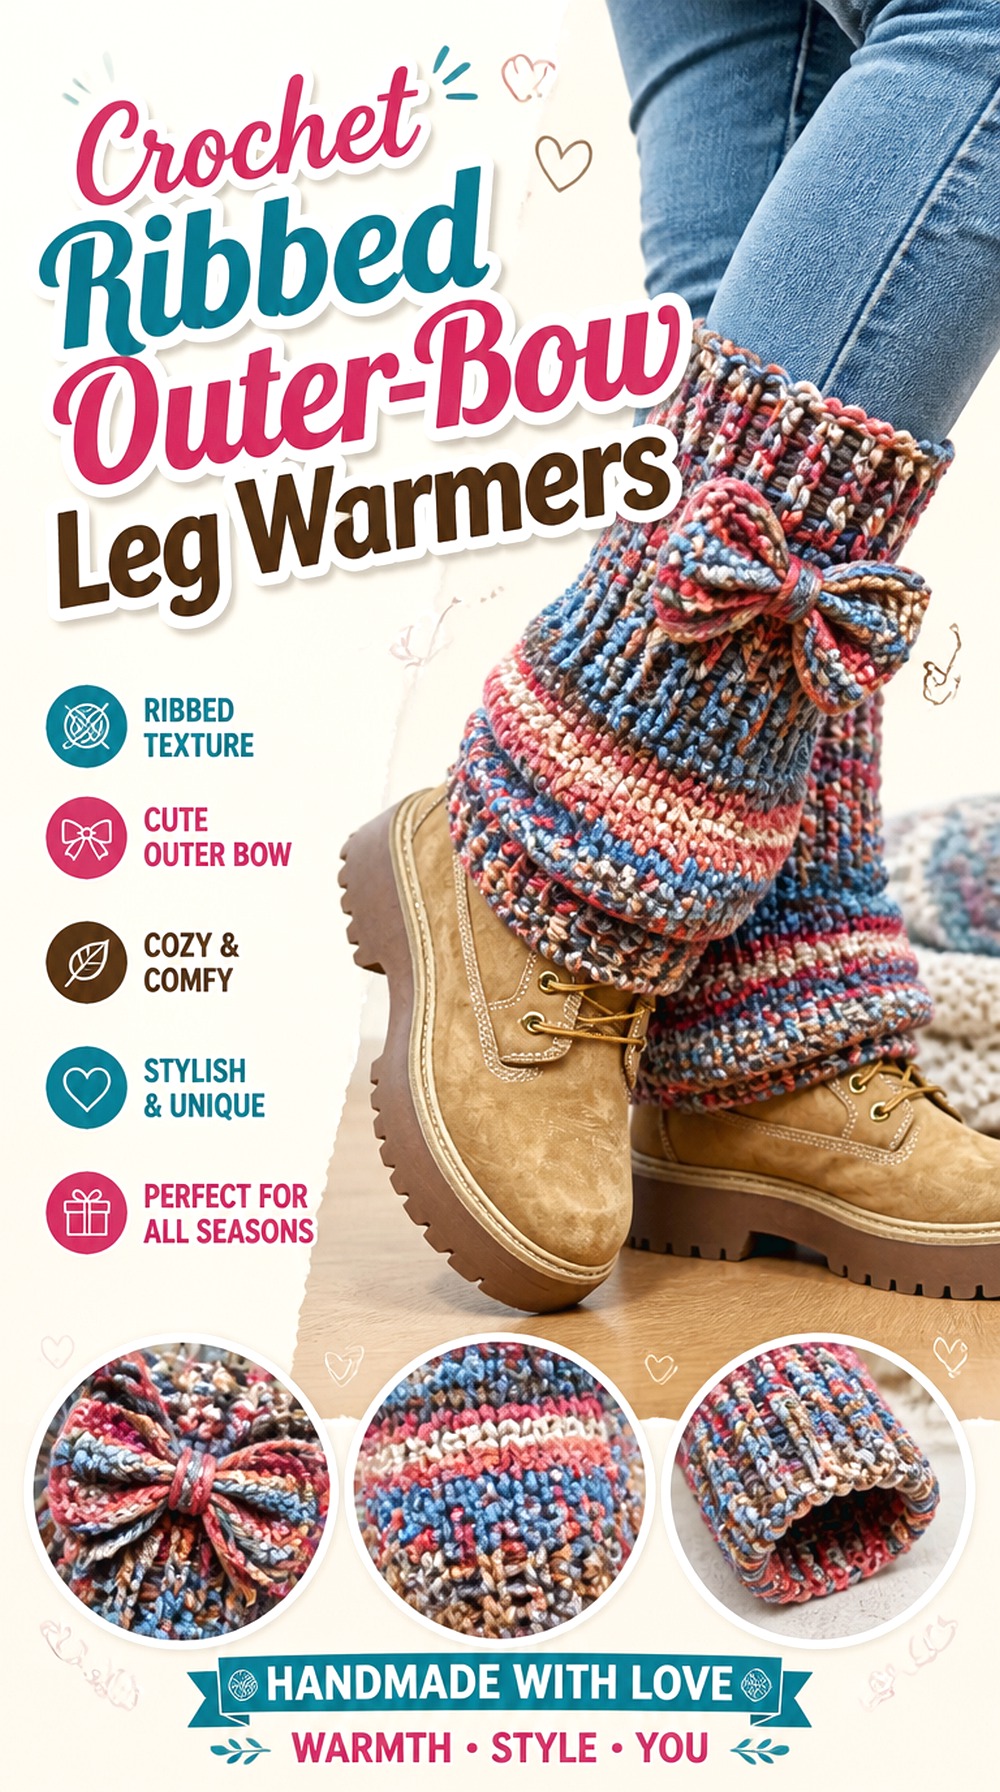
Defined ribbing gives a side bow a natural framework. The vertical lines visually lengthen the warmer, while a horizontal bow interrupts that direction at one intentional point. Dress it up Debra’s tutorial specifically focuses on ribbed leg warmers and includes discussion of sizing and stretch, making it a practical source for a decorative outer-bow variation.
Compared with the faux-knit version earlier, this idea can keep the bow more compact and clearly positioned on the outside calf. It is suitable for readers who want texture that is visible but not as ornate as shells, almond stitch, flowers, or ruffles.
Vertical Ribbing Makes an Outer Bow Easy to Place
Rib columns can serve as visual guides when matching the two warmers. Choose the equivalent area on each piece rather than estimating only from the outer edge.
Pin the bows, put both warmers on, and check them in a mirror. Stretch can move the apparent center of the ribbed fabric once it wraps around the leg, so final placement should be judged while worn.
Avoid Hiding the Rib Direction
A very broad bow may cover several rib columns and flatten the effect that gives the warmer its character. A smaller ribbon detail allows the vertical texture to continue visually above and below the bow.
If you prefer a larger bow, move it toward the cuff where interrupting the body texture is less noticeable. This keeps the design’s two main features from competing for the same space.
Original Tutorial and Creator Credit
Creator: Dress it up Debra
Crochet Classic Tube Leg Warmers with Removable Ribbon
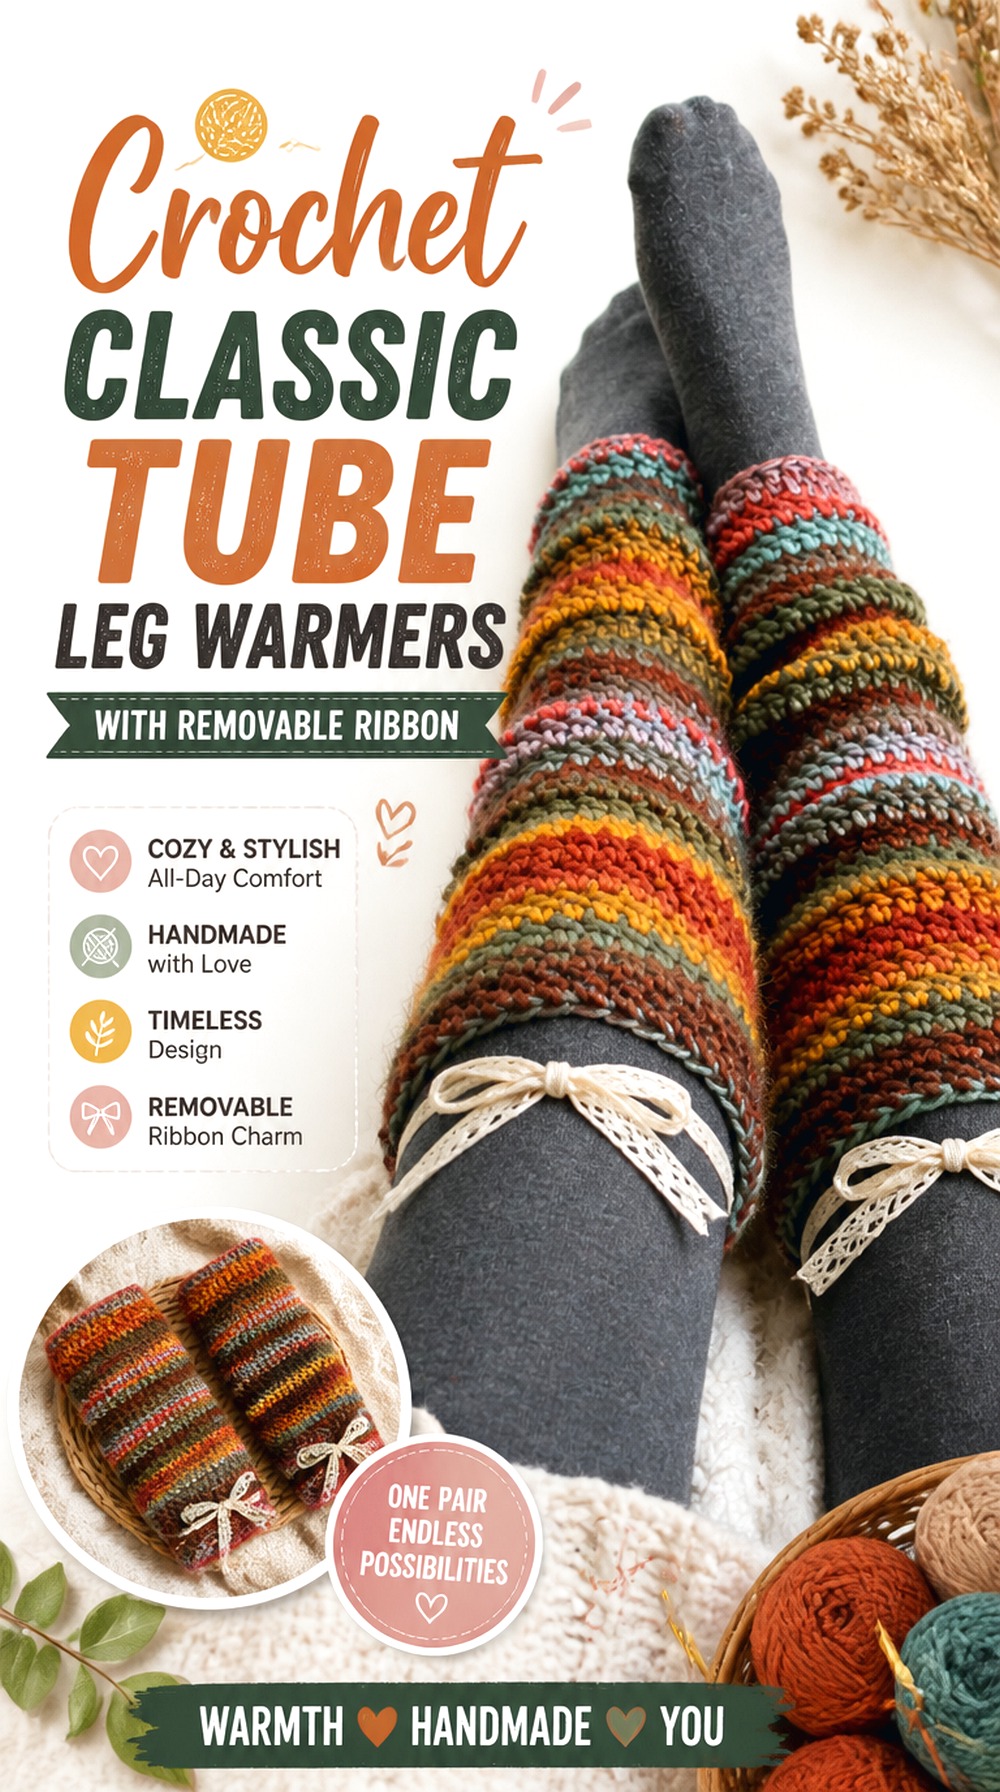
A basic tube is arguably the most adaptable foundation in the collection. There is no strong motif or closure dictating where the trim must go, so you can switch between a single cuff bow, two small side bows, or a removable ribbon wrap without changing the core project.
The B.Hooked Crochet tutorial provides the leg-warmer foundation; the ribbon treatment here is deliberately separate. This approach suits readers who want one useful pair rather than a highly specialized fashion piece. Make the crochet in a wardrobe-friendly color and the removable ribbon can provide the seasonal or outfit-specific change.
Removable Ribbon Makes Washing Simpler
Before laundering, always follow the care instructions appropriate to the yarn and ribbon actually used. A detachable trim makes it possible to handle each material according to its own requirements rather than assuming they tolerate identical treatment.
Removable bows also avoid crushing carefully tied loops during cleaning or storage. Photograph the preferred bow arrangement before removing it if you want to recreate the same proportions later.
A Plain Tube Is the Most Flexible Styling Base
Without flowers, flares, shells, or fixed lacing, a classic warmer can move between different outfits more easily. The ribbon can become the statement on one day and disappear entirely on another.
This is also useful if you are still deciding whether you prefer coquette bows or ballet-style wraps. Experiment after the leg warmer is complete instead of committing to permanent holes or attachments before you know which treatment you prefer.
Original Tutorial and Creator Credit
Creator: B.Hooked Crochet
Crochet Size Range Ribbon Cuff Leg Warmers
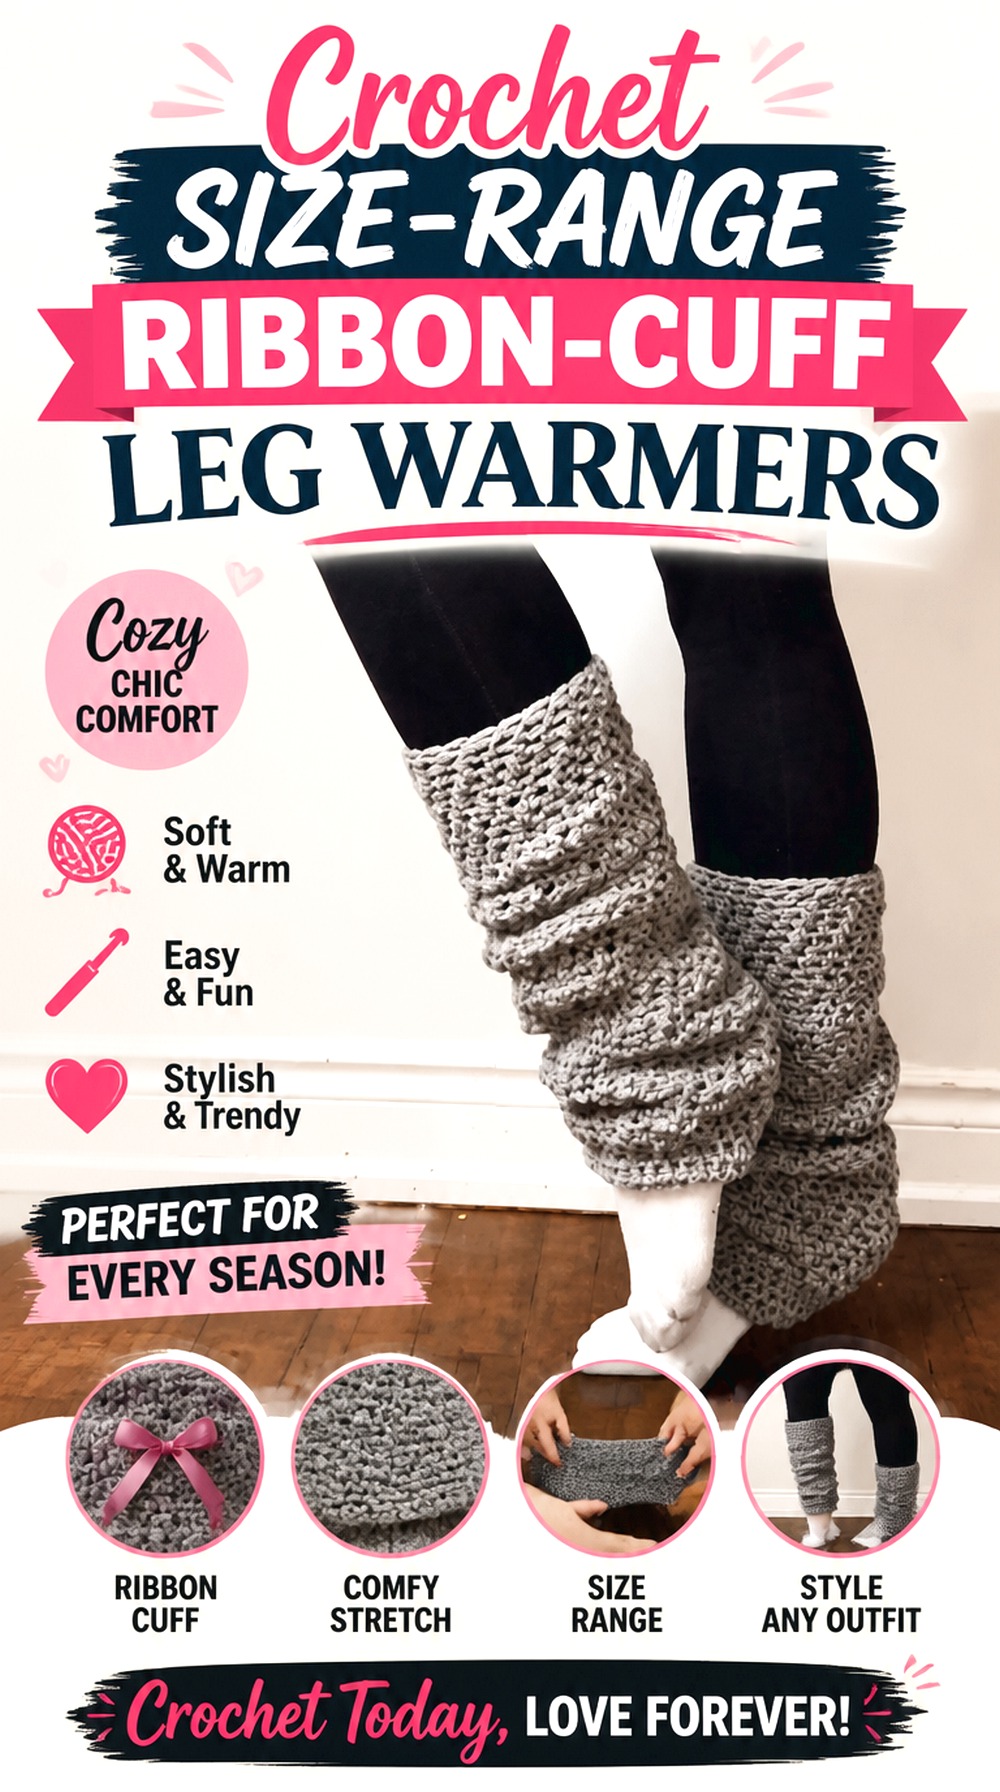
The final idea emphasizes sizing flexibility rather than an unusual stitch. DIY FROM HOME CROCHET’s source video demonstrates a leg-warmer project, while its accompanying pattern information covers a broad range of sizes. That makes it a useful base when the pair is intended for someone whose measurements may not match a single sample size.
Once the appropriate crochet size is established, a removable cuff ribbon can personalize the project without changing its underlying proportions. This is useful for matching sets, gifts, or wardrobes where the same simple silhouette may need different ribbon colors while the actual fit remains the priority.
Size Choice Comes Before Decorative Cuff Planning
Do not decide the finished ribbon circumference from a generic measurement. Complete or sufficiently establish the crochet cuff first, then assess how much it must expand when the warmer is put on.
If ribbon travels completely around the cuff, it needs enough slack to avoid blocking that movement. A bow attached at one point is often simpler because it leaves the rest of the stretchy edge independent.
Match Ribbon Scale to the Finished Length
A ribbon that looks balanced on a small warmer may look too delicate on a much longer adult pair, while an oversized bow can dominate a shorter version.
Instead of using one fixed bow size for every possible size, pin an uncut ribbon against the actual warmer and assess the proportion visually. Keep matching pairs consistent, but allow different finished sizes to have trim scaled to their own silhouette.
Which Crochet Ribbon Leg Warmer Style Should You Choose?
| If you want… | Start with… | Main ribbon role | Main checkpoint |
|---|---|---|---|
| The strongest bow look | Double-bow, statement-bow, or pom-pom versions | Focal decoration | Keep both bows level and comfortably placed |
| Full romantic lacing | Flared lace-up or openwork corset versions | Visible crisscross feature | Do not use lacing to compensate for poor base sizing |
| Ballet-inspired styling | Faux-knit, thigh-high, or slouchy versions | Soft removable accent | Preserve stretch at the upper edge |
| Decorative crochet texture | Flower, almond, or shell versions | Supporting accent | Avoid covering the texture that makes the project distinctive |
| Boot styling | Feather-stitch or lace boot cuffs | Compact side or cuff bow | Test placement with the actual boots |
| Easy outfit changes | Minimal or classic tube versions | Removable trim | Let the crochet provide the fit rather than the ribbon |
| Strong color impact | Striped version | Contrast or coordinating accent | Align bow placement with corresponding stripes |
Conclusion
The most successful crochet ribbon leg warmer depends on what you want the ribbon to accomplish. Choose the flared or openwork options when lacing should dominate the design, the double-bow and pom-pom versions when decoration is the focal point, or ribbed and tube styles when you want a removable accent that can change between outfits. Thigh-highs need more attention to fit, while boot cuffs require careful placement around footwear.
Whichever direction you choose, complete the underlying fit before asking a non-stretch ribbon to change it. Use the original tutorials near each idea for exact crochet construction details, then treat optional ribbon adaptations as a separate styling decision.
Frequently Asked Questions
Can I add ribbon to any crochet leg-warmer tutorial?
You can add a decorative ribbon to many designs, but not every stitch pattern provides suitable holes for threading or lacing. Dense ribbing may be better suited to an attached or removable side bow, while open shells and lace can offer natural-looking ribbon paths. Most importantly, do not force ribbon through stitches in a way that damages them or use a tight non-stretch ribbon to compensate for a poorly fitting crochet cuff.
Is satin or grosgrain ribbon better for crochet leg warmers?
Neither is automatically better. Satin creates a smoother, shinier contrast that works well for balletcore and coquette styling, while grosgrain has a more textured surface and a less glossy appearance. The right choice depends on the yarn texture, bow size, and intended look. Test a short piece against the finished crochet before buying or cutting the final length, and confirm the ribbon’s own care instructions if it will be permanently attached.
How do I stop ribbon from making the upper cuff too tight?
Let the crochet cuff provide the normal fit whenever possible. Instead of wrapping ribbon firmly around the entire leg, attach a decorative bow at one point or lace the ribbon loosely enough that the cuff can still stretch. Test the finished warmer while pulling it on, standing, and bending the knee. If the ribbon creates a rigid band or makes the crochet bunch toward the tie, loosen or reposition it.
Where should a ribbon bow sit when I plan to wear boots?
Put on the completed warmer with the actual boots before fixing the bow. Mark the section that remains visible above or outside the boot shaft and place the decoration within that area. Outer-calf positioning often keeps a bow visible without putting it directly under the front of the footwear. Also check that the tails remain clear of zippers, buckles, heel areas, and the ground during normal walking.
Should ribbon be removable for washing?
A removable ribbon is often convenient because yarn and ribbon can have different care requirements and bows can lose their shape during washing or drying. Check the care information for both materials rather than assuming they can be treated identically. Detachable bows also make it easier to reshape the crochet separately. If a ribbon must remain attached, secure it appropriately for the intended use and follow the most suitable care method for the combined materials.
How can I make two ribbon leg warmers look symmetrical?
Finish both crochet bases before permanently attaching the trims. Place the warmers side by side, identify the corresponding front or outer sides, and use a visible feature—such as a cuff edge, stripe, seam, rib column, or motif—as the placement reference. Pin or temporarily thread both ribbons, then try the pair on together. This catches rotation and height differences that are difficult to judge when each warmer is viewed separately.