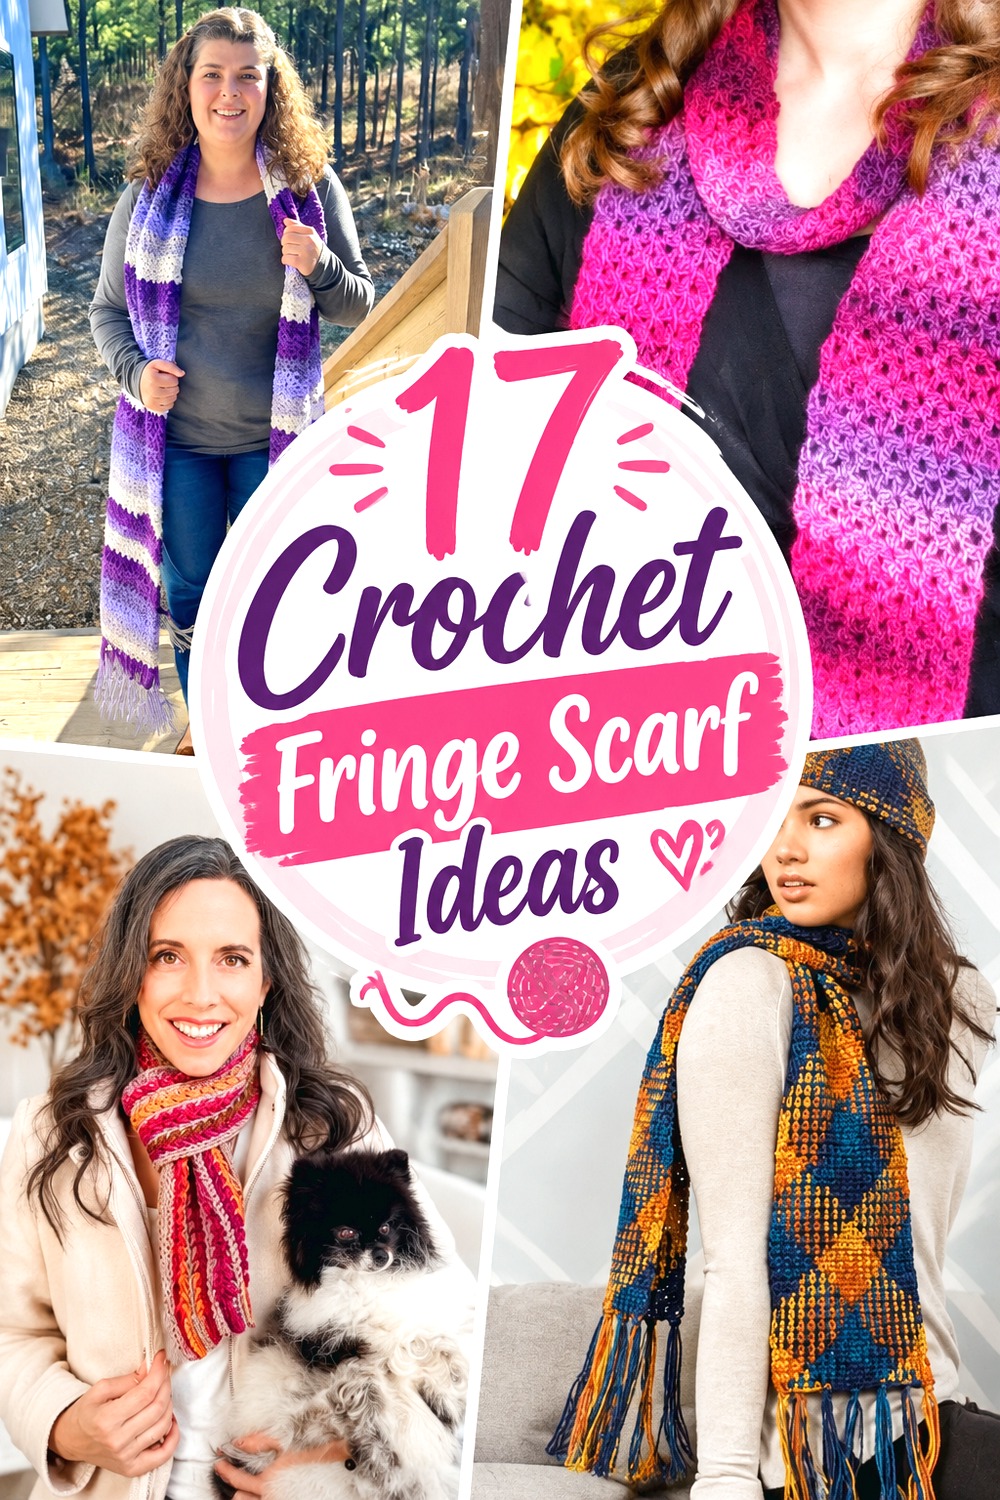

Fringe can completely change the character of a crochet scarf. A short, tidy fringe gives a simple rectangle a finished edge, while twisted strands, knots, chunky tassels, or color-matched fringe can become part of the main design. The scarf fabric matters just as much: dense textures give fringe a substantial base, while granny stitches, filet work, and V-stitches create a lighter look.
These 17 crochet fringe scarf ideas cover those differences rather than repeating the same scarf in new colors. You’ll find chunky and lightweight-looking options, pockets, Tunisian texture, planned pooling, cables, stripes, and several distinct fringe treatments. The practical notes under each idea focus on choosing materials, balancing fringe with the scarf body, planning color, checking drape, and avoiding finishing problems before you commit to a particular tutorial.
Quick List
- Crochet Moss Stitch Tassel Fringe Scarf
- Crochet Chunky Larks-Head Fringe Scarf
- Crochet Tunisian Texture Scarf with Knotted Fringe
- Crochet Color-Block Filet Fringe Scarf
- Crochet Soft Double-Crochet Fringe Scarf
- Crochet Bordered Scarf with Tassel Fringe
- Crochet Seamless Gradient Fringe Scarf
- Crochet Wattle Stitch Fringe Scarf
- Crochet Textured Stripe Scarf with Twisted Fringe
- Crochet Chunky Pocket Scarf with Fringe
- Crochet Planned-Pooling Plaid Fringe Scarf
- Crochet Multicolor Fringe Scarf
- Crochet Wheat-Texture Fringe Scarf
- Crochet Granny-Style Fringe Scarf
- Crochet Cable Fringe Scarf for Left-Handed Makers
- Crochet One-Skein V-Stitch Fringe Scarf
- Crochet Rib-Look Winter Scarf with Even Fringe
Choose the Fringe Style Before You Choose the Scarf
Straight cut-yarn fringe is the most adaptable option because it can sit quietly beneath a highly textured scarf or become fuller and more noticeable on a simple fabric. Knotted fringe creates a more deliberate decorative edge, while twisted fringe has stronger definition and movement. Tassel-style groupings can also look more substantial than evenly distributed individual bundles.
Think about the scarf body at the same time. A visually busy cable, planned-pooling plaid, or multicolor scarf rarely needs extremely elaborate fringe competing for attention. A plain or lightly textured scarf, however, gives you more room to make the fringe a feature. Also consider use: very long or bulky fringe can catch more easily on coats, bags, furniture, and zippers. Choose the finished edge for how the scarf will actually be worn rather than treating fringe as an automatic last step.
Yarn Weight and Drape Change How Fringe Behaves
The same yarn qualities that affect scarf fabric also affect the fringe. A smooth, well-defined yarn can produce crisp strands and make knots or twists easy to see. Yarn with a noticeable halo creates a softer visual edge, but individual strands may blend together and can be less precise-looking after trimming. Thicker yarn builds volume quickly, so fewer fringe bundles may still produce a substantial finish.
Fringe also adds weight along the short ends of the scarf. That may be barely noticeable with light strands but more significant with bulky yarn or dense knotted treatments. If the scarf body already feels heavy, test a small fringe section before finishing both ends. For open crochet fabrics, check that the edge can support the chosen fringe without stretching individual spaces. Always follow the yarn manufacturer’s care information instead of assuming fringe will respond well to a particular washing or drying method.
Finish the Scarf Body Before Making the Final Fringe Decisions
It is easier to judge fringe length and fullness once the scarf body has reached its final planned dimensions. If blocking is appropriate for the yarn and stitch pattern, doing that first also gives you a more reliable edge to work from. This matters especially when the scarf has lace, granny stitches, Tunisian fabric, cables, or another texture that can change after finishing.
Before cutting a large batch of strands, make a small sample bundle and hold it against the scarf. Check how far it hangs, how much bulk it creates, and whether the yarn springs back, twists, or separates. For gradient, self-striping, or limited-quantity yarn, reserve fringe yarn early rather than assuming enough will remain. Attach all the fringe before making the final trim so small differences in knots and yarn behavior can be corrected together.
Crochet Moss Stitch Tassel Fringe Scarf
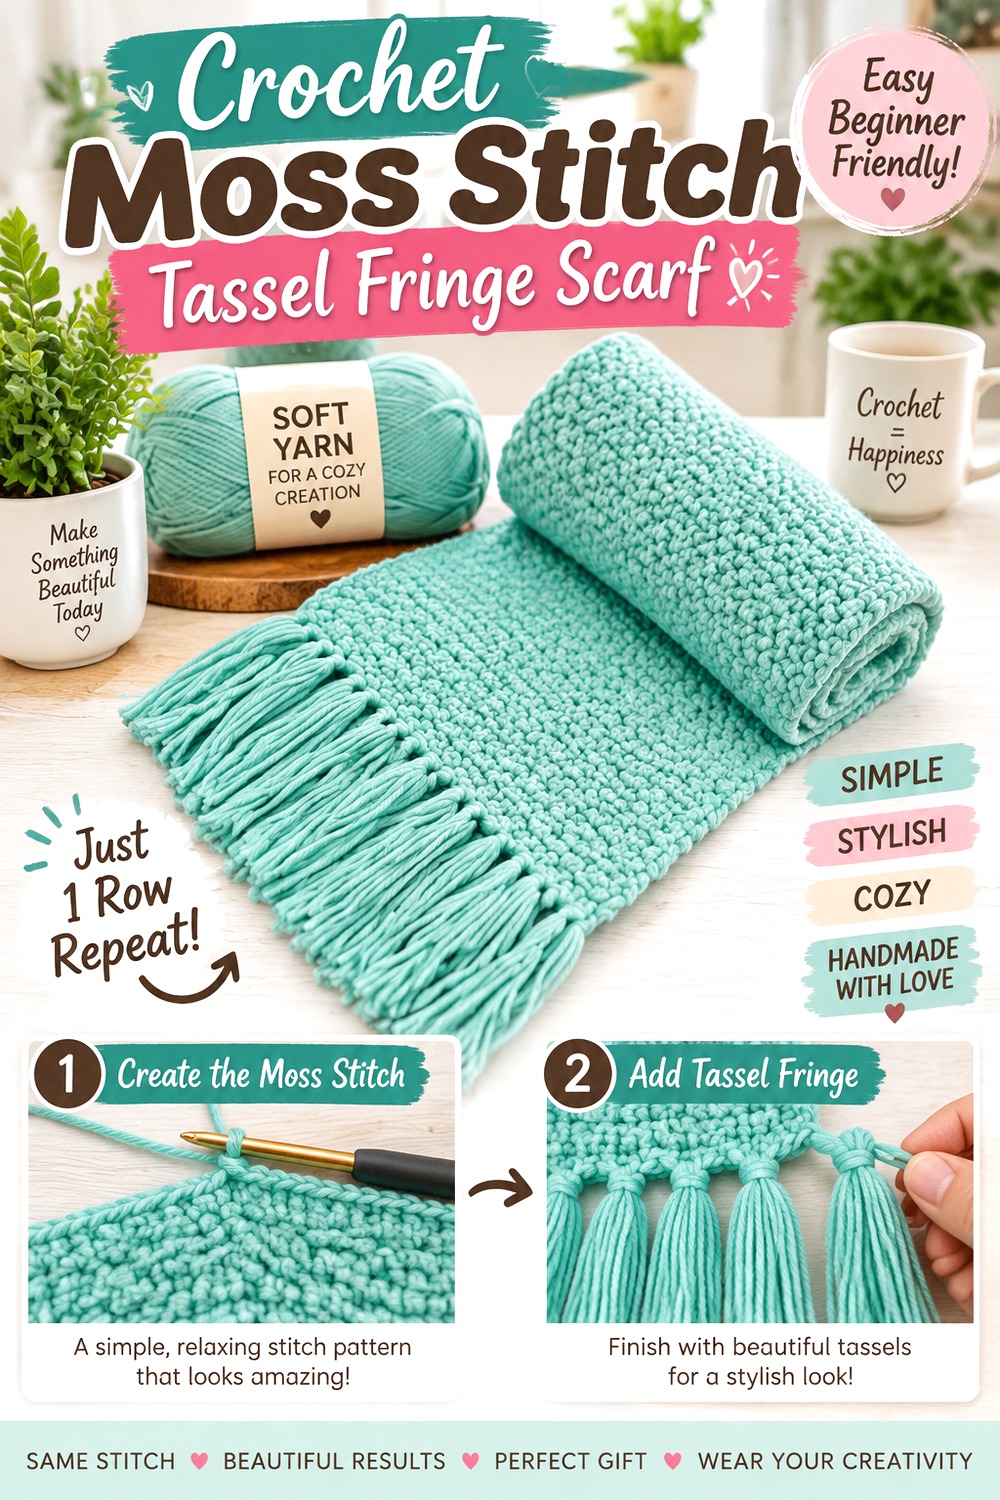
Moss stitch gives this scarf a small-scale, even texture that works particularly well with a straightforward fringed finish. The referenced tutorial builds the scarf around a repeating moss-stitch fabric and also demonstrates adding and trimming the tassel-style fringe, making the finished edge part of the complete project rather than an unrelated embellishment.
This is a useful direction when you want visible texture without the heavier appearance of cables or thick post stitches. Because the fabric and fringe are both relatively classic, the design can handle solids, subtle tonal yarns, or yarn with gradual color changes without losing its basic shape.
Keep the Fringe in Proportion to the Small Stitch Texture
Moss stitch creates a compact visual rhythm, so oversized fringe can quickly become the dominant feature. Before cutting every strand, compare one finished bundle with the width and thickness of the scarf. A lighter fringe treatment keeps attention on the stitch texture, while fuller tassels create a stronger decorative border. Neither is automatically better; the choice depends on whether you want the eye to stop at the scarf body or continue into the fringe.
Square the Short Ends Before the Final Trim
A tidy attachment edge matters on a scarf with such an orderly stitch surface. If the short edge curves or individual fringe groups sit at noticeably different levels, the inconsistency can be easier to see than on a highly irregular texture. Finish the body, settle the fabric appropriately for the yarn, and attach all fringe before trimming. That lets you judge the strands while the scarf is hanging naturally rather than trying to make every loose piece identical in advance.
Original Tutorial and Creator Credit
Creator: Crafty Turtle Crochet and Knitting Machines
Crochet Chunky Larks Head Fringe Scarf
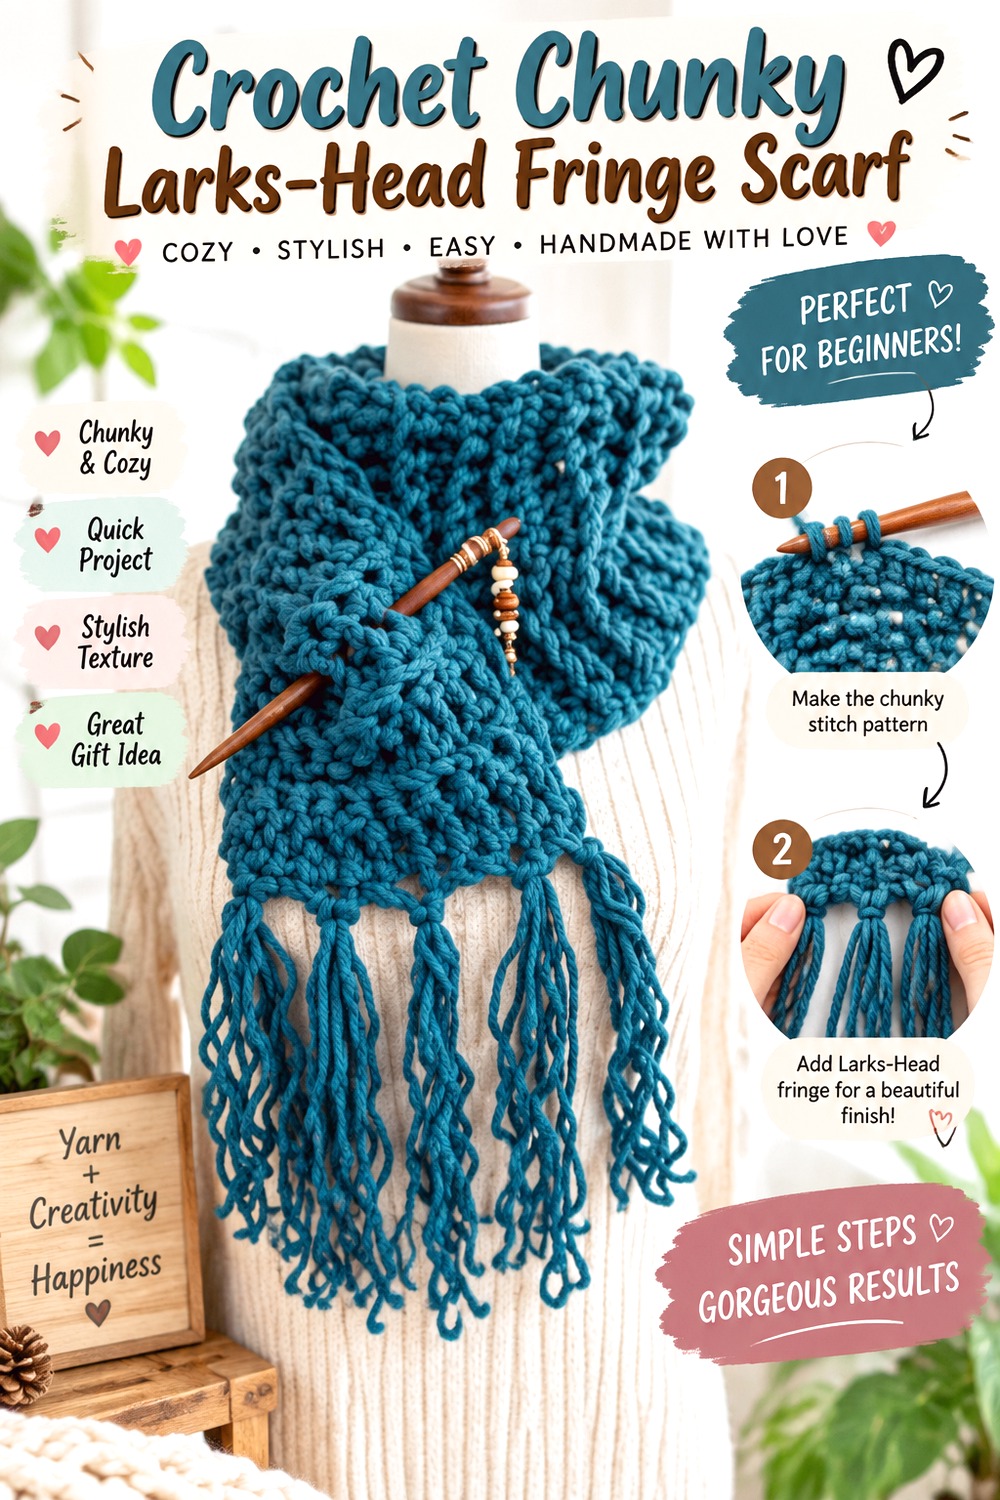
A chunky scarf creates a very different fringe effect because each strand has more visual weight. Hectanooga1’s tutorial demonstrates a chunky fringed scarf and uses a larks-head-style attachment for the fringe, providing a clear source for this classic, substantial look.
This option makes sense when you want the scarf to look bold without relying on complicated colorwork. The thicker fabric already creates volume, and the fringe extends that volume vertically at both ends. Because chunky yarn can become heavy faster than a finer yarn, it is worth evaluating the scarf body and fringe together instead of deciding fringe fullness by appearance alone.
Thick Yarn Needs Fewer Strands to Make an Impact
A fringe bundle made with bulky yarn occupies much more space than the same number of strands in a finer yarn. Attaching very dense bundles at every available point can produce a stiff, crowded edge rather than fluid fringe. Make one or two bundles first and spread them along the edge temporarily. If the border already looks full, leave more breathing room rather than increasing yarn simply because more attachment spaces are available.
Try the Scarf On Before Committing to Heavy Fringe
Chunky crochet can gain noticeable weight once both ends are fully fringed. Check the unfinished scarf around the neck with a small sample of fringe attached. This is also the right time to assess whether the body length suits the way you plan to wear it. Fringe adds visual length even though it does not provide the same wrapped coverage as the crocheted fabric, so body length and total visual length should be considered separately.
Original Tutorial and Creator Credit
Creator: Hectanooga1
Crochet Tunisian Texture Scarf with Knotted Fringe
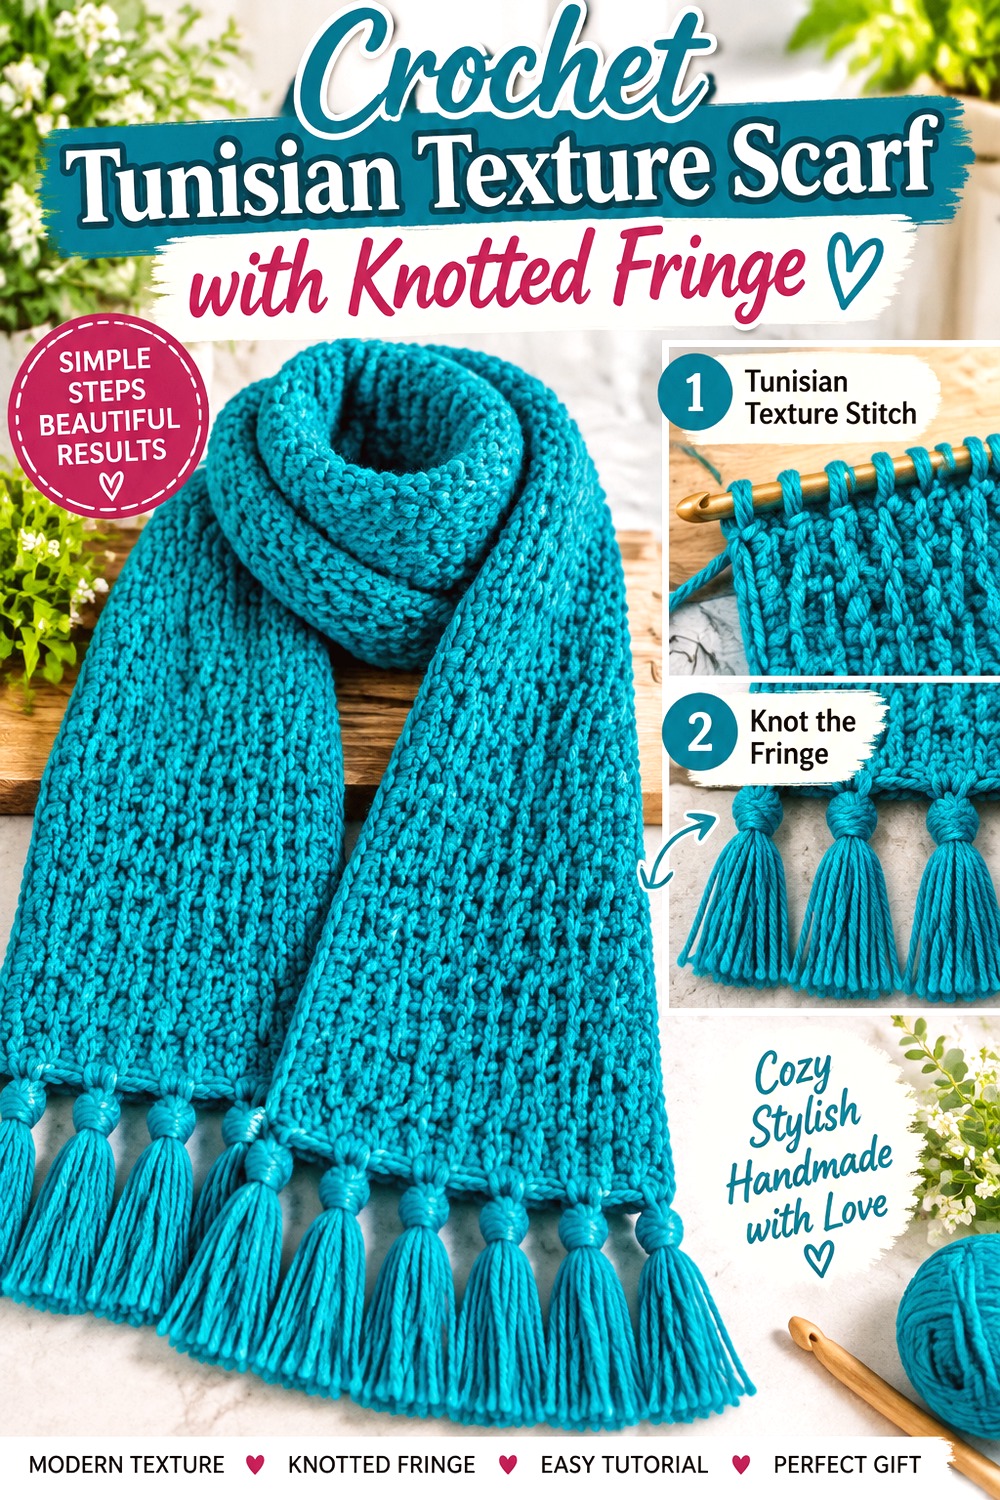
This scarf pairs the distinctive surface of Tunisian crochet with knotted fringe instead of leaving the ends as loose straight strands. I Heart Yarn’s tutorial specifically combines a Tunisian scarf with a knotted-fringe finish and also presents alternative edge treatment information.
The idea stands apart from conventional row-by-row crochet scarves because the fabric has a different visual structure, while the knots turn the fringe into an intentional design detail. It suits readers who want the scarf edge to look organized rather than wispy. The main planning concern is balance: both Tunisian fabric and knotted fringe can have more structure, so yarn choice and finishing affect whether the scarf feels fluid or comparatively firm.
Watch the Tunisian Edges Before Adding Decorative Knots
Some Tunisian fabrics can curl or pull at the edges depending on stitch choice, tension, yarn, and finishing. Fringe can visually disguise a minor uneven edge, but it should not be expected to correct a strongly distorted scarf. Check the body first and use whatever appropriate finishing or blocking approach suits the yarn. A stable, straight short edge gives the knotted fringe a much cleaner foundation and makes the spacing of the decorative knots easier to evaluate.
Knots Turn Fringe into a More Structured Border
Loose fringe moves independently, while knotted fringe connects or organizes strands into a visible pattern. That can make the edge look more polished, but it also means tension differences are easier to spot. Work with a relaxed hand and compare knot positions as you progress. If one section is pulled much tighter, the bottom edge can draw inward or the knot line may appear uneven even when all the original strands were cut to the same length.
Let the Yarn Show Both Texture Systems Clearly
This design has two visual elements competing for attention: Tunisian texture and the knotted border. A yarn with good stitch definition helps both remain readable. Highly fuzzy yarn may create an appealing soft effect, but it can blur the texture and make the knots less distinct. Before committing to the full scarf, consider whether your priority is a crisp architectural look or a softer surface where the details blend together.
Original Tutorial and Creator Credit
Creator: I Heart Yarn
Crochet Color Block Filet Fringe Scarf
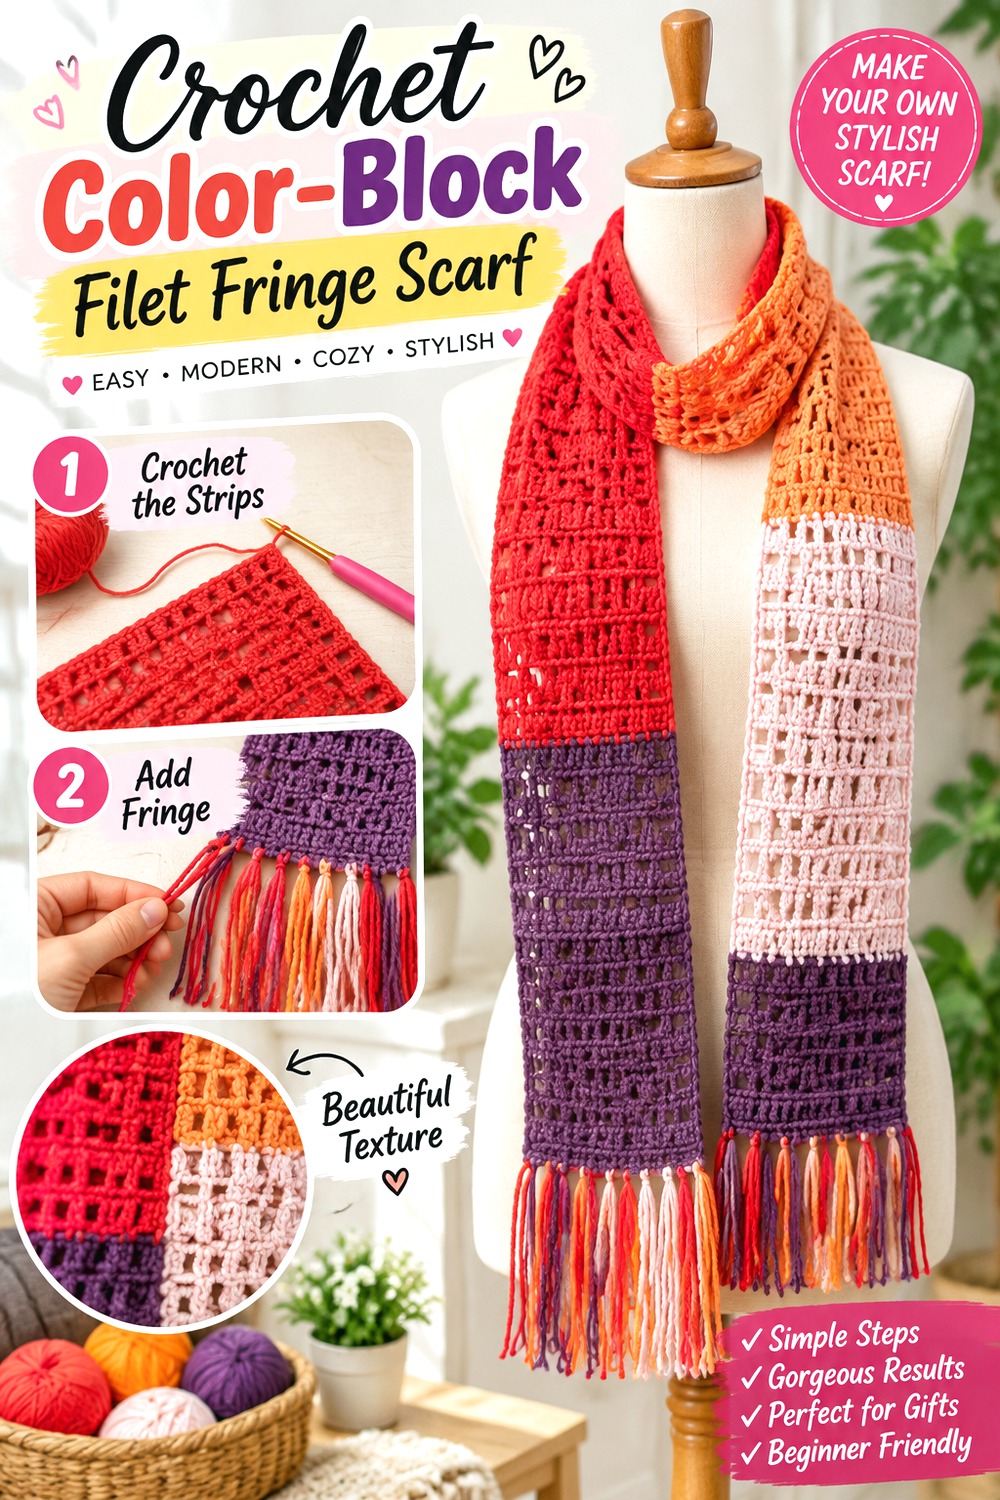
Filet-style crochet creates open areas that keep this color-block scarf visually lighter than many dense winter scarves. Sara Sach Crochet Designs demonstrates a color-block fringe scarf built with filet-style crochet and shows how the changing colors and fringe work together in the finished piece.
This direction is useful when color is supposed to be a major part of the design but you still want noticeable stitch structure. Instead of covering the scarf with heavy surface texture, the open fabric provides negative space between the blocks. Fringe can repeat the scarf colors, emphasize a single shade, or create a quieter border, so the final color decision extends beyond the crocheted rectangle itself.
Open Fabric Benefits from a Carefully Spaced Fringe Edge
Filet-style spaces can make a scarf edge feel visually lighter. Very dense fringe may suddenly create a heavy band at each end, while too little can look disconnected from the body. Test several attachment points before finishing the row. Look at the scarf from a distance rather than concentrating only on individual loops. The goal is to make the fringe feel like a continuation of the scarf’s rhythm rather than a separate curtain of yarn.
Decide Whether the Fringe Continues or Calms the Color Blocks
If the scarf contains several strong colors, repeating them in the fringe can extend the color-block effect. Using one color across the entire fringe creates a more unified stopping point. Both approaches are valid, but they produce different visual emphasis. Before cutting yarn, lay possible fringe colors across the finished end and compare them. This small planning step is especially helpful if one shade is limited and needs to be reserved for another section.
Keep Snagging in Mind with an Airier Scarf
Open crochet provides flexibility and visual lightness, but the larger spaces can catch more easily on jewelry, bag hardware, or rough closures than a dense fabric. Fringe adds another set of loose elements. If the scarf is intended for frequent everyday wear, consider the environments and outerwear it will encounter. A slightly shorter or less elaborate fringe may be more practical when the crocheted fabric is already very open.
Original Tutorial and Creator Credit
Creator: Sara Sach Crochet Designs
Crochet Soft Double Crochet Fringe Scarf
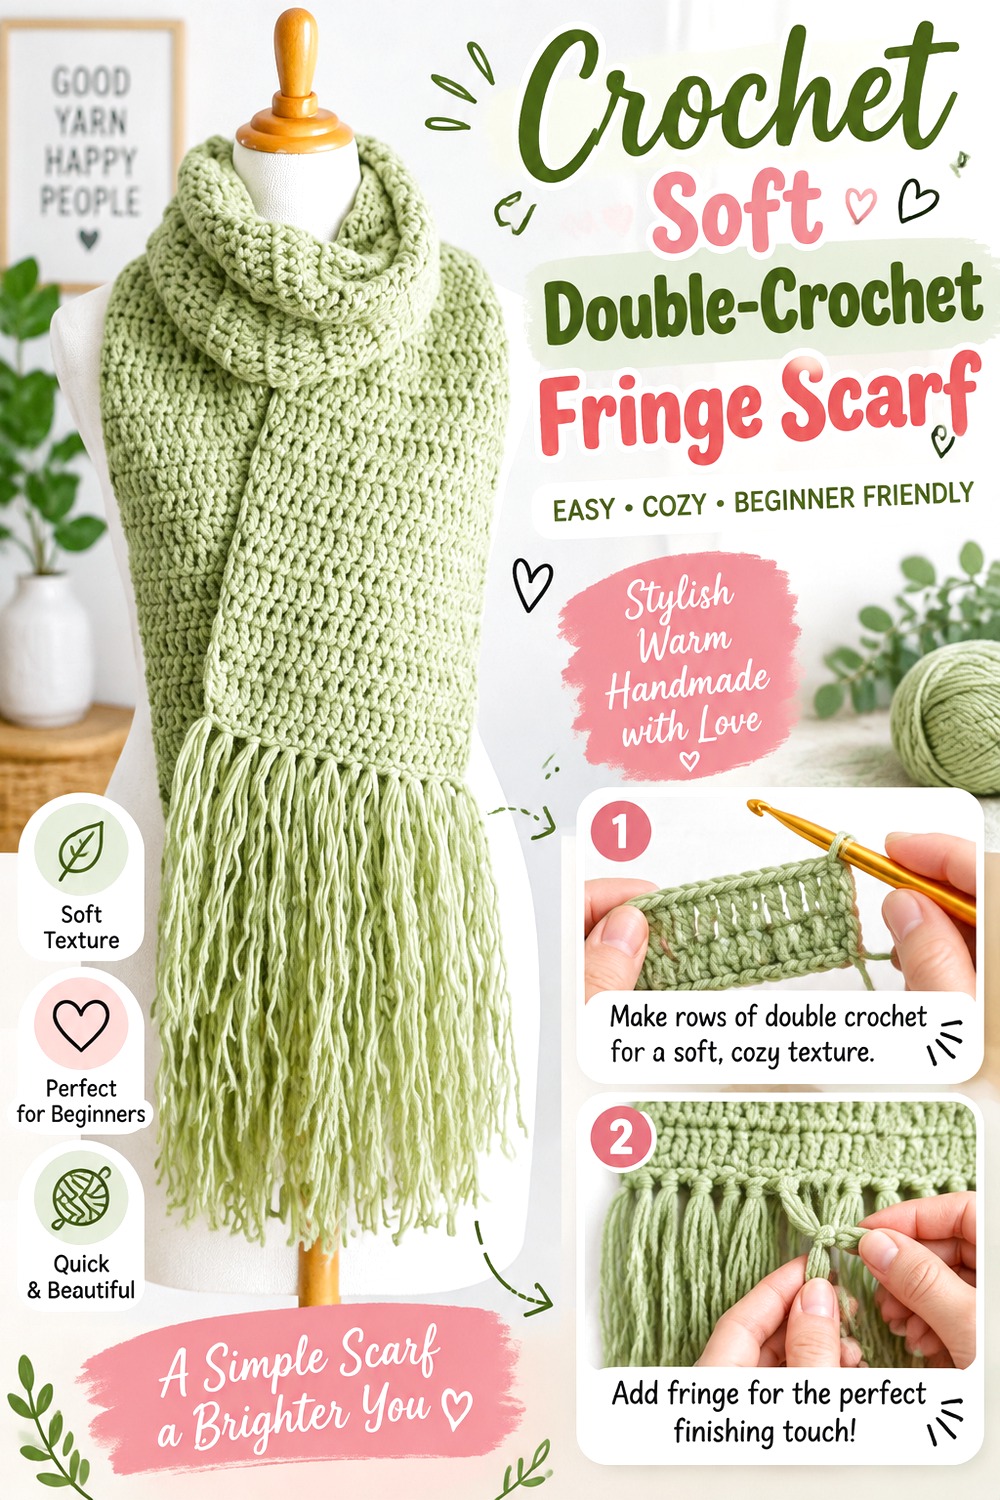
For a straightforward scarf where the fringe provides most of the decorative finishing, this flat double-crochet design is a useful reference. Fiber Flux’s tutorial is part of a learn-to-crochet series, and the accompanying project information confirms a scarf worked flat with double crochet and finished with fringe.
Because the stitch structure is uncomplicated, yarn appearance becomes particularly noticeable. A fuzzy yarn can soften the rows and make the scarf feel cloudier, while a smoother yarn will reveal the vertical stitch structure more clearly. This is also an adaptable concept when you want to concentrate on even edges, consistent fabric, and a neat fringe rather than managing multiple decorative techniques simultaneously.
Let Yarn Character Do the Work on a Simple Rectangle
A basic stitch surface gives you room to choose yarn for texture rather than for complicated stitch definition. A yarn with halo creates a softer outline, while a smooth yarn produces a cleaner, more graphic scarf. Keep in mind that the same difference continues into the fringe. Fuzzy strands tend to blend into one another visually; smooth strands stay more separate. Sample a small fringe bundle before deciding which effect works better with the scarf body.
Use the Fringe as the Final Edge Check
Simple fabric makes uneven short ends easier to notice. Once the scarf body is complete, compare the two ends before adding fringe. If one edge is visibly looser or more irregular, address that finishing issue first rather than trying to hide it beneath strands. After all fringe groups are attached, let the scarf hang naturally and make the final trim then. This avoids trimming based on yarn pieces that have not yet settled into their attached position.
Original Tutorial and Creator Credit
Creator: Fiber Flux
Crochet Bordered Scarf with Tassel Fringe
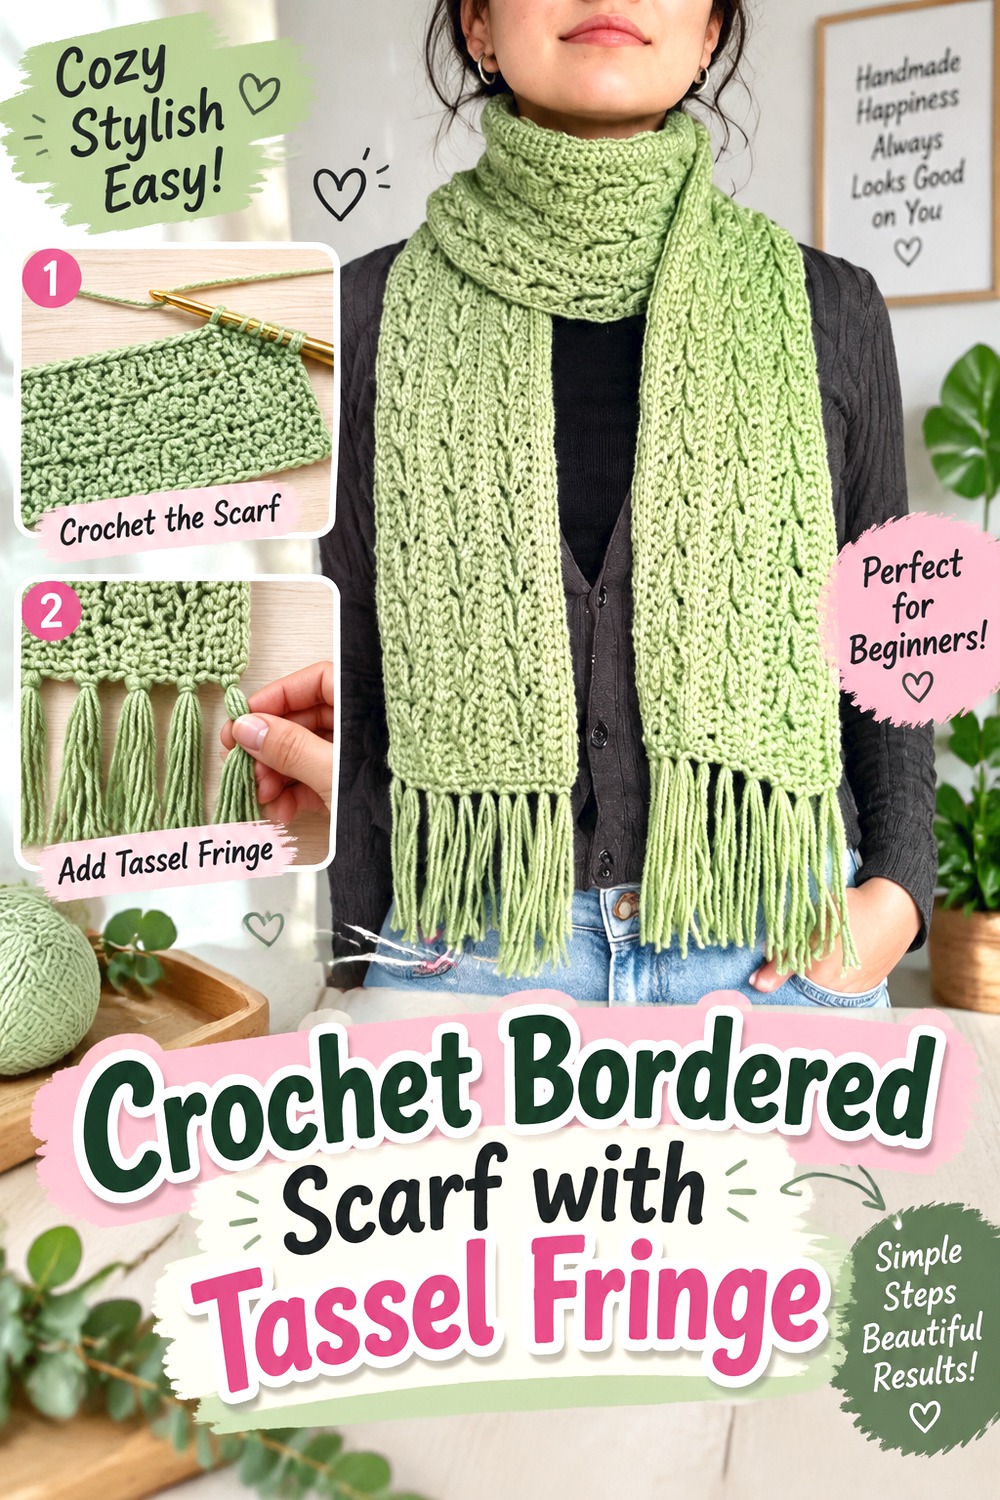
This design adds an important element that many basic fringe scarves skip: a defined border before the fringe is attached. Cherilyn Q’s tutorial separates the scarf construction, border, and fringe into visible stages, making it a useful reference when you want the finishing edge to look deliberate.
A border can visually frame the scarf and provide a clearer transition from the main stitch pattern to the hanging tassels. That makes this idea especially suitable when the scarf body contains texture or open stitches that would otherwise end abruptly. The border also gives you another customization decision: match it to the main fabric for continuity or use contrast to create a stronger frame.
A Border Can Create a Cleaner Fringe Foundation
When fringe is attached directly to an irregular or open stitch edge, the spacing can be dictated by whatever openings happen to be available. A deliberate border can create a more consistent visual foundation. Before adding fringe, look across the entire short edge and decide how the bundles will be distributed. Avoid forcing extra groups into crowded areas merely to achieve a particular count; even-looking spacing matters more than filling every possible attachment point.
Contrast at the Edge Changes the Whole Scarf
A border in the same yarn blends into the scarf body and keeps the tassels as the main finish. A contrasting border creates a strong horizontal line before the vertical fringe begins. If the scarf already contains several colors, another contrast may be unnecessary. For a mostly solid scarf, however, the border offers a restrained place to introduce a second shade without turning the whole project into stripes or blocks.
Original Tutorial and Creator Credit
Creator: Cherilyn Q
Crochet Seamless Gradient Fringe Scarf
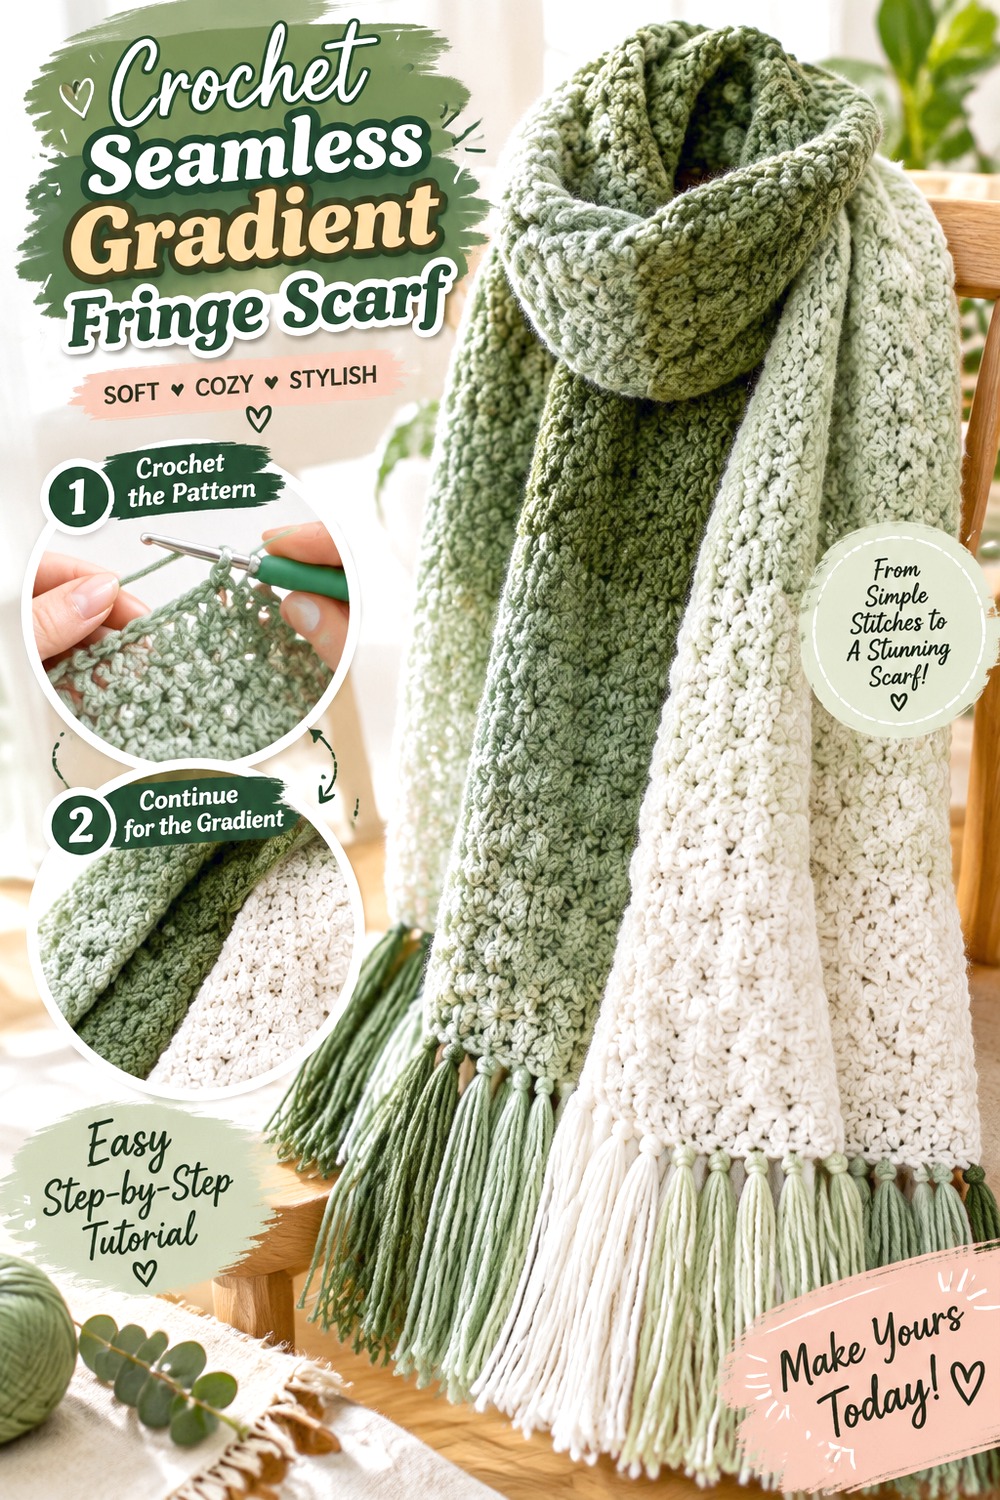
A gradient or long color-change yarn can make fringe planning more interesting because the color sequence is part of the finished design. Rich Textures Crochet’s Daydreamer Scarf tutorial uses color changes across the scarf and specifically accounts for yarn used in the fringe so the finished color effect remains connected.
This approach is more deliberate than simply finishing a gradient scarf with whatever yarn remains. It works well when the progression of color is one of the main reasons you chose the yarn in the first place. The scarf does not need extra surface decoration to attract attention; the shifting color provides the movement, while the fringe extends that story at the ends.
Reserve Fringe Yarn Before the Gradient Is Gone
With a solid color, fringe can usually be cut from any remaining portion of the same yarn. A gradient is less forgiving because the shade available at the end of the skein may not match the section where you want the fringe to continue. If color continuity matters, decide on the fringe strategy early. Separating the needed yarn before completing the body can prevent a situation where the only remaining shade creates an abrupt or unintended end treatment.
Avoid Letting the Fringe Break a Smooth Color Transition
Look at the completed scarf as a whole before choosing which colors appear at each end. Matching fringe to nearby fabric can make the transition feel continuous, while intentionally contrasting it creates a defined visual stop. Neither requires copying the exact color sequence from another scarf. The useful checkpoint is simply to lay the candidate strands against the finished fabric and see whether the change looks intentional rather than accidental.
Keep Additional Texture Subordinate to the Gradient
A strong gradient already creates visual movement, so an extremely elaborate fringe treatment can compete with it. Straight or moderately grouped fringe often allows the changing yarn to remain the central feature. If you do want knots or twists, sample them against the scarf before committing to both ends. The more decorative the fringe becomes, the more important it is to check that the color transition can still be read clearly from a normal viewing distance.
Original Tutorial and Creator Credit
Creator: Rich Textures Crochet
Crochet Wattle Stitch Fringe Scarf
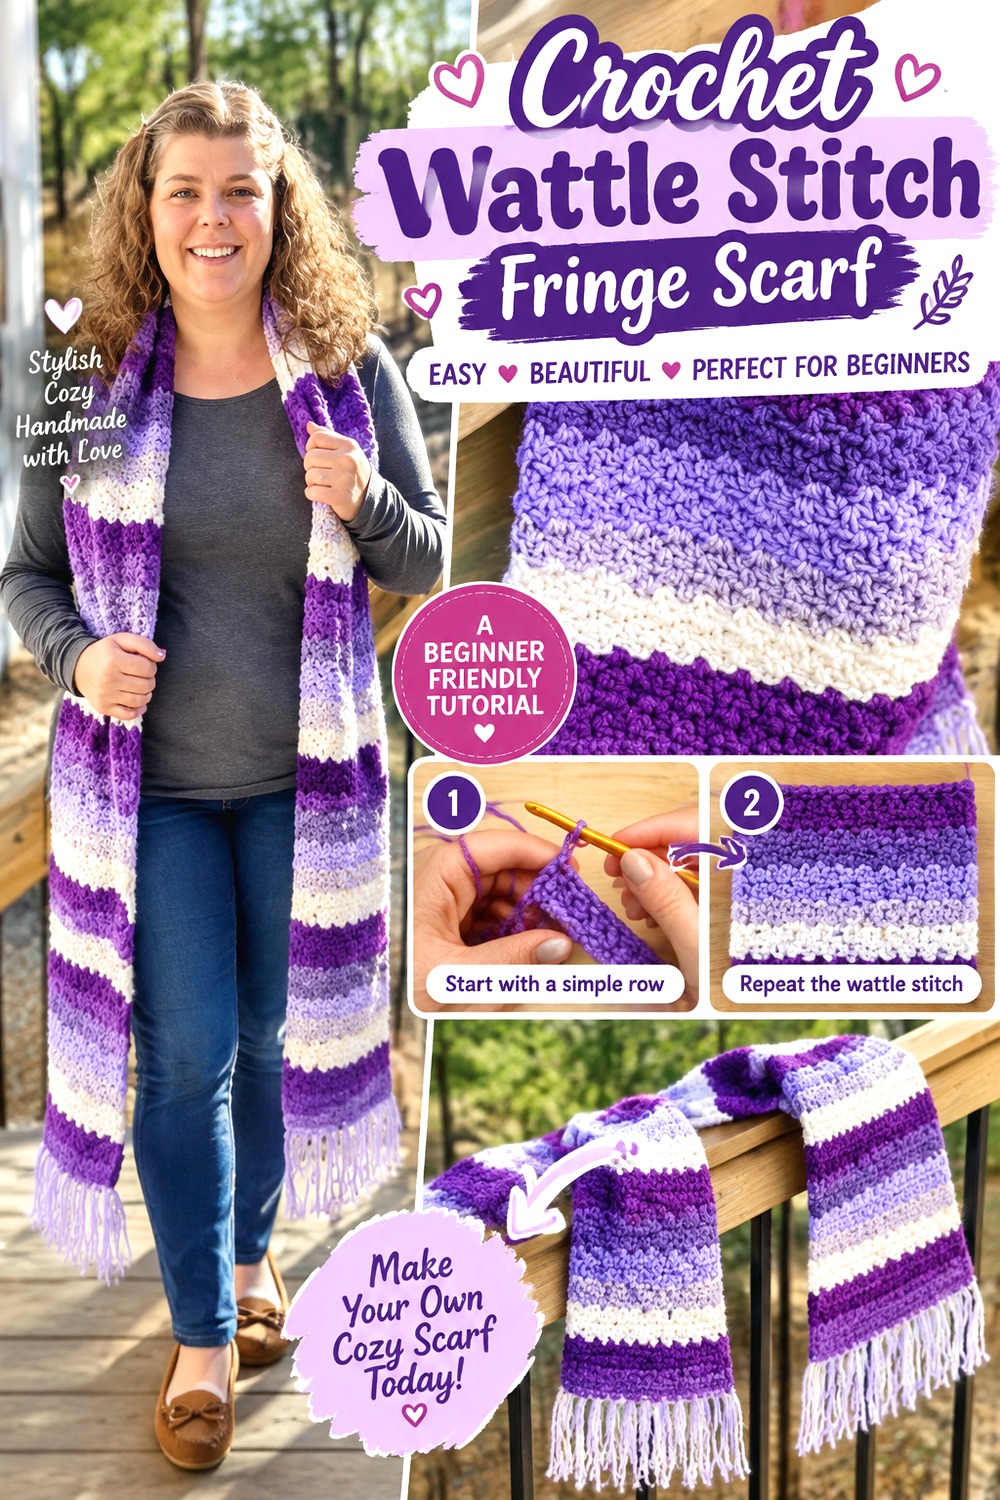
Wattle stitch gives this scarf a compact, pebbled texture that is more pronounced than a plain double-crochet rectangle but less visually dominant than cables. OkieGirlBling’n’Things demonstrates the Wattle Scarf with striped yarn, and the accompanying project information notes that fringe can be added as an optional finish.
That combination makes the design a useful middle ground for readers who want texture and color without several separate construction techniques. Self-striping yarn can create much of the visual variation automatically, while the fringe can either stay simple or repeat the changing colors at the ends. The small-scale texture also works well when you want the scarf surface to remain interesting at close range.
Small Texture Helps Stripes Feel More Integrated
Straight horizontal rows can sometimes make self-striping yarn look strongly banded. A textured stitch breaks up those transitions and gives each color section more surface variation. When choosing yarn, compare whether you want long, calm color changes or frequent narrow shifts. The stitch does not control the yarn’s repeat length, so the finished stripe rhythm will depend on both the yarn and the width of your particular scarf.
Treat the Fringe as Optional Visual Weight
Because the scarf already has texture and color movement, it can look finished even before fringe is added. That makes the edge treatment a true design choice. Hold a few sample strands against the end and compare the scarf with and without them. If the body already feels visually busy, restrained fringe may be enough. If you want a more traditional winter-scarf silhouette, fuller fringe can add the familiar vertical finish without changing the stitch pattern.
Original Tutorial and Creator Credit
Creator: OkieGirlBling’n’Things
Crochet Textured Stripe Scarf with Twisted Fringe
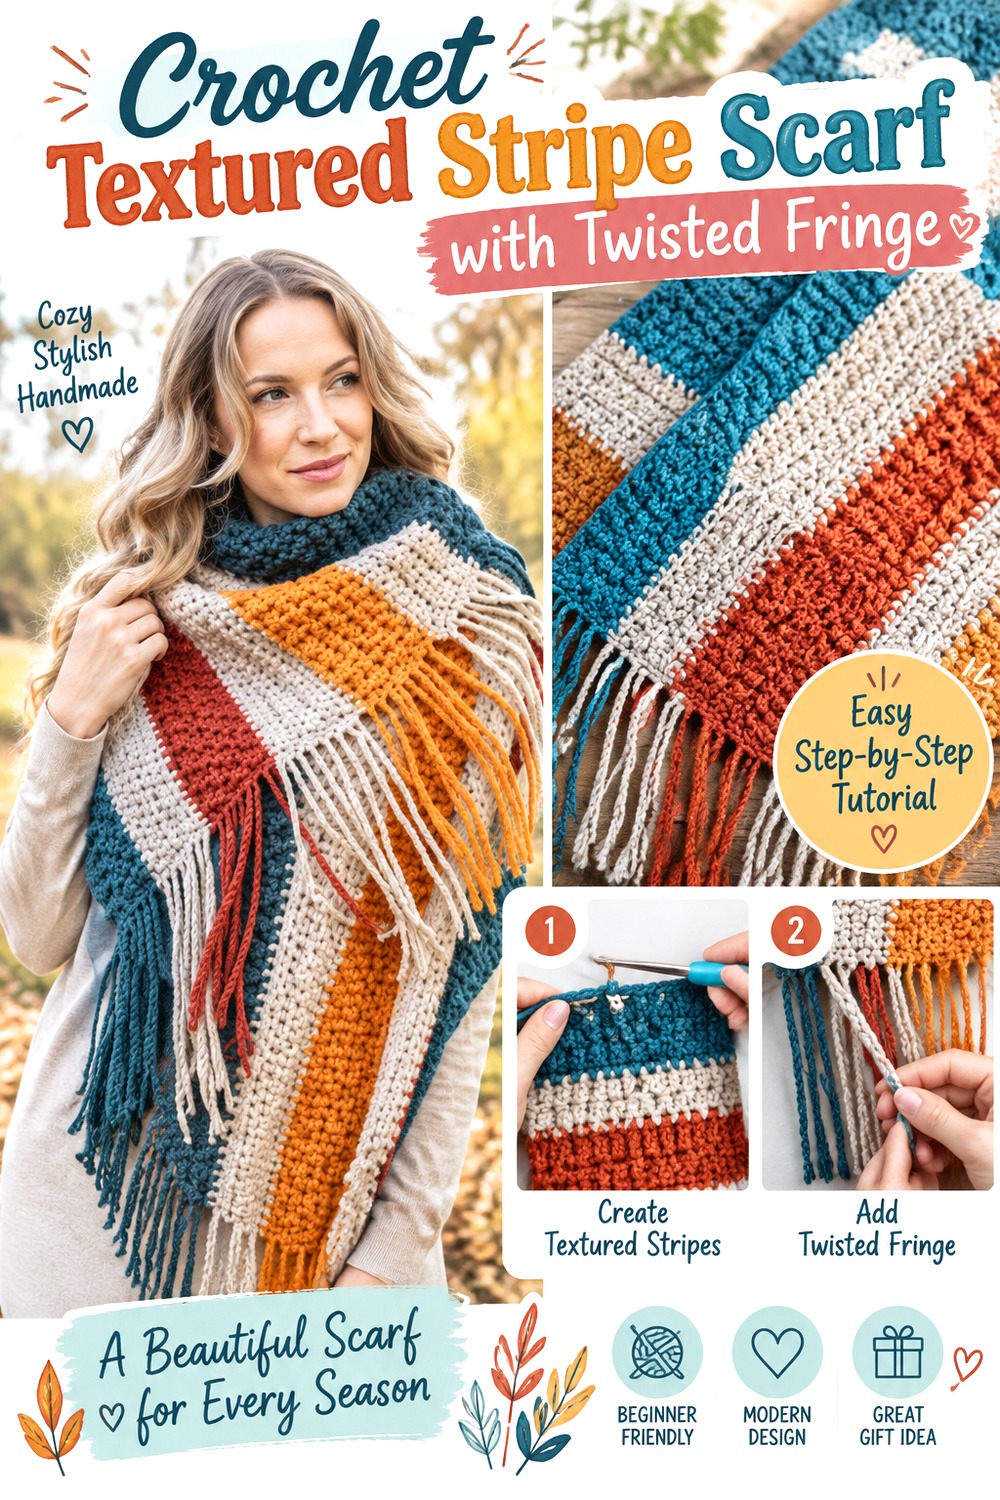
Twisted fringe gives this striped scarf a noticeably different finish from loose tassels. The Turtle Trunk’s Bonfire Scarf tutorial combines alternating textured stripes with twisted fringe and includes the finishing treatment as part of the scarf tutorial.
This is a strong choice when you want the fringe itself to look engineered rather than casually cut. The twisted strands create defined cords that hold their identity beside the scarf’s striped body. Because both the fabric and the edge contain noticeable detail, the design works best when those elements support each other. The twist should frame the stripe pattern, not create an unrelated second focal point.
Twisted Fringe Needs Consistent Tension
Two pieces cut to the same length can finish differently if one is twisted much more tightly than the other. Make a few sample cords and compare their final hanging length before completing the entire edge. Once you find the degree of twist you prefer, use the same visual standard for the remaining strands. Perfect mechanical uniformity is unnecessary, but large differences will show clearly because each cord has a defined outline.
Echoing Stripe Colors Creates a Deliberate Finish
Twisted fringe provides another opportunity to repeat the scarf palette. You can keep individual cords in one color or combine colors depending on the look you want. Before deciding, place the finished scarf flat and check how the stripe colors reach each short end. Fringe that relates to the nearby stripe can extend the pattern visually, while a single neutral fringe color can calm a scarf with several contrasting bands.
Test the Cord Movement Before Making Every Strand
Twisted fringe behaves differently from loose yarn. It tends to move as a cord instead of separating into many fibers, so the finished edge can appear cleaner and slightly more structured. Make one finished cord and move the scarf as it would be worn. If the cord feels too stiff or springs upward, adjust the twist or yarn choice before multiplying the treatment across both ends.
Original Tutorial and Creator Credit
Creator: The Turtle Trunk
Crochet Chunky Pocket Scarf with Fringe
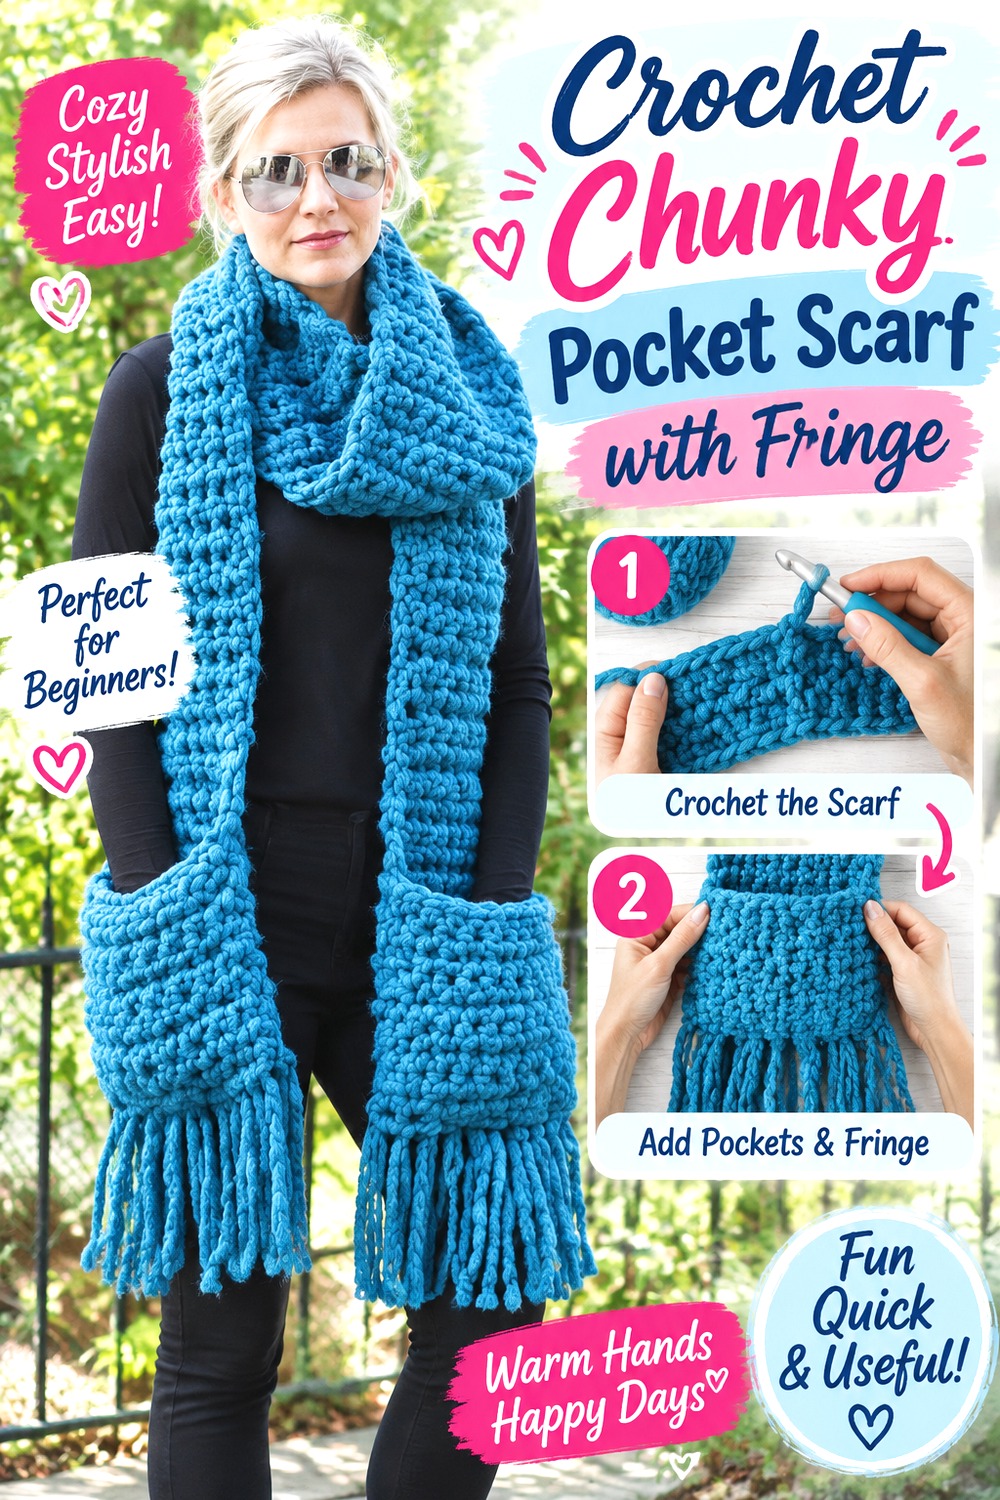
A pocket scarf changes the project from a simple neck accessory into a more functional wrap-style piece. Melanie Ham’s tutorial shows a chunky crochet scarf with pockets and fringe, giving this idea a noticeably different silhouette from the other straight-ended scarves in the collection.
The pockets add fabric, thickness, and a specific placement decision that regular fringe scarves do not require. This style can be useful for casual outerwear when you like having somewhere to rest your hands, but the pocket location needs to work with the wearer rather than simply matching a photograph. Fringe below the pockets extends the ends visually and helps retain the classic scarf appearance.
Pocket Height Should Follow the Wearer
Do not finalize pocket placement only by measuring down from one end. Drape the scarf around the intended wearer or a suitable form and check where the hands naturally reach. A pocket that sits too low may pull the scarf forward when used; one that is too high can feel awkward. Placement also changes when the scarf is wrapped differently, so check it in the wearing configuration you expect to use most often.
Extra Layers Add Weight at the Scarf Ends
A pocket doubles the crochet fabric over part of each end, and fringe adds more yarn below it. On a chunky scarf, those elements can create noticeably more weight than the center section. Before sewing or securing everything permanently, compare the drape with the pockets positioned in place. If the ends pull too strongly, a lighter fringe treatment may balance the design better than adding the fullest possible tassels.
Keep Fringe Clear of the Pocket Opening
The visual transition from pocket to fringe should not interfere with how the pocket is used. Check that loose strands begin below the functional opening and do not migrate into it when the scarf moves. A neat lower border can help separate the two areas visually. This is also a good reason to finish and check the pockets before cutting the full amount of fringe—you can judge the remaining space instead of planning the edge in isolation.
Original Tutorial and Creator Credit
Creator: Melanie Ham
Crochet Planned Pooling Plaid Fringe Scarf
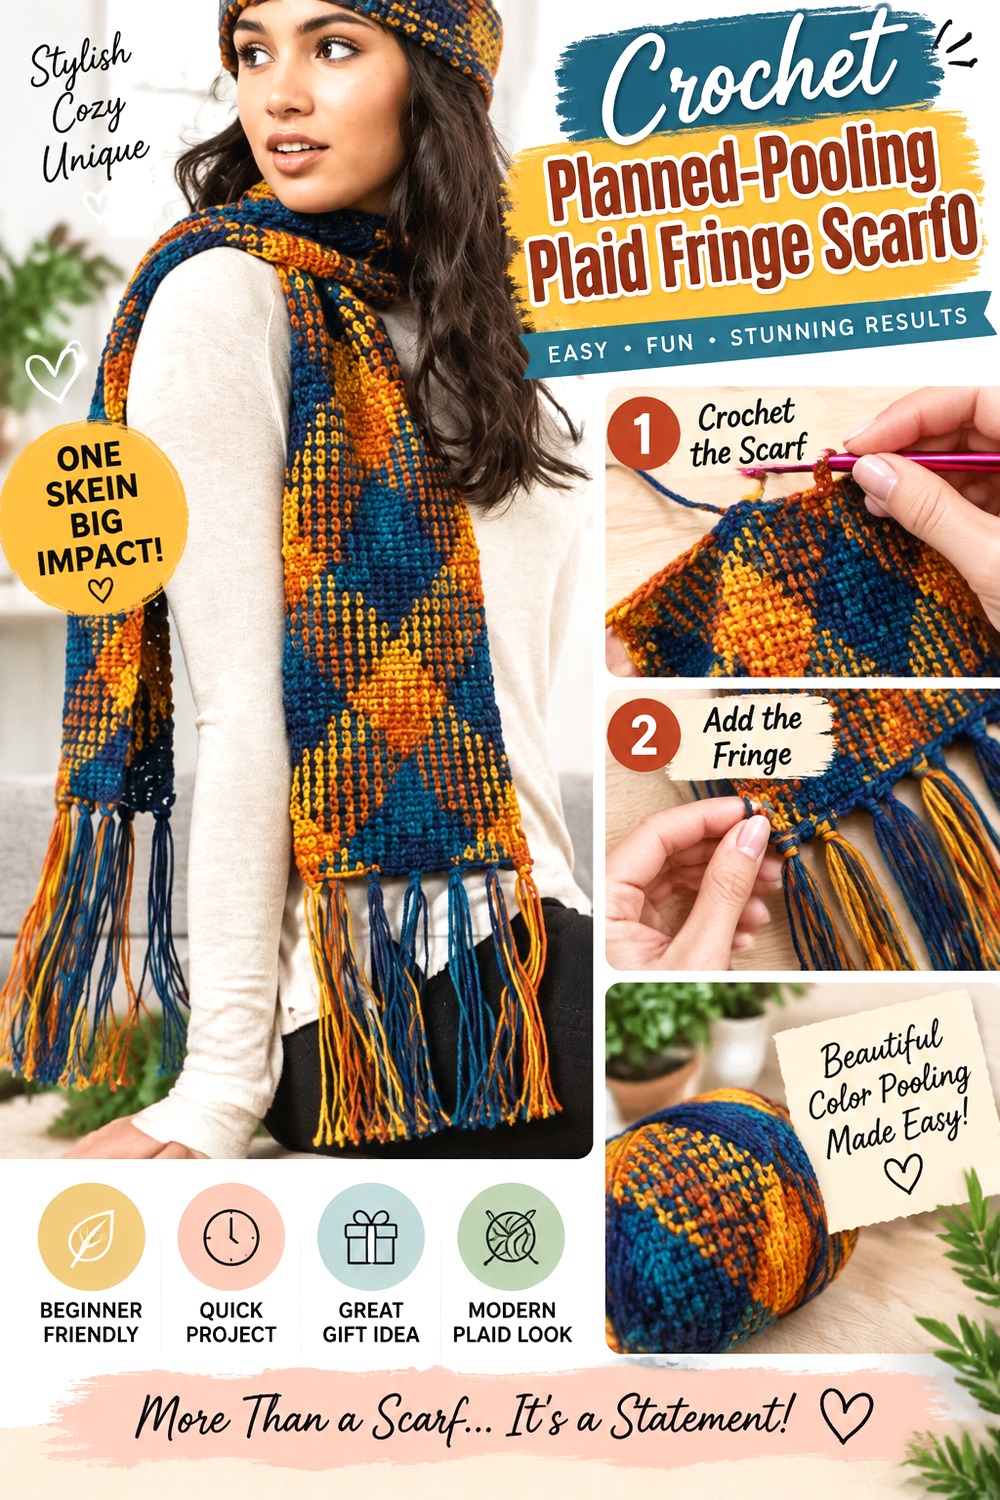
Planned pooling uses the color repeat within a variegated yarn to create an intentional plaid-like arrangement, so yarn selection and tension have a much larger role than they do in an ordinary solid scarf. GoodKnitKisses demonstrates a planned-pooling plaid fringe scarf using a linen/moss-stitch approach.
This is one of the most technique-driven ideas in the roundup. The fringe provides a conventional scarf finish, while the body gets its impact from controlled color placement rather than added surface stitches. It is best chosen because you want to explore pooling itself; substituting an unrelated yarn may remove the effect that makes the design distinctive.
The Yarn Repeat Is Part of the Construction Decision
For planned pooling, “variegated yarn” is not specific enough. The color sequence needs to behave in a way that can be intentionally aligned. Before planning a full scarf, examine the yarn repeat and use the tutorial’s guidance to understand how the colors are being managed. If you substitute yarn, do not assume the same visual result will appear merely because the replacement contains similar colors.
Tension Changes More Than the Fabric Width
In a conventional scarf, small tension changes may mainly alter dimensions and drape. In planned pooling, they can also shift where colors land. That makes consistency particularly important. If the plaid effect begins to drift, investigate tension and the color sequence rather than assuming the solution is to add or remove decorative elements. Correcting the body first produces a much stronger finish than using fringe to distract from a disrupted pattern.
Keep the Fringe Quieter Than the Plaid
The pooled color arrangement is the reason this scarf stands out, so a highly elaborate edge can compete with it. Straight fringe lets the eye finish at a familiar scarf border while still giving the plaid most of the attention. Consider using colors already present in the nearby repeat rather than introducing an unrelated shade. The resulting edge can reinforce the palette without becoming a second colorwork system.
Original Tutorial and Creator Credit
Creator: GoodKnitKisses
Crochet Multicolor Fringe Scarf
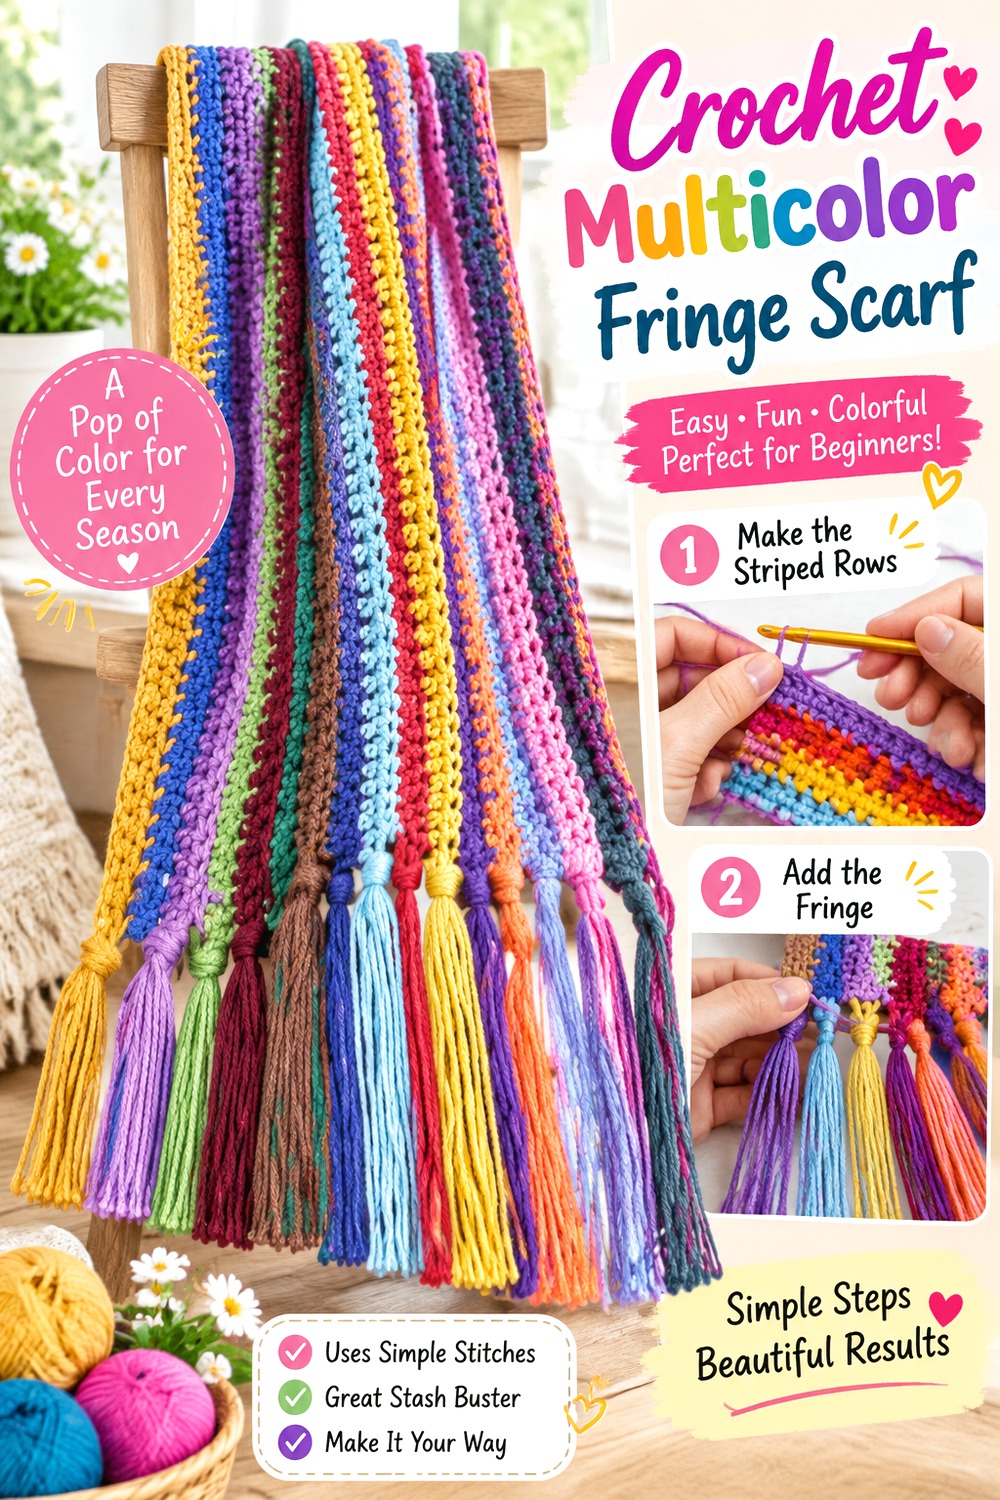
This multicolor option uses repeated color changes across the scarf and then carries the finishing through to fringe. The Crochet Crowd’s beginner scarf tutorial demonstrates the color-based project and includes a dedicated fringe portion, making it a useful source when your main design interest is combining several shades in one scarf.
Unlike a gradient, where hues flow gradually because of the yarn itself, a multicolor scarf gives you more direct control over contrast and sequence. That also means more planning. The fringe can repeat the palette, emphasize selected colors, or become visually simpler than the body. This idea suits makers who enjoy arranging color but do not necessarily want complicated textural stitches competing with it.
Plan the Color Rhythm Before You Judge Individual Shades
Colors that look good side by side in skeins can behave differently once repeated across a long scarf. Lay the chosen yarns in sequence and consider how often each one should return. A dominant color can create continuity, while equal amounts of several high-contrast shades produce a busier rhythm. You do not need to duplicate the tutorial palette; the useful lesson is to evaluate the entire sequence rather than choosing each stripe independently.
Fringe Can Use Up Awkward Small Color Amounts—With Planning
A multicolor fringe can be a practical place to repeat shorter remaining lengths, but do not rely on scraps without first checking that the amounts are sufficient for consistent bundles. Decide which colors will appear at each end and reserve them as needed. If one shade is scarce, use it as an accent rather than creating an unfinished-looking section where the color suddenly disappears halfway across the edge.
Manage Ends Before the Fringe Makes Them Harder to Reach
Multiple color changes can leave more finishing work than a one-color scarf. Complete the necessary end management before filling the short edges with fringe. Once numerous strands are attached, identifying and reaching an unsecured yarn end near the same area can become frustrating. Separating those tasks also makes it easier to inspect the actual scarf edge before the fringe conceals part of it.
Original Tutorial and Creator Credit
Creator: The Crochet Crowd
Crochet Wheat Texture Fringe Scarf
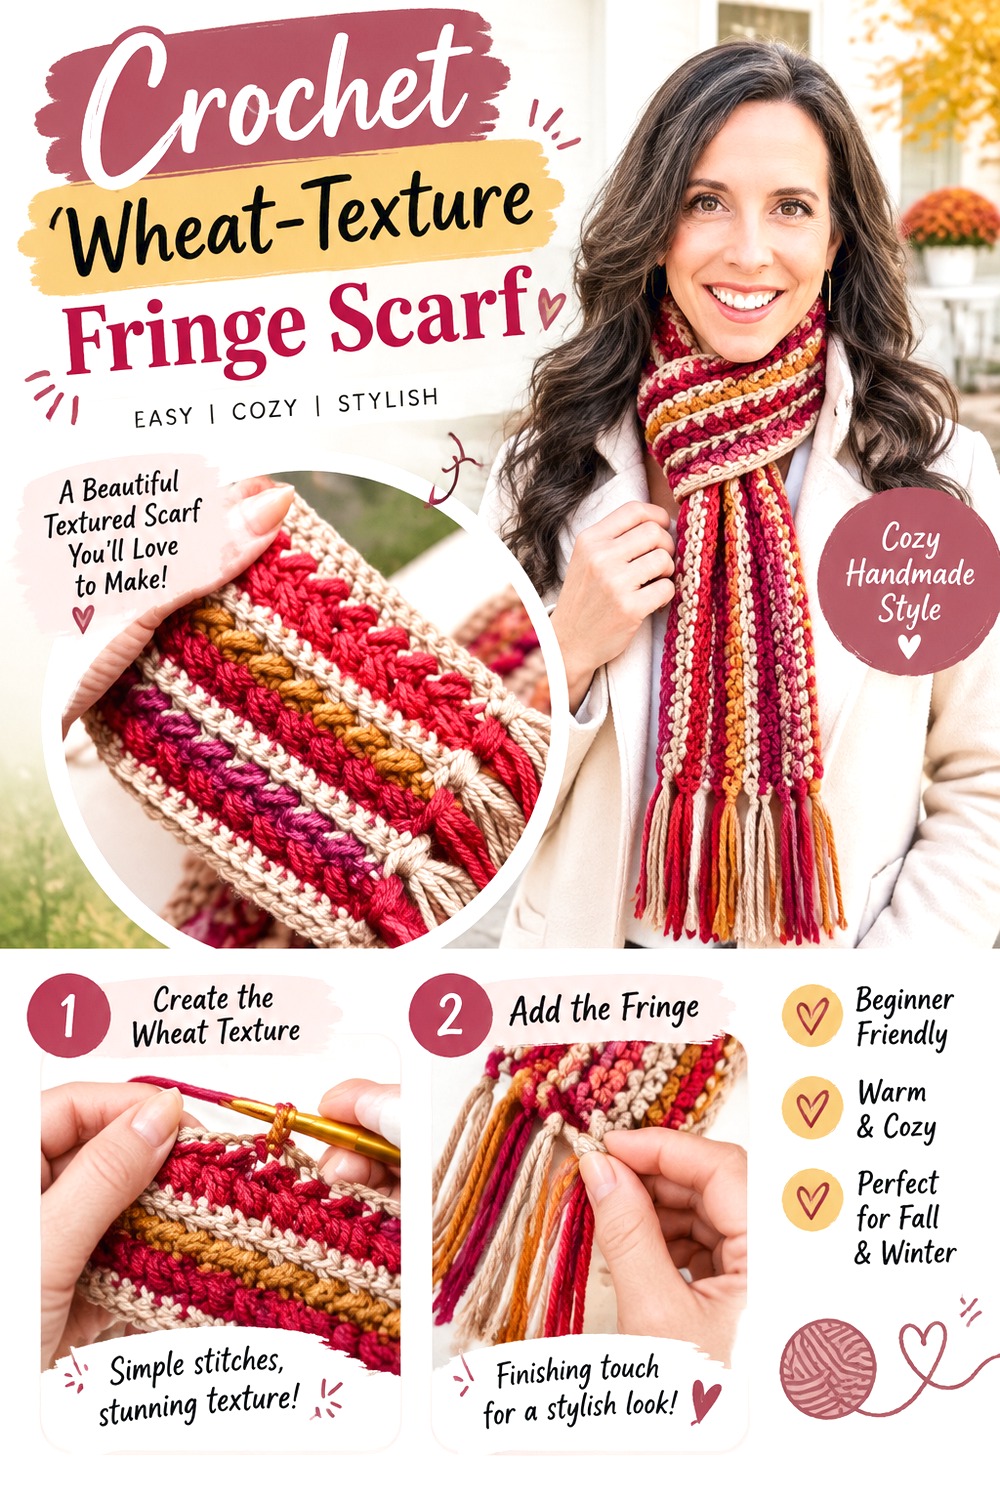
A raised wheat-like texture gives this scarf a more dimensional surface than moss stitch or plain rows while keeping the overall shape familiar. Briana K’s tutorial teaches the Wheat Stitch Scarf and discusses finishing choices that include fringe as well as ribbing.
This project is useful when stitch definition is more important to you than elaborate colorwork. The repeated texture becomes the main design feature, and fringe can soften the straight ends without drawing too much attention away from it. Because the texture itself has relief, yarn selection matters: some fibers show those raised details much more distinctly than others.
Choose Yarn That Lets the Wheat Texture Read Clearly
Dimensional stitch patterns can disappear in yarn with a very fuzzy surface or in highly variegated color combinations where rapid changes obscure the relief. If the texture is the reason you chose this scarf, crochet a small swatch and look at it in normal lighting. A smooth yarn or a calmer color often makes raised details easier to see, while halo or busy color creates a softer, less graphic effect.
Compare Fringe with a More Structured End Finish
The source project presents fringe among the finishing choices, so consider what you want the edge to contribute. Fringe adds movement and gives the scarf a traditional hanging finish. A firmer ribbed or otherwise structured edge emphasizes the fabric itself. If you choose fringe, keep its density moderate enough that the wheat texture remains visible all the way to the short end rather than disappearing behind a very heavy curtain of strands.
Wait to Trim Until the Raised Fabric Has Settled
A textured scarf may not hang exactly like a flat, plain-stitch rectangle. Once appropriate finishing has allowed the fabric to settle, the short edges may sit slightly differently than they did straight off the hook. Attach the fringe after that stage and trim only when the scarf is hanging naturally. This produces a more reliable visual line than matching strands to an unfinished piece that may still change in drape.
Original Tutorial and Creator Credit
Creator: Briana K
Crochet Granny Style Fringe Scarf
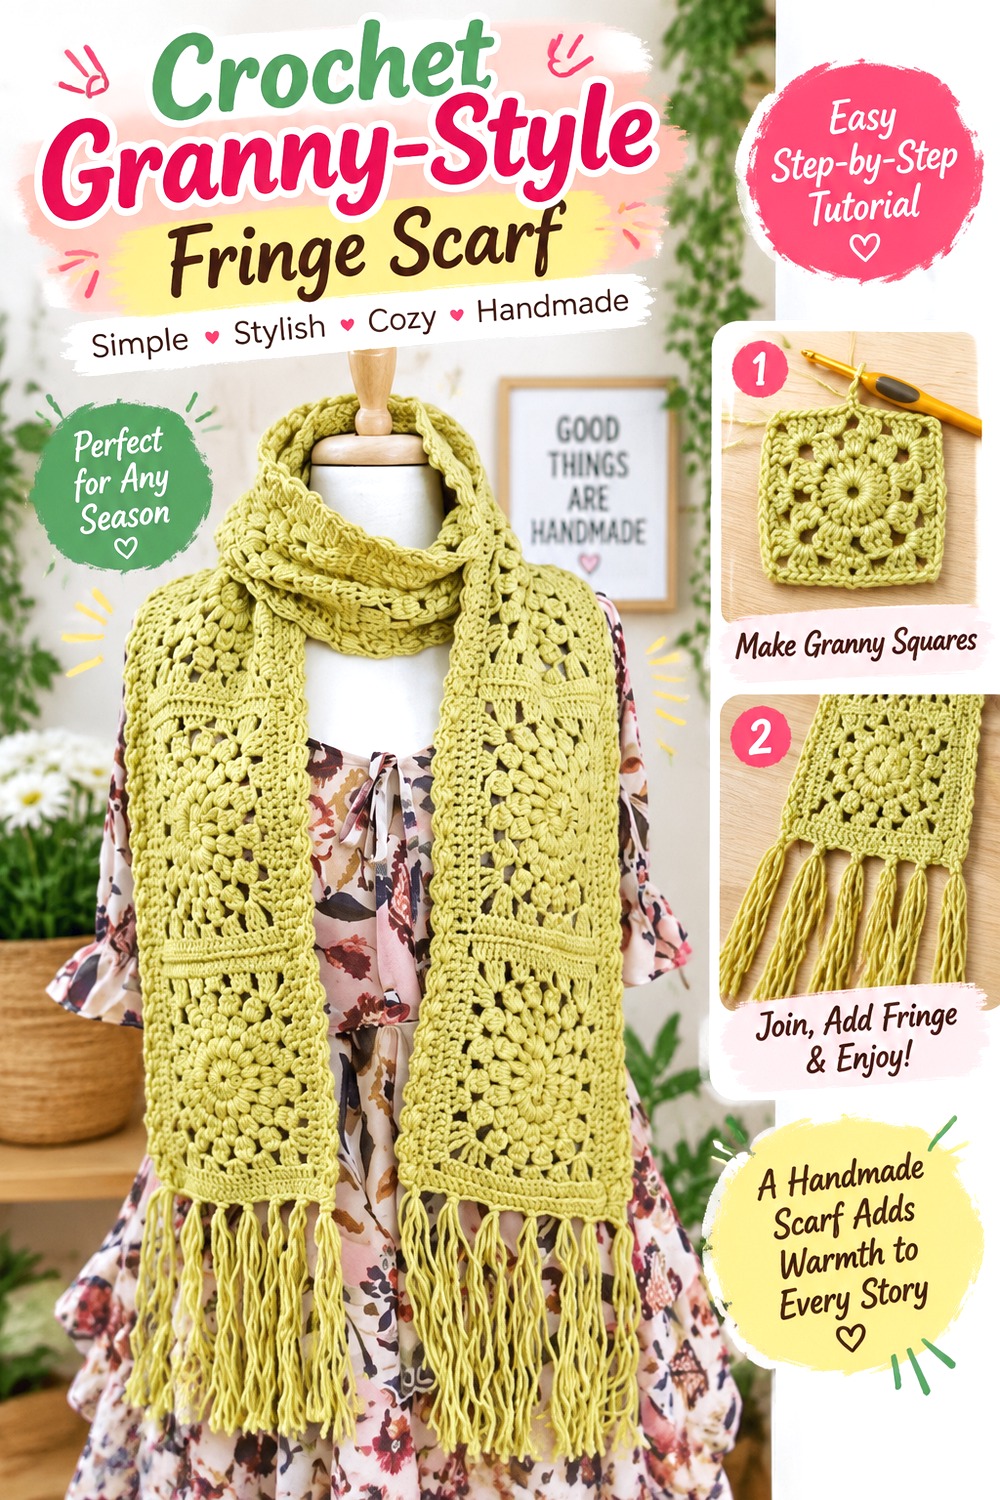
Granny-style crochet gives a scarf more open space and a recognizable clustered texture, making this option noticeably lighter-looking than dense ribbing or cables. Sirin’s Crochet demonstrates a granny scarf and includes the fringe stage in the same tutorial.
The open structure makes this a good direction when you want color and stitch rhythm to show without creating a solid block of fabric. It can work in one shade, but granny-style fabric also gives you natural opportunities for stripes or repeated color changes. Fringe reinforces the casual, handcrafted character of the scarf while providing a fuller finish at the otherwise airy short edges.
Let the Open Clusters Guide Fringe Spacing
An airy granny edge may offer fewer or more visually obvious attachment spaces than a dense row. Instead of forcing fringe into every opening, step back and evaluate the spacing across the entire end. Too many bundles can pull individual spaces open and create a bottom edge that feels much heavier than the scarf body. Even distribution and appropriate weight are more important than maximizing the number of strands.
Block Before Judging the Granny Fabric’s Final Width
Open stitch patterns can respond noticeably to finishing, depending on the fiber and construction. If blocking is suitable for your yarn, complete it before deciding that the scarf is too narrow or before making final fringe measurements. The fabric should be evaluated in the state in which it will actually be worn. This also lets you attach fringe to a settled edge rather than one that may widen or relax afterward.
Use Fringe to Repeat Color Without Adding Another Stripe
If you have several colors in the scarf, the fringe can repeat them vertically without adding more horizontal bands. This is a useful way to bring accent shades back into the design at the ends. Arrange sample strands first so the mix appears intentional. A random handful can work aesthetically, but an evenly distributed color plan often looks calmer next to the regular rhythm of granny clusters.
Original Tutorial and Creator Credit
Creator: Sirin’s Crochet
Crochet Cable Fringe Scarf for Left Handed Makers
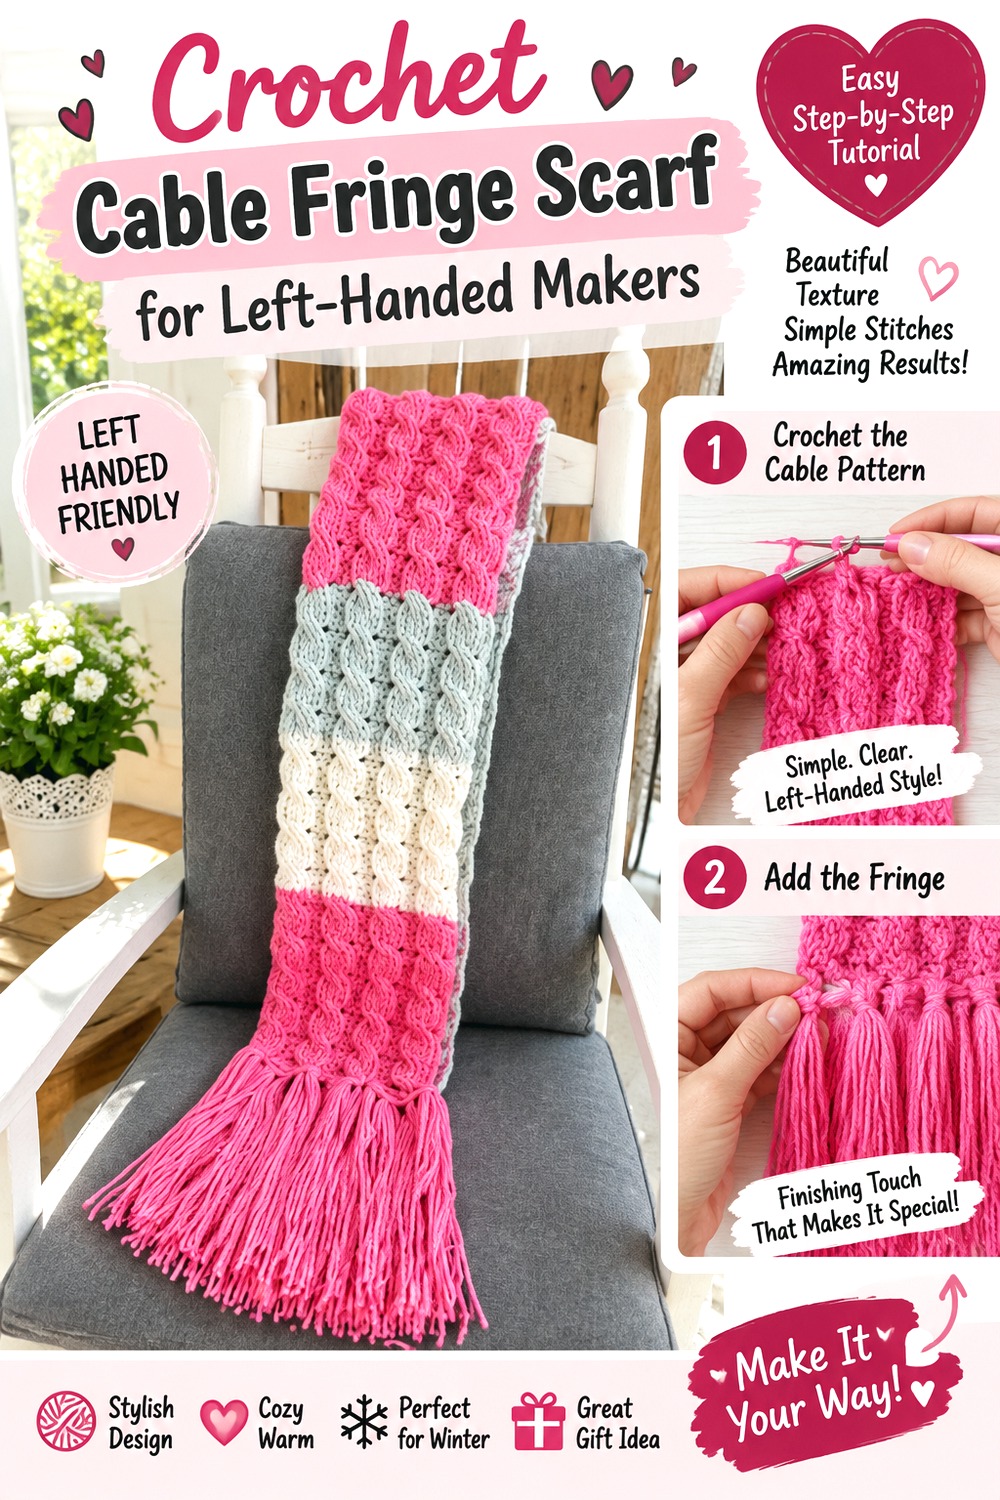
Cable texture creates one of the most substantial-looking scarf surfaces in this collection. Fiber Theory’s tutorial is specifically presented for left-handed crocheters and demonstrates a cable scarf finished with fringe, making it useful for readers who prefer instruction shown from that orientation.
The strong vertical or raised cable effect gives the scarf plenty of design interest before fringe is added. For that reason, the end treatment works best as a supporting detail rather than something that hides the cable structure. Cable fabrics can also feel thicker than simpler stitch patterns, so drape, yarn bulk, and fringe weight deserve extra attention before the finishing stage.
Give Raised Cables Enough Stitch Definition
The cable effect relies on visible relief. A very fuzzy yarn can soften that relief, while a smoother yarn tends to make the crossing or raised sections easier to read. Color matters too: highly busy variegation may compete with the cable shadows. If the dimensional surface is your priority, make a sample and view it from several angles before deciding that the yarn is a good match.
Heavy Texture Calls for a Balanced Fringe
A cable scarf already has substantial visual weight. Very thick, densely packed fringe can make the short ends appear disproportionately heavy. Start with fewer sample bundles than you think you need and add more only after seeing the overall scarf. This approach also reduces the chance of loading an already thick fabric with unnecessary extra yarn. The fringe should finish the cable scarf, not overpower the texture that required more visual attention to create.
Left-Handed Presentation Can Be the Deciding Factor
Two scarf tutorials may produce similarly textured results but feel very different to follow depending on how the instruction is presented. If you crochet left-handed and find mirrored demonstrations easier to interpret, that learning format is a meaningful reason to choose this project over another cable scarf. Still verify all project-specific details directly in the source rather than assuming every cable construction or fringe method transfers unchanged between tutorials.
Original Tutorial and Creator Credit
Creator: Fiber Theory
Crochet One Skein V Stitch Fringe Scarf
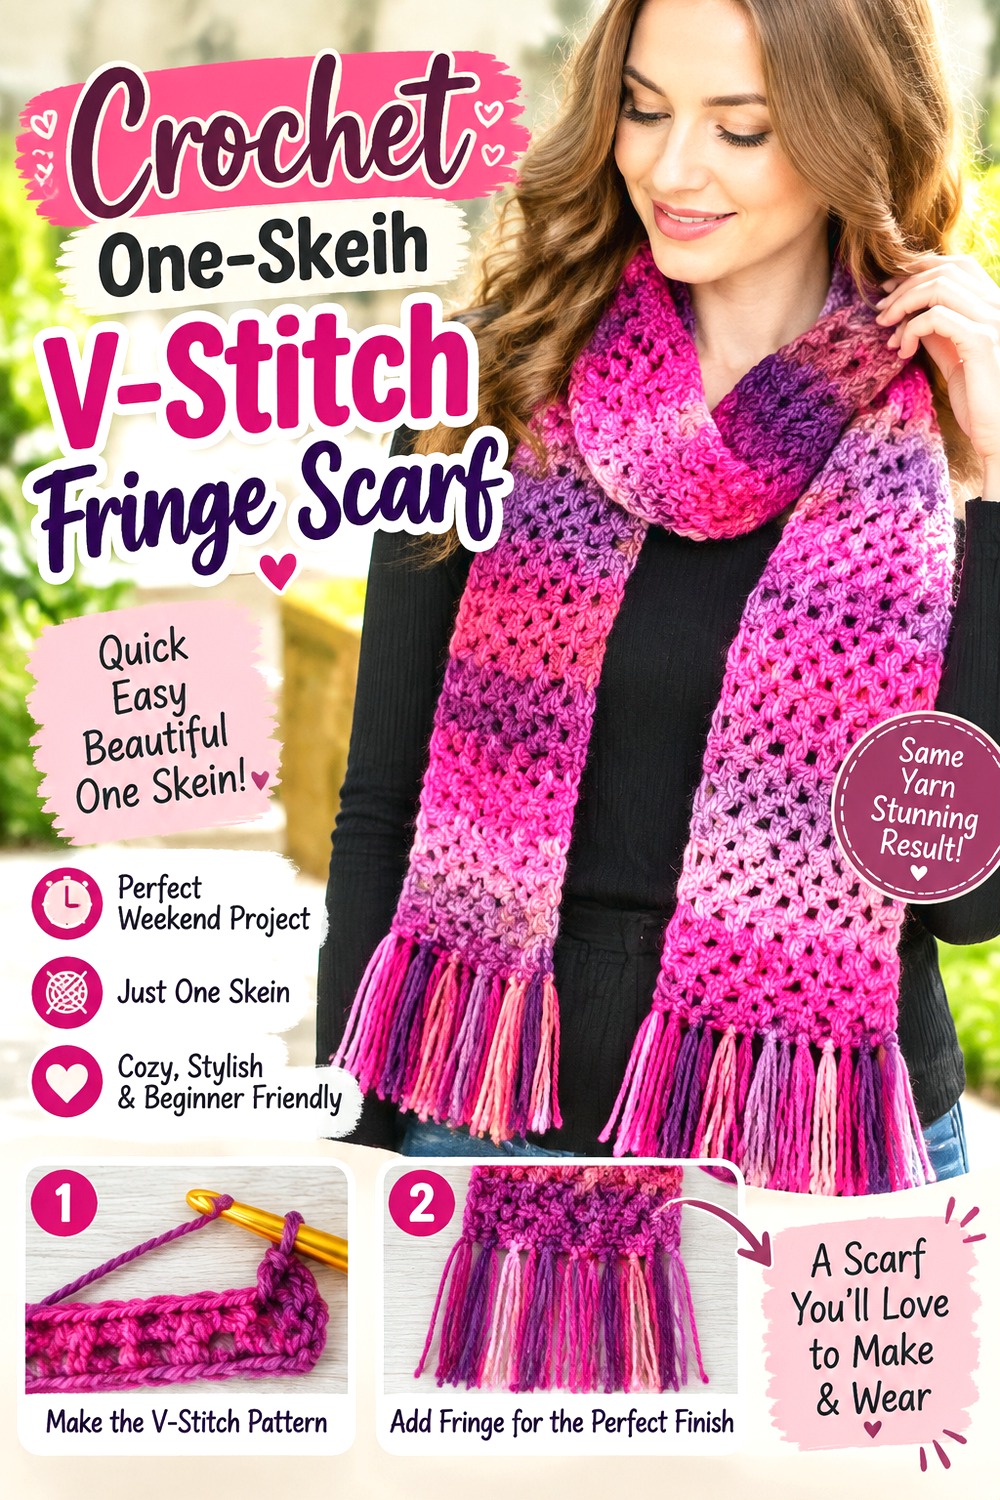
An open V-stitch gives this scarf a lighter structure and leaves plenty of space for the yarn itself to remain visible. Amanda Saladin’s tutorial covers the Unforgettable One Skein Scarf, while the associated project information identifies the V-stitch construction and fringe finish.
The one-skein concept is appealing for a contained project, but it should not be interpreted as a promise that every substitute skein will be sufficient. Skeins vary greatly in yardage, weight, and fiber construction. This idea works best when you check the source material requirements and compare them with the exact yarn you intend to use, especially if you also want generous fringe.
Reserve Yarn for Fringe Instead of Using the Skein to the End
A scarf body can continue consuming yarn until very little remains, but fringe needs a predictable amount reserved for cutting. If you are working within a limited quantity, decide on a sample fringe bundle early and estimate your needs from the planned number of attachment points. Treat that as project planning rather than a universal yardage formula. The exact amount changes with strand length, bundle fullness, yarn thickness, and the width of your scarf.
V-Stitch Keeps the Scarf Visually Open
The V-shaped stitch structure creates more negative space than a dense solid fabric, so the scarf can showcase gradual or variegated color changes without becoming visually heavy. That openness also makes a dense fringe edge more noticeable by contrast. If you want continuity, use a lighter fringe treatment. If you want the ends to feel intentionally heavier, fuller strands can create a strong frame around the airy center.
“One Skein” Depends on the Skein You Choose
Two skeins labeled with the same general yarn-weight category may contain very different lengths of yarn. Fiber content and construction can also change how much fabric a given amount produces. Before substituting yarn, compare the tutorial’s stated requirements with the label information on your chosen skein and account for any fringe you intend to add. Do not assume the project will remain one-skein simply because the original version was designed that way.
Original Tutorial and Creator Credit
Creator: love.life.yarn. by Amanda Saladin
Crochet Rib Look Winter Scarf with Even Fringe
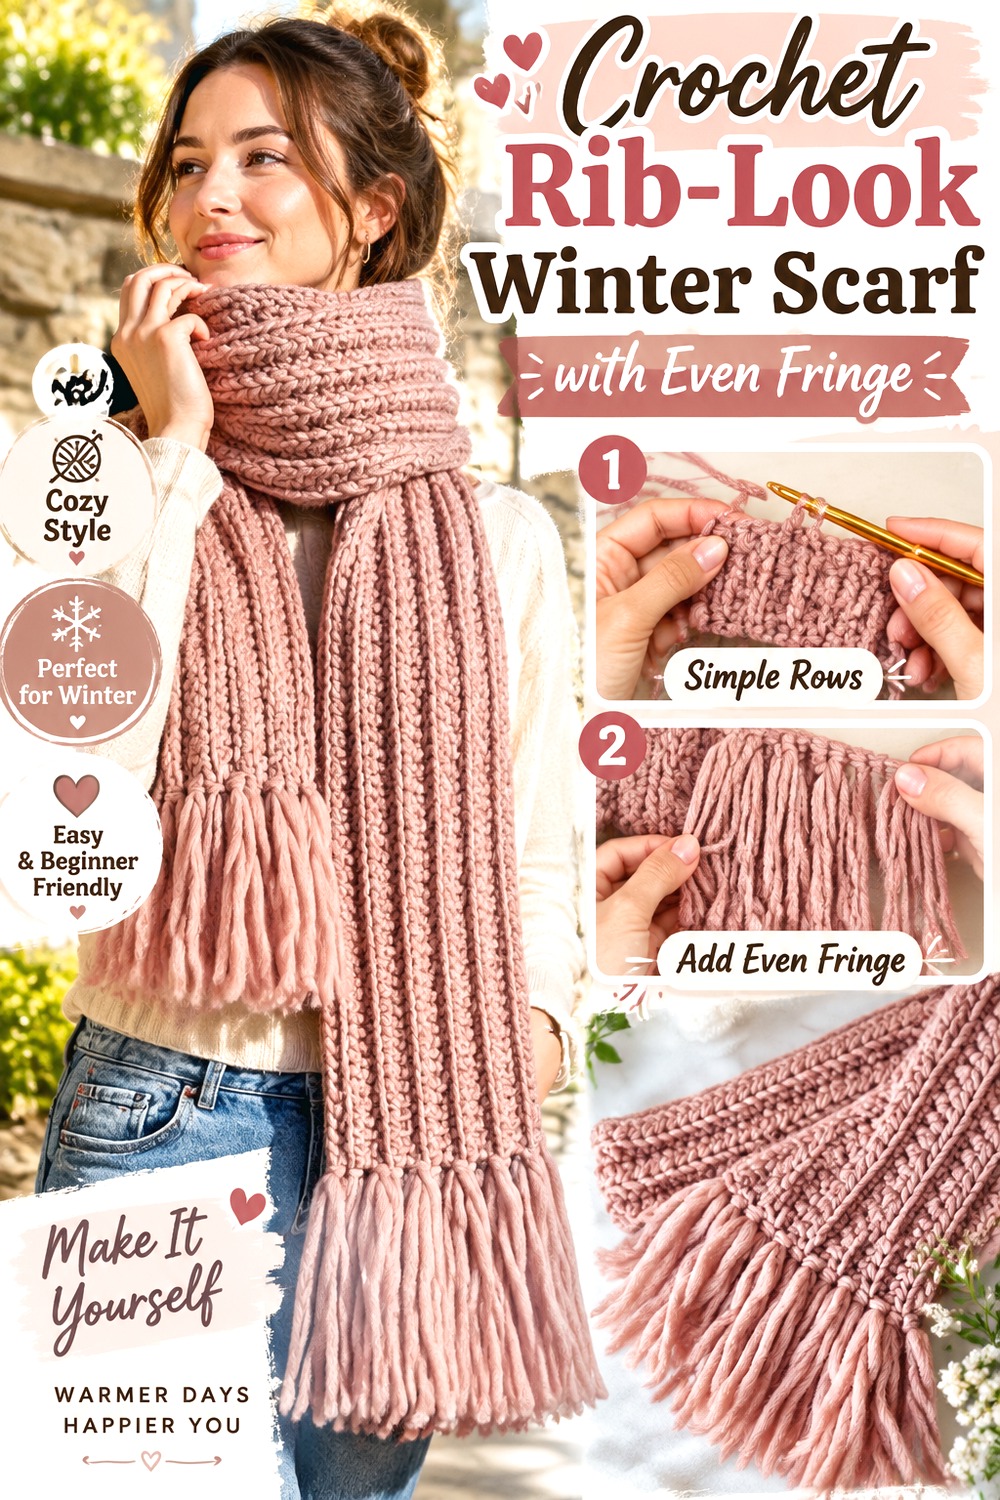
This scarf uses crochet texture to create the appearance of pronounced ribbing, giving it a clean, knit-like surface before fringe is added. Teia Crochet’s tutorial presents a rib-stitch winter scarf and includes a method for producing an even-looking fringe finish.
It is a useful choice for anyone who prefers orderly vertical texture over granny holes, color blocks, or decorative cables. The ribbing already creates strong lines, so the fringe works best when it continues that clean visual language. A smooth yarn can emphasize the ribs and individual strands, while softer halo produces a more blended winter look. Either way, consistency at the short edge becomes especially noticeable.
Straight Fringe Complements the Ribbed Lines
Ribbing creates repeated vertical channels, and evenly hanging fringe naturally extends that direction beyond the body of the scarf. This is one design where a clean cut edge can look more cohesive than an elaborate knotted treatment. Before trimming, let all the fringe strands hang freely. Small differences that seem insignificant while the scarf lies flat can become more noticeable once the strands drop in the same direction as the ribs.
Volume Should Come from the Scarf and Fringe Together
A ribbed scarf can already look substantial because of its raised surface. When choosing fringe density, consider the total silhouette rather than treating the edge separately. Thick yarn plus deep ribbing plus very full fringe can produce a much bulkier result than expected. If you like a cleaner profile, reduce fringe fullness first rather than changing the texture that defines the scarf.
Original Tutorial and Creator Credit
Creator: Teia Crochet
How to Choose Among These Crochet Fringe Scarf Ideas
The biggest difference is not color—it is what you want the scarf and fringe to contribute.
| If you want… | Strong options to compare | Main decision |
|---|---|---|
| A classic scarf with straightforward fringe | Moss Stitch, Soft Double-Crochet, Bordered, Rib-Look | Choose by fabric texture and yarn character |
| Fringe that becomes a design feature | Tunisian Knotted, Textured Stripe with Twisted Fringe | Decide between structured knots and cord-like twists |
| Color as the main attraction | Color-Block Filet, Gradient, Planned Pooling, Multicolor | Plan the fringe colors before using all available yarn |
| A strongly textured scarf | Wattle, Wheat Texture, Cable, Rib-Look | Keep fringe from overpowering the stitch surface |
| A lighter, more open appearance | Filet, Granny-Style, V-Stitch | Check that fringe weight suits the open edge |
| Extra function | Chunky Pocket Scarf | Fit pocket placement before finishing the fringe |
| Maximum chunky impact | Chunky Larks-Head Scarf | Control fringe density so the ends do not become overly bulky |
Conclusion
The most useful way to choose among these 17 crochet fringe scarf ideas is to decide what should lead the design. Pick the planned-pooling, multicolor, gradient, or filet versions when color is the focus. Choose wheat, cables, ribbing, wattle, or Tunisian crochet when surface texture matters more. For fringe that makes its own statement, the knotted and twisted options stand apart, while the pocket scarf adds practical function.
Whichever direction you choose, finish and evaluate the scarf body before cutting all the fringe. That gives you a better basis for judging length, density, color, and edge stability. Use the original tutorials linked with each idea for their exact construction details and creator-specific finishing methods.
Frequently Asked Questions
Can I add fringe to almost any crochet scarf?
Fringe can be added to many scarf designs, but the existing edge should be considered first. A dense, stable short edge can usually support fringe more predictably than very delicate openwork. On an airy scarf, attaching large yarn bundles to a few small spaces may stretch or distort them. Test one or two bundles before finishing the entire edge, and make sure the attachment points are part of a secure crochet structure rather than loose yarn tails.
Should I block a crochet scarf before adding fringe?
When blocking is appropriate for the yarn and project, finishing the scarf body first can make fringe planning easier. The fabric may relax, widen, straighten, or change drape, which affects how the short edges sit. Once the body has reached its intended finished state, you can judge fringe length more accurately. Check the yarn label and the tutorial for suitable care or blocking information rather than assuming every fiber should be treated the same way.
What yarn qualities make crochet fringe look neat?
Smooth yarn with clear plies generally makes individual strands, twists, and knots easier to see, which is useful for a crisp fringe. Yarn with halo or fuzz creates a softer edge where strands visually blend together. Thick yarn builds fullness quickly, while finer yarn usually needs more strands to create the same visual weight. The best choice therefore depends on whether you want defined fringe, soft blended tassels, or a substantial chunky finish.
How can I make the bottom of the fringe look more even?
Cut strands to a consistent starting length, attach all of them, and make the final trim after the scarf has been allowed to hang naturally. Knots and attachment loops can change the effective length slightly, so trimming every strand perfectly before attachment does not guarantee an even finished edge. Twisted fringe needs additional care because differences in twist tension can shorten individual cords by different amounts. Compare the completed cords before making the final adjustment.
How much extra yarn should I save for fringe?
There is no reliable universal amount because fringe usage changes with scarf width, strand length, yarn thickness, number of attachment points, and how many strands go into each bundle. A practical planning approach is to make one complete sample bundle, determine how many similar bundles you expect to use, and reserve yarn accordingly with a margin for trimming or adjustments. This is especially important with gradients, discontinued yarn, or a project intended to stay within one skein.
Can I replace straight fringe with twisted or knotted fringe?
Often you can adapt the finishing concept if the scarf edge is stable enough, but the yarn requirements and finished weight will change. Twisted fringe may shorten as it twists, and decorative knots also consume usable strand length. Both can feel more structured than loose fringe. Make a small sample directly on the finished scarf edge before cutting all your yarn, and follow the original tutorial whenever its construction depends on a specific finishing method.
Is very long fringe practical for an everyday scarf?
Long fringe creates movement, but it can also catch more easily on zippers, handbag hardware, chair arms, and other objects. For a scarf intended for frequent travel or active use, shorter or less dense fringe may be easier to manage. Also consider the intended wearer: long dangling elements are not automatically appropriate for children or situations where snagging is a concern. Practical length should be chosen for the actual use, not appearance alone.