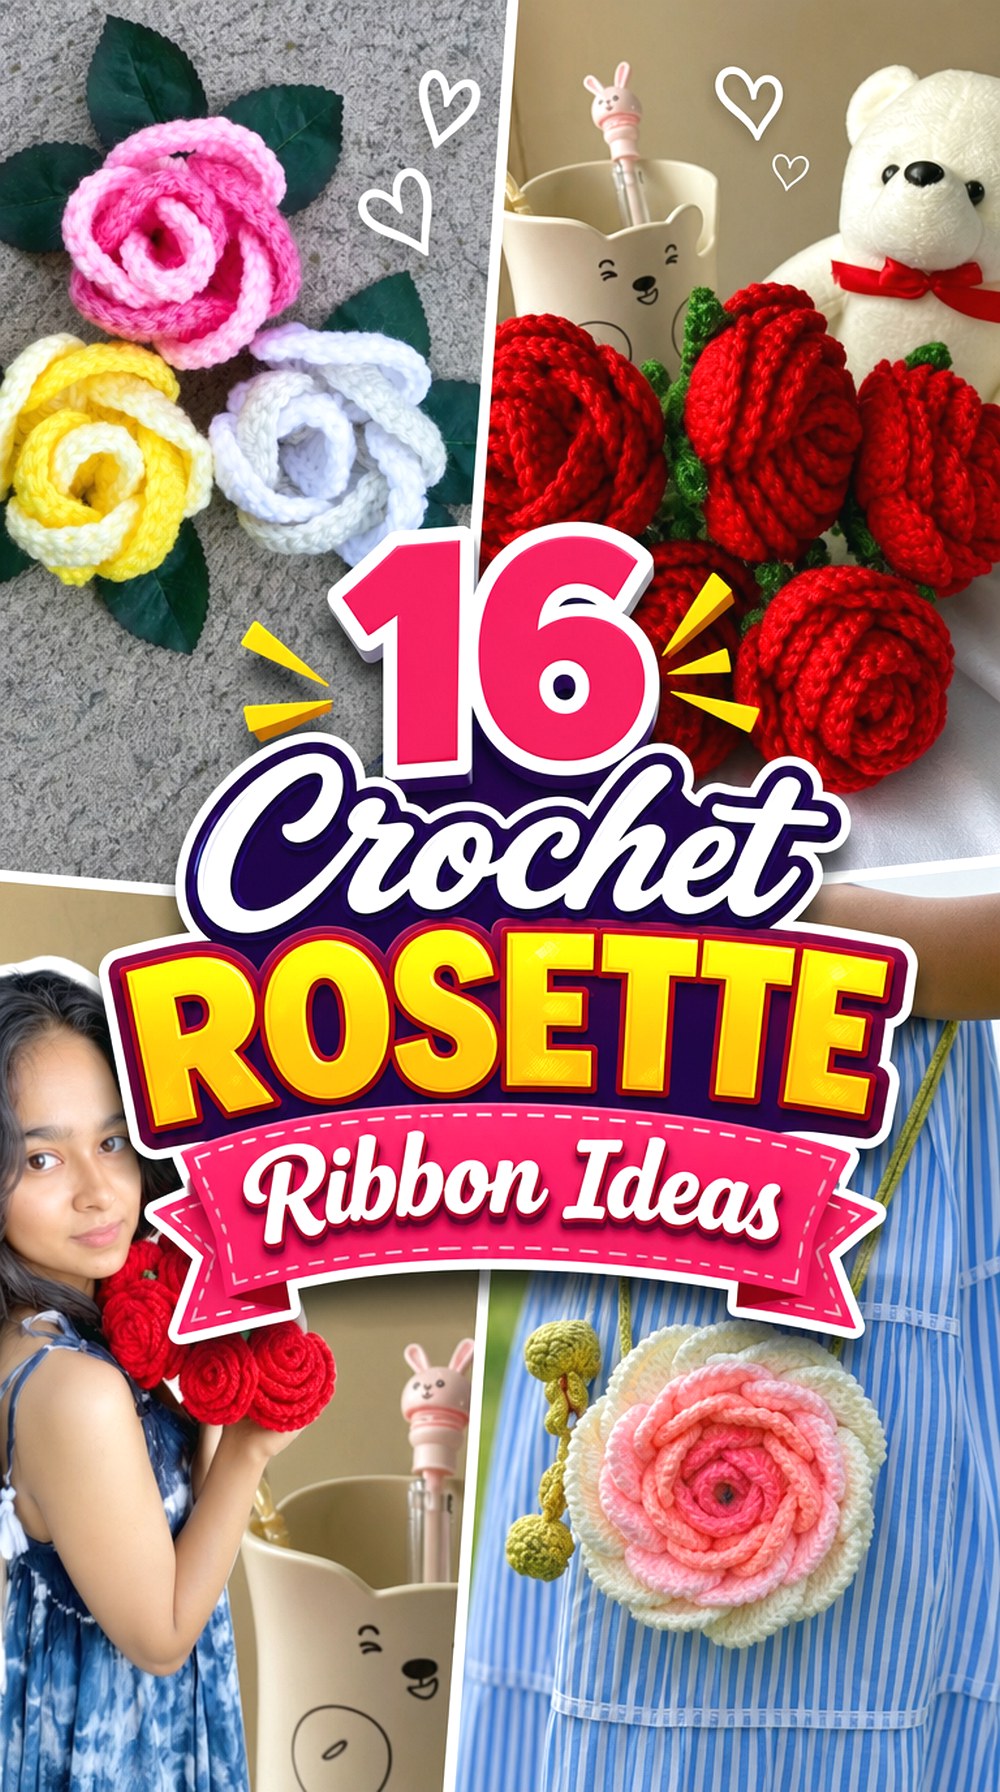

Crochet rosettes can move in very different directions depending on what happens after the flower is formed. A curled strip can become a soft neck tie, a tiny bloom can sit on an earring or hair accessory, and a larger dimensional rose can become the focus of a brooch, bag, or bouquet. That makes rosette-style crochet especially useful when you want one floral idea with many possible finished forms.
These 16 crochet rosette ribbon ideas cover wearable ties, hair pieces, jewelry, removable accessories, decorative motifs, bags, and flower arrangements. The projects also use noticeably different approaches to scale, backing, placement, and repetition. Use the comparisons below to decide whether you want a light ribbon-like piece, a structured attachment, a repeated floral surface, or a dimensional rosette that stands on its own.
Quick List
- Crochet Rose Ribbon Choker
- Crochet Rosette Turban Headband
- Crochet Rose Ribbon Hair Tie
- Crochet Rose Gajra Hair Garland
- Crochet Rose Ribbon Bookmark
- Crochet Rose Ribbon Keychain
- Crochet Rose Shawl Pin
- Crochet Mini Rosette Earrings
- Crochet Rose Ribbon Bracelet
- Crochet Rolled Rose Appliqué
- Crochet Interlocking-Ring Rosette Flower
- Crochet Stemmed Rose Bouquet
- Crochet Dimensional Rose Bag
- Crochet Rose Brooch
- Crochet Rose Accent Headband
- Crochet Flower Clip with Ribbon-Lined Base
Choose the Rosette Structure Before the Color
“Rosette” can describe several noticeably different crochet forms. Some flowers begin as a longer crocheted strip that curls into a bloom. Others are built from rings, layered sections, or smaller repeated flowers attached to a band or base. These approaches affect more than appearance.
A rolled strip usually creates obvious spiral movement and can work naturally with ribbon-like ties or narrow bands. Compact rosettes are easier to use where bulk matters, such as earrings, clips, or bracelets. Larger layered flowers make stronger focal points on brooches, bags, and display pieces.
Before changing colors or adding decorative details, look at the side profile of the finished flower. Decide whether you need a relatively flat embellishment, a softly raised flower, or a strongly dimensional bloom. That decision will make later choices about attachment and placement much easier.
Match Yarn Behavior to the Finished Use
A rosette does not have to use the same yarn characteristics in every application. A neck tie or bracelet benefits from a band that feels comfortable and bends easily, while a bag decoration or freestanding flower may need more visible shape.
The main checkpoint is how the finished crochet behaves after the flower is curled or assembled. If the yarn produces a very soft fabric, petals may relax more than expected. A firmer fabric can emphasize the spiral shape but may feel bulky when placed directly against the skin.
If you change yarn from a tutorial, make a single flower or short sample first. Check its thickness, weight, petal definition, and flexibility before committing to the entire project. This is particularly useful for earrings, hair accessories, and ribbon-style neck pieces where a small change in bulk can noticeably change how the item sits.
Backing and Attachment Can Change the Whole Project
A beautiful rosette is only part of the finished object. The way it connects to a clip, elastic, pin, band, bag, or chain affects both appearance and function.
For removable accessories, inspect the back before finishing. A flatter attachment area can make it easier to position a pin or clip without forcing the flower to tilt. On fabric items such as bags, spread attachment points across a stable section instead of relying on the outer petals to carry all the movement. For hair pieces, make sure decorative yarn does not interfere with the working part of the clip or elastic.
When adapting one project into another, think about the attachment first. A flower designed as a brooch may need a different backing before it becomes a hair accessory, and an earring-scale rosette may need more structure before it works as a bag charm.
Crochet Rose Ribbon Choker
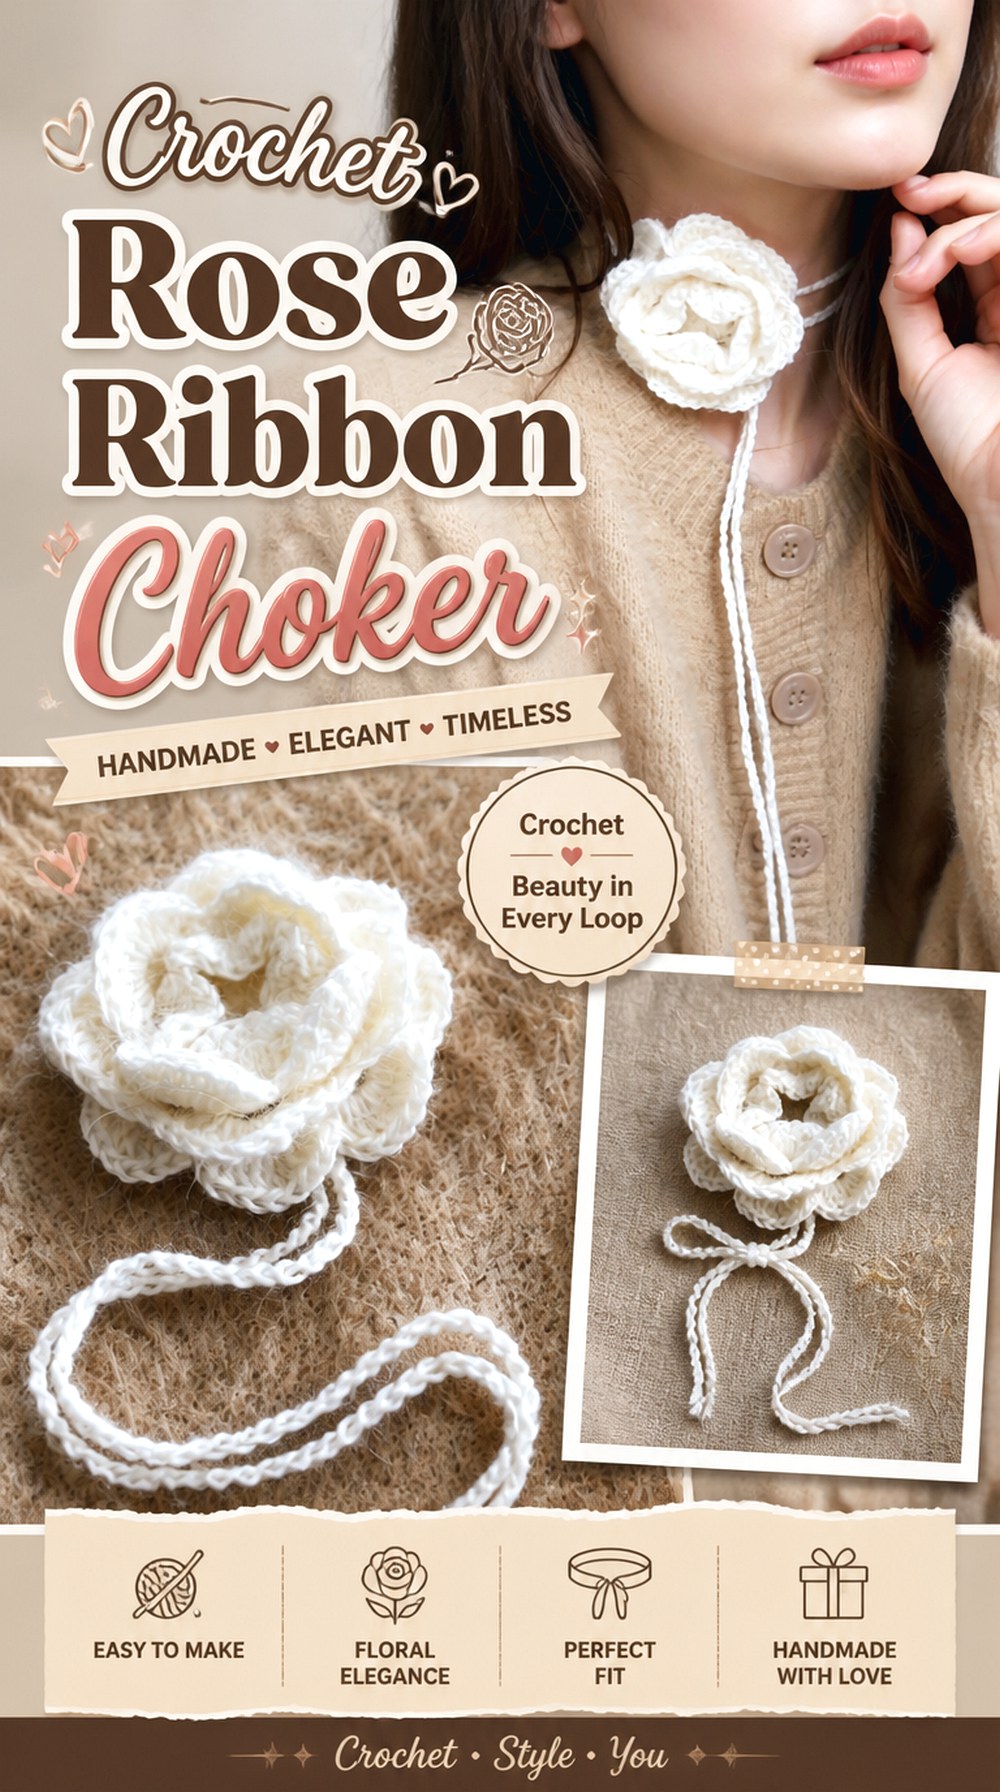
This crochet choker turns the rose itself into the central focal point and extends the design outward with slender crochet ties. The result is much lighter visually than a necklace made from repeated flowers, because the rosette remains concentrated at the front while the narrow strings create the ribbon effect around the neck.
This is a useful direction when you want a coquette-style floral accessory without building a wide collar. The tutorial visibly combines a dimensional rose with long crocheted ties, so the way the flower sits against the neck matters just as much as the bloom itself.
Keep the Flower Proportionate to the Ties
A large, heavy rosette can overpower a very fine tie, while an extremely small flower may disappear once the choker is worn. If you substitute yarn, make the flower first and hold it against the planned tie width before completing the accessory.
The useful checkpoint is visual balance rather than a universal measurement. You want the rose to read as the intentional center of the piece without making the ties look too fragile to support it.
Check the Back of the Rose for Neck Comfort
Rolled flowers naturally create several layers at their center. Before finishing the choker, feel the reverse side where it will touch the skin. Loose tails, bulky knots, or a raised assembly point can be more noticeable on a neck accessory than on a bag or brooch.
Aim for a tidy, relatively flat reverse side and confirm that the tie placement does not make the flower rotate when worn.
Tie Length Changes the Styling Options
A longer tie can create more visible trailing ends or allow different knot placements, while a shorter one keeps the flower closer to a fixed choker shape. Rather than copying a length without checking, decide how you want the finished ends to appear and confirm the fit against the intended wearer.
Crochet Rosette Turban Headband
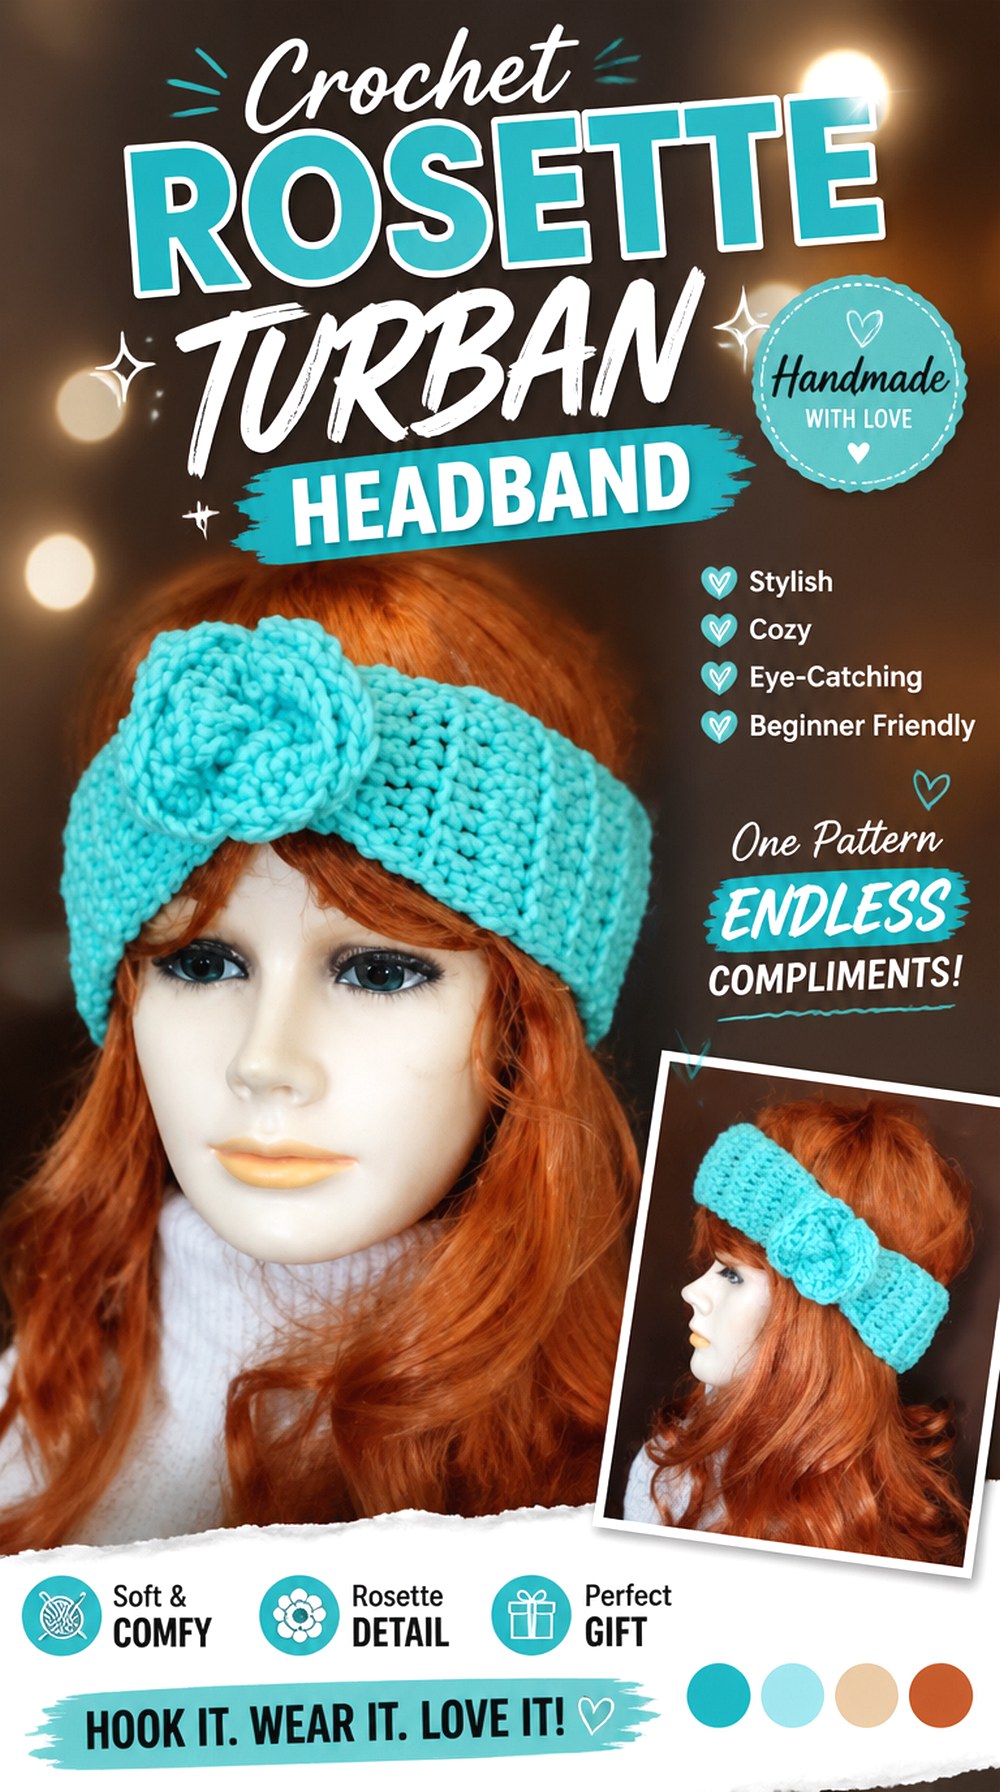
This version combines a broad headband shape with a gathered or twisted turban-style front and a rosette accent. Unlike a narrow flower band, the headband itself contributes substantial texture and coverage, so the flower becomes part of a larger fabric structure rather than a separate ornament on a thin base.
That makes this option worth considering when you want the rosette to feel integrated into a cozy accessory. The source tutorial specifically presents a crochet rosette turban headband and discusses making the headband to size.
The Headband Width Changes the Visual Weight
A broad band already occupies a large area around the head. Adding an equally bulky rosette can create a strong statement, while a smaller flower leaves the twisted or gathered band as the main feature.
Before attaching the rosette, pin or hold it temporarily at the front. View the headband from several angles instead of judging the flower only while the project lies flat.
Stretch Matters More Than Flat Measurement
Headbands depend on how the crochet fabric behaves when worn. A flat length alone does not tell you how firmly or loosely the piece will sit because stitch pattern, fiber, and tension all affect stretch.
If you substitute yarn or change the band construction, check the stretched fit before adding the rosette. A flower attached to a band that is already too loose or too tight will not correct the fit.
Position the Rosette After the Turban Detail Settles
The gathered front creates its own high point. Attach the flower only after you know where that front detail naturally sits on the head. This prevents the rosette from drifting too far to one side or sitting on an unstable fold.
Original Tutorial and Creator Credit
Creator: Hectanooga1
Crochet Rose Ribbon Hair Tie
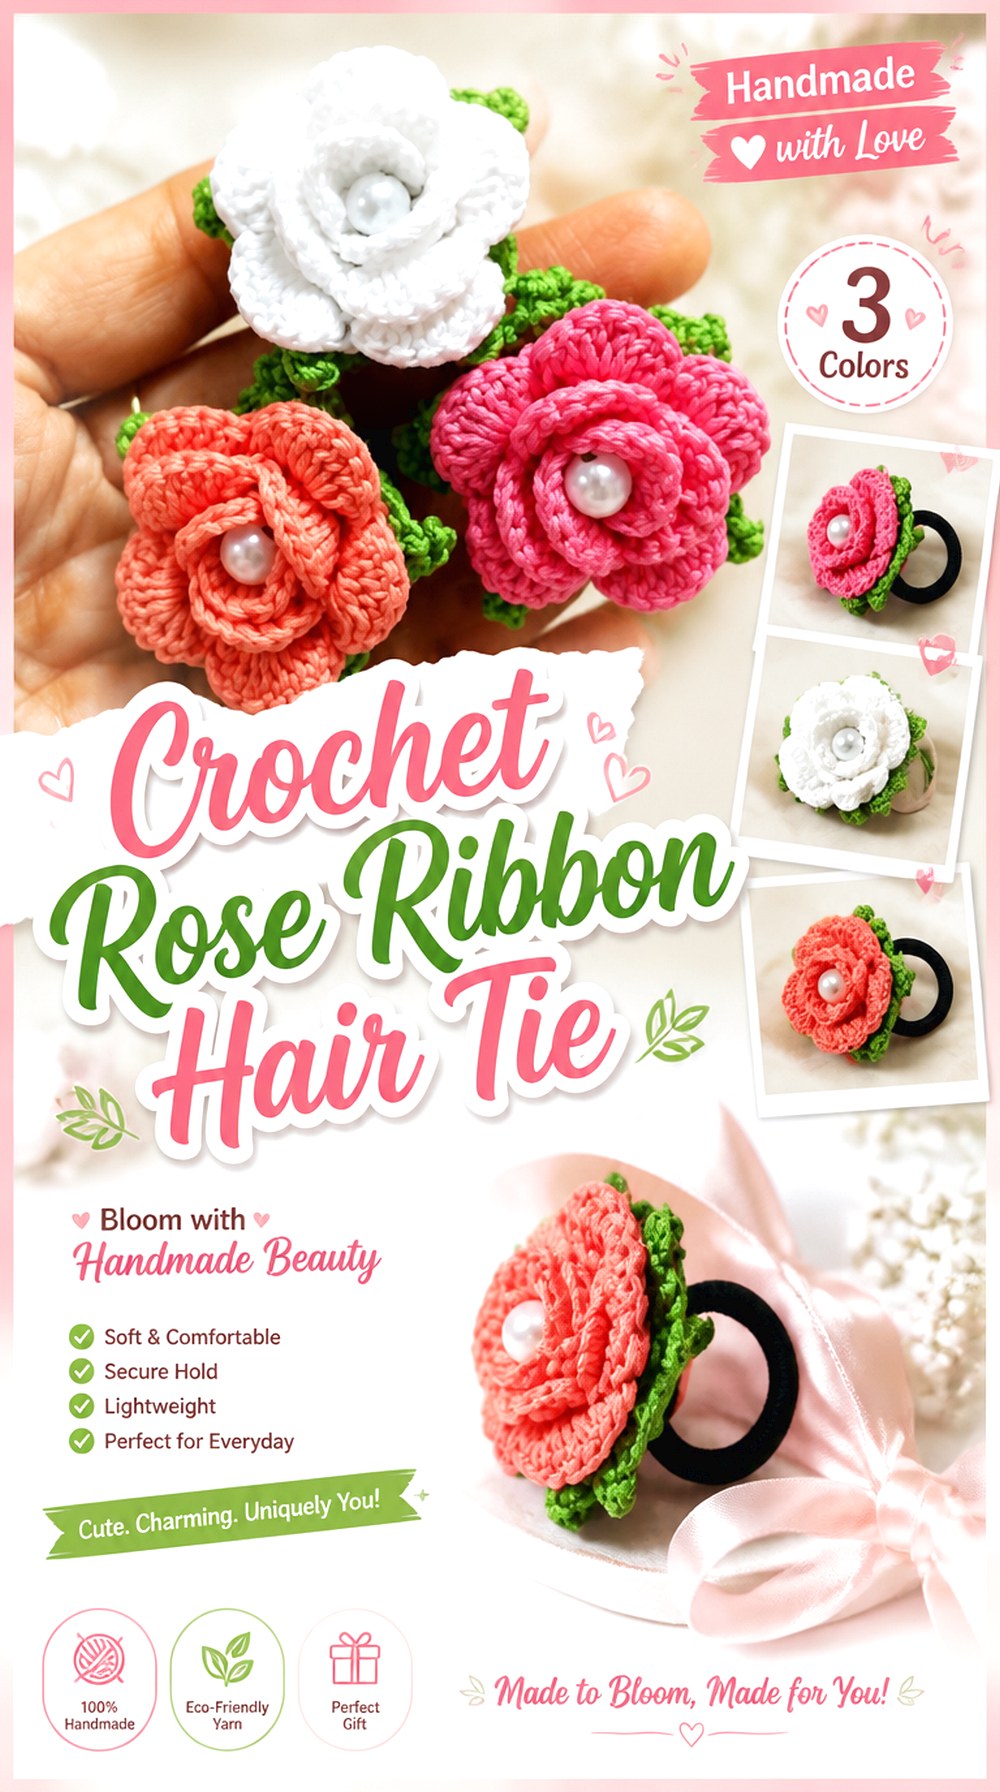
A rose hair tie keeps the flower small enough to move with an elastic rather than placing it on a rigid clip. That makes the finished accessory softer and more flexible than a barrette or brooch. The rosette becomes a decorative cover over the working hair tie instead of being the structural component.
The tutorial shows a crochet rose specifically finished as a hair tie, making it a strong option for readers who want a simple wearable application for a small rolled flower.
Attach the Rose Without Restricting the Elastic
The elastic needs to stretch independently of the flower. When adapting the idea, keep stitching or attachment material concentrated around a small stable point rather than wrapping too much of the elastic itself.
After attachment, stretch the hair tie gently and confirm that the flower remains secure while the elastic still moves normally.
Smaller Petals Reduce Bulk Around a Ponytail
A very dimensional rose can be attractive but may push outward when wrapped around hair. If you prefer a lower-profile result, compare the thickness of the finished bloom before attaching it.
This is one project where slightly reducing floral bulk can improve practicality without changing the basic rosette look.
Let the Flower Face Outward Before Final Finishing
Hair ties rotate during use. Check which direction the rose faces when the elastic is wrapped around a ponytail or bun. Securing the flower at the wrong orientation can leave the decorative face angled downward instead of outward.
Original Tutorial and Creator Credit
Creator: Sarita crochet crafts
Crochet Rose Gajra Hair Garland
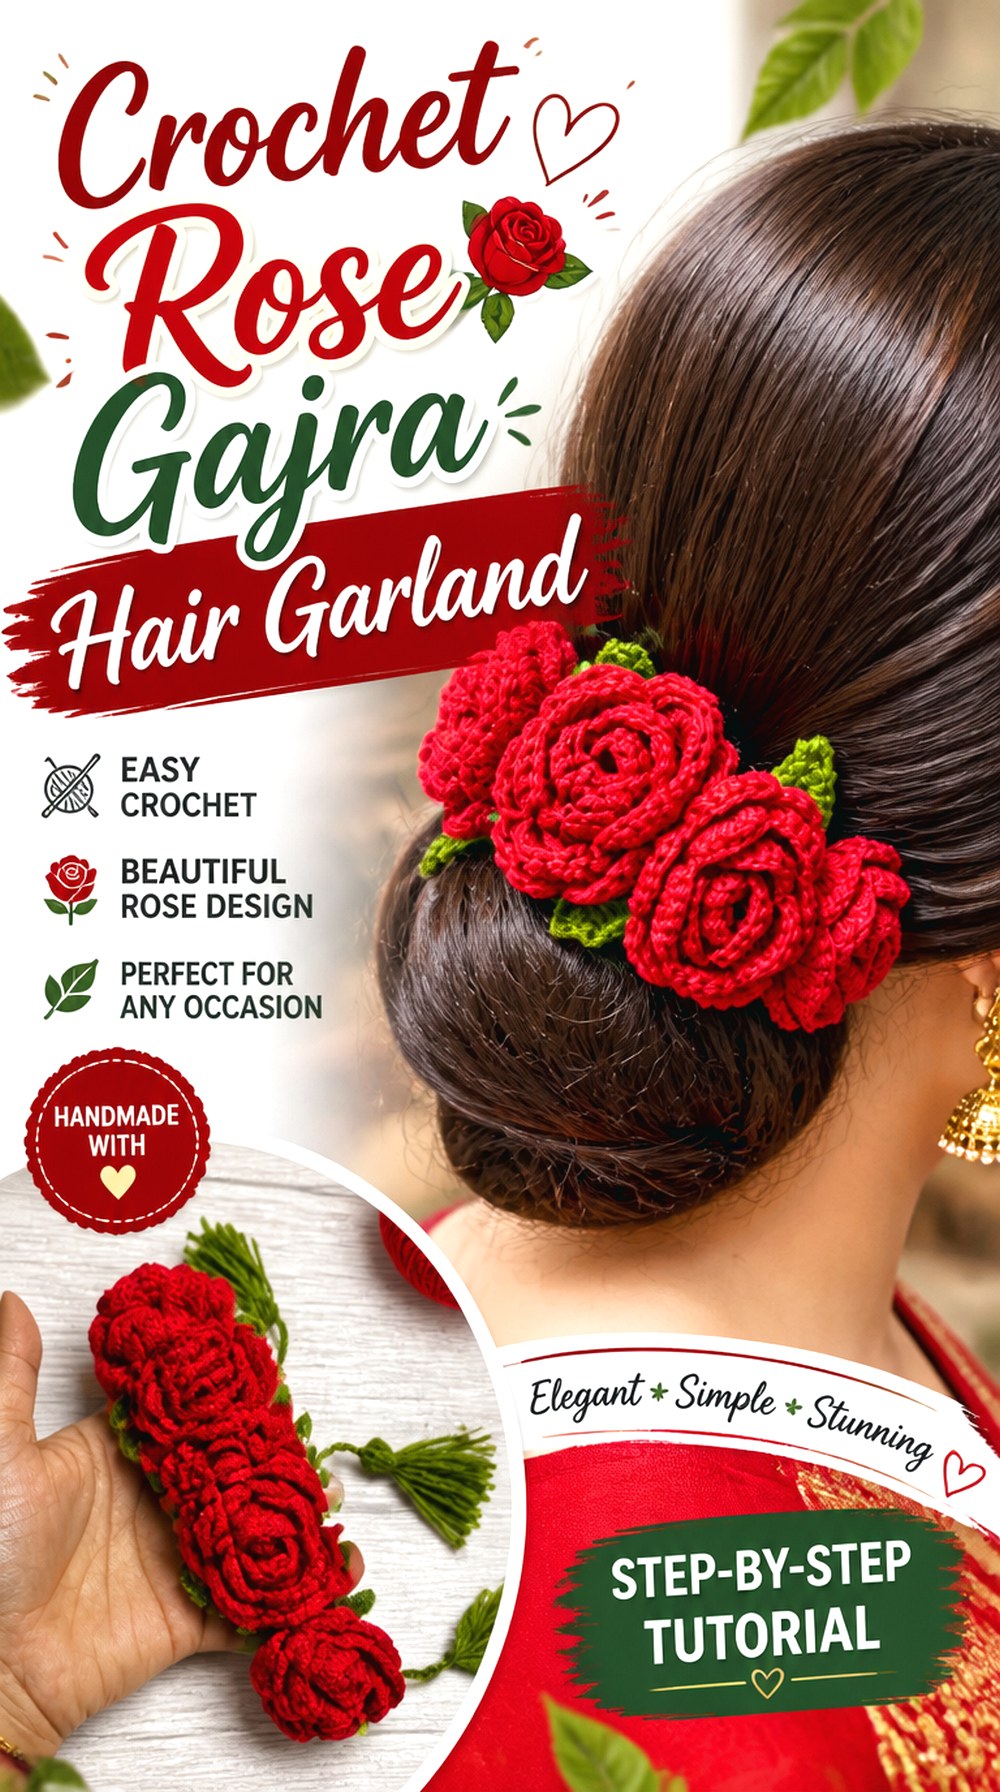
This design changes the scale of the idea by using roses as a repeated hair decoration rather than relying on a single bloom. A gajra-style piece follows the shape of a bun, so repetition and spacing become important parts of the finished appearance.
The source tutorial shows crocheted roses assembled into a gajra hair accessory, giving this project a noticeably different silhouette from the single-flower hair tie and headband options.
Repetition Makes Small Size Differences Visible
One individual rose can hide a slight variation in tension. A row or cluster of repeated flowers makes those differences much easier to notice.
If consistency matters to you, compare each finished rose before assembly. Flowers do not have to be mechanically identical, but large differences in diameter or thickness can make the garland look uneven once wrapped around a bun.
Test the Curve Around the Hairstyle
A floral strip that looks straight and balanced on a table may behave differently when curved around hair. Arrange the flowers temporarily around the intended bun shape before fixing their final positions.
This check helps reveal crowded sections, visible gaps, or flowers that turn inward when the piece bends.
Keep Attachment Materials Away From Hair
Any glue, wire, thread ends, or other assembly materials used in a hair accessory should remain contained within the finished structure. Inspect the back so that nothing rough or sharp sits directly against the hair or scalp.
Original Tutorial and Creator Credit
Creator: Knit Bucket By Pinki Mehta
Crochet Rose Ribbon Bookmark
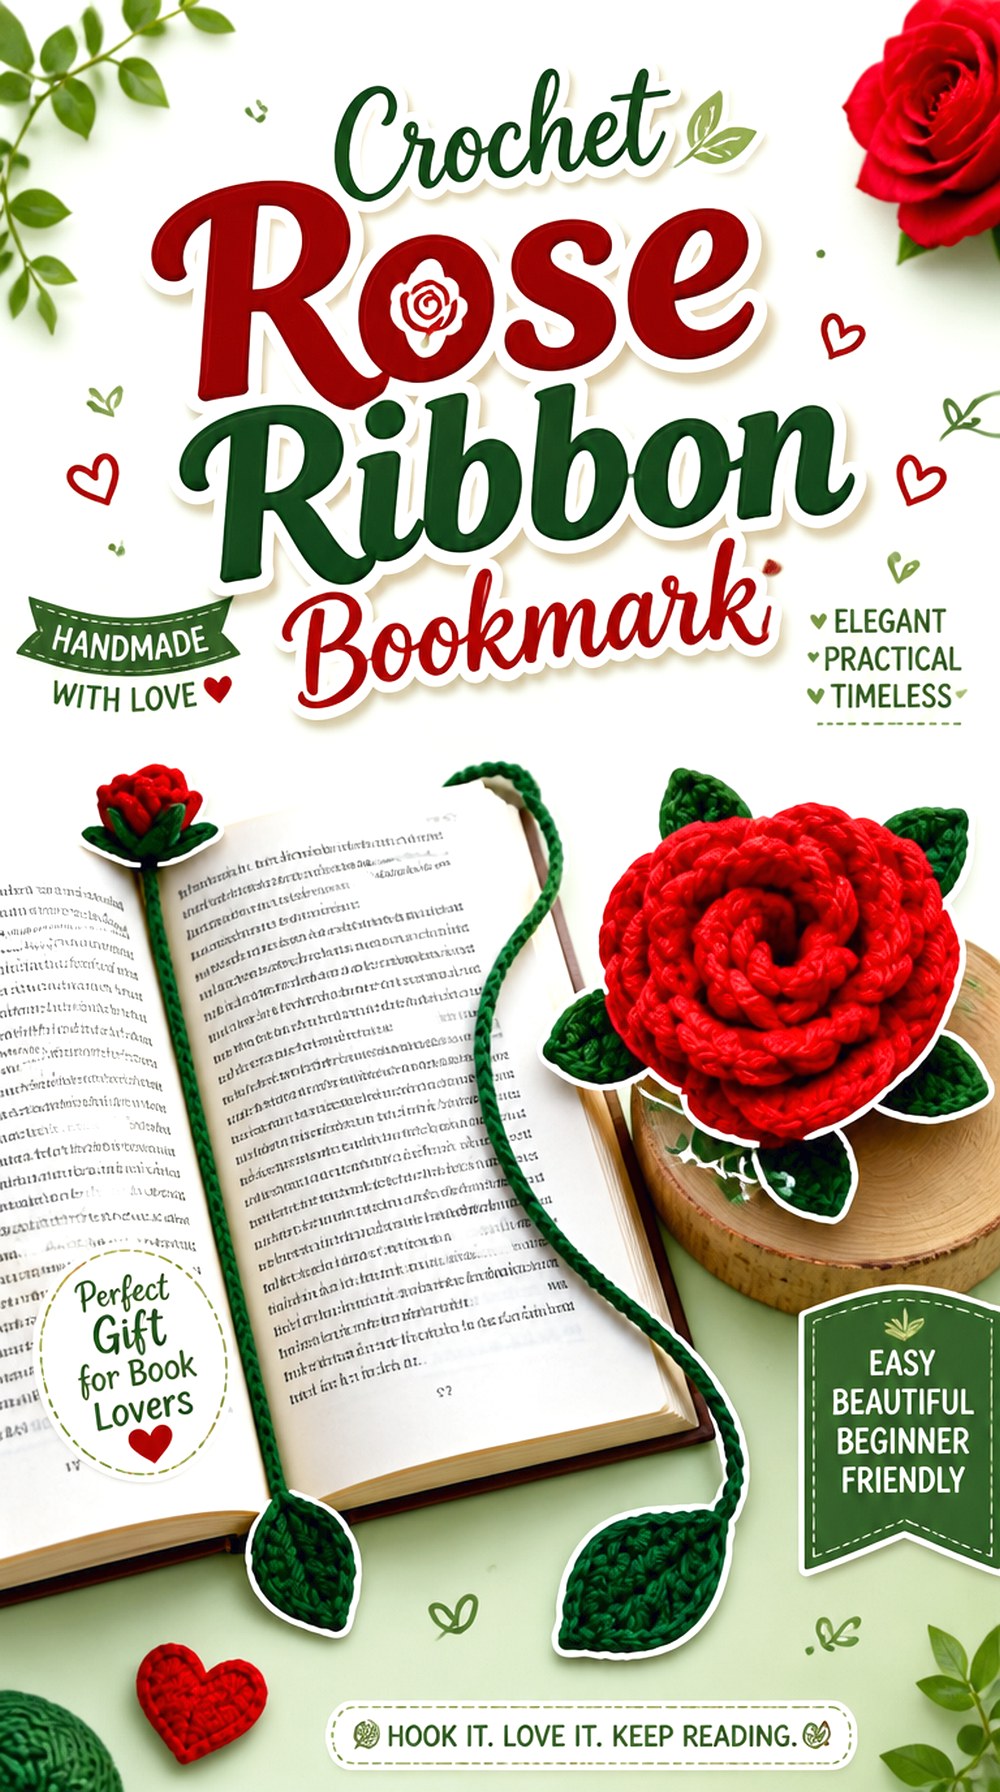
The bookmark format stretches the rosette concept vertically. Instead of adding a flower to clothing or jewelry, the bloom sits at one end of a long narrow stem or chain that slips between book pages.
This gives the flower a decorative role while the slim section performs the practical job. The CrochetTreasure tutorial includes a rose, leaf, and long bookmark section and shows the completed result in use.
Keep the Section Between Pages Relatively Flat
The flower can be dimensional because it remains outside the book, but the part placed between pages benefits from staying slim. Bulky joins, knots, or thick embellishments along the central length can prevent the book from closing as naturally.
Before finishing, run your fingers along the section that will sit inside the book and check for raised areas.
Place the Rose Outside the Page Edge
A dimensional rosette should not need to be pressed between closed pages. When adapting the length, make sure the flower can rest beyond the top or bottom edge of the intended book while the stem reaches the reading position.
Leaf Placement Can Help the Design Read as a Flower
A small leaf near the bloom can visually connect the rose to the long stem-like bookmark. If you customize the arrangement, keep decorative elements close enough to the flower that the section between pages remains clean and functional.
Original Tutorial and Creator Credit
Creator: CrochetTreasure
Crochet Rose Ribbon Keychain
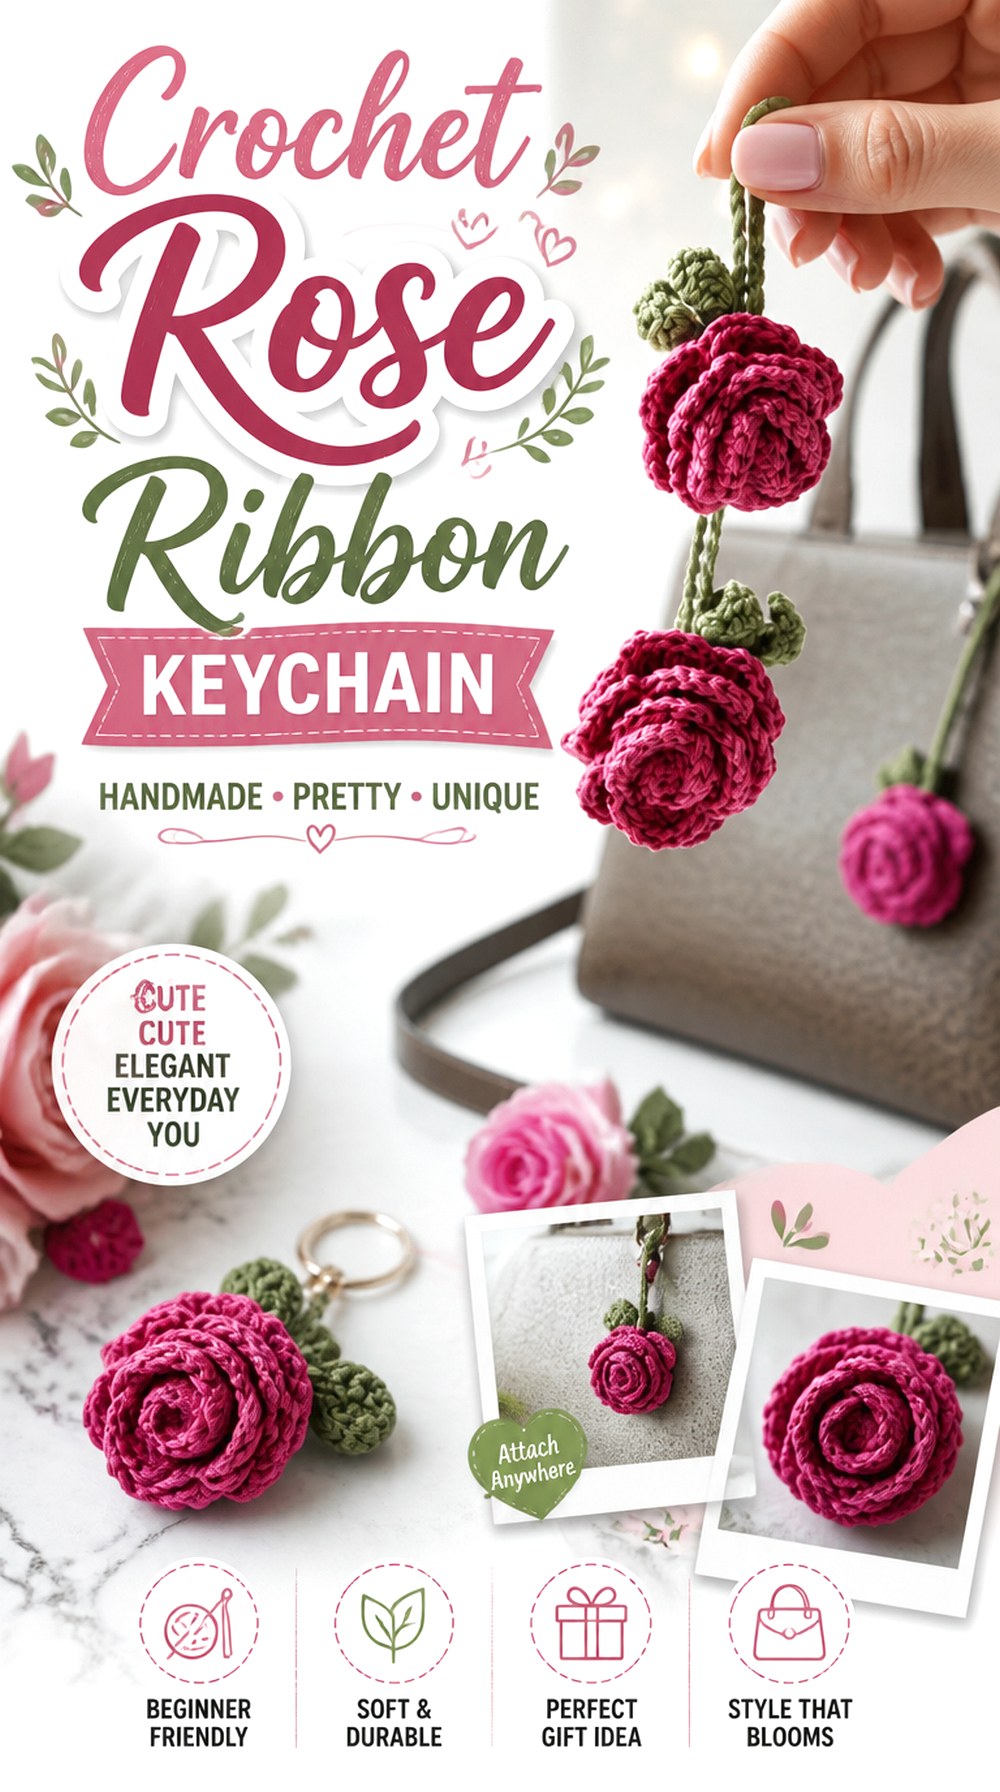
This keychain reduces the rose idea to a portable accent that can hang from keys or a bag. The small scale means attachment security matters more than drape: the flower will move, twist, and rub against other objects instead of resting in one position.
The Joy as it Flies tutorial specifically demonstrates a rose keychain and also discusses the option of using keychain hardware.
Secure the Center Before Adding Hardware
A rolled rose depends on its inner layers remaining together. Before treating it as a hanging object, check that the center and outer layers stay stable when the flower is gently tugged.
The keychain connection should pull against a secure section of the project rather than a loose outer petal.
Hanging Orientation Is Different From Flat Display
A flower that looks perfect on a table may turn sideways when suspended. Hold the finished rosette from the planned attachment point before fastening the hardware permanently.
If the front tilts away, adjust where the hanging loop or connection sits rather than trying to reshape the whole flower.
Think About Abrasion on Everyday Bags
Keychains and bag charms repeatedly brush against zippers, fabric, and other items. Very loose decorative loops may catch more easily than compact petals.
If the piece will be used daily, inspect the outer edges and weave in tails securely before attaching the final ring or loop.
Original Tutorial and Creator Credit
Creator: Joy as it Flies
Crochet Rose Shawl Pin
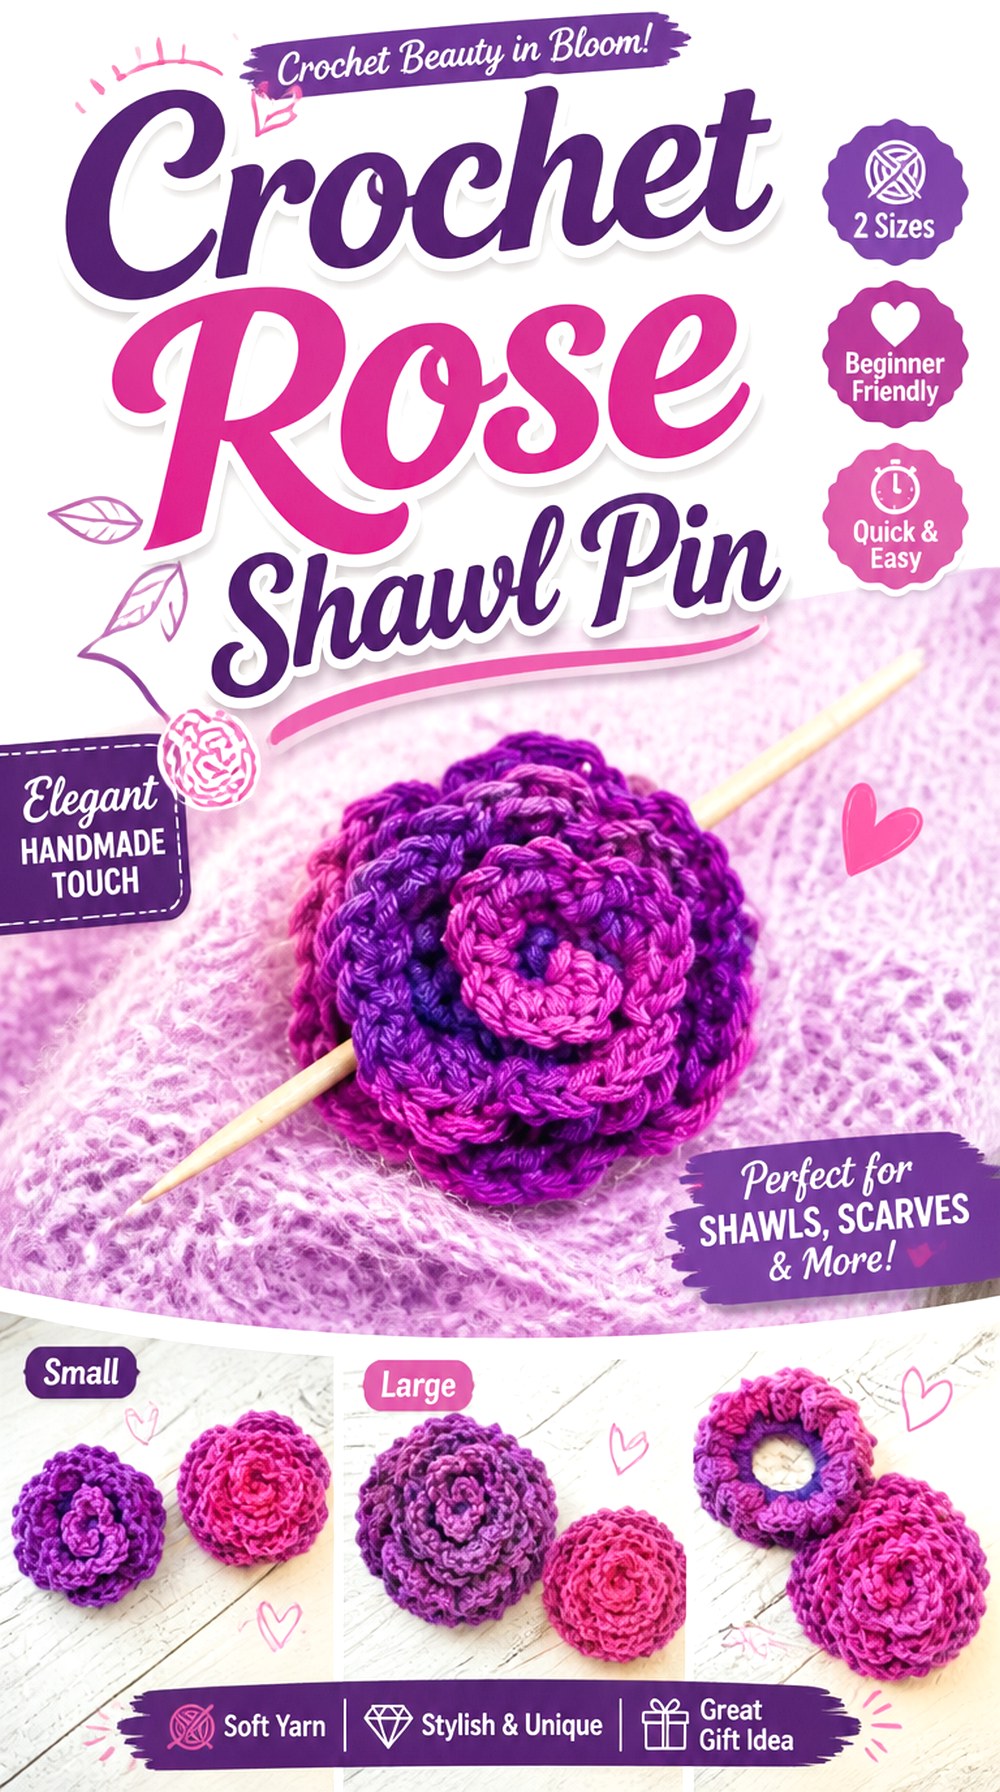
A shawl pin uses the rosette as a removable focal point on a much larger textile. The flower can therefore be more substantial than an earring or hair tie without becoming the entire project.
Light and Joy Designs shows a crochet rose intended specifically as a shawl pin, with two rose size options in the source video.
Match the Flower Scale to the Fabric Below It
A tiny rose may disappear on a thick textured wrap, while an oversized one can visually dominate a delicate scarf. Place the finished flower on the actual shawl or a similar fabric before choosing the final backing.
The important comparison is between the volume of the rosette and the surface it will sit on.
A Removable Pin Preserves More Styling Options
Because the flower is not permanently sewn to the garment, it can move to different positions or be removed entirely. That makes this idea more flexible than a fixed appliqué.
When adapting the concept, select backing hardware that sits securely and does not distort the rose when opened or closed.
Check the Reverse Side Before Wearing
Pins place hardware directly against fabric. Make sure the backing and any attachment stitches are contained within the flower base so they do not pull unnecessarily on surrounding petals.
Original Tutorial and Creator Credit
Creator: Light and Joy Designs
Crochet Mini Rosette Earrings
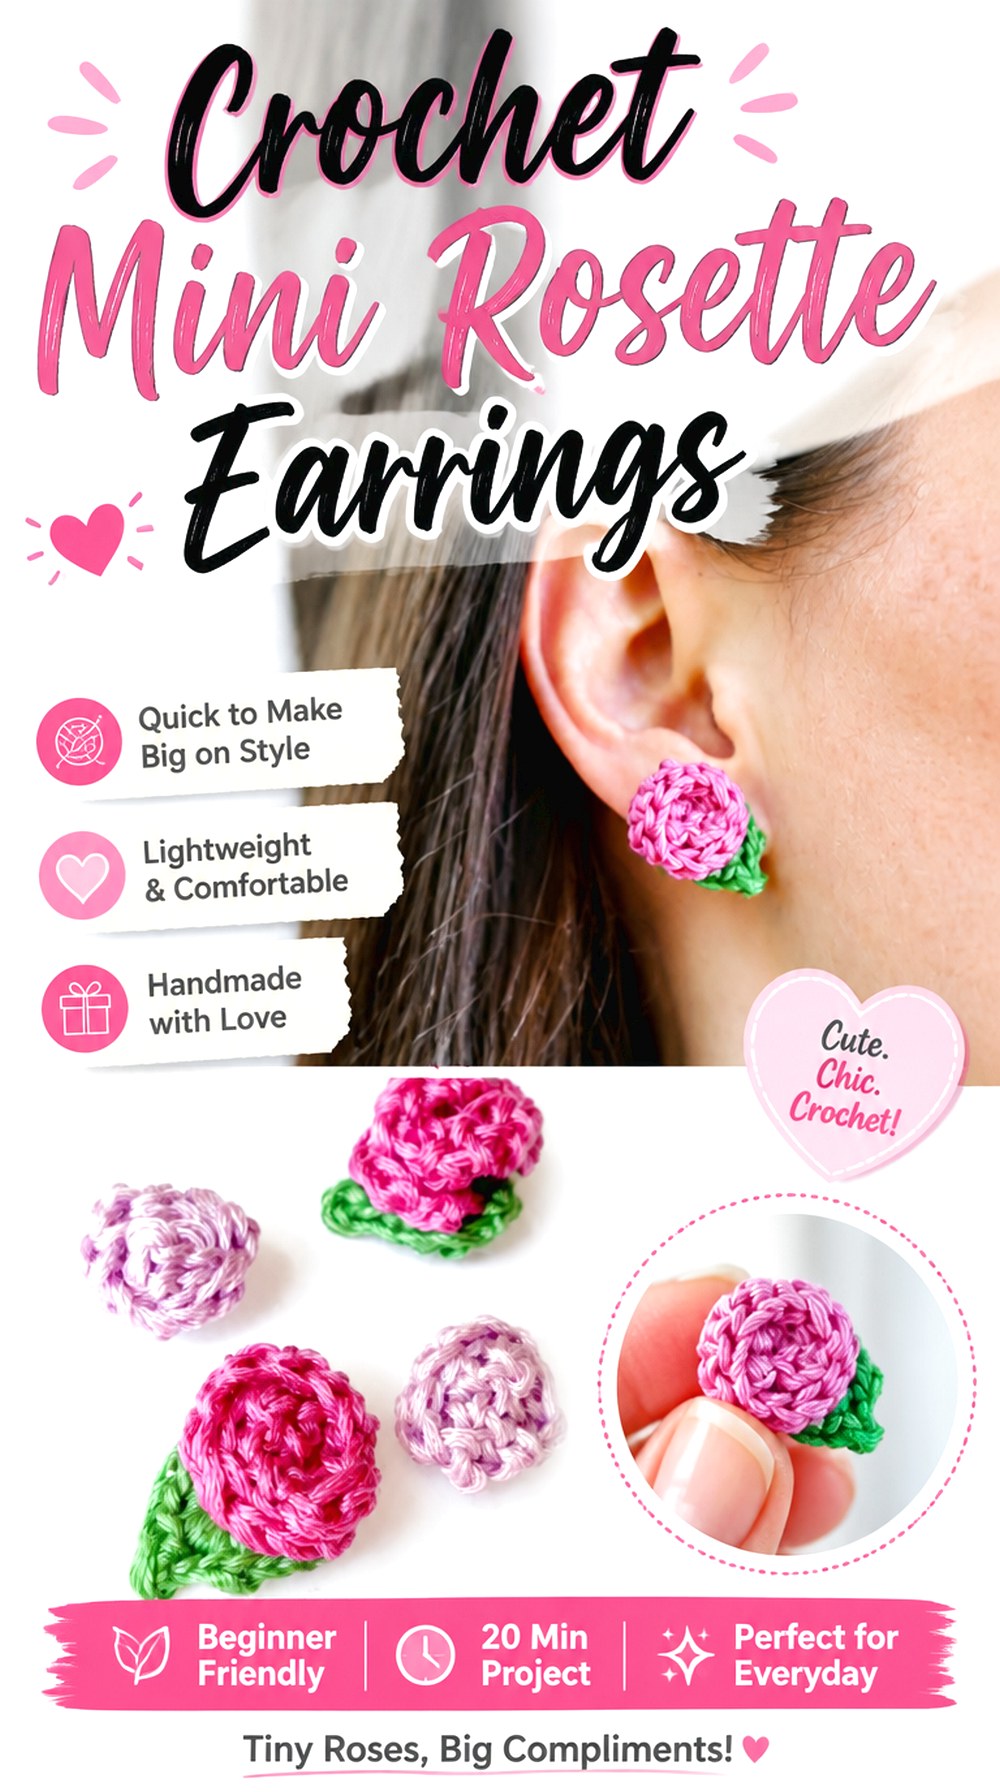
Rosette earrings take the flower concept to one of its smallest wearable scales. Because the rosettes sit beside the face, thickness and weight can affect the finished look more noticeably than they would on a bag or home-decor piece.
Fiber Flux demonstrates crochet rosette earrings with versions both with and without a small leaf, providing two different visual profiles from the same basic accessory idea.
Fine Materials Keep the Flower Visually Crisp
When a design is very small, thick yarn can quickly hide petal separation. If you change materials, compare one trial rosette with the earring finding before making the pair.
The goal is not simply to make the flower smaller; it is to preserve enough definition for the rosette shape to remain recognizable at that scale.
Make the Pair Before Attaching the Findings
Two independently crocheted flowers may differ slightly in shape. Place them side by side and adjust their final rolling or shaping before fixing the earring hardware.
This gives you a better chance of creating a visually balanced pair.
The Leaf Changes More Than the Color
Adding a leaf extends the outline and creates an asymmetrical botanical look. Leaving it off produces a simpler circular rosette. Choose between those versions based on the silhouette you want near the face rather than treating the leaf as an automatic extra.
Original Tutorial and Creator Credit
Creator: Fiber Flux
Crochet Rose Ribbon Bracelet
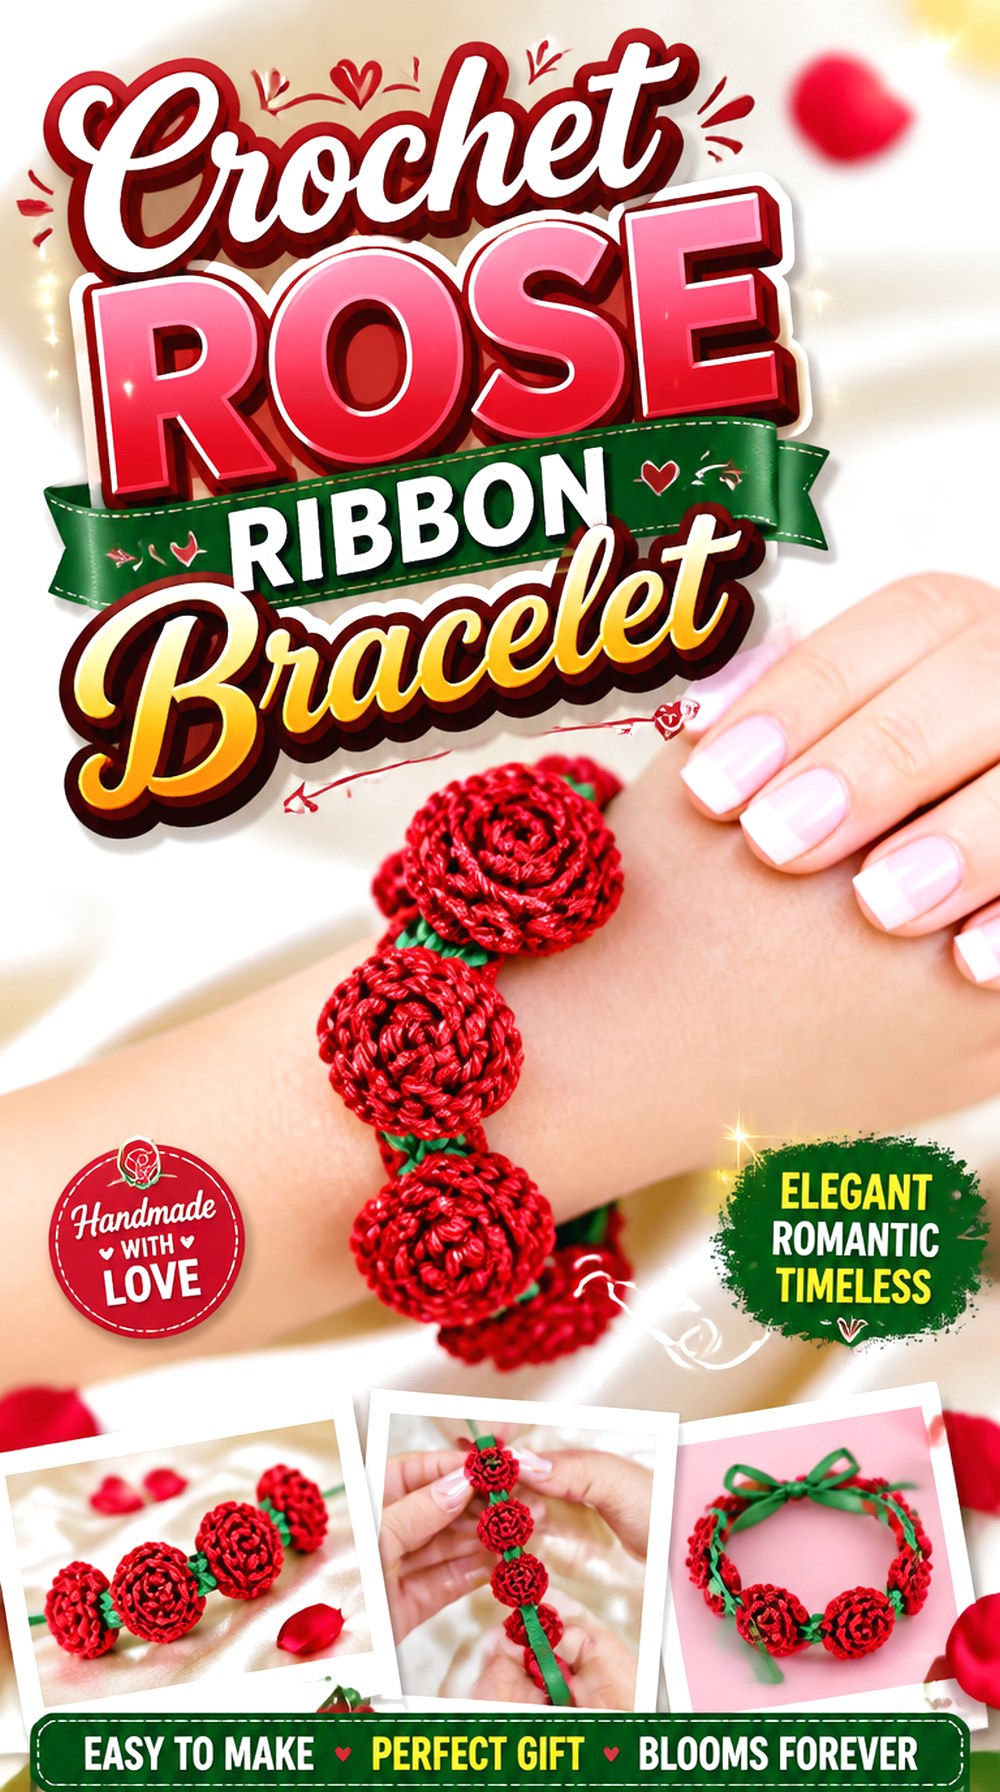
The bracelet format turns repeated roses into a flexible band around the wrist. Unlike a single statement flower, several small rosettes share attention across the accessory, which makes spacing and flexibility part of the design.
Nicki’s Homemade Crafts demonstrates a rose bracelet as part of a jewelry crochet-along and shows the flowers integrated into the bracelet structure.
Check Flexibility Between the Flowers
A floral bracelet needs to curve around the wrist. If the sections between rosettes become too rigid, the piece can behave more like a flat strip than wearable jewelry.
Before adding the closure, wrap the unfinished band loosely around the wrist and see whether it bends naturally at several points.
Closure Choice Affects the Final Fit
A button, tie, snap, or other closure changes how much adjustment the bracelet can offer. If you adapt the source idea, choose the closure before finishing both ends so you can plan enough space for it without crowding the nearest flower.
Keep Raised Roses Clear of the Wrist Edge
Strongly dimensional flowers can press differently depending on where they sit. Arrange the rosettes around the top and sides of the wrist during your fit check rather than judging the bracelet only while it lies flat.
Original Tutorial and Creator Credit
Creator: Nicki’s Homemade Crafts
Crochet Rolled Rose Appliqué
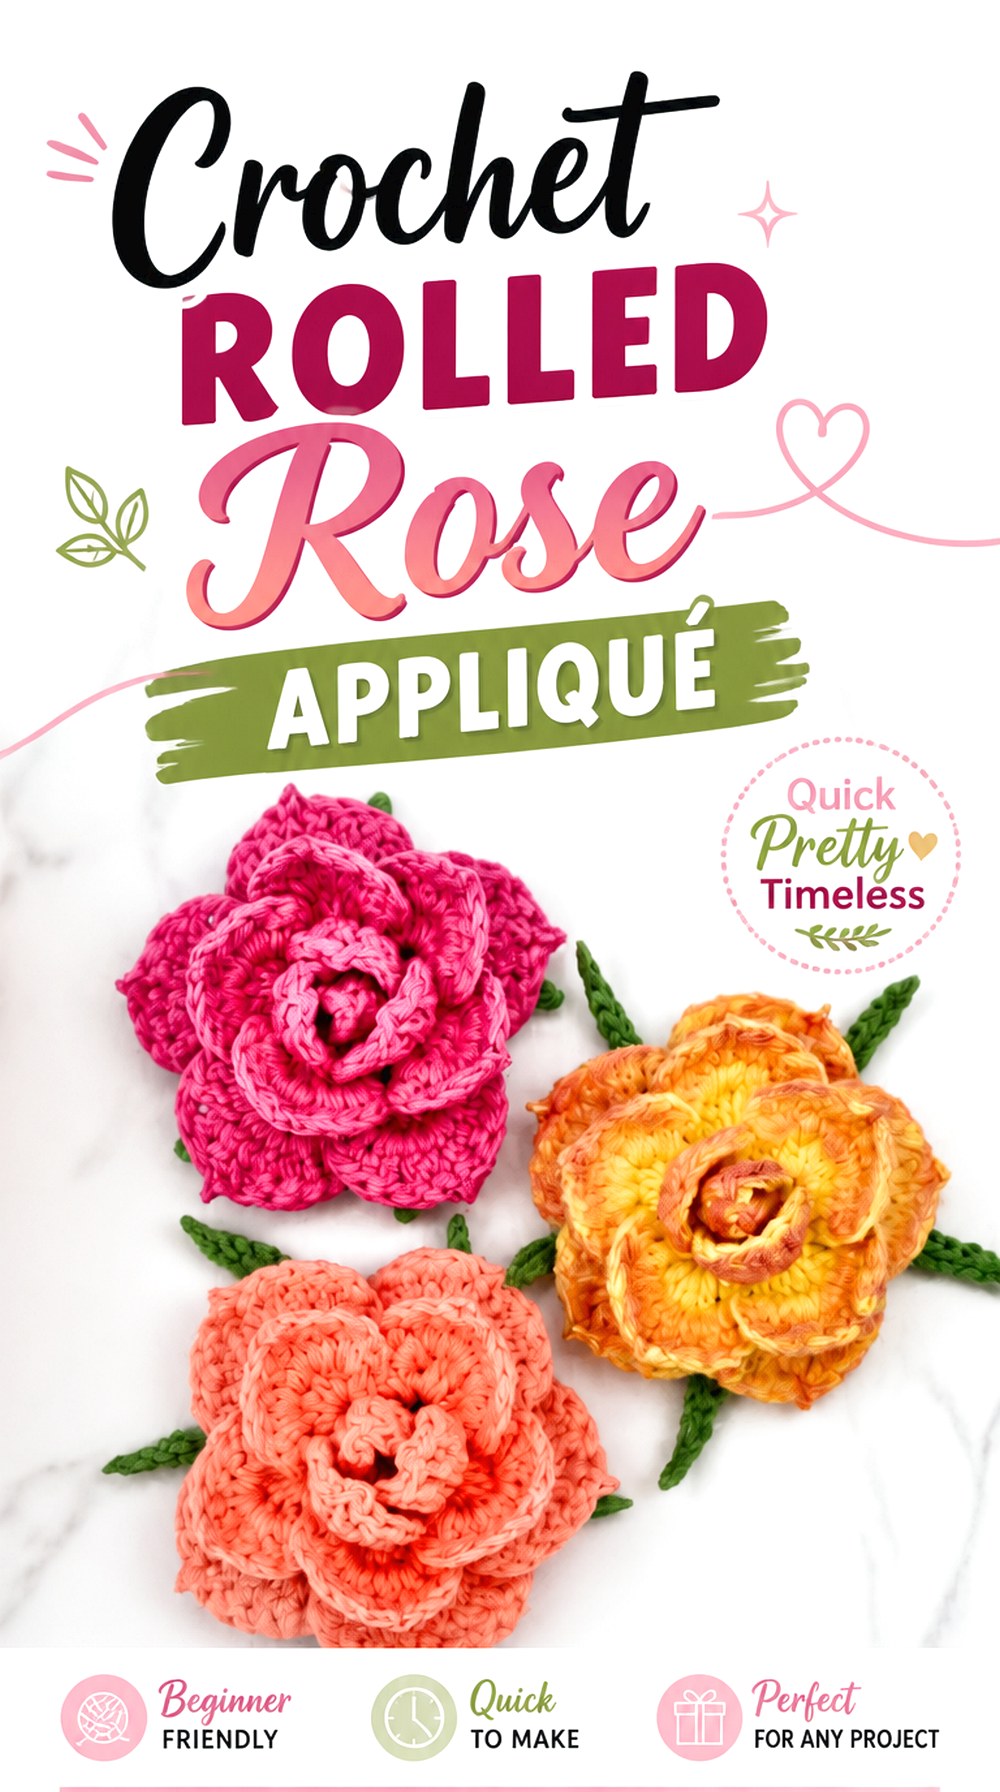
A standalone appliqué is one of the most adaptable rosette forms because you can decide where it goes after the flower is complete. Happy Patty Crochet demonstrates a rose with a relatively flat bottom designed so the finished bloom can be attached to another surface.
This is a useful project when you want to learn the flower first and postpone the final application. It can serve as a planning sample before you commit to a larger accessory.
A Flat Base Expands the Possible Uses
The outer petals create the visible flower, but the base determines how easily it can be sewn or attached elsewhere. Check the back after assembly and make sure the supporting stitches stay within the outline of the bloom.
A neat base gives you more control when positioning the appliqué on fabric.
Sample the Flower Before Repeating It
If you plan to use several matching roses on a garment, bag, or decor piece, make one first and block or finish it as intended. Measure or visually compare the completed flower before making the rest.
This avoids discovering after several repeats that the motif is too large or too bulky for the available surface.
Placement Changes the Meaning of the Same Rosette
One rose near a neckline reads differently from a repeated line on a bag or a cluster on home decor. Before sewing, arrange the finished appliqués loosely on the target item and compare concentrated versus spaced placement.
Original Tutorial and Creator Credit
Creator: Happy Patty Crochet
Crochet Interlocking Ring Rosette Flower
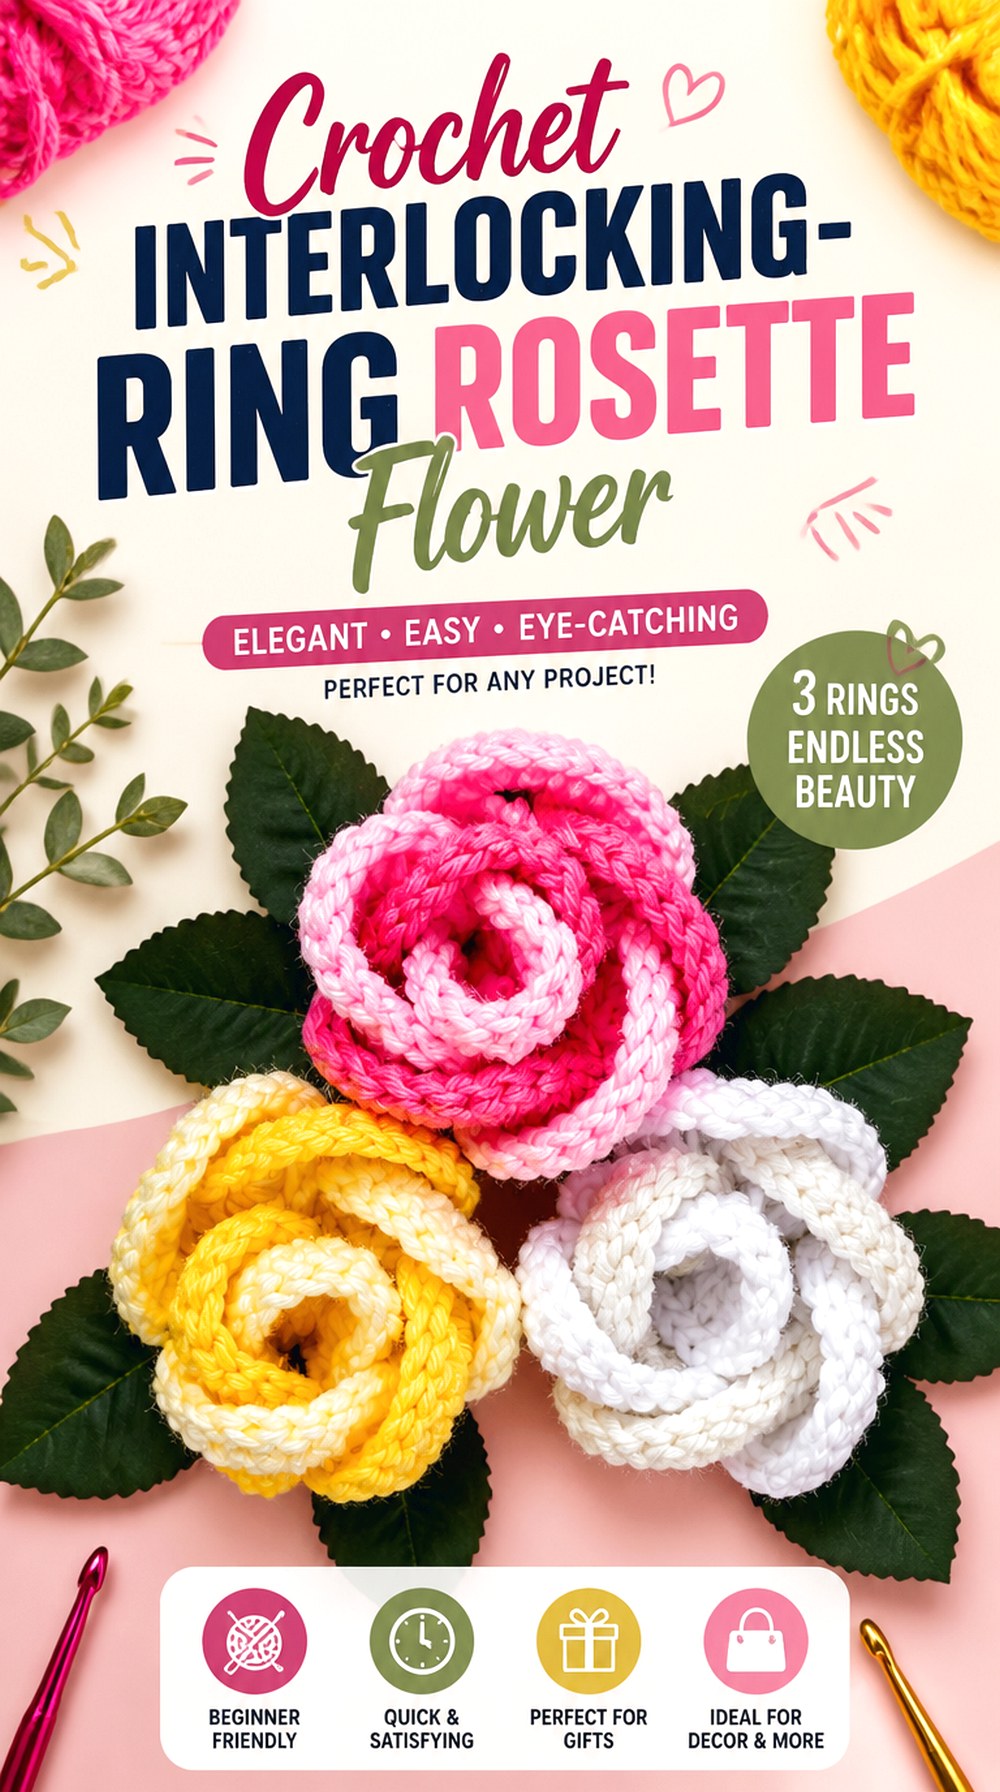
This flower stands apart from the rolled-strip projects because its visual identity comes from interlocking crochet rings. The result reads as a geometric rosette rather than a conventional spiral rose, making it useful when you want something floral without copying the silhouette of the other projects.
Naztazia’s tutorial specifically demonstrates a “rose with rings” made from interlocking ring elements.
Ring Placement Becomes the Main Design Feature
With this style, the eye follows the overlapping circular sections instead of individual curled petals. That means uneven ring spacing can be more noticeable than small stitch variations.
Lay the flower flat after assembly and check the overall radial balance before securing any additional embellishment.
Color Changes Can Clarify the Construction
Because the design uses separate-looking ring sections, contrasting or alternating colors can emphasize the interlocking structure. A single color creates a more unified rosette.
Choose based on whether you want viewers to notice the construction method or mainly see the flower silhouette.
Keep the Center From Becoming Too Crowded
Several ring sections converge toward the middle. If you add a button, bead, or another decorative center, check the existing thickness first so the embellishment does not overwhelm the geometry.
Original Tutorial and Creator Credit
Creator: naztazia
Crochet Stemmed Rose Bouquet
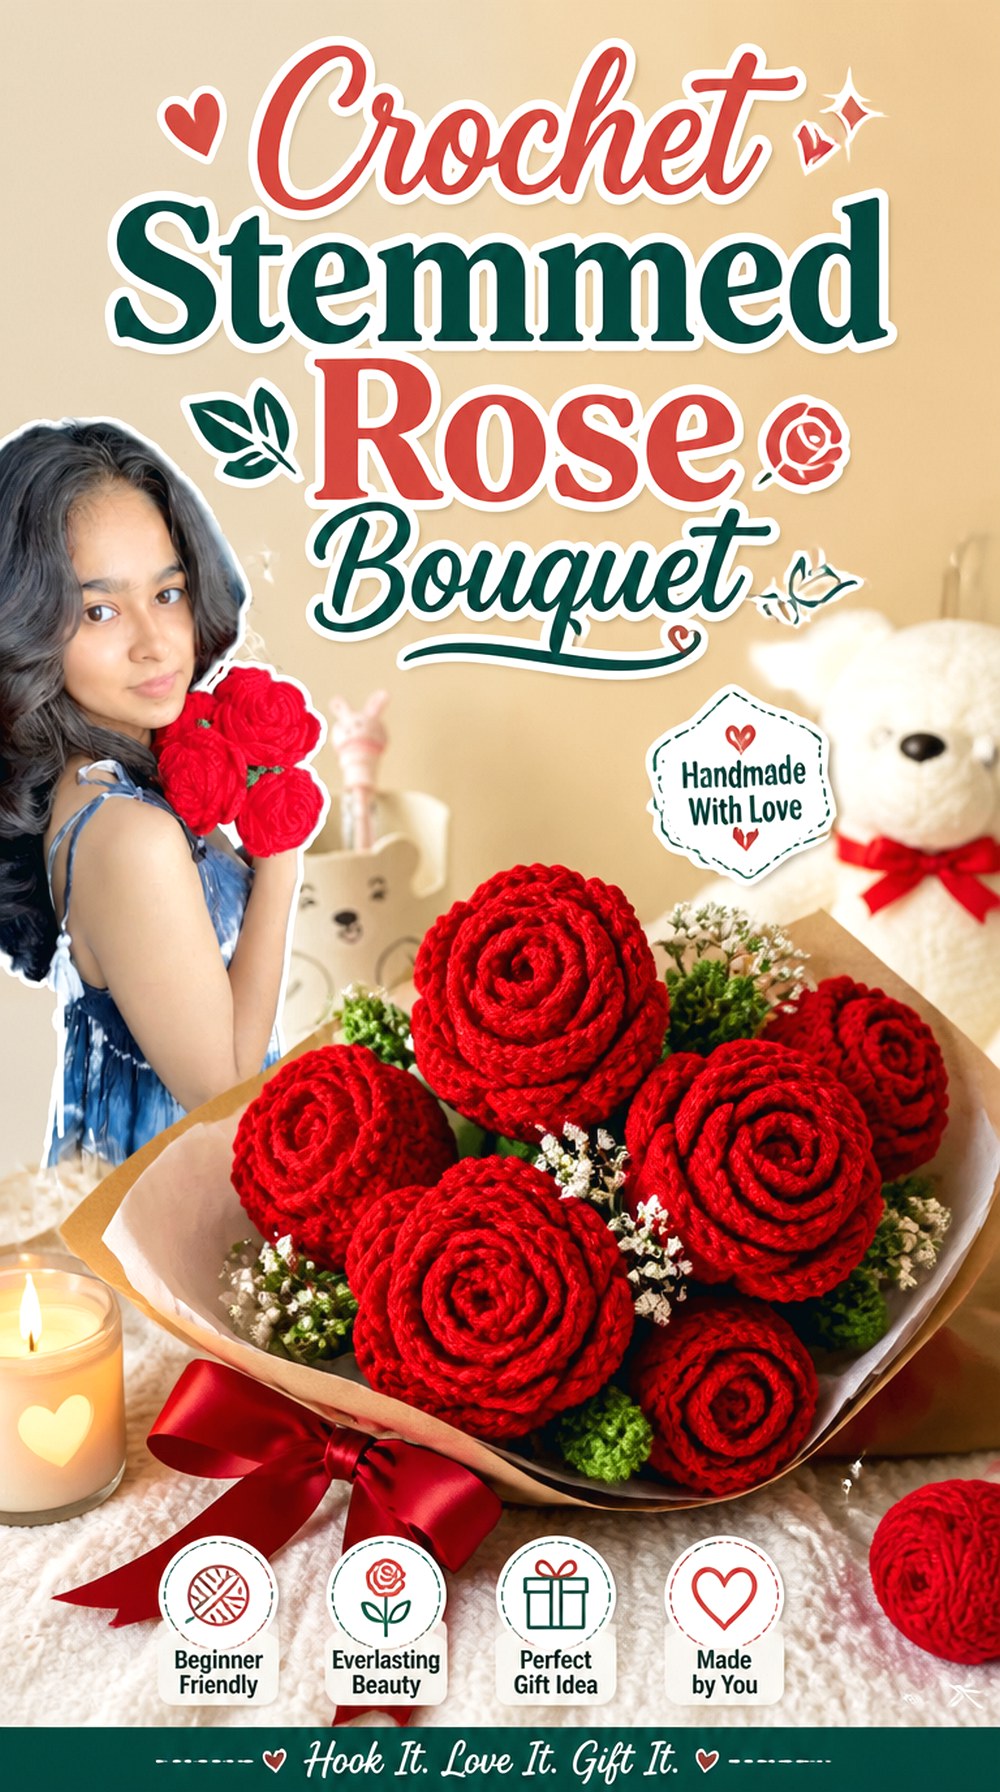
The bouquet turns individual crochet roses into freestanding display flowers. Instead of attaching the bloom directly to fabric, the tutorial builds the visual relationship among the rose, sepals, leaves, stem, and the completed arrangement.
The Yarnling’s tutorial shows the full rose bouquet concept, including the floral components and assembly into stemmed flowers.
Bloom Angle Matters Once a Stem Is Added
A rose attached to a stem is viewed from the side as well as the front. Before fixing the final position, hold the flower upright and inspect how the petals sit relative to the stem.
A bloom angled too far downward can hide its center; a completely upright flower may look different from the softer bouquet profile you want.
Mix Visual Stages Instead of Only Changing Color
Bouquets can gain variety through bloom openness, leaf position, and flower angle rather than relying entirely on different colors. If the source provides compatible flower variations, compare those structural differences first.
Plan the Arrangement Before Final Wrapping
Several individually attractive stems can still crowd each other when gathered. Arrange the flowers loosely in the intended vase or hand-held grouping before permanently finishing the bundle.
Check height relationships and make sure large blooms do not completely hide smaller ones.
Original Tutorial and Creator Credit
Creator: The Yarnling
Crochet Dimensional Rose Bag
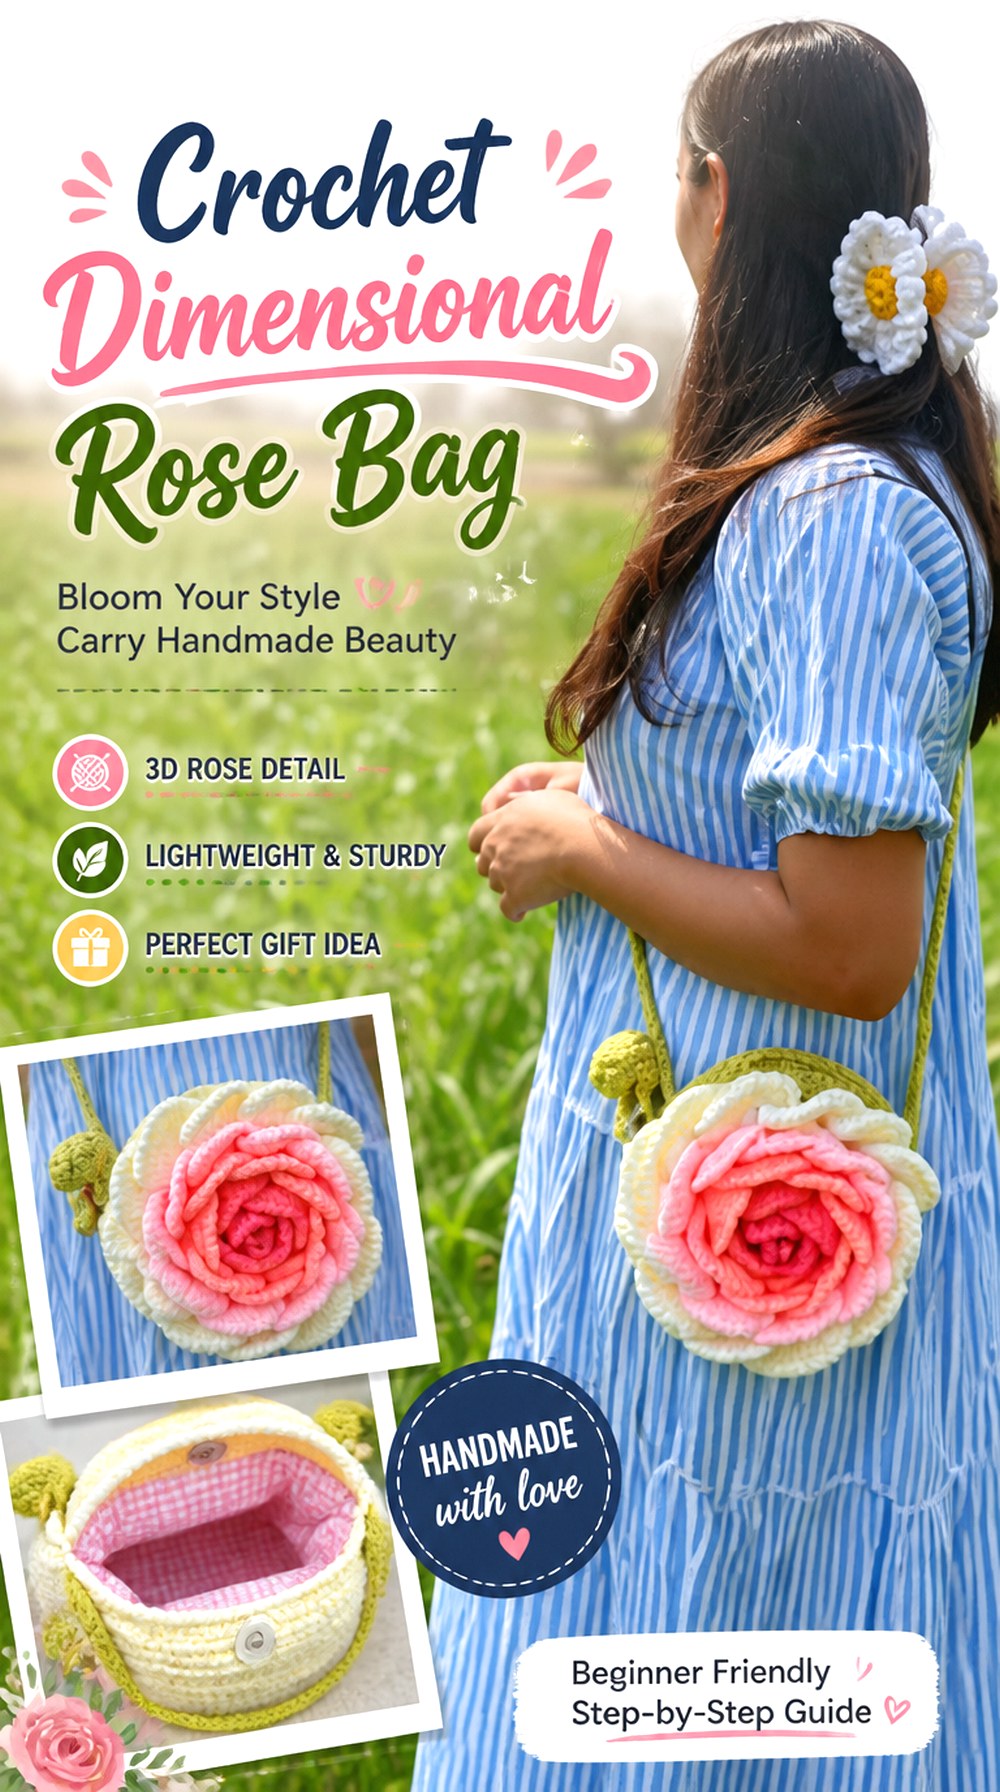
This project moves rosettes onto a much larger functional surface. Instead of one flower acting as a detachable accent, the rose design becomes an important part of the bag’s overall texture and visual identity.
Handmade by Sakshi’s tutorial shows a finished crochet rose bag and covers the rose pattern together with bag assembly and handles.
Floral Texture Adds Surface Weight
Dimensional flowers add more material than a flat color change or simple stitch pattern. When adapting the concept, consider how much of the bag you want covered in raised roses.
A concentrated floral area creates a focal point while leaving more of the base visible. Wider coverage creates a stronger statement but can also change how the fabric hangs.
Keep the Opening Clear
The upper edge of a bag needs to remain easy to access. Before fixing flowers near the opening, check that petals do not fold inward where they could interfere with handles, closures, or the usable opening.
Support the Roses From Stable Fabric
A large flower attached to an open or stretchy section can pull the surrounding stitches out of shape. Place or attach dimensional motifs where the bag fabric can support them without excessive distortion.
If you change yarn or scale, test one attached rose before repeating the motif across the bag.
Original Tutorial and Creator Credit
Creator: Handmade by Sakshi🌻
Crochet Rose Brooch
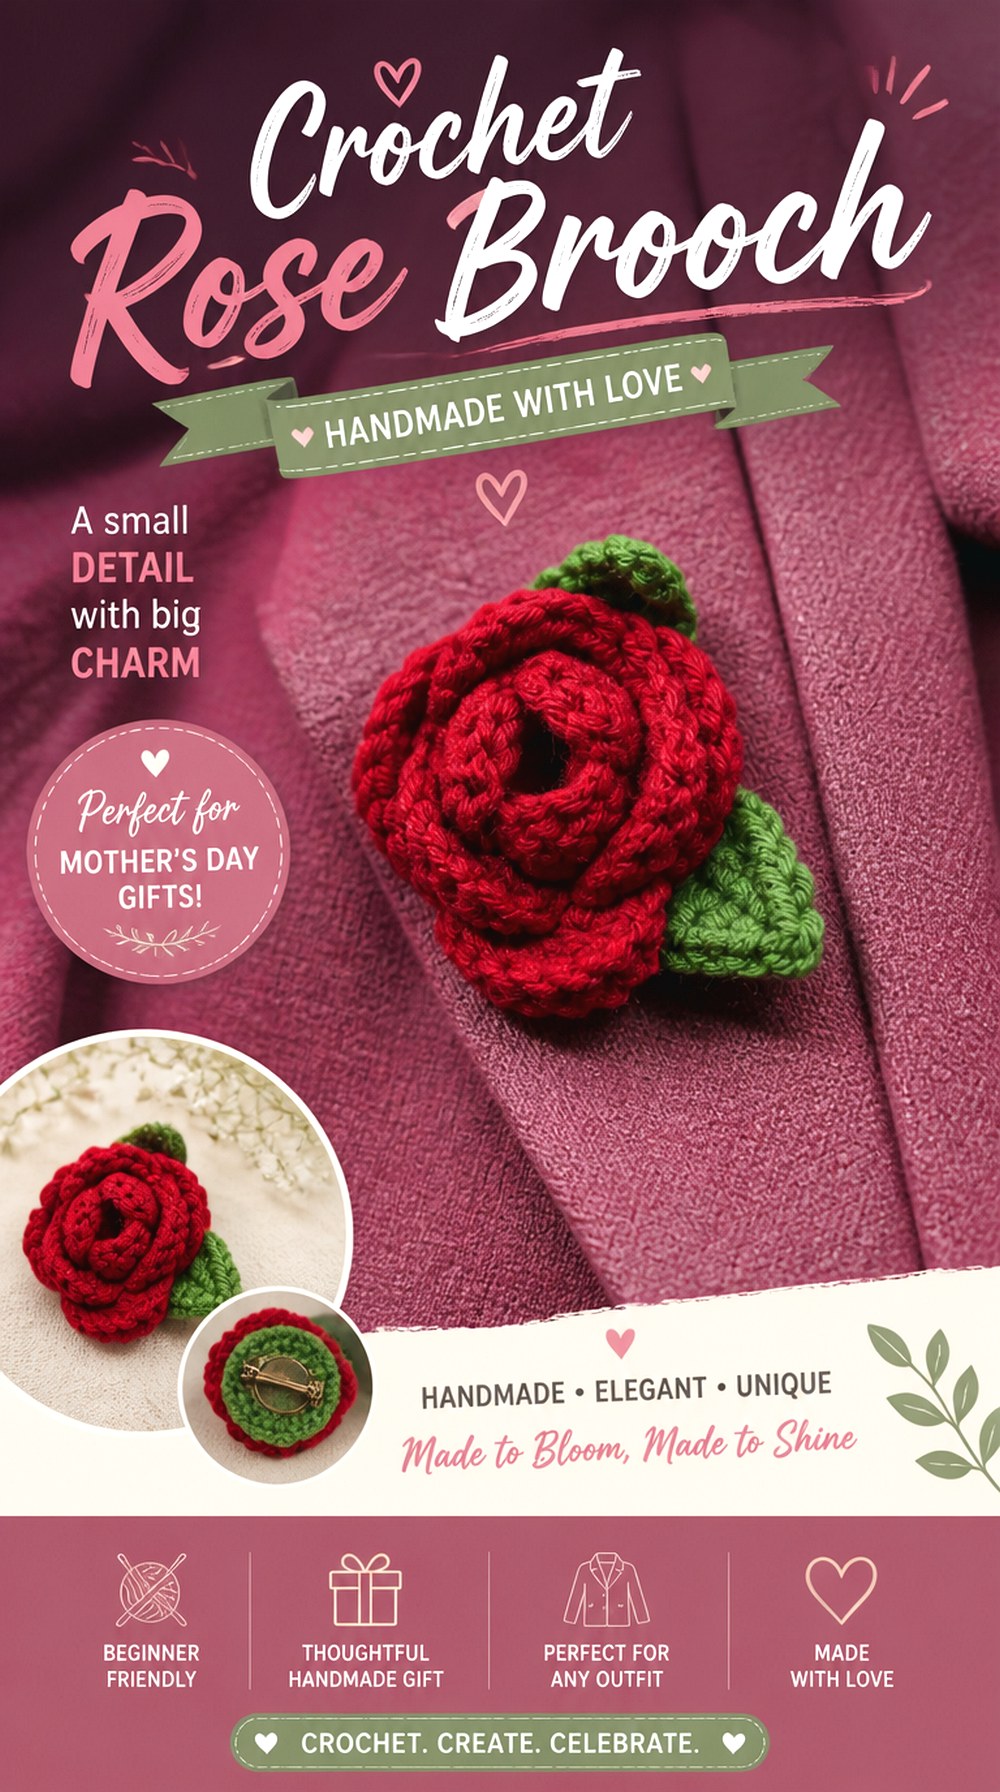
A brooch gives the crochet rose a compact backing that can move between garments or accessories. It is more formal and structured than a simple appliqué because the flower is finished as its own wearable object rather than waiting to be sewn permanently onto something else.
Let’s Yarn Over Over demonstrates a crochet rose made specifically into a brooch.
Center the Pin on the Stable Part of the Flower
A brooch tilts when its hardware sits too far from the flower’s center of mass. Before sewing the pin in place, hold it against the back and check whether the rosette naturally faces forward.
The hardware should connect to the firm base, not just the soft outer petals.
Consider the Fabric That Will Carry the Brooch
A heavier dimensional flower may sit differently on a dense coat than on a very light blouse. Test the finished piece on fabric similar to what you intend to wear it with.
If the fabric puckers noticeably, a smaller flower or different placement may work better.
Removability Makes Placement Part of the Design
Unlike a sewn appliqué, a brooch can move from a lapel to a bag, scarf, or hat. Keep the back tidy so the piece looks intentional no matter where it is positioned.
Original Tutorial and Creator Credit
Creator: Let’s Yarn Over Over
Crochet Rose Accent Headband
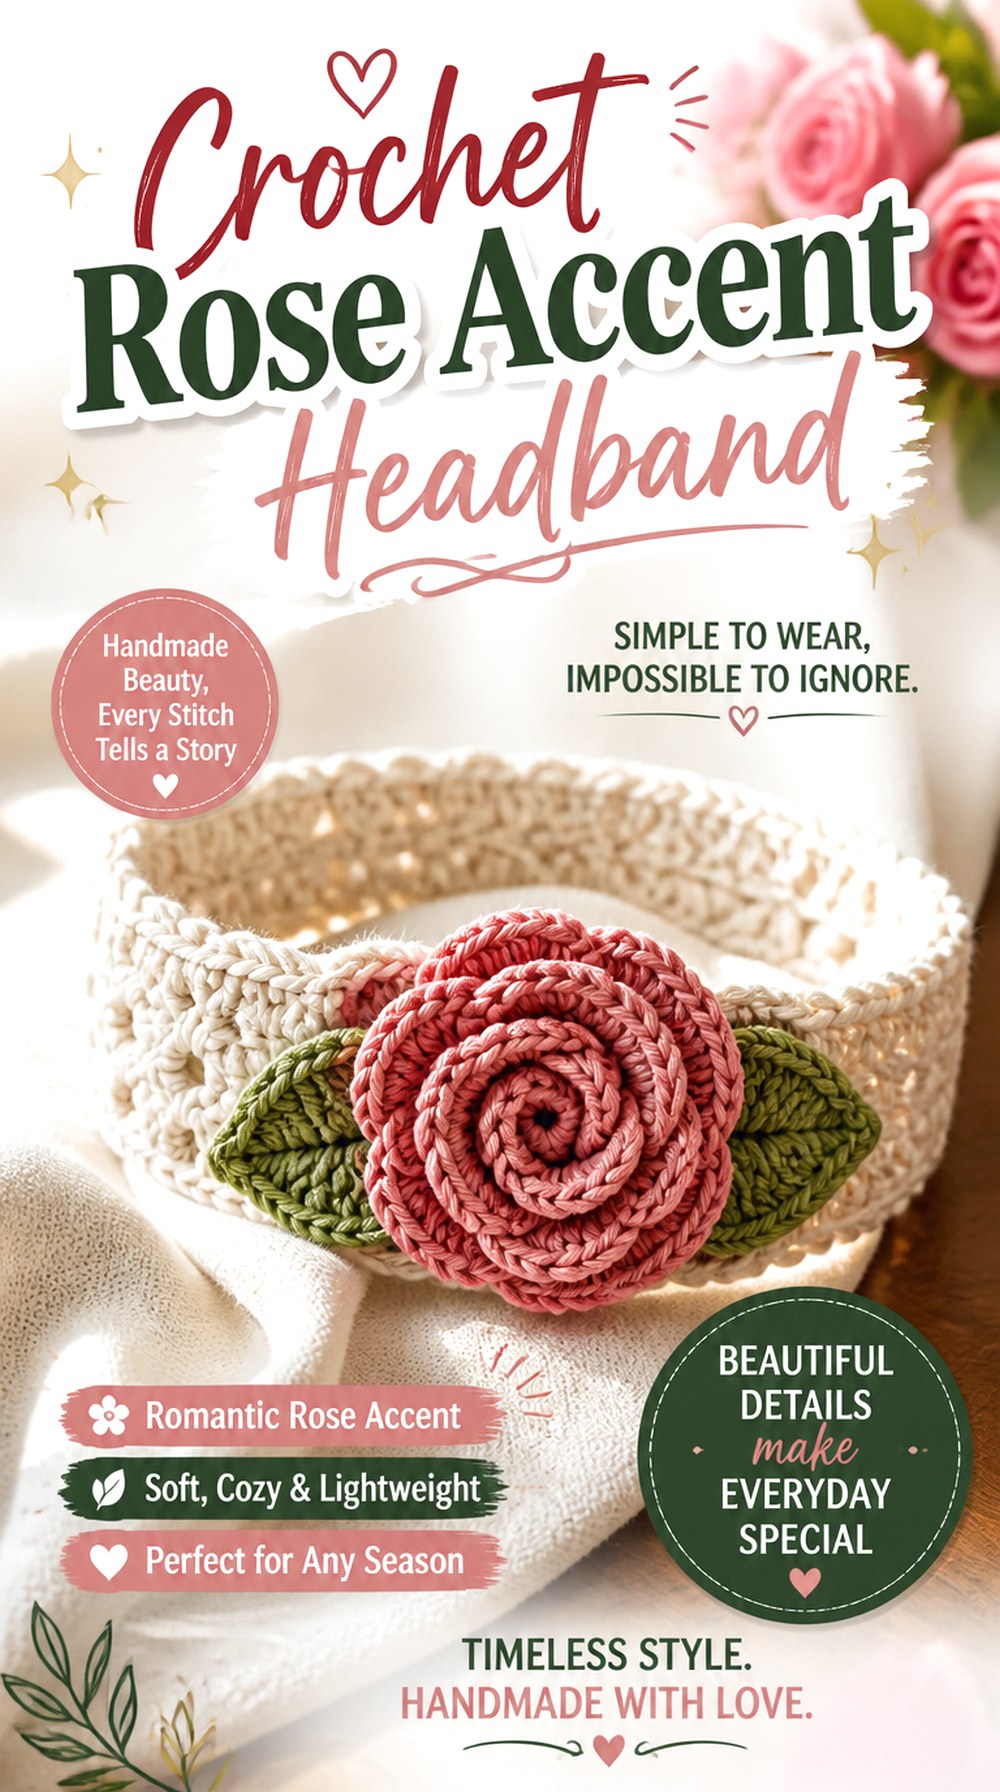
This headband uses a recognizable rose as a decorative focal point on a simpler band. Compared with the wider turban version earlier in the list, the emphasis here is on the flower rather than a strongly textured headband structure.
The Coc Tips & Tricks tutorial demonstrates the headband base, rose, and flower attachment as parts of one finished accessory.
Decide Whether the Rose Should Be Centered or Offset
A centered flower produces a symmetrical look, while a side placement can feel more like a floral fascinator or accent band. Try the unfinished band on and mark the position while it is being worn.
The visual center of a stretched headband can differ from what looks centered while the piece is lying flat.
Make the Fit Check Before Sewing the Rose
Adding a flower can hide the exact section of the band where you later need to adjust or join. Confirm the headband fit first, then attach the decorative element after the main structure is settled.
Keep Leaves and Petals Clear of the Hairline
If you add extra leaves or enlarge the flower, check the lowest edge when the headband is worn. Decorative pieces that extend too far downward can rub against the forehead or interfere with hair placement.
Original Tutorial and Creator Credit
Creator: Coc Tips & Tricks
Crochet Flower Clip with Ribbon Lined Base
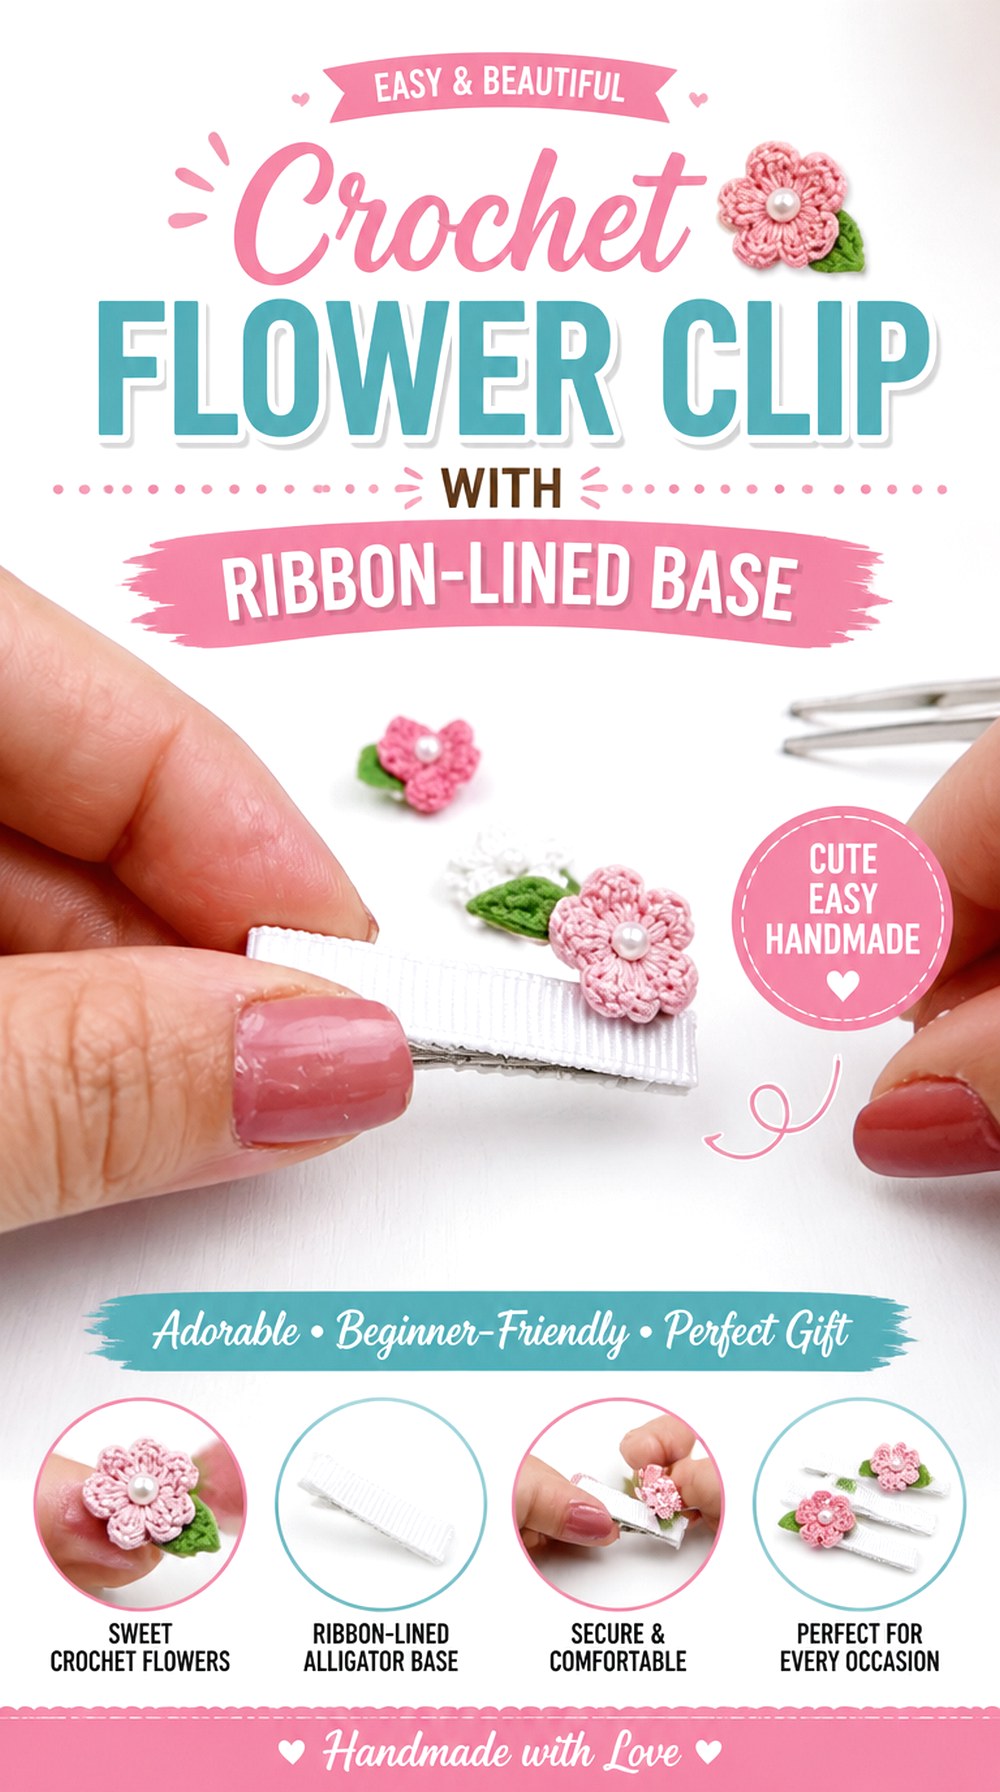
This final idea combines crochet with an actual ribbon-backed hair clip. The flower provides the soft handmade focal point, while ribbon is used to cover the alligator clip underneath. That makes the project particularly relevant if you want the “rosette ribbon” idea to include both yarn and conventional ribbon in the same accessory.
Remarkable Crochet demonstrates the flower hair clip as well as lining an alligator clip with ribbon.
Lining Changes the Look of Exposed Hardware
A bare metal clip can remain visible around a small crochet flower. Adding ribbon creates a more finished base and lets the support coordinate with the flower instead of competing with it.
Choose a ribbon width that works with the actual clip rather than selecting it by color alone.
Keep the Clip Mechanism Functional
Decorative ribbon and crochet should not obstruct the hinge, gripping area, or section that needs to open. Test the clip repeatedly after lining it and again after adding the flower.
This is an important difference from a sewn headband or elastic hair tie: the mechanical hardware must continue working freely.
Position the Flower for the Way the Clip Is Worn
An alligator clip has a clear direction. Before attaching the crochet flower, hold the clip in the orientation you normally use and confirm which way the bloom should face.
A quick orientation check prevents a neatly made flower from appearing upside down once the accessory is in the hair.
Which Crochet Rosette Ribbon Idea Should You Choose?
For the lightest ribbon-like wearables, start with the Crochet Rose Ribbon Choker, Rose Ribbon Bracelet, or Rose Ribbon Hair Tie. Their narrow bands keep the flower visually dominant without creating a large crocheted surface.
If you want removable accents, the Rose Brooch and Rose Shawl Pin make more sense because the flower can move between different garments or accessories. For hair styling, compare the single-flower headbands with the Rose Gajra: the headbands create one focal point, while the gajra depends on repeated blooms following the curve of a bun.
The Rose Bag and Stemmed Rose Bouquet use rosettes at a larger visual scale, while the Mini Rosette Earrings, Keychain, and Bookmark show how the same floral idea can be reduced for small practical accessories.
Conclusion
The main difference among these 16 crochet rosette ribbon ideas is not simply flower color. The finished use changes the way the rosette needs to behave. Chokers and bracelets need flexible bands, hair pieces need secure attachment, earrings benefit from compact scale, brooches need stable backing, and bags or bouquets can support much more dimensional flowers.
If you want a project that highlights the ribbon effect, begin with the choker, bracelet, bookmark, or ribbon-lined clip. For a stronger floral statement, consider the bag, bouquet, gajra, or turban headband. Use the original tutorials for the creators’ exact construction details, then make your own material and placement decisions based on how the finished item will actually be worn, carried, or displayed.
Frequently Asked Questions
What does “crochet rosette ribbon” mean?
The phrase can describe several related ideas rather than one universal crochet construction. A rosette may be formed from a curled, ribbon-like crochet strip, attached to long ties, placed on a narrow band, or used as the center of a ribbon-style accessory. It can also refer more broadly to decorative crochet rosettes used where a fabric ribbon flower might normally appear. Look at the finished shape you want before choosing a tutorial.
Is a rolled crochet rose better than a flat rosette?
Neither is automatically better. A rolled rose creates noticeable depth and spiral movement, which works well for brooches, bouquets, bags, and statement accessories. A flatter rosette can sit more comfortably on garments, small clips, or pieces where thickness would be inconvenient. Choose according to the mounting surface and how much projection you want from the finished flower.
Can I use a different yarn weight for a crochet rosette?
Often you can adapt the general concept, but changing yarn weight can change the flower’s diameter, thickness, drape, and petal definition. Those changes matter more in fitted or small accessories such as chokers, bracelets, earrings, and hair clips. Make one complete sample with the substitute yarn and evaluate the finished flower before committing to several matching pieces.
How do I stop a rolled crochet rosette from opening?
The important checkpoint is the base of the flower. After the strip is curled into the desired shape, all important layers need to remain connected at the back according to the source tutorial’s finishing method. Before attaching the flower to a clip, pin, bag, or band, gently move the outer petals and confirm that the center and lower layers stay together.
Should I attach a rosette before or after finishing the main accessory?
In most adaptable projects, it is useful to finish and check the main structure first. Confirm the fit of a headband or bracelet, the usable opening of a bag, or the orientation of a clip before fixing the flower permanently. Temporary positioning also lets you compare centered, offset, clustered, and repeated placement without having to undo finished attachment stitches.
How can I make several crochet rosettes look consistent?
Use the same yarn, hook, tension approach, and finishing method, but also compare the flowers after they are fully assembled. Rolled flowers can look different even when the crocheted strips begin similarly because the final curl affects diameter and fullness. Place repeated roses side by side before attaching them and adjust their shaping while you still can.
Can I turn a crochet rosette tutorial into another type of accessory?
Often the flower concept can be adapted, but the backing or attachment should be reconsidered for the new use. A brooch pin, elastic hair tie, alligator clip, earring post, key ring, or sewn bag attachment experiences different movement and stress. Treat the flower and its mounting method as two separate decisions instead of assuming the same attachment will work everywhere.


