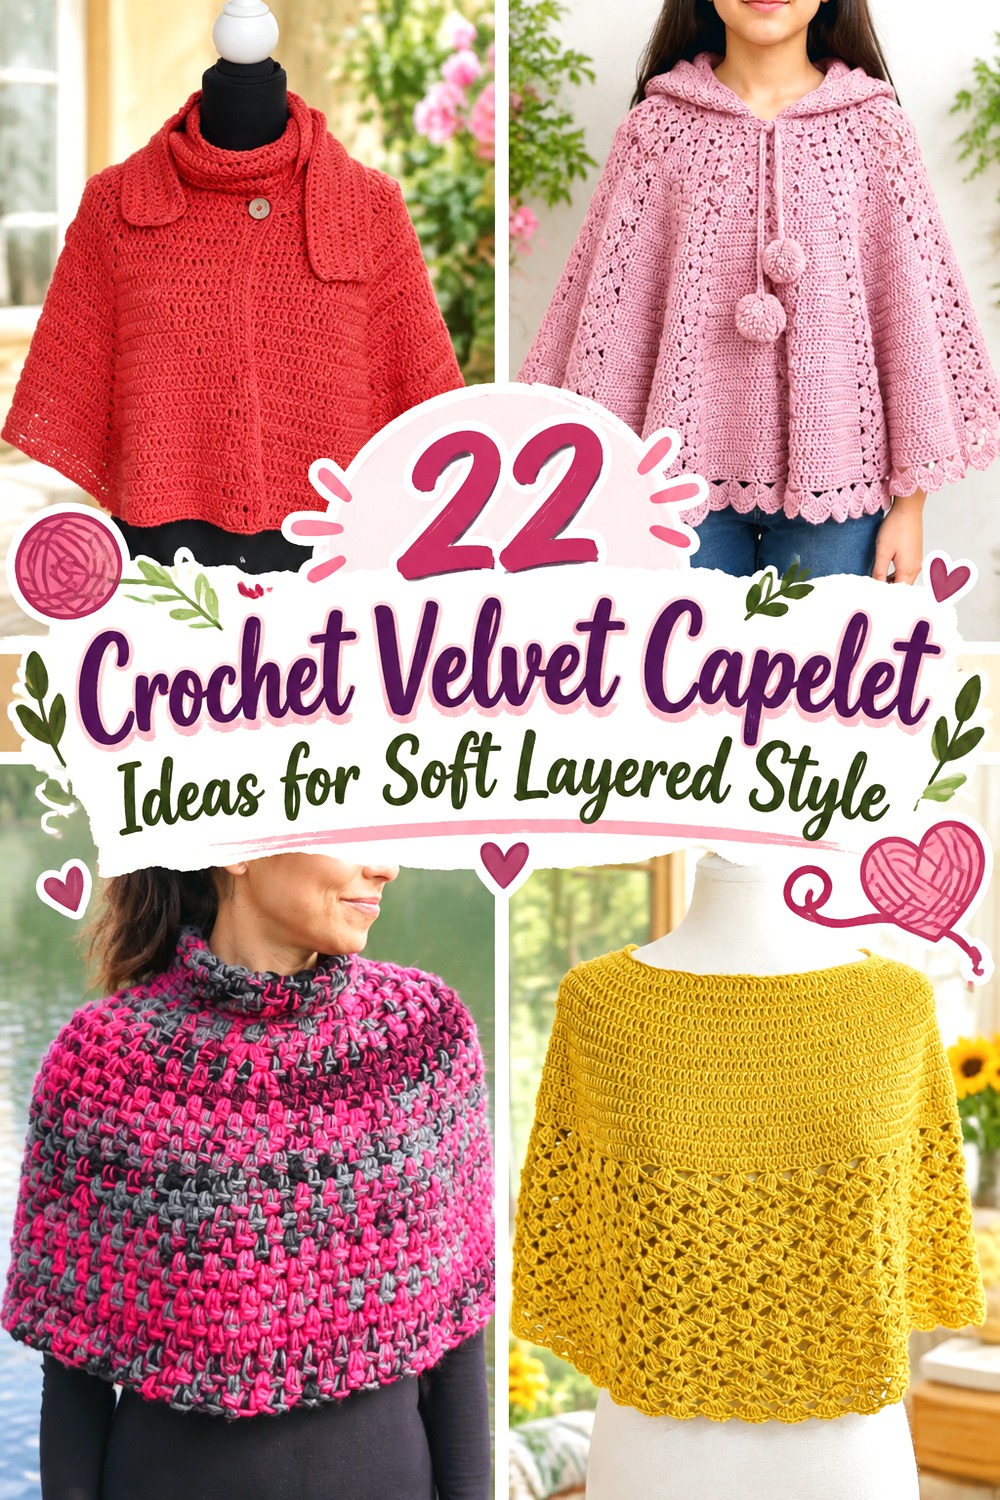

A crochet velvet capelet can range from a neat shoulder warmer to a hooded mini cape, vintage-inspired wrap, or short poncho. That range matters because plush velvet yarn changes more than color: its pile can soften stitch definition, add visual density, and make some constructions feel heavier than they would in the yarn originally used.
The 22 ideas below focus on genuinely different capelet and short-cape constructions. Some source tutorials use yarns other than velvet, so think of them as construction references rather than automatic one-for-one yarn substitutions. Open lace, raised cables, fitted necklines, and long fringe deserve especially careful swatching before you commit.
Quick List
- Crochet Velvet Moss-Stitch Hooded Capelet
- Crochet Velvet Edwardian Tie-Front Capelet
- Crochet Velvet 1891-Inspired Vintage Capelet
- Crochet Velvet Short-Row Shoulder Capelet
- Crochet Velvet Classic Shoulder Capelet
- Crochet Velvet Snowdrift Cable Capelet
- Crochet Velvet Box-and-Bow-Tie Collar Capelet
- Crochet Velvet Braided-Cable Drawstring Cape
- Crochet Velvet Granny Fringe Capelet
- Crochet Velvet Cozy Shawl-Poncho Capelet
- Crochet Velvet Lace Hooded Storybook Capelet
- Crochet Velvet Hooded Shoulder Cape
- Crochet Velvet Textured Fall Poncho Capelet
- Crochet Velvet Buttoned Everyday Capelet
- Crochet Velvet Lace-Trim Buttonhole Cape
- Crochet Velvet All-Size Capelet-Poncho
- Crochet Velvet Mini Cape for Women and Girls
- Crochet Velvet Circular Draped Capelet
- Crochet Velvet Girls’ Hooded Capelet-Poncho
- Crochet Velvet Basic All-Size Shoulder Cape
- Crochet Velvet Lightweight Summer Capelet
- Crochet Velvet Family-Size Classic Cape
Velvet Yarn Changes More Than the Surface
Velvet and chenille-style yarns create a plush fabric because the visible pile surrounds the yarn core. That softness can also make individual stitches harder to read, especially in intricate lace, small cables, or tightly packed texture. A design that looks sharply sculpted in smooth yarn may appear softer and less defined when translated into velvet.
Before adapting any tutorial, crochet a generous swatch in the stitch style that matters most to the project. Look at it from normal wearing distance rather than only close up. Check whether the texture is still readable, whether open spaces stay open, and whether the fabric bends comfortably instead of becoming stiff. If the velvet version overwhelms the original design, a simpler capelet construction may showcase the yarn better than a more elaborate one.
Check Neckline and Shoulder Weight Before Committing
Capelets concentrate much of their fabric around the neck and shoulders, so yarn substitution can affect comfort quickly. A yarn that is thicker or heavier than the tutorial yarn may enlarge the fabric while also increasing the weight hanging from the neckline. Hoods, fringe, dense cables, and long lower edges add still more material.
Treat the neckline as a fit checkpoint rather than assuming the body can simply be lengthened or widened. Make sure the opening sits where you want it, the capelet clears the shoulders, and the lower edge does not pull the neck backward. For buttoned or tied styles, also watch whether the closure carries too much of the garment’s weight. When changing yarn type, follow the tutorial’s construction logic while using your own swatch and body measurements to judge the adapted fit.
Choose a Construction That Lets Velvet Do Its Job
Velvet usually has the strongest visual impact when the silhouette and plush surface can be appreciated without depending on tiny stitch details. Smooth circular capelets, straightforward shoulder capes, short poncho shapes, and substantial hoods therefore make practical starting points.
Texture-heavy designs can still work, but they require a different test. For cables, confirm that the raised lines remain visible. For filet or lace, hold the swatch over the clothing color you expect to wear underneath and see whether the openings remain distinct. For fringe, check how the extra strands affect the lower edge. A design should not be rejected simply because it was created in another yarn; the useful question is whether your velvet swatch preserves the feature that makes that particular capelet worth choosing.
Crochet Velvet Moss Stitch Hooded Capelet
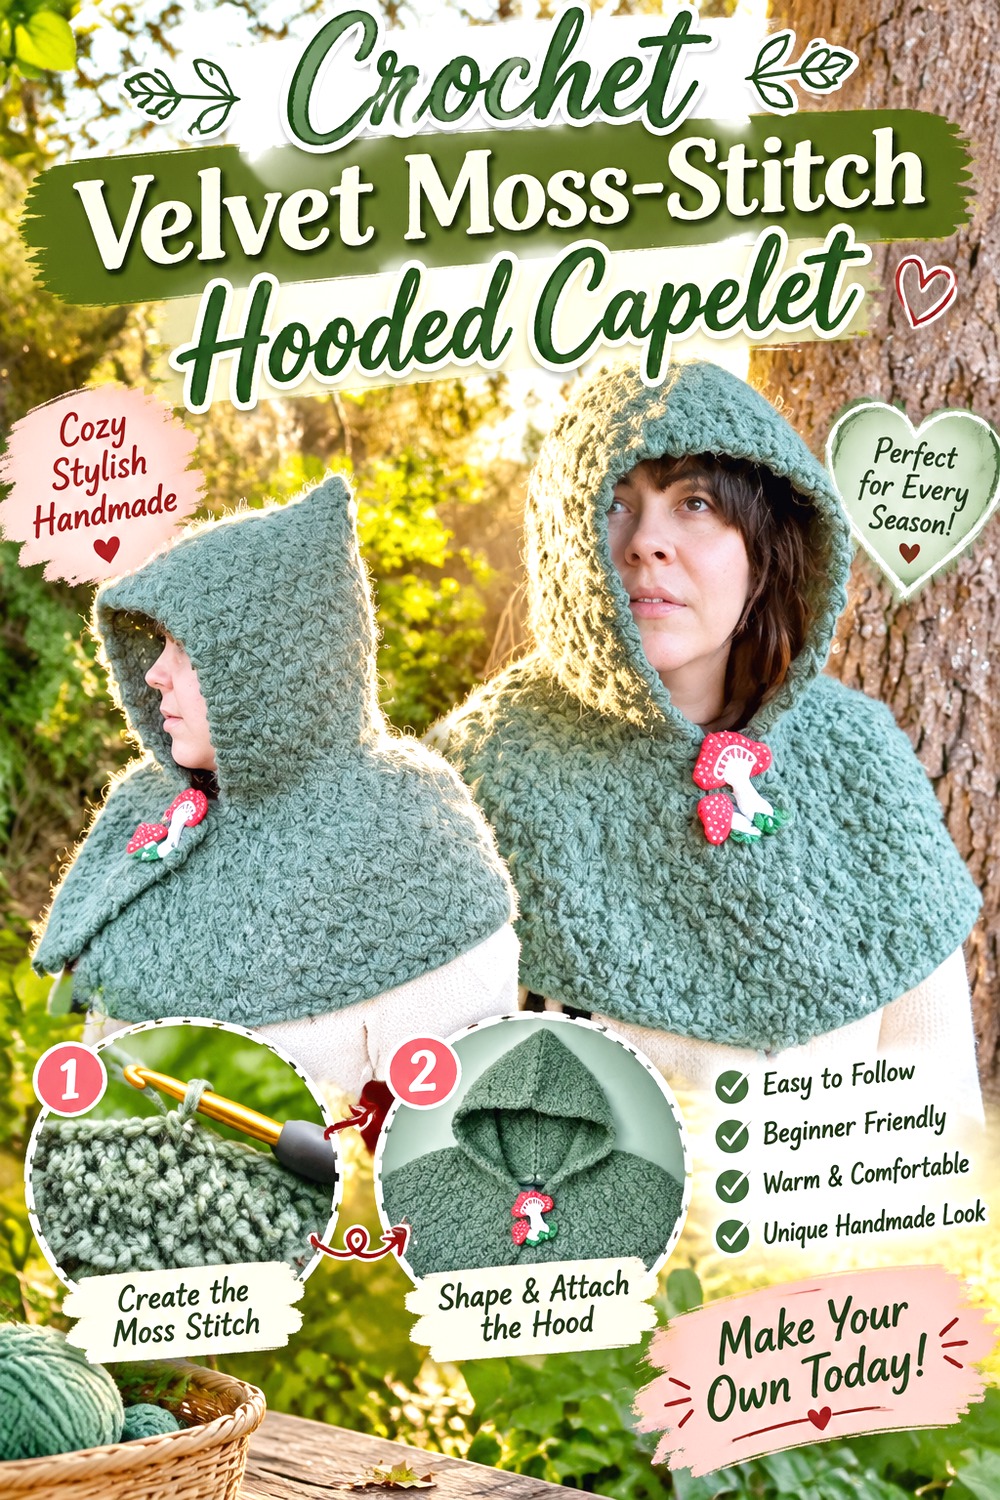
This hooded capelet combines a short shoulder-covering body with a substantial hood, giving it more of a small-cloak character than a standard neck warmer. Lizfaerie Crafts uses extended moss stitch in the source design, so the surface has visible texture without relying on elaborate lace. The tutorial also shows the capelet as a complete garment rather than simply adding a hood to a scarf.
Velvet could emphasize the soft, enveloping shape particularly well. The important adaptation question is whether your yarn keeps enough flexibility around the neckline for the hood to fall naturally instead of pulling backward.
The Hood Makes Yarn Weight More Noticeable
A hood adds a concentrated amount of fabric behind the neck. With a heavier velvet yarn, that extra mass can alter how the capelet rests on the shoulders. Make your fabric swatch large enough to judge its weight and flexibility, not merely its stitch appearance. If the material already feels dense in a small sample, increasing the hood and cape body substantially could make the finished piece less comfortable than expected.
Moss Texture Can Survive a Softer Surface
Compared with intricate lace, moss-style texture does not depend entirely on tiny raised details. That makes this construction interesting for plush yarn, although stitch definition still varies between velvet products. View the swatch both close up and from several feet away. If the texture disappears completely, let the hooded silhouette become the main visual feature rather than trying to force additional decorative stitches into the fabric.
Original Tutorial and Creator Credit
Creator: Lizfaerie Crafts
Crochet Velvet Edwardian Tie Front Capelet
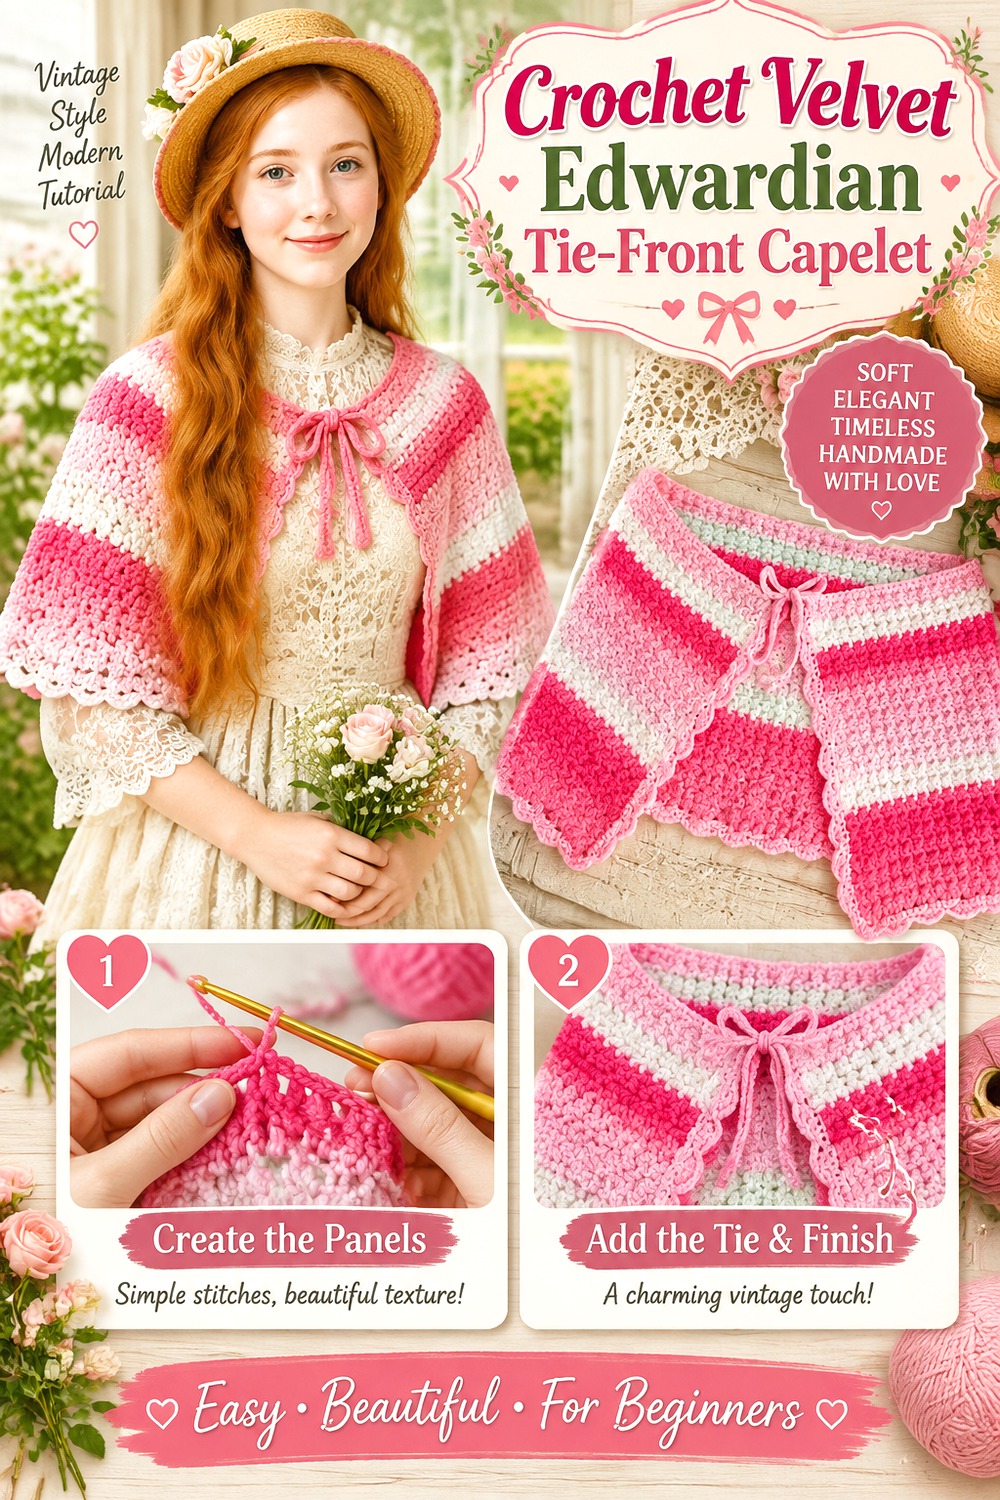
A short Edwardian-inspired capelet gives velvet a more formal direction. Selina Veronique Crochet presents a vintage-style cape with a decorative shell edging and front ties, creating a garment that feels closer to a historical shoulder wrap than a casual poncho.
For a velvet interpretation, the strongest features are the compact length and defined front opening. The plush surface could make the silhouette look especially rich, but the edging needs a swatch because highly textured yarn can soften the crisp outline of decorative shells. This is a good choice when you want the closure and neckline to be part of the design instead of hiding beneath a hood.
Front Ties Need to Support the Fabric Comfortably
Ties look lighter than buttons, but they still help control where the capelet sits. If your velvet yarn produces a noticeably heavier fabric than the source material, check that the front ties are not being asked to carry excessive tension. The shoulder line should support the garment naturally. Treat the ties as a positioning feature rather than the only thing keeping a heavy capelet in place.
Decorative Edging Needs Enough Definition
The border contributes strongly to the historical character of this design. Crochet a section of comparable decorative texture before deciding that velvet is suitable. If the shell shapes merge visually into one fuzzy edge, a less plush yarn may preserve the original look better. Another option is to keep the capelet body velvet-soft while choosing a compatible, better-defined material for a contrasting trim only if your own planning supports that combination.
Original Tutorial and Creator Credit
Creator: Selina Veronique Crochet
Crochet Velvet Inspired Vintage Capelet
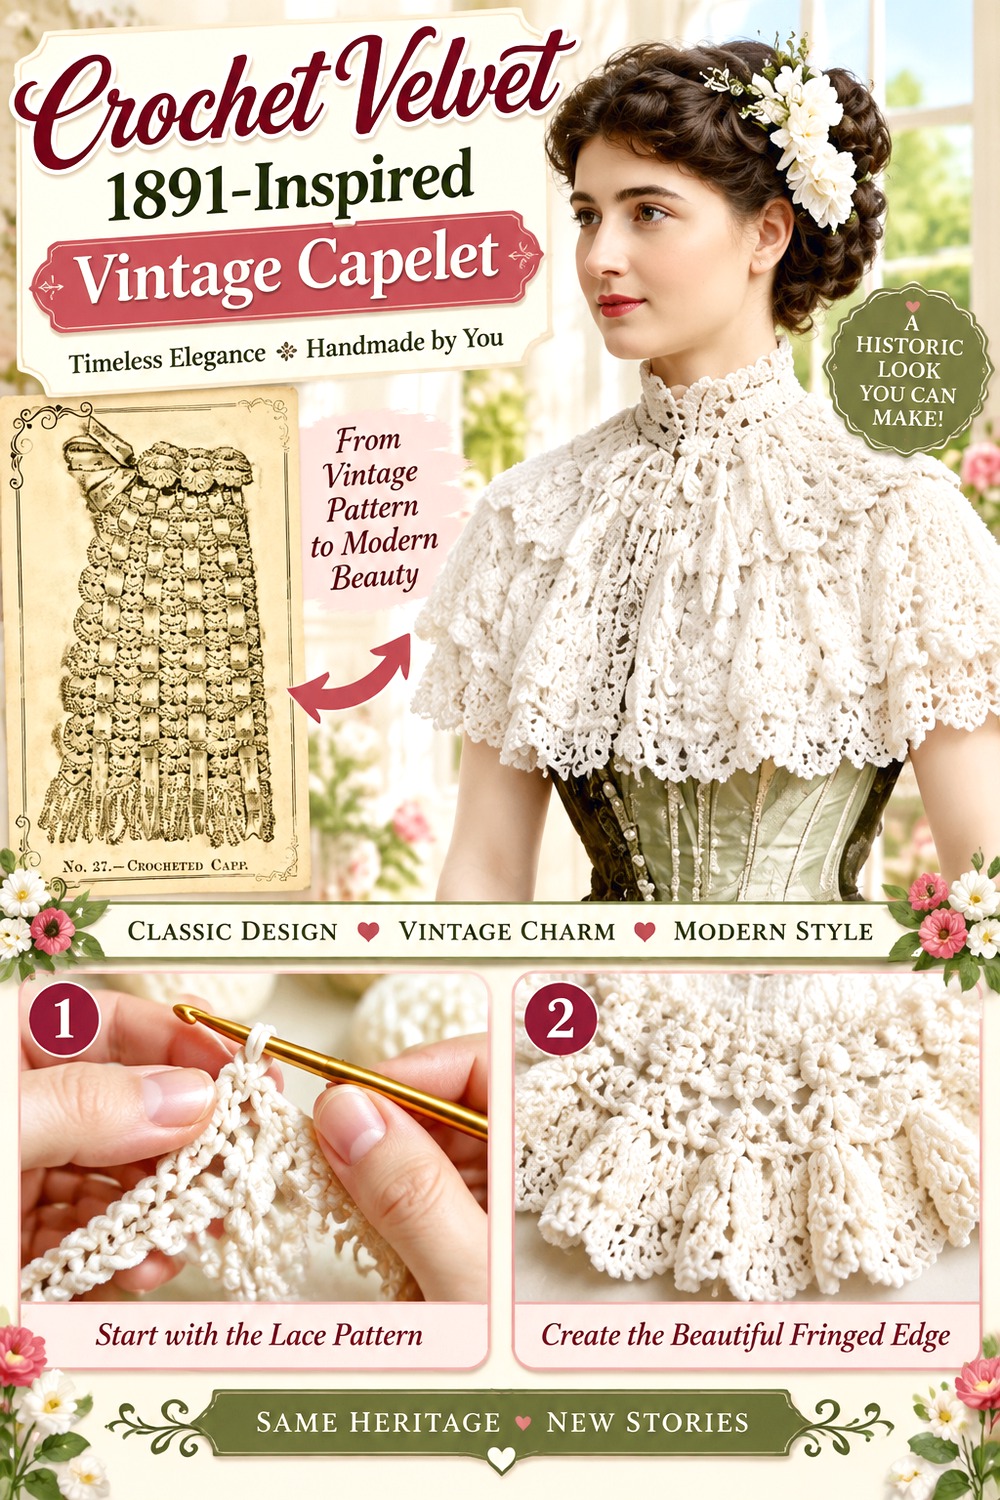
Just Vintage Crochet bases this project on an 1891 capelet, making it one of the most historically focused choices in the collection. Instead of starting with a modern poncho and shortening it, the project approaches the capelet as its own vintage garment form.
That makes it appealing for velvet because the yarn itself can reinforce the dressed-up, period-inspired mood. The challenge is avoiding a substitution that changes the proportions too dramatically. Vintage-style shaping can look very different if a much thicker yarn increases the neck opening, shoulder span, and depth at the same time.
Preserve the Historical Silhouette Before Adding Plushness
The strongest reason to choose this project is its vintage form, so prioritize silhouette over yarn novelty. Compare your gauge and fabric thickness with the tutorial before progressing far into a velvet version. If the cape becomes considerably larger or stiffer, the historical shape may disappear beneath the bulk. A velvet adaptation works best when it still reads first as a capelet rather than as an oversized poncho.
A Solid Color Keeps the Shape in Focus
Velvet already reflects light differently as the pile changes direction. That creates its own subtle visual variation even without complex color changes. For a historically influenced capelet, a restrained palette can keep attention on the neckline and overall form. Before combining multiple colors, place swatches together under normal indoor and daylight conditions; velvet can look surprisingly different as the light moves across its surface.
Original Tutorial and Creator Credit
Creator: Just Vintage Crochet
Crochet Velvet Short Row Shoulder Capelet
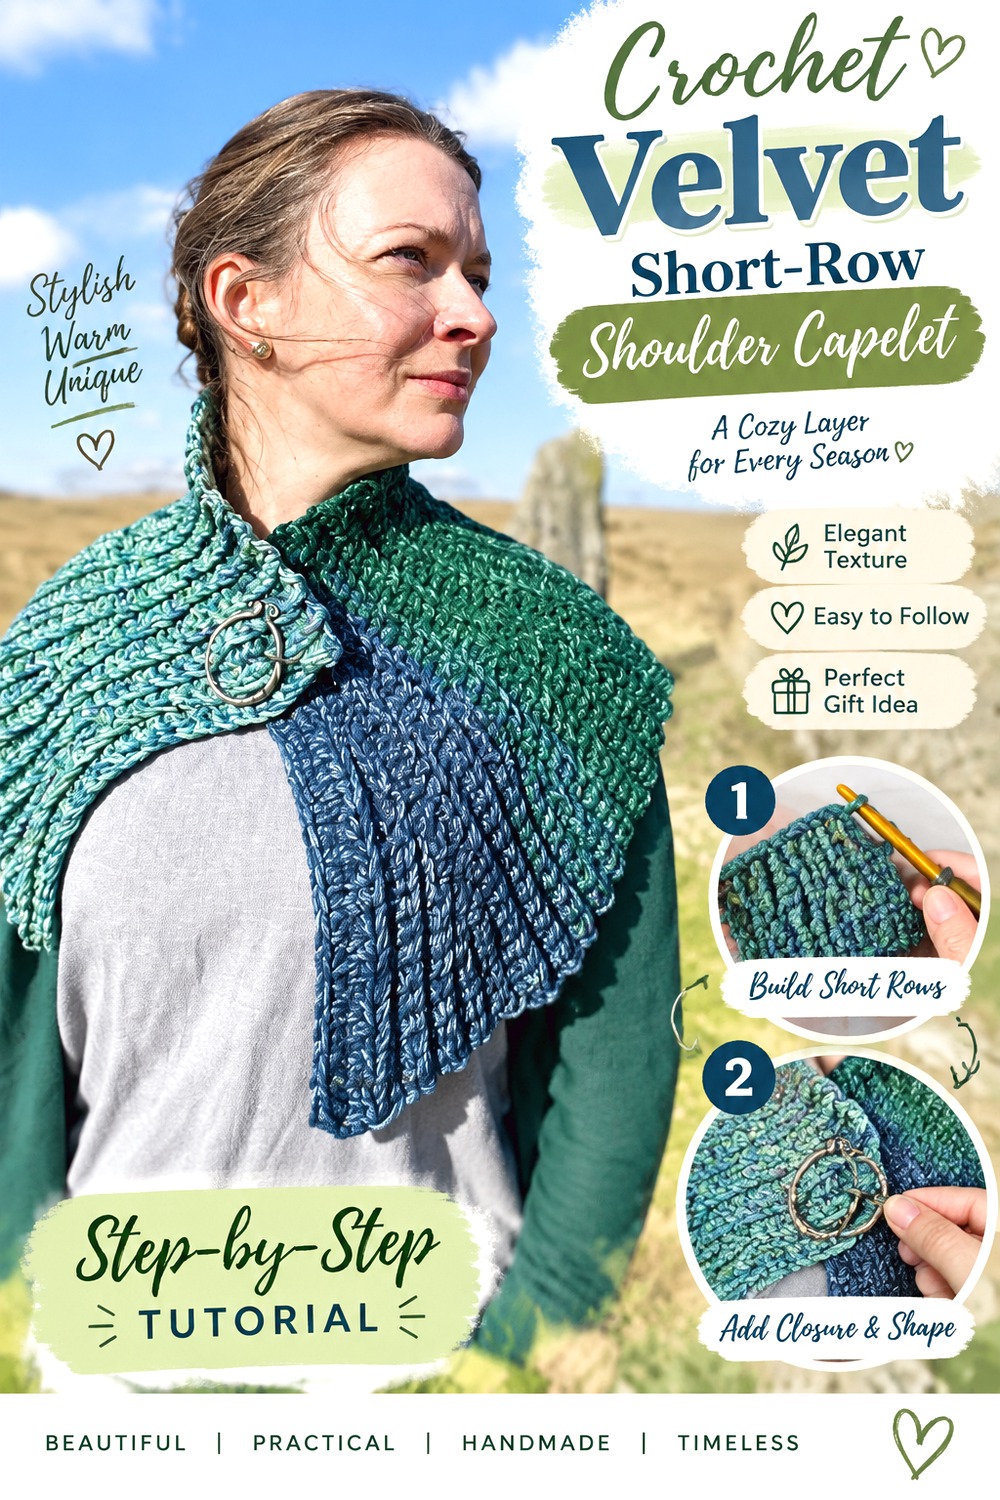
This capelet uses short-row shaping as an important part of its construction. Ophelia Talks Crochet developed the tutorial around Brianna’s capelet from Outlander, and the video specifically demonstrates short rows as the piece is formed.
That gives this option a different structural character from circular or rectangular capes. A velvet adaptation should concentrate on whether the shaping remains smooth at the shoulders. Plush yarn can hide individual stitches, which may make turning points harder to identify during the work even though the finished fabric looks beautifully soft.
Short Rows Make Stitch Tracking More Important
Velvet often makes it harder to see exactly where one stitch begins and another ends. That matters more in a shaped section than in a long uninterrupted rectangle. Use whatever non-pattern tracking method helps you stay oriented—such as removable markers at important transition points—without changing the creator’s construction. Losing your place in a plush fabric is more frustrating because ripping velvet can also be less pleasant than undoing smooth yarn.
Shoulder Shaping Is the Feature to Protect
Do not judge this version solely by whether your velvet color looks attractive. The short-row shaping is what distinguishes it from the simpler capelets in the list. Try on or compare the developing piece at the checkpoints demonstrated by the creator. If yarn substitution causes bunching, excessive flare, or a neckline that shifts, correct the fit issue before adding more length.
Original Tutorial and Creator Credit
Creator: Ophelia Talks Crochet
Crochet Velvet Classic Shoulder Capelet
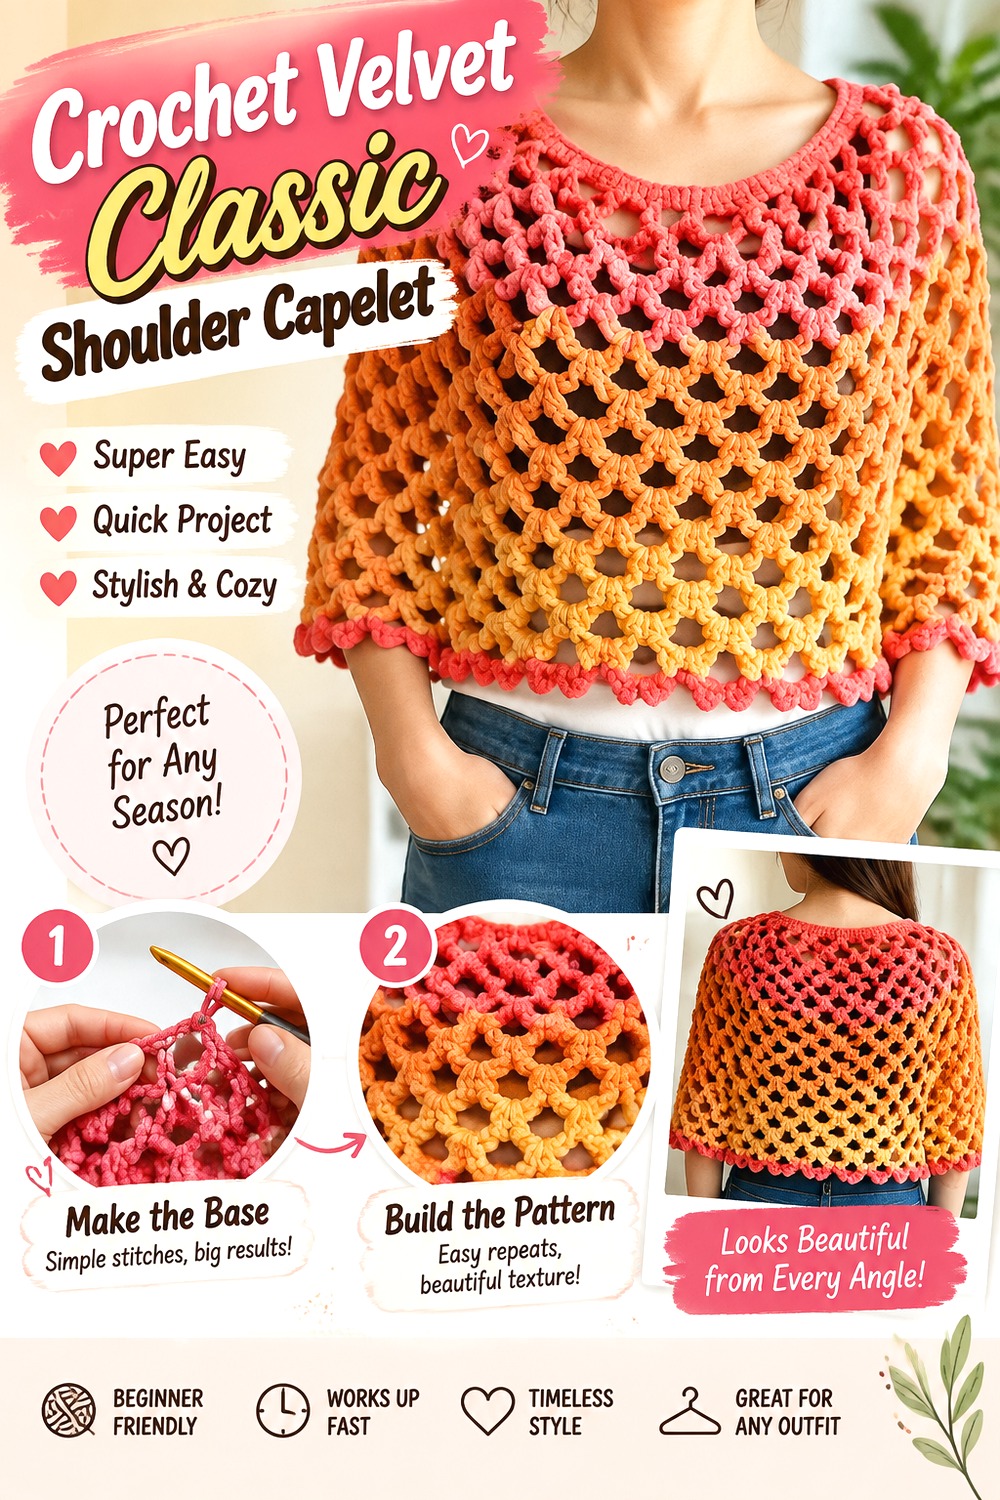
Crafting Shed’s tutorial offers a straightforward capelet route without requiring the strong styling identity of a hood, historical theme, or long fringe. That makes the basic shoulder-covering shape useful when the velvet itself is intended to be the main feature.
A compact capelet like this can work over a fitted top, dress, or simple long sleeve without covering as much of the body as a poncho. When adapting it, focus first on the circumference and depth. Plush yarn can make even a modest silhouette look visually substantial, so extra length is not always necessary.
Simplicity Gives Plush Yarn More Room to Show
Velvet has its own texture, sheen, and depth. A simpler capelet can therefore look intentional without adding several competing stitch effects. If your swatch already appears rich and dense, keeping the garment details restrained may produce a cleaner result. This is also a sensible project to compare against more complicated options before deciding whether cables, lace, or fringe are truly adding something you want.
Test the Lower Edge for Unwanted Stiffness
The hem should fall around the upper body rather than stand away from it like a rigid ring. If your chosen velvet yarn produces a stiff fabric, changing the garment length will not necessarily solve the problem. First check your fabric density and drape. The most useful velvet capelet is one that moves with the shoulders instead of fighting the body underneath it.
Original Tutorial and Creator Credit
Creator: Crafting Shed
Crochet Velvet Snowdrift Cable Capelet
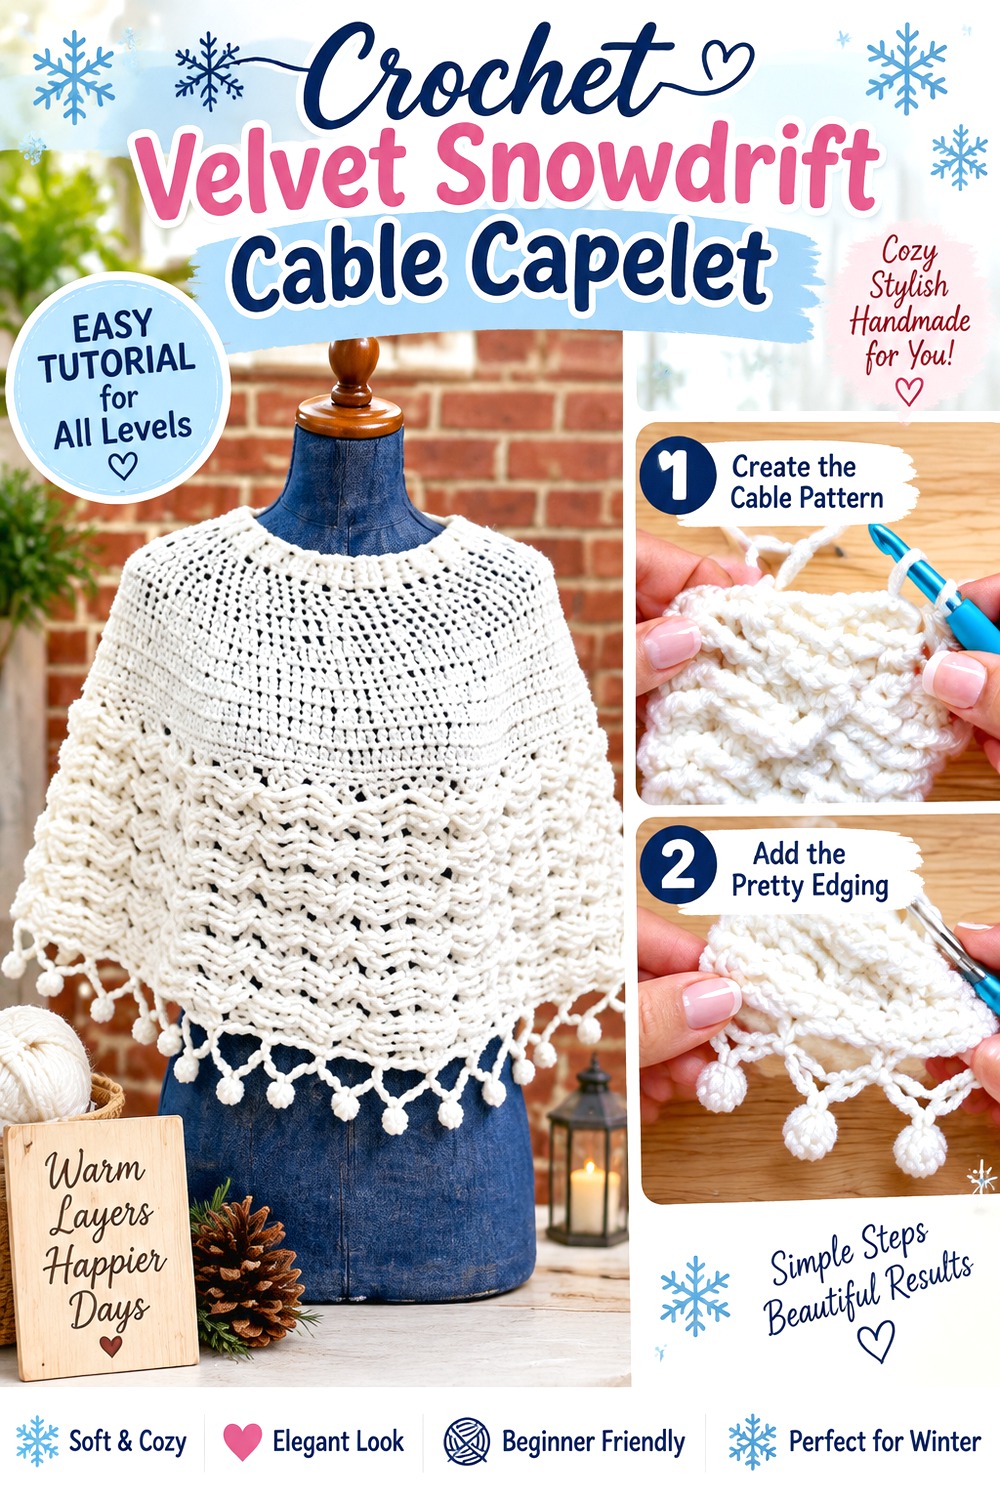
The Snowdrift Capelet has one of the most distinctive constructions here. Stitches n Scraps combines a sideways cable panel with a circular yoke and offers alternative finishing around the lower edge.
Cables and velvet are a visually tempting combination because both suggest softness, but they are not automatically compatible. The pile can blur the cable crossings that make the design special. This is therefore a project where the swatch should reproduce a meaningful section of texture rather than only a few basic stitches. If you cannot clearly see the raised cable movement, another yarn may serve the original design better.
Sideways Cables Need Clear Relief
The cable panel draws the eye around the capelet rather than simply downward. That directional texture is worth preserving. Look at your velvet cable swatch from across the room as well as close up. If it reads as a uniform plush strip, the extra work involved in creating cables is not providing much visible return. A smoother velvet with shorter pile may show relief better than an especially fluffy chenille.
The Yoke Controls How the Weight Reaches the Neck
A circular yoke brings the broader body toward the neckline. With a heavier substitute yarn, that area deserves repeated fit checks because the fabric below it can pull differently than the original. Watch for rippling, bunching, or a neckline that creeps outward. The goal is not to force the original dimensions onto different material, but to preserve the comfortable relationship between neck, shoulders, and cable body.
Original Tutorial and Creator Credit
Creator: Stitches n Scraps
Crochet Velvet Box and Bow Tie Collar Capelet
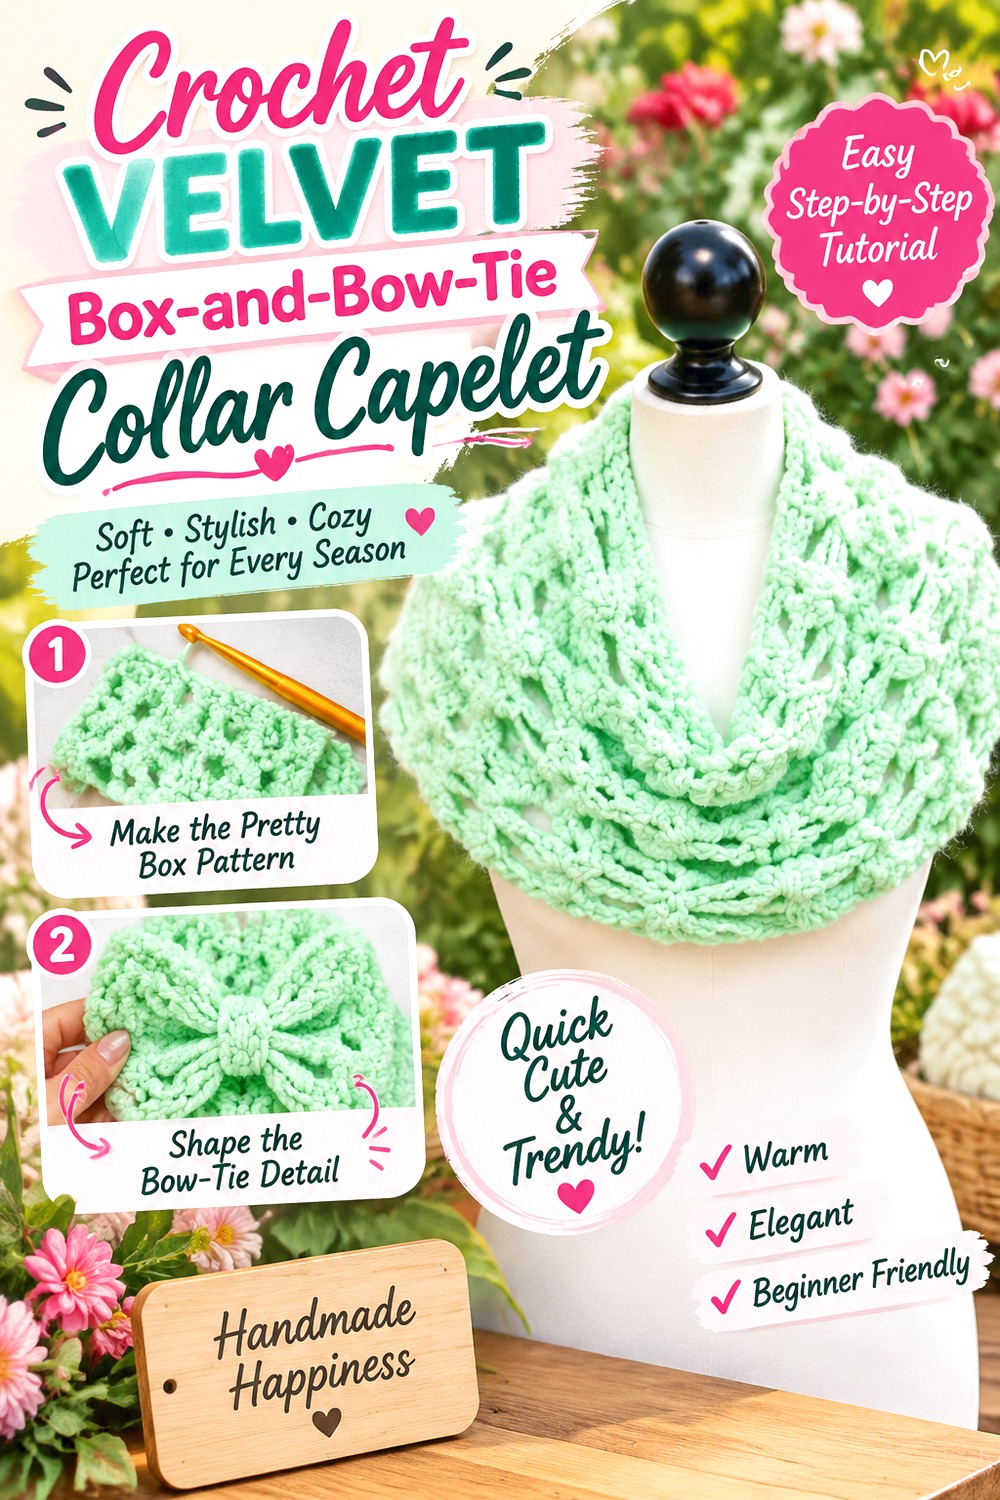
Secret Yarnery’s design can function as a capelet, cowl, or neck warmer and uses its box-and-bow-tie texture as a major visual feature. The tutorial demonstrates the stitch pattern and its circular construction in detail.
For velvet, this option sits between a close collar and a fuller capelet, so it can deliver plushness without the same volume as a long cape. The main question is whether the distinctive texture survives. Chenille yarn may produce a wonderfully cushioned surface while making smaller openings and stitch groupings less obvious.
Decide Whether You Want Capelet or Oversized Cowl Proportions
The design’s versatility means proportion matters. A shorter version emphasizes the neck and collar area, while more depth makes the garment read as a capelet. Velvet already adds volume, so compare the developing piece against your shoulders before assuming that extra rows will improve it. A compact plush collar can sometimes look more balanced than a deeper version made from the same heavy yarn.
Bow-Tie Texture Must Remain Legible
This project earns its place because its surface pattern is different from moss stitch, cables, and plain drape. Make sure that difference remains visible in your chosen material. If the velvet fills the openings and hides the contrast between stitch groups, you may be investing effort in a texture that cannot be appreciated once worn. Swatching the actual feature stitch is more informative than testing only basic crochet.
Original Tutorial and Creator Credit
Creator: Secret Yarnery
Crochet Velvet Braided Cable Drawstring Cape
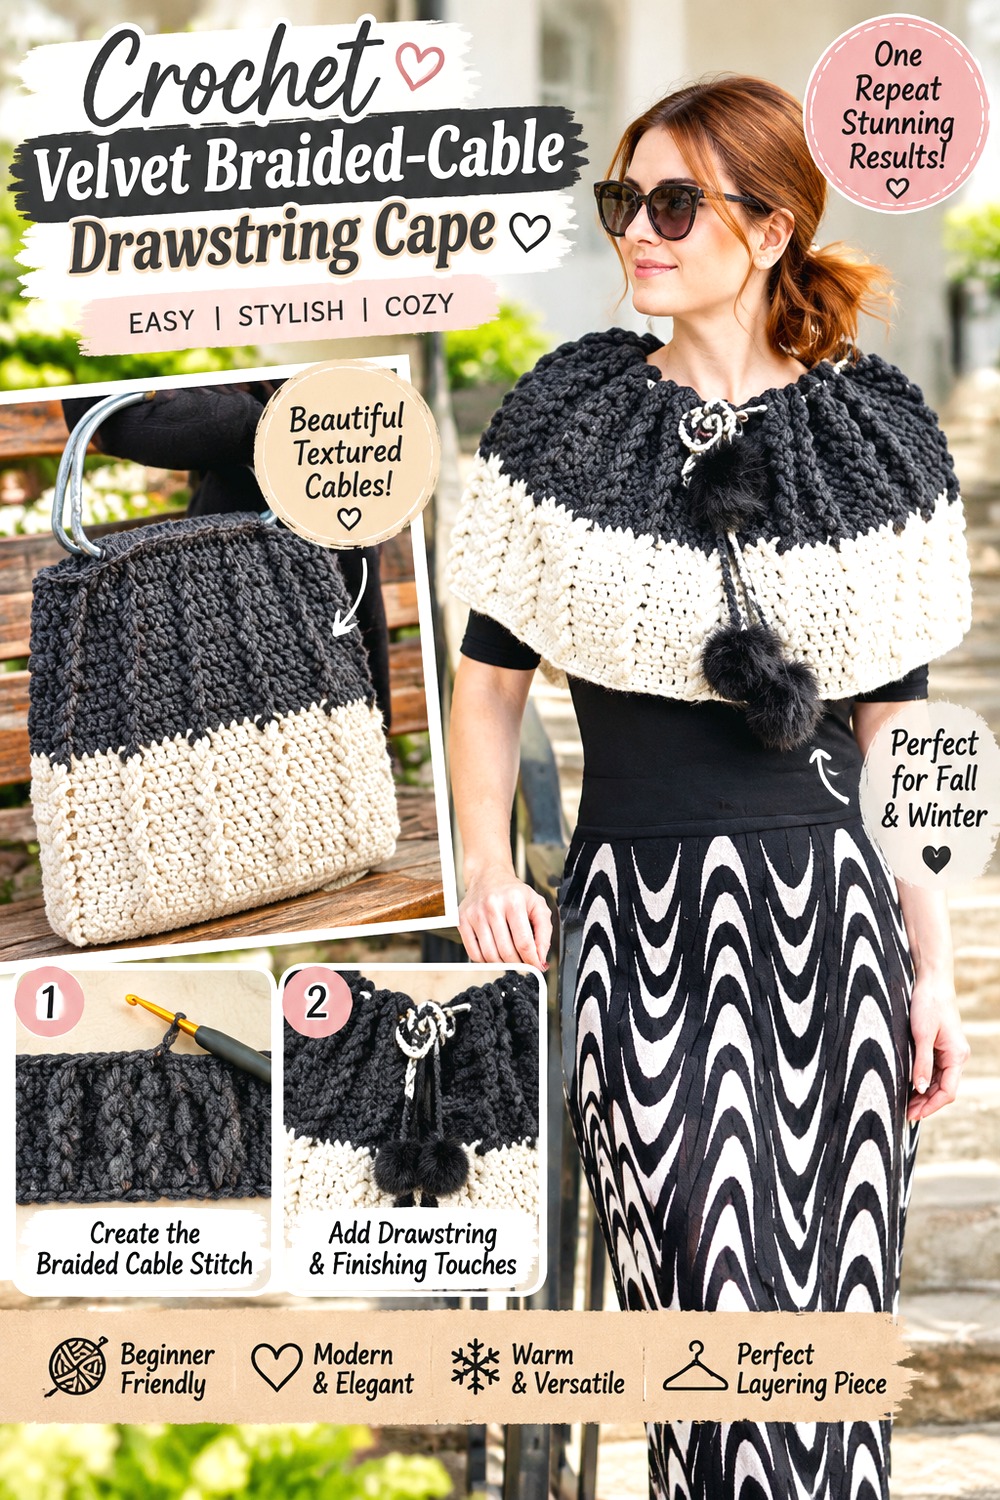
This cape combines bold braided cable texture with a gathered neckline and drawstring-style detail. Nana’s Crafty Home presents the source project with bulky rope-like cables, giving it a heavier and more sculptural appearance than the delicate capelets elsewhere in the list.
Velvet could amplify the cozy character, but this is another texture-dependent adaptation. Large cables may remain more visible than small ones, yet an extremely fluffy yarn can still soften the braid. The neckline also needs attention because gathering a heavy velvet fabric too tightly can create uncomfortable bulk.
Big Cables Deserve a Full-Scale Swatch
A tiny sample will not tell you whether a broad braided feature remains readable. Work enough of the texture to see a complete section of the raised pattern before deciding on the yarn. Look at how the surface catches light and whether the cable edges remain distinct. If the braid disappears, the simpler moss or circular capelets may make better use of that particular velvet.
The Gathered Neck Should Not Become a Heavy Ridge
Gathering creates visual fullness near the neckline. With thick chenille, the same area can become much bulkier than expected because several folds of plush fabric are brought together. Check how the neck feels before finishing the closure. You want the gathering to shape the cape, not create a stiff ring or a concentrated pressure point around the shoulders.
Original Tutorial and Creator Credit
Creator: Nana’s Crafty Home | Tonya Bush
Crochet Velvet Granny Fringe Capelet
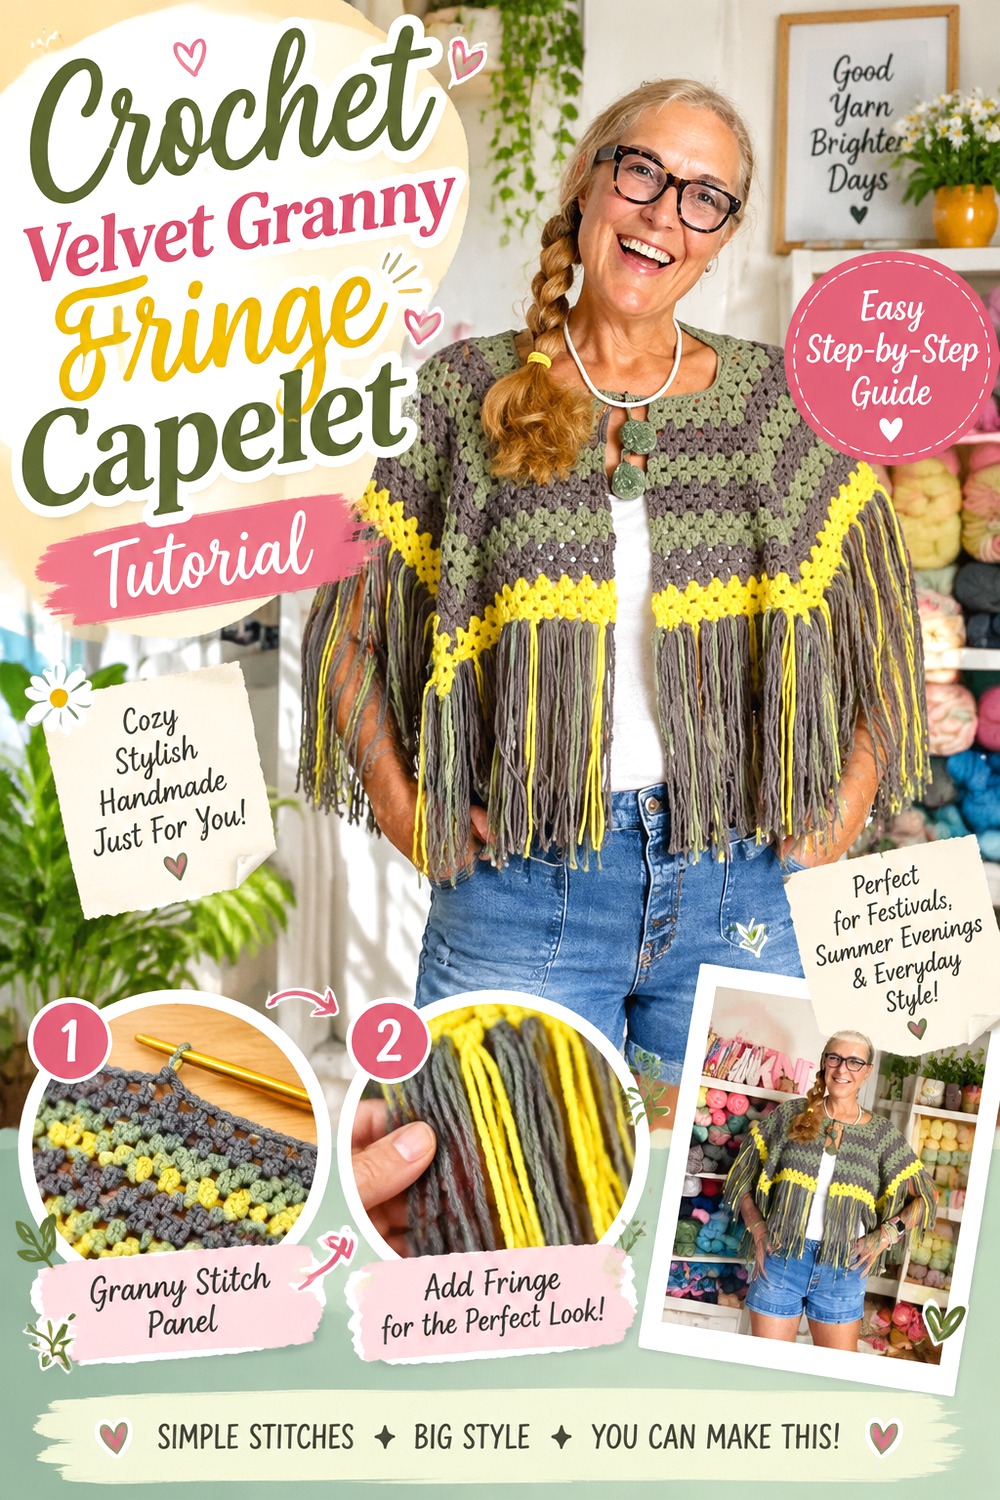
Whirledpeas00 Knits takes the capelet in a clearly bohemian direction with granny-style construction and a long fringed edge. The finished result is visually different from the close vintage and cabled designs because both the motif rhythm and moving fringe contribute to the silhouette.
Velvet makes this idea especially dramatic, but it can also multiply the weight at the hem. If the body already feels substantial, a full fringe made from the same yarn may pull downward more than expected. Think of fringe length and density as structural choices, not just decoration.
Fringe Can Change the Way the Whole Capelet Hangs
Every added strand contributes weight below the shoulder line. Before committing to a dense velvet fringe, temporarily attach a small representative section and observe how the edge reacts. If it stretches or drags the body downward, a shorter, sparser, or different-material finish may preserve the look without overwhelming the capelet.
Granny Openings Need a Clean Visual Rhythm
Plush yarn can make open granny-style spaces look smaller because the pile occupies some of the visual gap. Check whether the repeated openings still read as intentional when viewed against clothing. A contrasting underlayer can make the structure more visible, while a similar color creates a softer, nearly solid effect. Neither is inherently better; choose based on whether you want the granny construction to be obvious.
Original Tutorial and Creator Credit
Creator: Whirledpeas00 Knits
Crochet Velvet Cozy Shawl Poncho Capelet
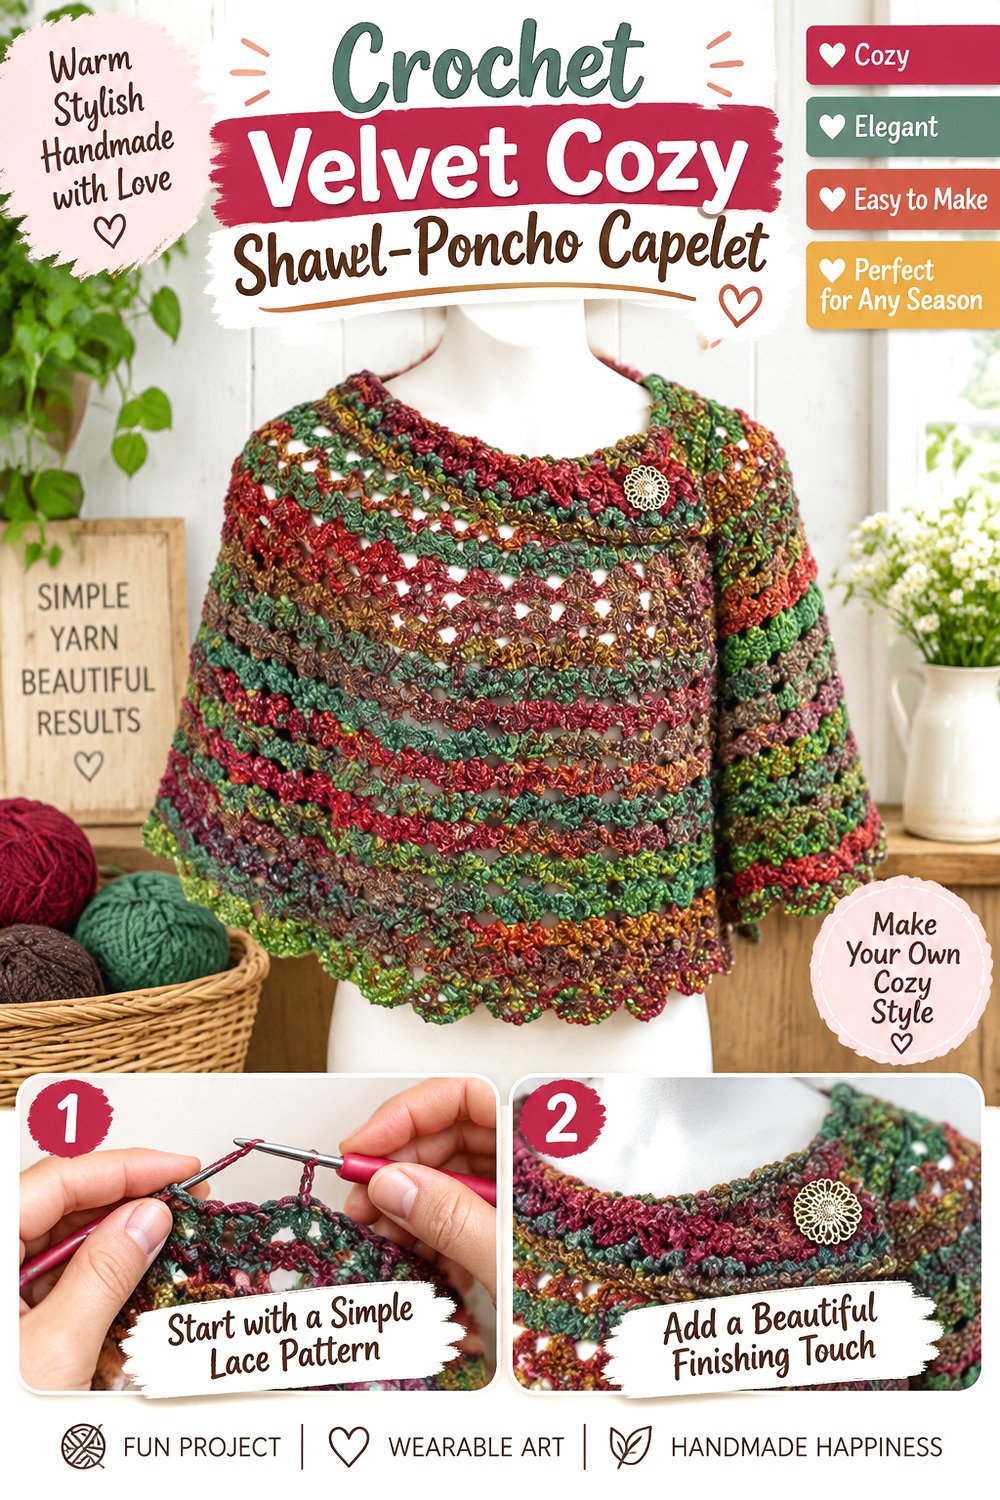
Bag-O-Day Crochet’s project sits between a capelet, shawl, and poncho, offering more coverage than the compact vintage shoulder pieces. That hybrid shape makes it useful when you want velvet to feel like a cozy outer layer rather than a small decorative accessory.
The extra fabric also means yarn weight becomes more significant. A velvet version may drape attractively, but the same plushness that makes it cozy can make a larger garment heavy. Decide how much upper-arm coverage you actually want before extending the body.
More Coverage Creates a Different Layering Job
A short capelet can sit over a dress or blouse without dominating the outfit. A shawl-poncho shape covers more of the shoulders and upper arms, so it functions more like an outer layer. Consider what you plan to wear underneath. If the velvet fabric is thick, allow enough room for the intended base layer without making the neck opening unnecessarily wide.
Stop at the Length That Still Moves Well
Longer is not automatically warmer or more useful. As the lower edge extends, the circumference and total yarn weight can also increase. Try the piece against your body as it grows and check arm movement. If reaching forward causes the capelet to ride upward or pull at the neckline, that is more important than achieving an arbitrary length.
Original Tutorial and Creator Credit
Creator: Bag-O-Day Crochet
Crochet Velvet Lace Hooded Storybook Capelet
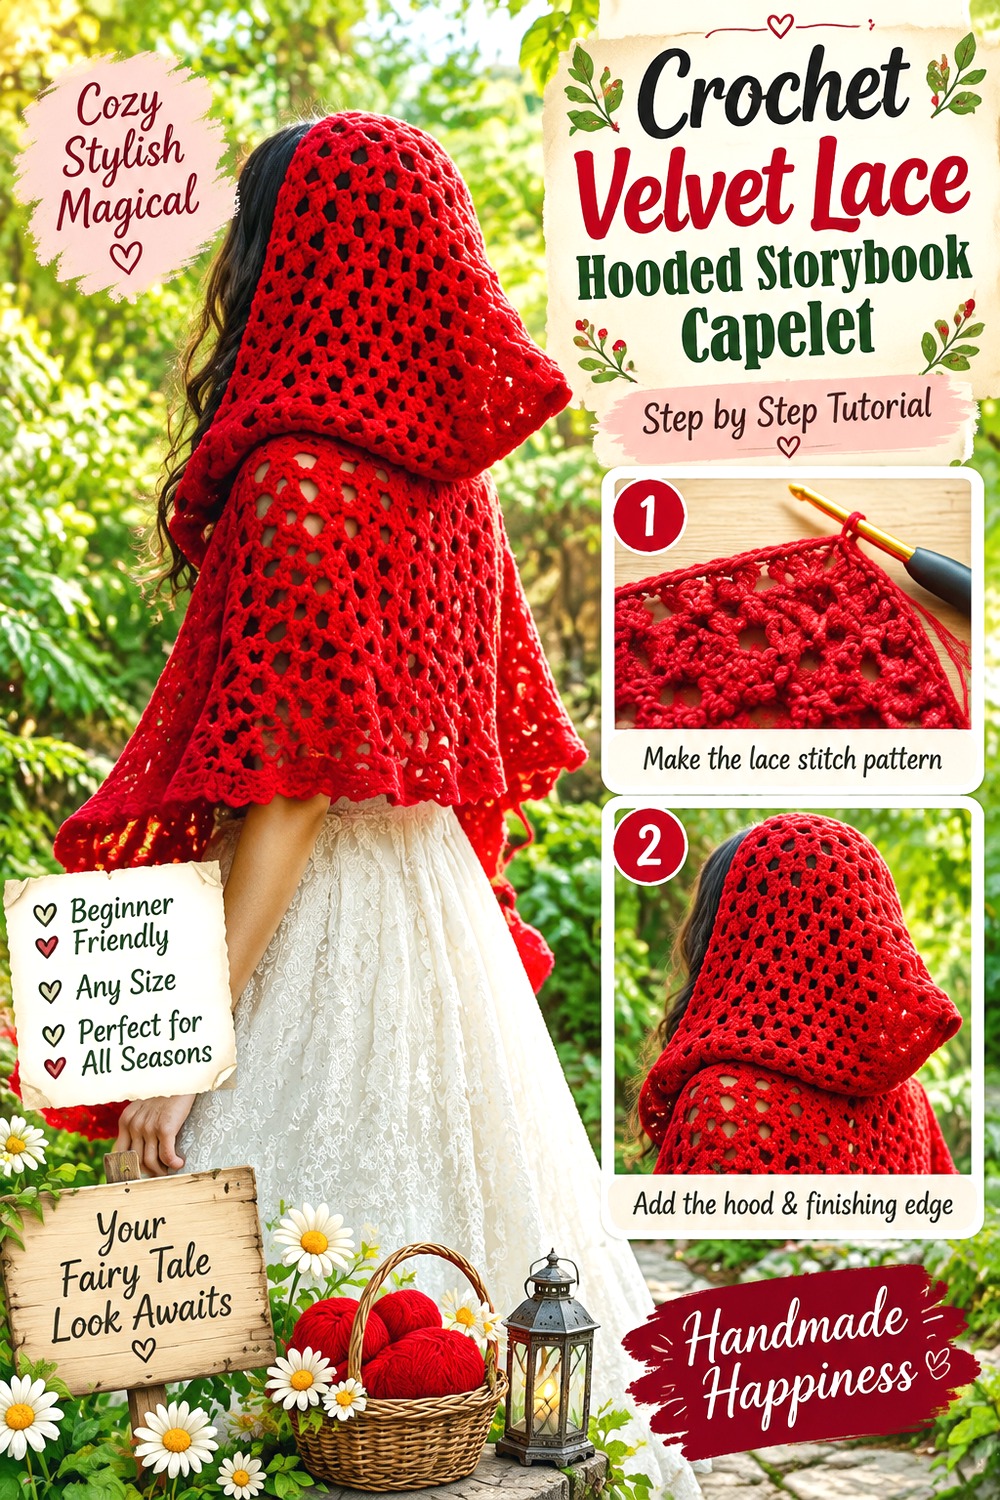
Jennyandteddy crochet. combines a cape body, front tie, and separate hood in a fairytale-inspired design. The source project uses a lace stitch and constructs the hood separately before joining it to the body.
This is one of the more demanding velvet adaptations in the list because both lace definition and hood weight matter. A soft velvet version could create an appealing storybook cloak effect, but it should not be assumed that the original open fabric will behave the same way in thicker plush yarn.
Lace Openings Need to Stay Open
The original design depends partly on a light, open appearance. Velvet can fill visual space and make lace appear denser. Work a sample of the actual openwork and place it over the type of garment you plan to wear underneath. If the pattern becomes nearly solid, decide whether you still like the resulting fabric or whether another capelet construction better suits your yarn.
A Separate Hood Gives You a Useful Decision Point
Because the source hood is constructed separately, you can evaluate the cape body before committing to the additional volume of a velvet hood. That is useful when the substitute yarn is heavier than expected. If the body already supplies enough warmth and visual drama, stopping at a hoodless wrap may suit your needs better than automatically completing every optional styling feature.
Original Tutorial and Creator Credit
Creator: Jennyandteddy crochet.
Crochet Velvet Hooded Shoulder Cape
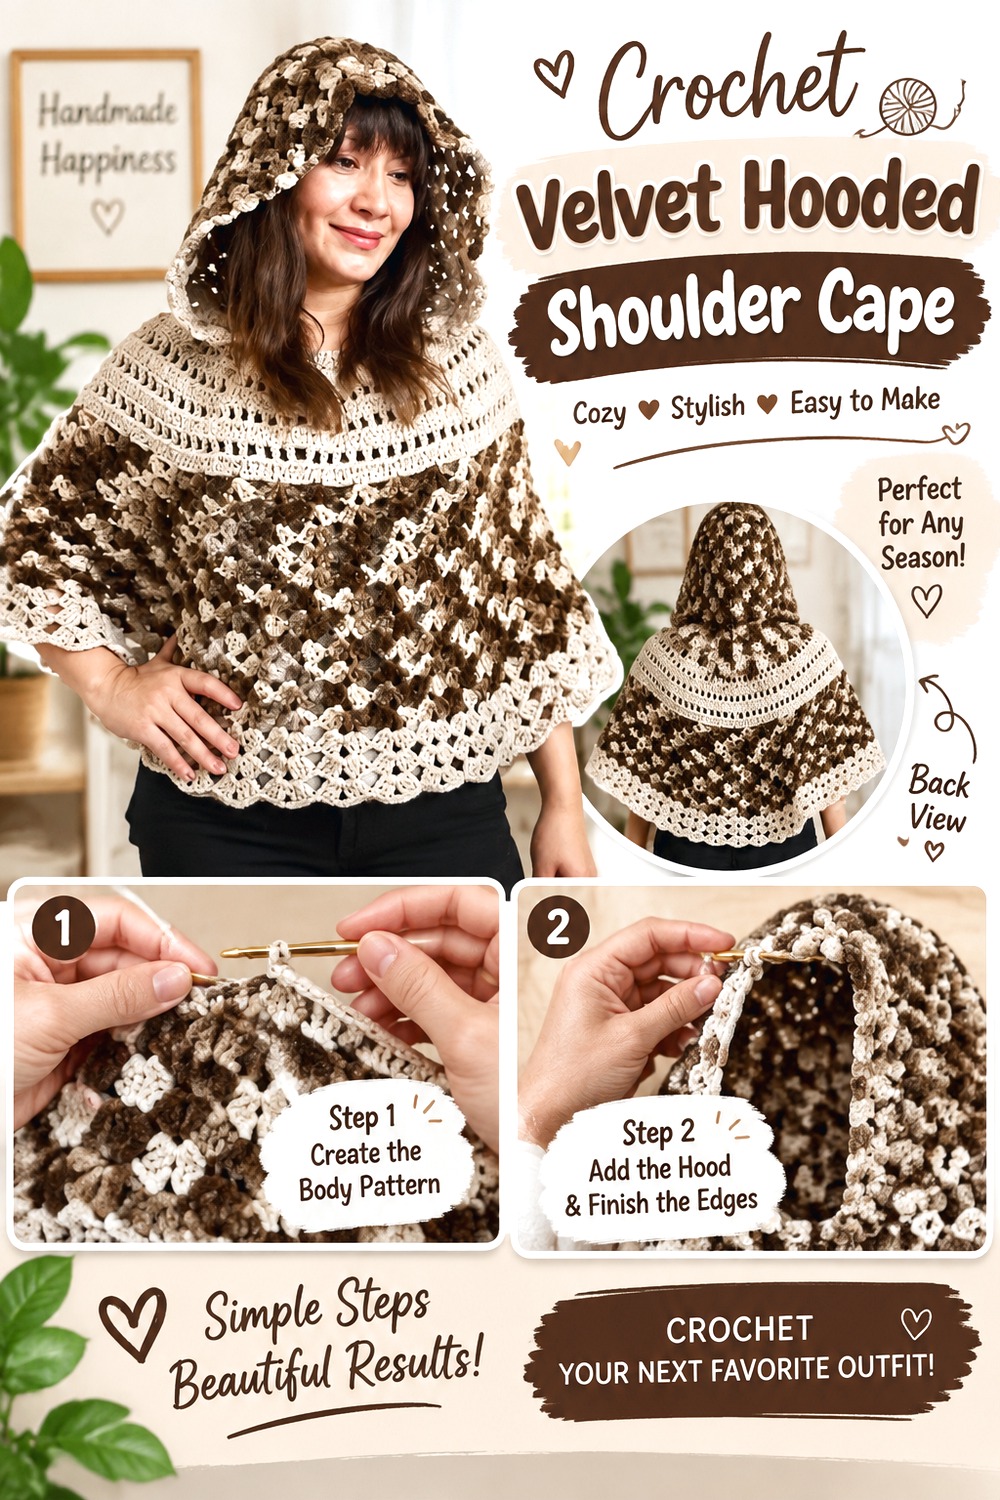
Mariie Crochet’s tutorial focuses directly on a crochet hooded cape, offering another hooded route without relying on the same moss-stitch or lace identity as the previous options.
That makes it useful for readers whose main priority is the hood-and-cape silhouette itself. Velvet can give this shape a soft cloak-like presence, especially in a solid color where the pile becomes the dominant surface feature. The practical issue is proportion: the hood should not become so bulky that it overwhelms a relatively short cape body.
Balance Hood Volume Against Cape Depth
A large plush hood paired with a very shallow shoulder section can make the garment feel visually top-heavy. As you adapt the tutorial, compare the apparent scale of the two sections rather than altering either one in isolation. The goal is a hood that looks intentional when down and does not drag the neckline backward when worn.
Keep the Neck Transition Smooth
The point where hood and cape meet deserves careful finishing because several layers or seams can create thickness. Velvet already has substantial surface volume, so a bulky join may be more noticeable against the neck. Follow the creator’s assembly method, but inspect your own fabric before final finishing and make sure the connection lies comfortably rather than forming a stiff ridge.
Original Tutorial and Creator Credit
Creator: Mariie Crochet
Crochet Velvet Textured Fall Poncho Capelet
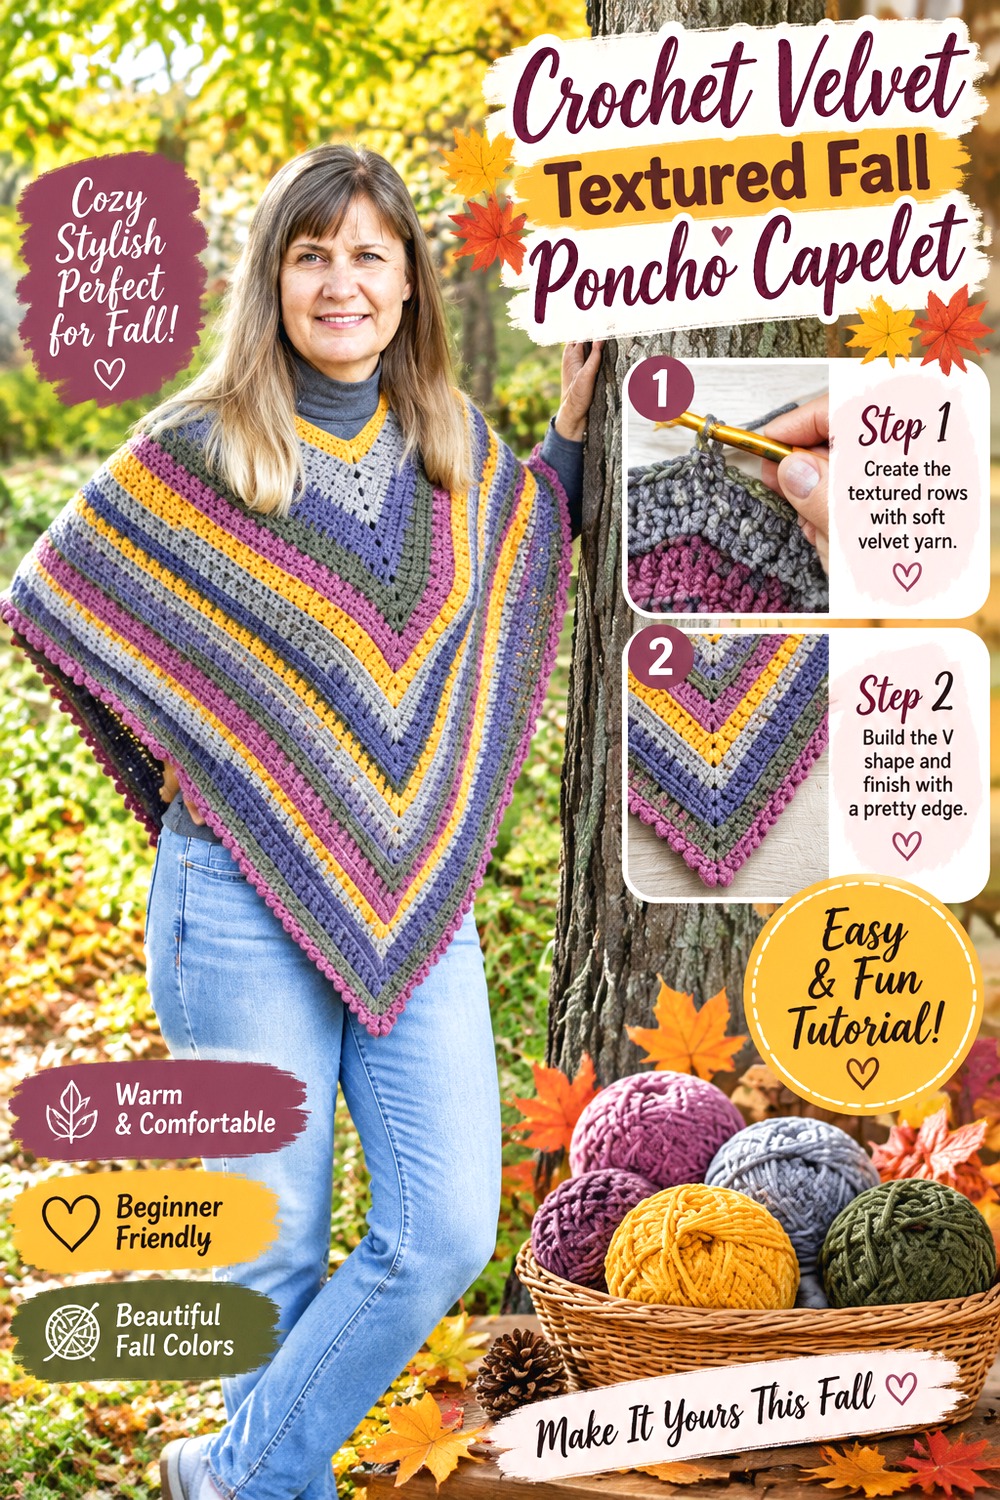
The Crochet Crowd’s fall poncho provides a broader, more relaxed silhouette that can be treated as a short capelet-poncho adaptation when more shoulder coverage is wanted. The source project emphasizes a textured cold-weather wearable rather than a delicate evening cape.
Velvet naturally supports that cozy direction, but the finished fabric can become visually and physically dense. This option works best for someone who wants the capelet to read as a substantial seasonal layer rather than a small collar-like accessory.
Let the Poncho Shape Supply the Drama
When using plush yarn, a broad silhouette may already be enough to create visual impact. Avoid assuming that every surface needs additional embellishment. Compare a plain velvet swatch with the source texture. If the plush pile makes the fabric look busy on its own, a simplified color plan can prevent the capelet from feeling overloaded.
Watch the Width Around Active Arm Movement
Poncho-style capelets rely on generous width, but that width should still move comfortably. Check how the developing fabric behaves when you reach forward or raise your arms. Heavy velvet may swing or bunch differently from a lighter yarn. The useful finished width is the one that provides coverage without constantly shifting the neckline during normal movement.
Original Tutorial and Creator Credit
Creator: The Crochet Crowd
Crochet Velvet Buttoned Everyday Capelet
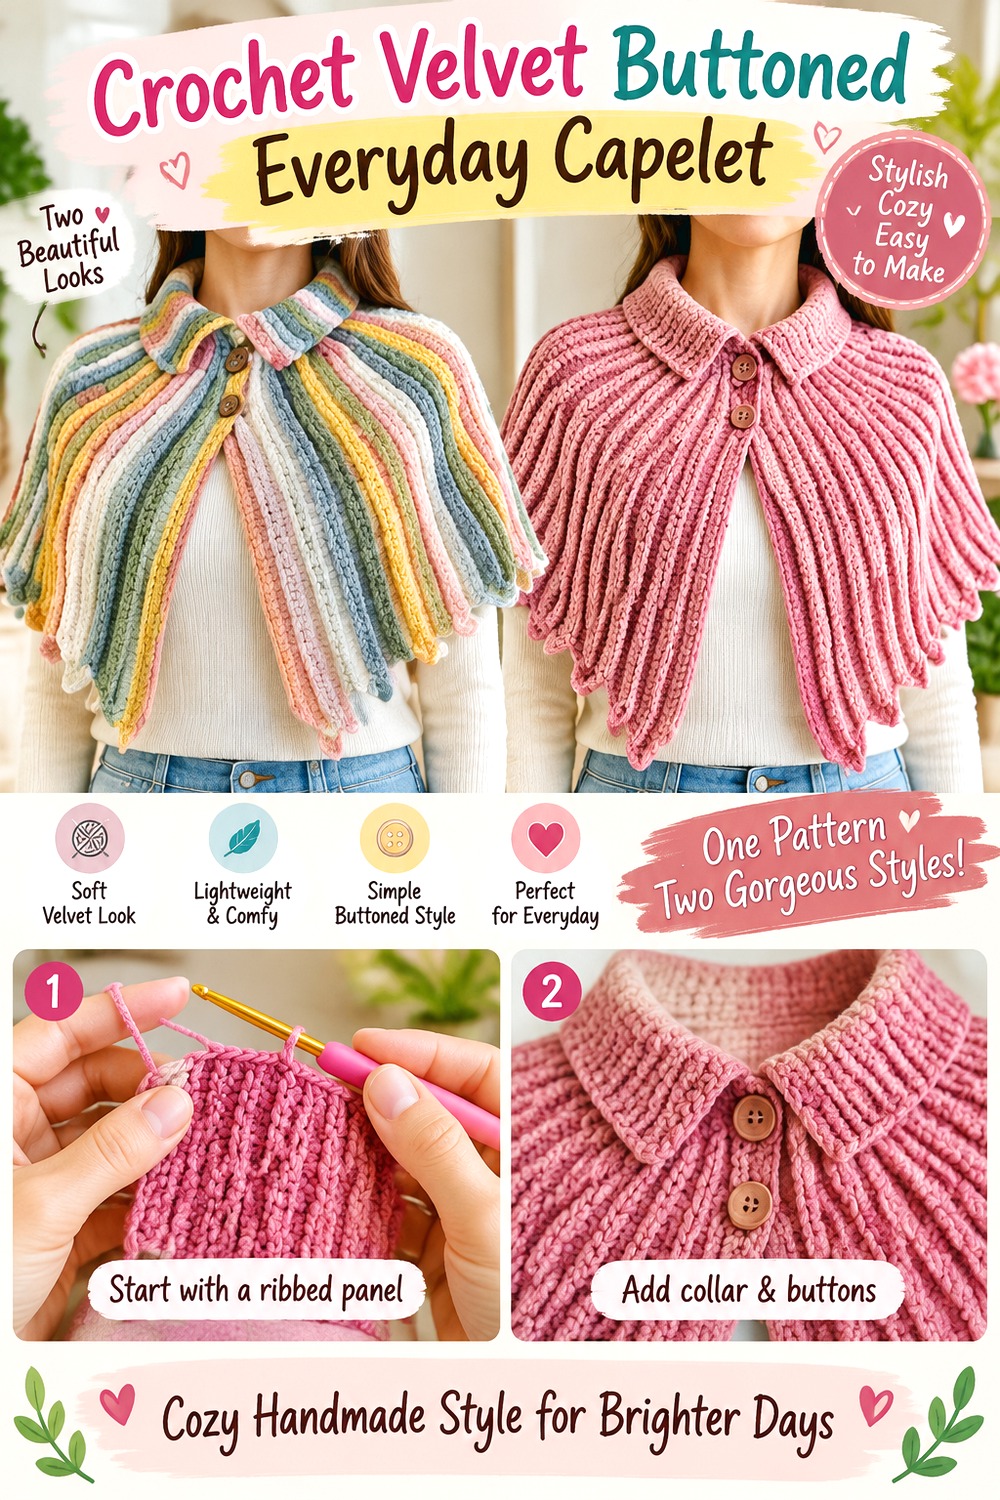
Sabrina Melodieuse’s capelet introduces a buttoned approach, which immediately makes the front opening feel more defined than a pull-over poncho or tied vintage capelet.
For velvet, a button closure can provide a neat focal point on an otherwise soft surface. It also creates a practical checkpoint: the button and opening must work with the actual thickness of the yarn. A buttonhole that is suitable for smooth yarn may behave differently in plush fabric, so test the closure before the rest of the finishing is locked in.
Match the Button to the Actual Velvet Fabric
Choose the closure after you have fabric in hand rather than from yarn photos alone. Thick pile can partially hide a small button, while an oversized heavy button can distort a soft edge. Test whether the button passes through comfortably and whether the surrounding crochet springs back instead of stretching permanently around it.
A Defined Front Makes Styling More Predictable
An open shawl can move freely, while a buttoned capelet establishes a clear front center. That is useful if you want the garment to sit consistently over dresses, blouses, or fitted tops. Before final placement, put the capelet on over the clothing thickness you expect to wear most often; closure position can feel different over a bulky sweater than over a lightweight shirt.
Original Tutorial and Creator Credit
Creator: Sabrina Melodieuse
Crochet Velvet Lace Trim Buttonhole Cape
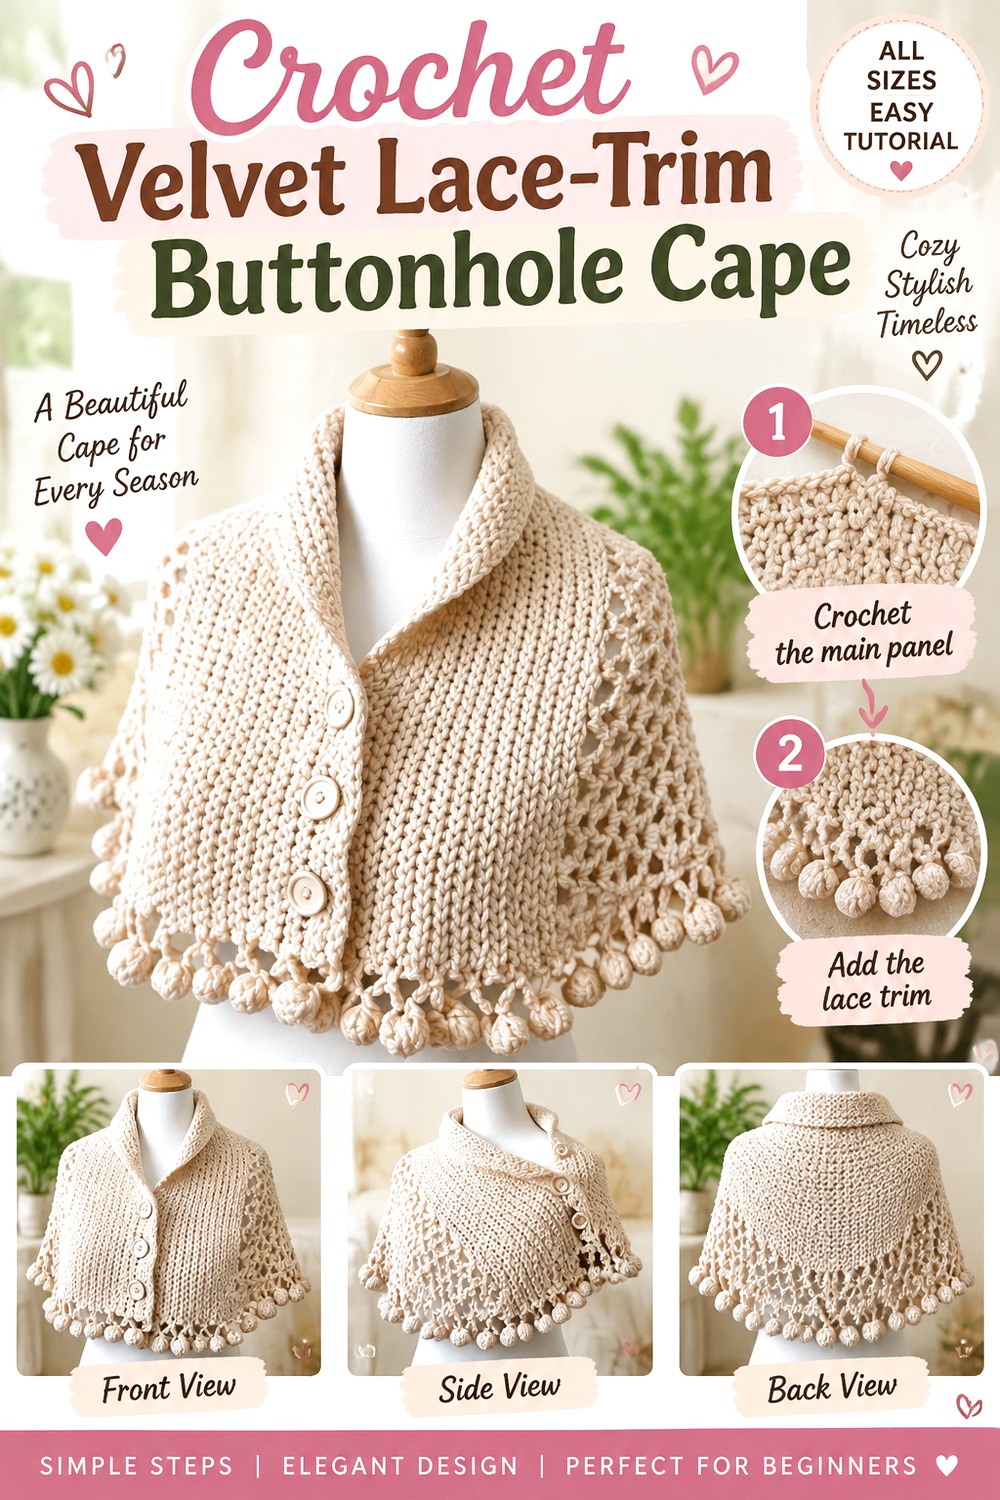
Handwork diy’s tutorial combines cape-or-poncho shaping with buttonholes and a lace-stitch section, followed by decorative finishing. Those elements make the source more detailed than a plain pull-over cape.
A velvet adaptation should be approached selectively. The broad cape form may translate well to plush yarn, while lace and decorative edging may lose definition. Rather than assuming the complete texture package will look identical, test the areas that depend most heavily on open spaces.
Buttonholes Should Be Planned Before the Edge Is Finished
Velvet fabric can be thicker and more flexible around an opening than smooth yarn. Test the planned button against a sample buttonhole before committing to the final edge. A closure that is too loose may open unexpectedly; one that is too tight can snag or distort the pile. The practical fit of the closure matters more than matching a button size by appearance alone.
Lace and Plushness Need a Visual Compromise
This design lets you decide how much decorative openness you actually want. If your velvet makes the lace look muddy, consider whether the cape’s overall shape and buttoned front still appeal to you enough to choose another compatible material. The goal is to preserve the reason you selected the project instead of forcing velvet into a stitch style that no longer reads clearly.
Original Tutorial and Creator Credit
Creator: Handwork diy
Crochet Velvet All Size Capelet Poncho
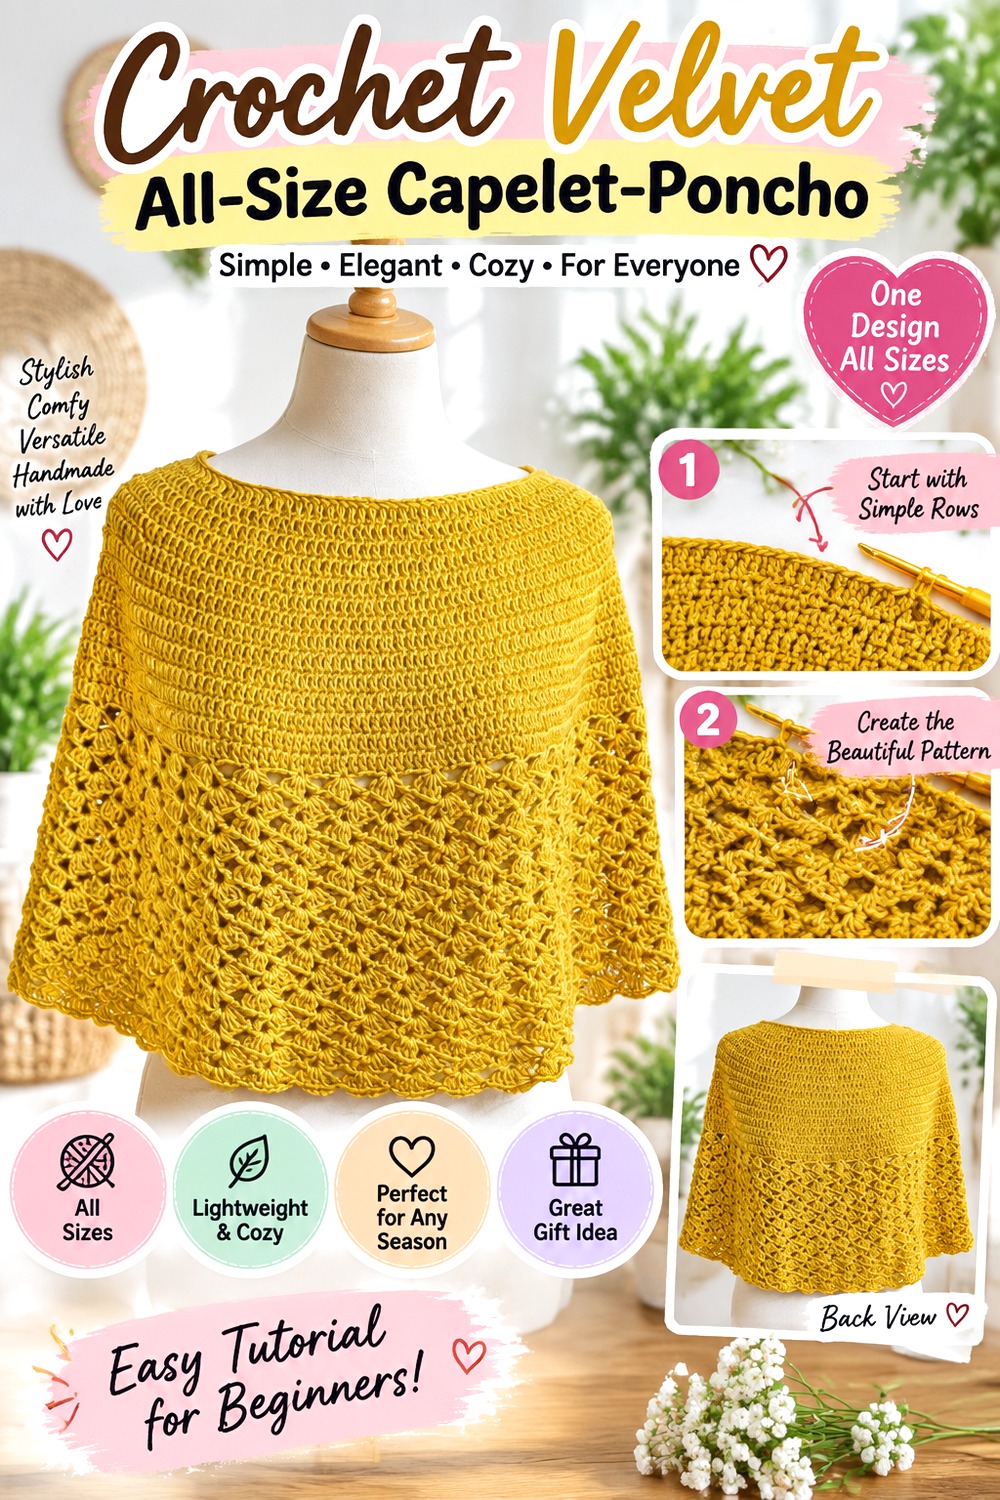
Crochet con Sole presents a cape-or-poncho design intended to be adaptable across sizes. That makes it a useful candidate when your main priority is choosing the overall amount of coverage rather than reproducing a very specific historical or decorative style.
For velvet, flexibility in size planning is helpful, but the original sizing logic should still be followed rather than replacing it with generic assumptions. Measure the wearer, compare the tutorial’s approach, and then account for how your velvet swatch behaves. A plush fabric that grows or drapes differently may change the point where the piece feels like a compact capelet versus a fuller poncho.
Choose the Finished Category Before Adding Length
“Cape” and “poncho” can describe noticeably different amounts of coverage even within a similar construction. Decide whether you want the edge to stay near the shoulders and upper arms or continue farther down the body. That decision affects yarn weight and movement as much as appearance, especially when the material is plush.
Use Fit Checks Instead of a Universal Velvet Formula
There is no single conversion that makes every cape tutorial work in chenille. Follow the creator’s sizing information, but compare it with your own gauge and desired fit. If the neck and shoulder area already sits well, change length cautiously rather than scaling every dimension at once. Preserving the neckline can matter more than making the entire cape proportionally larger.
Original Tutorial and Creator Credit
Creator: Crochet con Sole
Crochet Velvet Mini Cape for Women and Girls
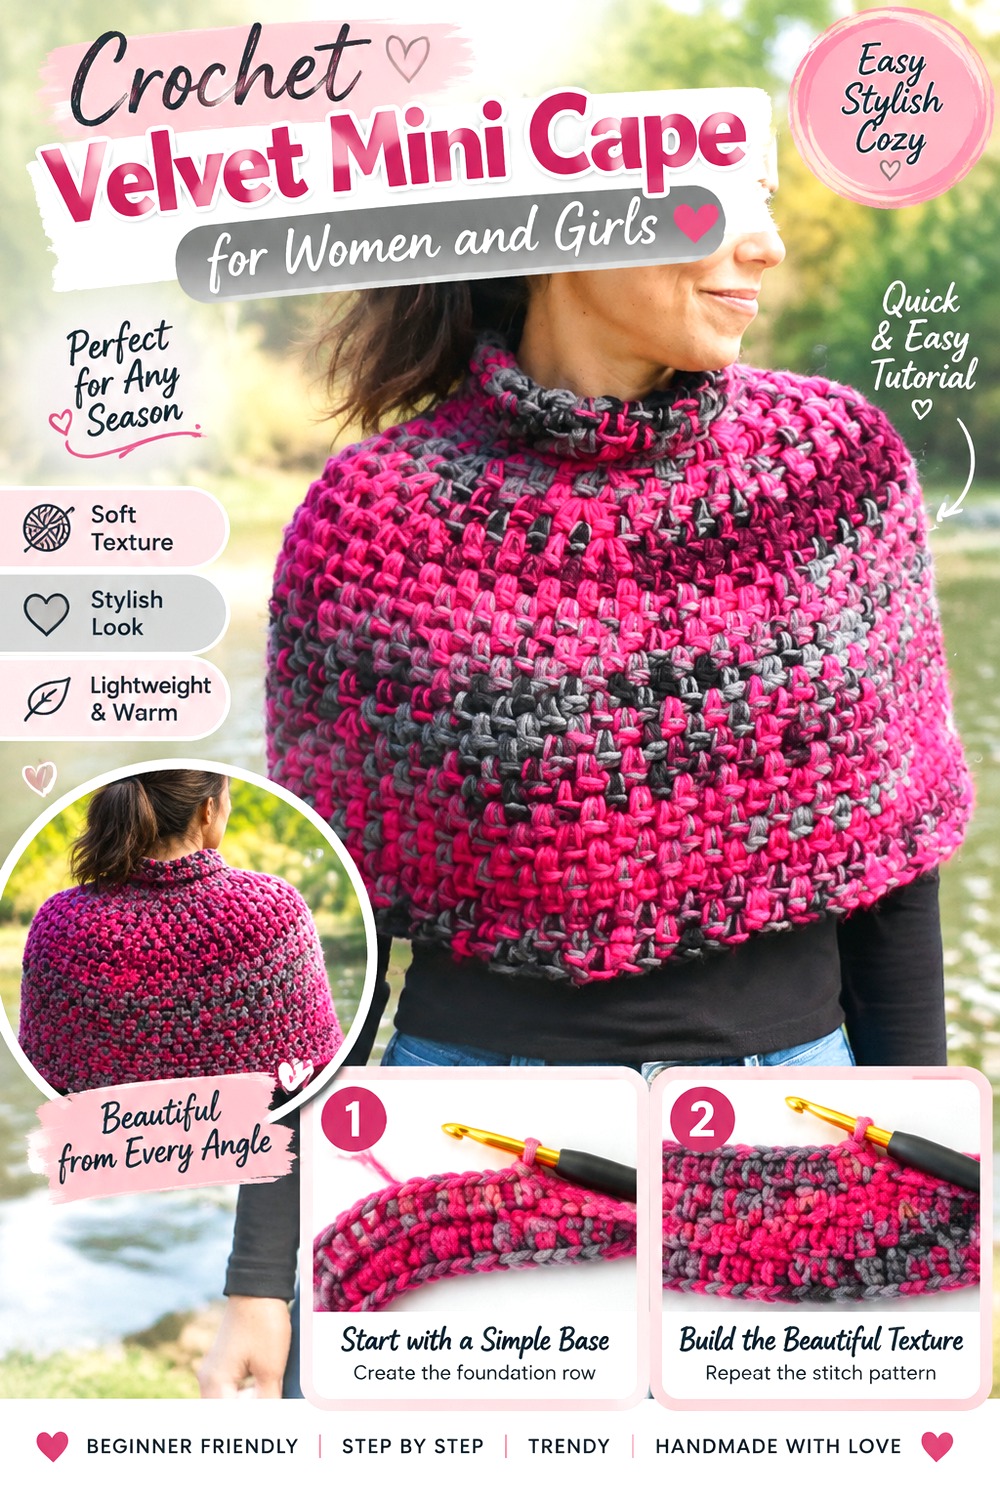
Francesca Uncinettando Crochet&Love presents a cape or mini-poncho tutorial with women’s and girls’ sizing in the source title. That gives this idea a shorter, more compact direction than the larger fall ponchos in the collection.
The mini-cape scale is appealing for velvet because it limits total fabric while still giving the shoulders a plush layer. If adapting the design for different wearers, do not simply shrink or enlarge by eye. Follow the creator’s size guidance and check neck comfort, shoulder width, and finished depth as separate issues.
A Mini Cape Keeps Velvet From Dominating the Outfit
Plush yarn has strong visual presence. Keeping the garment short allows that texture to act as an accent rather than covering most of the upper body. This can work particularly well over simple clothing where the cape is intended to be the focal layer. Compare the planned finished depth with the wearer’s torso instead of judging it only while the piece lies flat.
Child and Adult Versions Need Separate Fit Thinking
The same general silhouette can work across age groups, but the proportions should come from the tutorial’s intended sizing rather than from an arbitrary percentage reduction. Pay particular attention to the neck opening and shoulder spread. For a child’s version, also avoid adding loose decorative elements simply because they look attractive on an adult garment; intended use should guide finishing decisions.
Original Tutorial and Creator Credit
Creator: Francesca Uncinettando Crochet&Love
Crochet Velvet Circular Draped Capelet
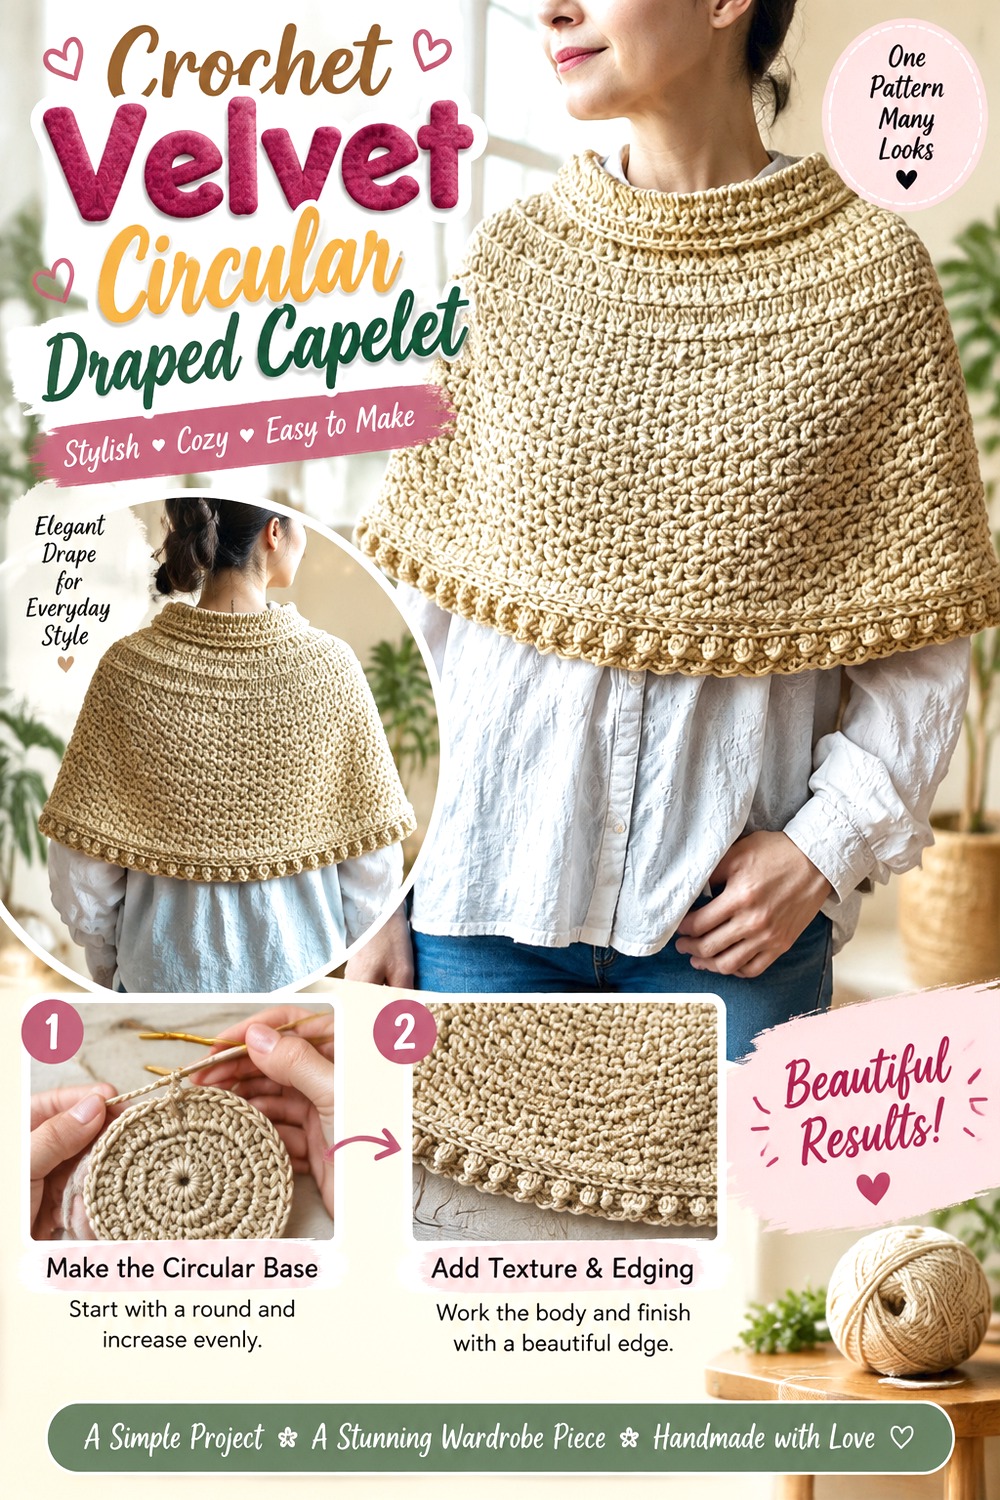
Kiri Kiri’s tutorial uses a circular poncho form and describes the project as a women’s shawl or capelet-style garment, with the length adjusted through measurement.
A circular construction is particularly interesting for velvet because it lets the yarn’s surface and drape become the main attraction without depending on a front seam or elaborate closure. The shape can also distribute visual fullness around the body rather than concentrating it at the front. The essential test is whether the fabric falls in soft folds instead of becoming too stiff.
Circular Drape Exposes Fabric Problems Quickly
A flat swatch may seem flexible even when a full circular garment becomes bulky. As the circumference grows, watch how the fabric falls under its own weight. It should create comfortable movement around the shoulders rather than forming a rigid shelf. If the velvet feels too dense, address gauge and yarn choice before assuming additional length will improve the drape.
Measure Depth While the Piece Is Hanging Naturally
Circular garments can appear different on a table than on the body. Check length while the fabric is hanging in its normal orientation, because weight can affect the vertical fall. This is particularly important with plush yarn. Your target should be the coverage you actually want when worn, not a flat measurement selected without considering how the fabric settles.
Original Tutorial and Creator Credit
Creator: Kiri Kiri’s tutorial uses a circular poncho form and describes the project as a women’s shawl or capelet-style garment, with the length adjusted through measurement.
A circular construction is particularly interesting for velvet because it lets the yarn’s surface and drape become the main attraction without depending on a front seam or elaborate closure. The shape can also distribute visual fullness around the body rather than concentrating it at the front. The essential test is whether the fabric falls in soft folds instead of becoming too stiff.
Circular Drape Exposes Fabric Problems Quickly
A flat swatch may seem flexible even when a full circular garment becomes bulky. As the circumference grows, watch how the fabric falls under its own weight. It should create comfortable movement around the shoulders rather than forming a rigid shelf. If the velvet feels too dense, address gauge and yarn choice before assuming additional length will improve the drape.
Measure Depth While the Piece Is Hanging Naturally
Circular garments can appear different on a table than on the body. Check length while the fabric is hanging in its normal orientation, because weight can affect the vertical fall. This is particularly important with plush yarn. Your target should be the coverage you actually want when worn, not a flat measurement selected without considering how the fabric settles.
Original Tutorial and Creator Credit
Creator: Kiri Kiri
Crochet Velvet Girls’ Hooded Capelet Poncho
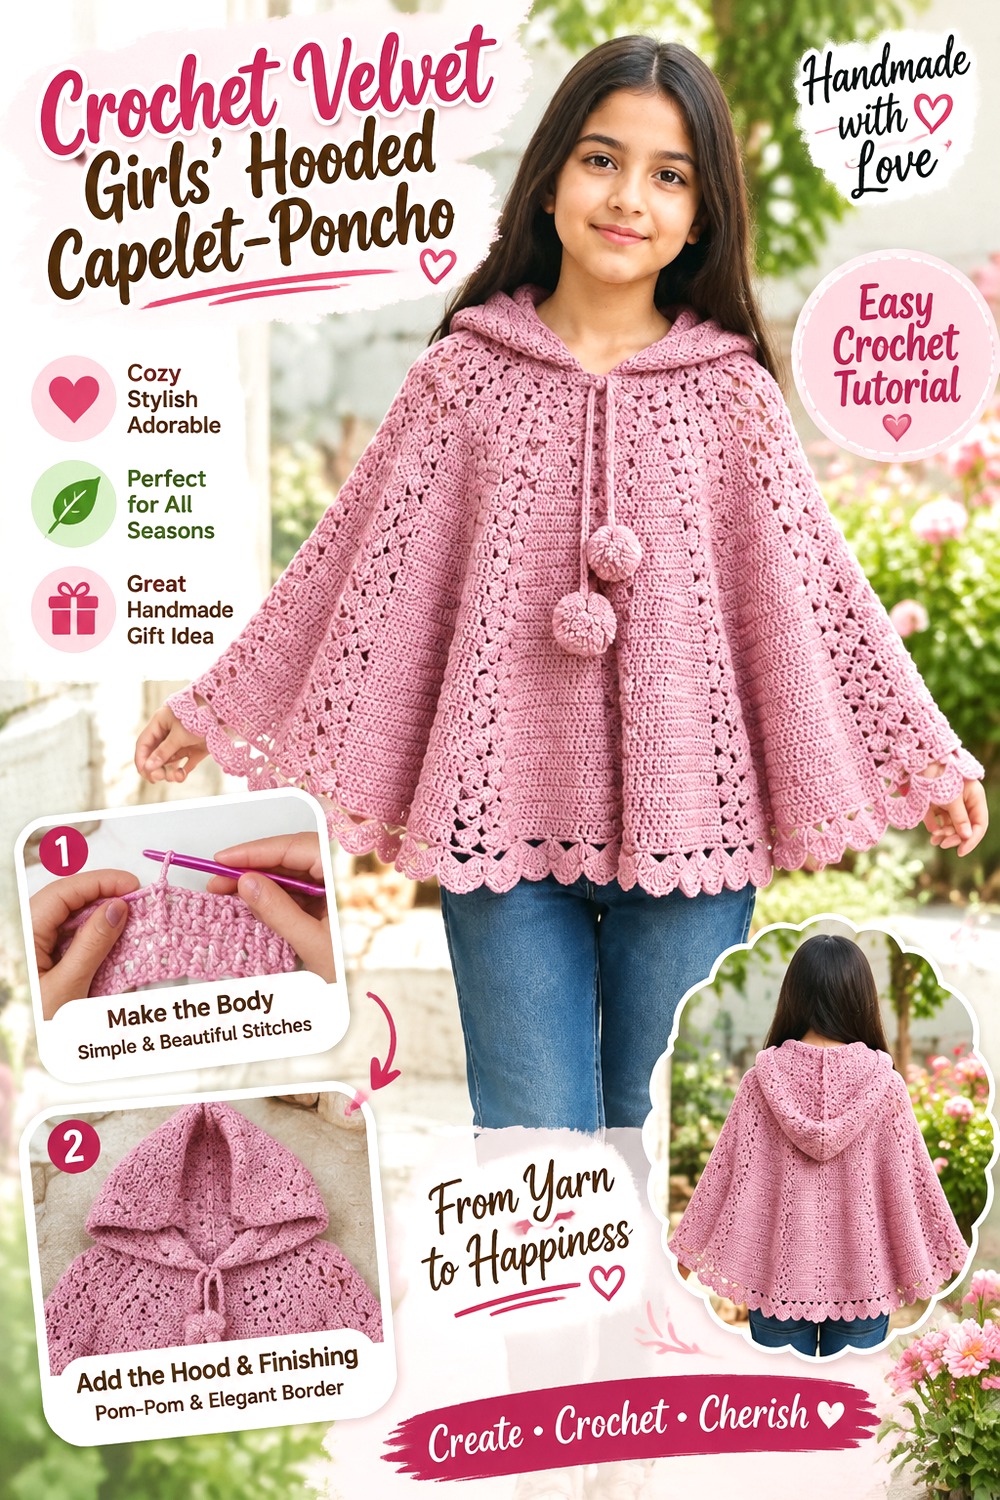
crochet-crosia’s tutorial focuses on a hooded poncho for girls, bringing child sizing and a hood into the same project.
For a velvet interpretation, the appeal is obvious: the soft surface can suit a cozy short outer layer without requiring adult-scale fabric volume. However, the hood, neckline, and lower circumference should all be evaluated using the creator’s sizing rather than simply substituting a thick yarn into the same instructions. Plushness can alter both scale and weight.
Keep the Hood Comfortable Rather Than Oversized by Accident
Changing to thicker yarn can enlarge a hood in every direction. A hood that looks charming when oversized may still pull backward or bunch around a smaller wearer’s neck. Compare its development with the tutorial and check the relationship between hood depth and cape body before final assembly or finishing.
Avoid Unnecessary Loose Add-Ons for a Child’s Cape
If you customize the velvet version, keep the intended wearer in mind. Long cords, loosely attached ornaments, or other dangling embellishments are not required to make the cape visually interesting because velvet already provides texture. Follow appropriate garment-safety judgment for the child’s age and intended use rather than copying decorative details from an unrelated adult cape.
Original Tutorial and Creator Credit
Creator: crochet-crosia
Crochet Velvet Basic All Size Shoulder Cape
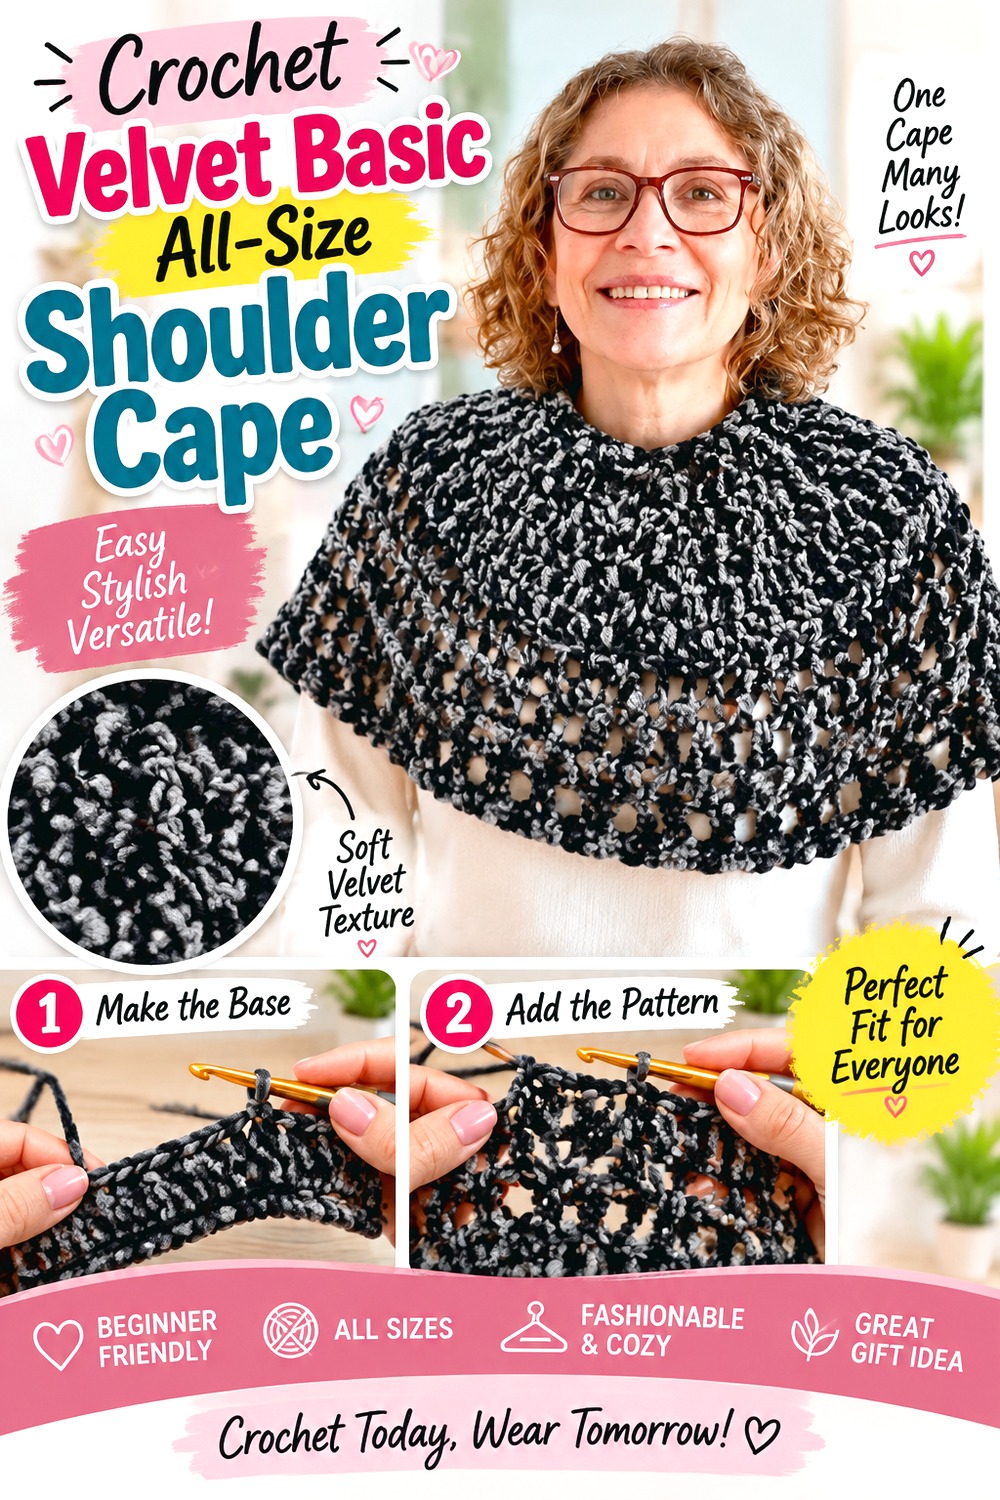
Hobby Crochet’s tutorial presents a basic cape with size flexibility rather than centering the design around cables, fringe, or a dramatic hood.
That simplicity makes it one of the more logical places to explore velvet because the yarn does not have to reproduce a highly detailed stitch motif to make the design recognizable. A smooth shoulder cape can let color, sheen, and plushness do most of the visual work. It is also useful as a comparison point if you like velvet yarn but find the more decorative projects too busy.
A Basic Shape Makes Swatch Decisions Easier to Read
When a garment depends on a straightforward silhouette, you can judge yarn suitability through basic qualities: does it bend, hang, and feel comfortable? You do not also have to decide whether tiny lace holes or cable crossings remain visible. That makes this a practical project for learning how your specific velvet yarn behaves in a wearable before attempting more texture-dependent capelets.
Size Flexibility Still Requires Measurement
“All sizes” should not be treated as permission to guess. Use the tutorial’s own sizing information and compare it with the wearer. Pay particular attention to the neckline and shoulder area because those determine whether the cape sits securely. Length is easier to evaluate later; an uncomfortable neck opening is a more fundamental problem.
Original Tutorial and Creator Credit
Creator: Hobby Crochet
Crochet Velvet Lightweight Summer Capelet
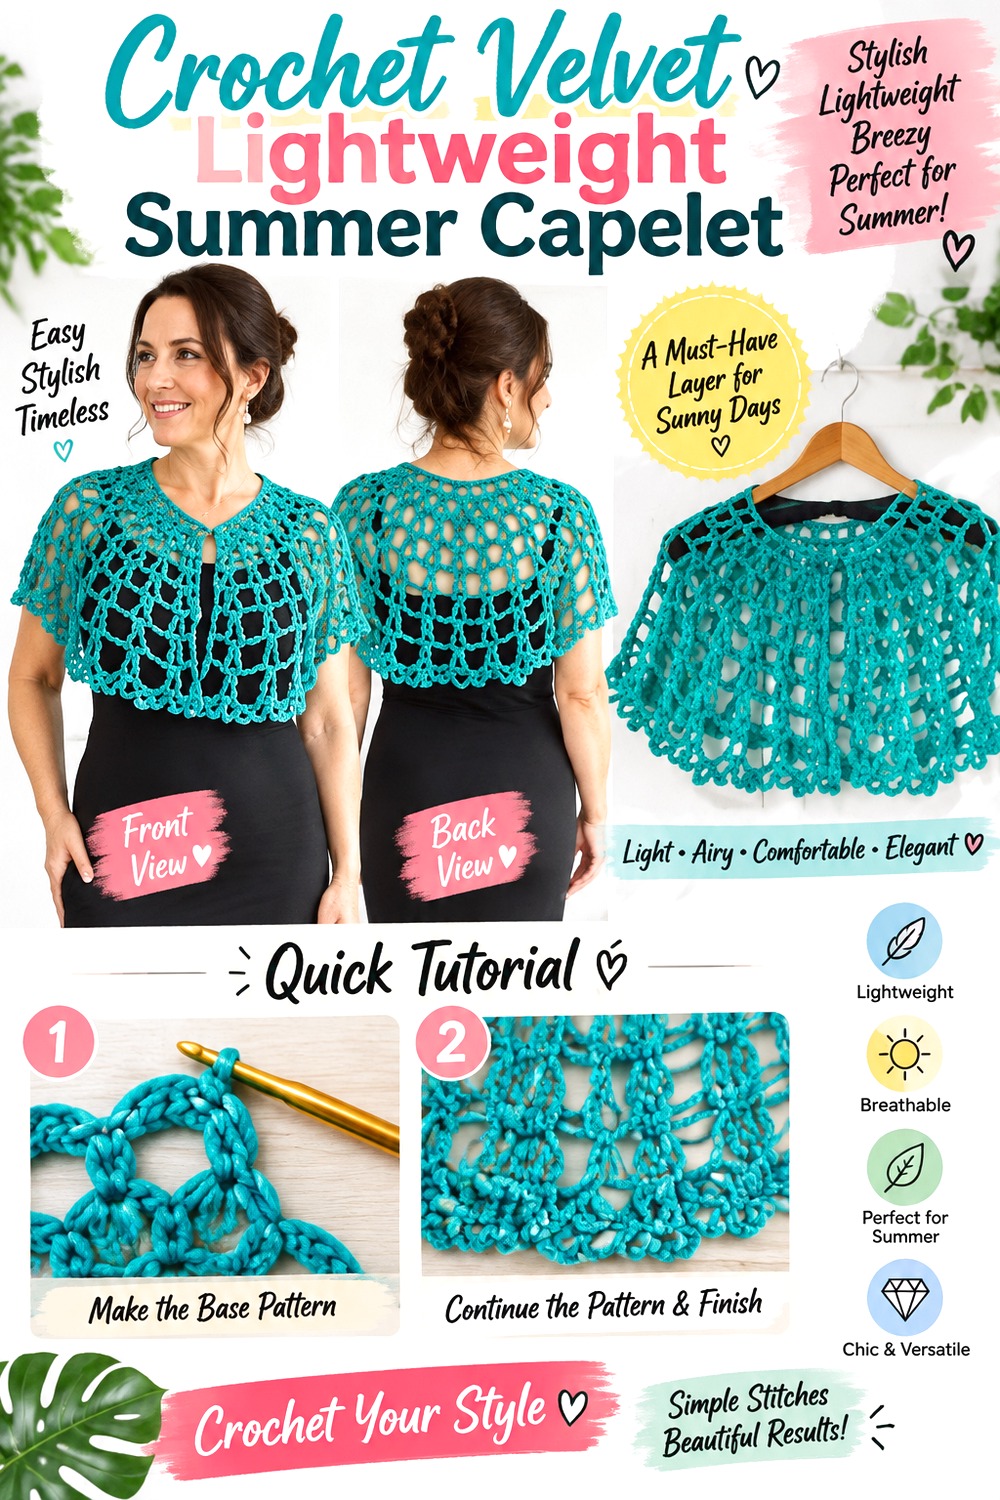
Hectanooga1’s source project is explicitly a lightweight summer capelet or shawl and includes multiple listed size options.
That makes this the clearest “contrast adaptation” in the collection. A conventional plush velvet yarn will not automatically behave like the lightweight material envisioned for a summer layer. The construction can still provide inspiration, but the fabric test is non-negotiable. If your velvet makes the piece warm, thick, or heavy, treat the result as a cool-weather capelet rather than pretending it retains the source garment’s summer behavior.
Do Not Preserve the “Summer” Label If the Fabric Changes
Seasonal suitability comes from the actual fabric, not the name of the source tutorial. A plush chenille version may trap more warmth and have less airflow than the original lightweight capelet. Judge the finished swatch by touch, thickness, and openness. If it feels cozy rather than airy, simply plan the garment for a different season instead of forcing the original use case.
Larger Sizes Magnify Yarn-Weight Differences
The source offers a broad size range, so total fabric increases substantially across versions. That makes a heavier substitution increasingly important to evaluate. Before investing in the full garment, estimate your practical comfort from a large swatch and consider how much fabric the chosen size will place around the shoulders. Do not assume a yarn that feels light in one skein will feel equally light as a complete capelet.
Original Tutorial and Creator Credit
Creator: Hectanooga1
Crochet Velvet Family Size Classic Cape
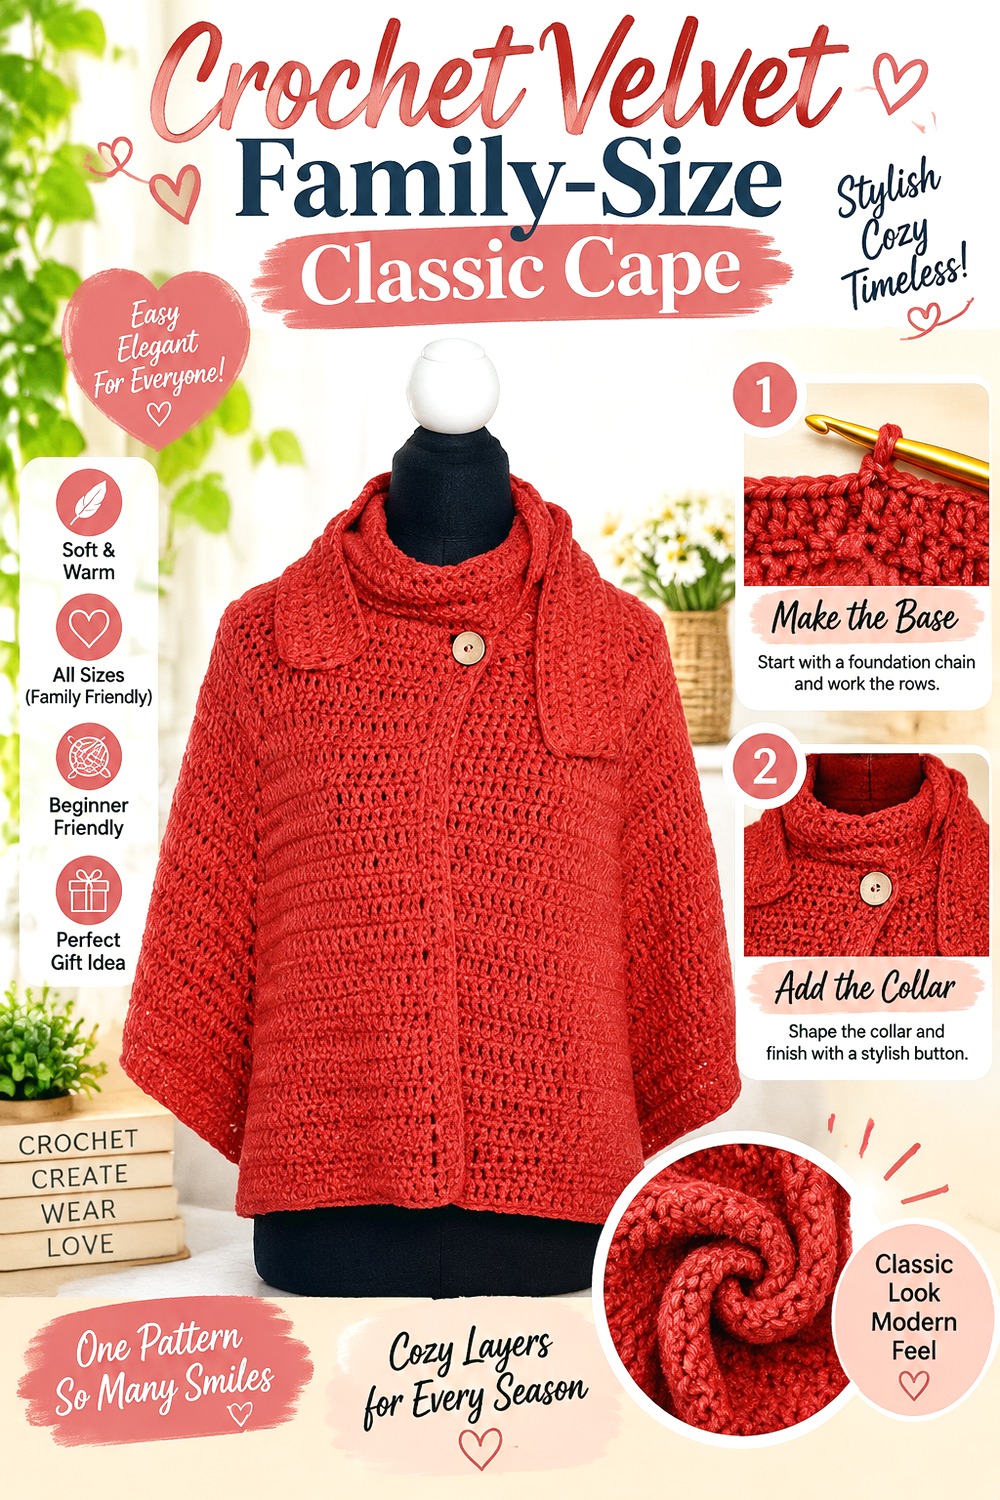
Crochet with Clare’s cape tutorial is supported by a companion pattern listing that spans baby, toddler, child/teen, and adult sizing, making it notably broad in intended wearer range.
That makes this idea useful when you are interested in a coordinated family-style cape concept rather than one adult-only statement piece. Velvet can visually unify different sizes through the same plush surface, but each version still needs to follow its appropriate sizing information. Scaling a single finished cape by eye would not give the same result.
Treat Each Wearer as a Separate Fit Project
A child’s shoulder width, adult neckline, and toddler proportions are not interchangeable. Start with the creator’s applicable size rather than using one cape as a master template. If you plan matching velvet versions, consistency can come from yarn family or color while the dimensions remain appropriate to each wearer.
Matching Capes Do Not Need Identical Finishing
Using the same velvet does not require every version to have the same decorative details. A restrained child’s finish, a simple adult edge, or different closure choices may better suit how each cape will actually be worn. Keep the overall fabric and silhouette related while making functional decisions independently, especially where loose embellishments could be inappropriate for younger wearers.
Original Tutorial and Creator Credit
Creator: Crochet with Clare
Comparing the 22 Velvet Capelet Directions
If the velvet itself is your main attraction, start with the Classic Shoulder Capelet, All-Size Capelet-Poncho, Circular Draped Capelet, Basic All-Size Shoulder Cape, or Family-Size Classic Cape. Their identity depends more on silhouette than delicate stitch definition.
For a stronger statement, the Moss-Stitch Hooded Capelet, Lace Hooded Storybook Capelet, Hooded Shoulder Cape, and Girls’ Hooded Capelet-Poncho make the hood part of the finished shape. The Snowdrift Cable, Braided-Cable, and Box-and-Bow-Tie designs are better choices when your velvet swatch clearly preserves texture.
The Edwardian, 1891-Inspired, Short-Row, and Buttoned capelets emphasize shaping or closure. The most swatch-dependent options are the Granny Fringe, Lace-Trim, and Lightweight Summer versions because plush yarn can substantially change openness, edge weight, or seasonal use.
Conclusion
For the simplest velvet-focused result, choose a capelet whose shape does most of the work: the circular, classic shoulder, mini-cape, or roomy poncho forms let plush yarn remain the main feature. If you want more character, hoods, vintage ties, buttons, cables, and fringe create much stronger identities, but they also introduce more places where yarn weight or reduced stitch definition can matter.
The cabled and lace-based designs deserve the most careful swatching, while a straightforward cape gives you more freedom to emphasize softness and color. Once you choose the silhouette, use the original tutorials for the exact construction details rather than assuming velvet can replace the demonstrated yarn without adjustment.
Frequently Asked Questions
Can I use velvet yarn with any crochet capelet tutorial?
Not automatically. A capelet tutorial may have been designed around a much lighter, smoother, or more elastic yarn. Velvet can change gauge, weight, drape, stitch visibility, and the way a neckline behaves. Make a swatch that includes the project’s important stitch texture, then compare it with the tutorial’s intended fabric. If the substitution changes the character of the design too much, choose a different capelet or a yarn closer to the source material.
Which crochet capelet shapes are easiest to adapt to velvet?
Straightforward silhouettes are generally less dependent on crisp stitch definition. A simple shoulder cape, circular capelet, short poncho, or uncomplicated hooded design gives the plush surface room to become part of the look. Cable, filet, lace, and detailed textured capelets can also be adapted, but only when your swatch shows that those features remain visible and the resulting fabric still drapes comfortably.
How can I keep a velvet capelet from feeling too heavy around my neck?
Pay attention to total fabric volume instead of thinking only about yarn softness. Hoods, deep cape bodies, fringe, dense cables, and gathered necklines all add weight. Check the garment on the body as it develops and make sure the shoulders are carrying the fabric comfortably. If the neck begins pulling backward or the lower edge feels unnecessarily heavy, reconsider length or yarn choice before adding more material.
Does velvet yarn work well for lace or filet capelets?
It can, but the result depends heavily on the particular yarn. Plush pile may partially fill visual openings and soften the contrast that makes lace or filet attractive. Crochet a meaningful sample of the actual openwork and place it over the clothing colors you expect to wear beneath the capelet. If the openings disappear from normal viewing distance, a smoother yarn may better preserve the design.
Should I block a crochet velvet capelet?
Check the care instructions supplied for your specific yarn before using heat, steam, washing, or aggressive stretching. Velvet and chenille-style yarns can vary considerably in fiber content and construction, so a blocking method appropriate for one yarn should not be assumed safe for another. Test any intended finishing method on your swatch first. The goal is to settle the fabric without damaging or flattening the pile.
How do I choose between a hooded velvet capelet and a simple shoulder cape?
Choose the hooded version when you want the garment to have a cloak-like or storybook silhouette and are comfortable with extra fabric behind the neck. Choose the simple shoulder cape when you want a lighter visual profile, easier layering, and fewer concerns about concentrated weight. With especially thick velvet, the simpler version may also allow the yarn’s plush surface to stand out without making the upper garment excessively bulky.