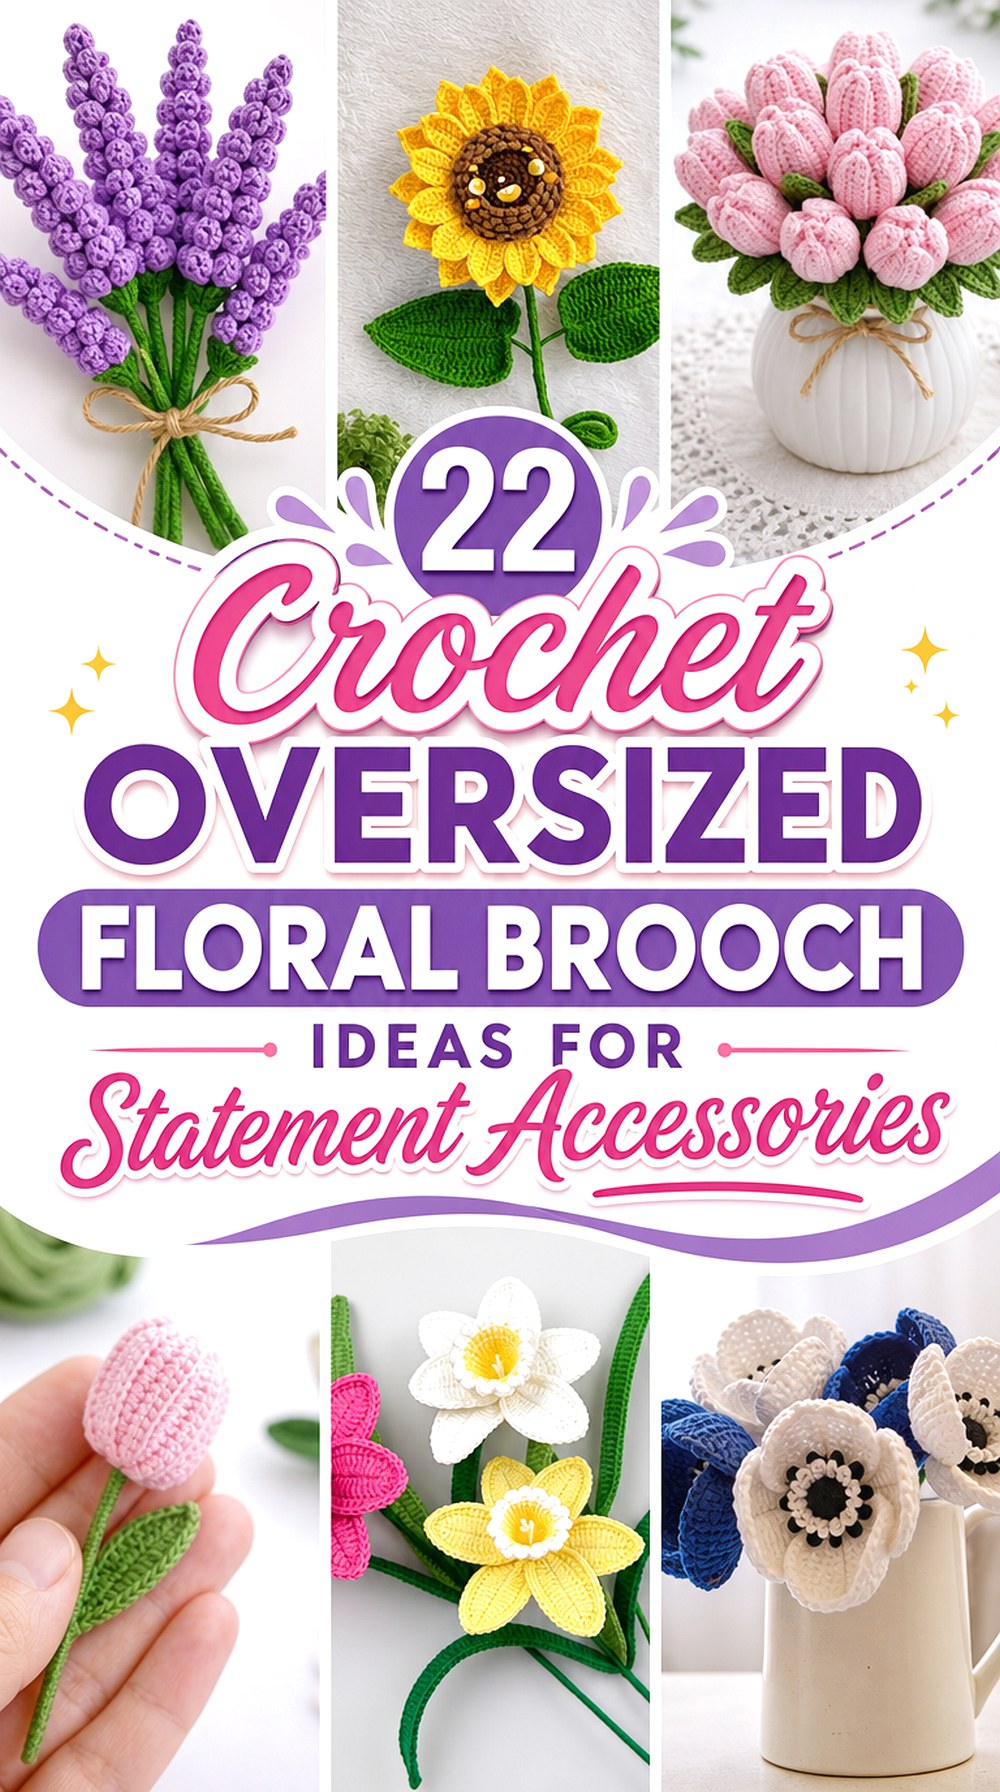

An oversized crochet flower can work more like a textile corsage than a small decorative pin. The interesting choices are not limited to flower species: a flat poppy sits differently from a projecting lily, a lavender spray creates a long silhouette, and a clustered cherry blossom brooch distributes its visual weight across several smaller blooms.
This collection focuses on those meaningful differences. You will find broad disc flowers, deep ruffles, sculptural folded petals, clustered arrangements, and directional floral forms, along with practical guidance for keeping a large brooch supported on clothing or accessories. Some featured tutorials specifically address wearable flowers, while others teach the flower itself; in those cases, the brooch backing, enlargement, placement, and reinforcement ideas below are independent adaptation considerations rather than steps taken from the creator’s pattern.
Quick List
- Crochet Wide-Petal Remembrance Poppy Brooch
- Crochet Layered Camellia Corsage Brooch
- Crochet Graphic Daisy Disc Brooch
- Crochet Gerbera Statement Brooch
- Crochet Sculptural Lily Brooch
- Crochet Oversized Sunflower Brooch
- Crochet Ruffled Carnation Brooch
- Crochet Dimensional Orchid Brooch
- Crochet Lotus Rosette Brooch
- Crochet Calla Lily Fold Brooch
- Crochet Ruffled Iris Brooch
- Crochet Trumpet Daffodil Brooch
- Crochet Color-Blocked Pansy Brooch
- Crochet Tropical Hibiscus Brooch
- Crochet Lavender Spray Brooch
- Crochet Holiday Poinsettia Brooch
- Crochet Magnolia Bloom Brooch
- Crochet Tulip Cluster Brooch
- Crochet Oversized Anemone Brooch
- Crochet Cherry Blossom Cluster Brooch
- Crochet Curled Rose Brooch
- Crochet Chrysanthemum Pom Brooch
Plan the Brooch Back Before Enlarging the Flower
Making a flower wider does more than increase its visual impact. Extra petals, thicker yarn, multiple layers, leaves, and dimensional centers can move more weight away from the garment, which makes a poorly supported flower tip forward. Before mounting a finished bloom, examine which part of its underside is actually structural. A backing can stay concealed behind the flower while still spreading the attachment over more than a tiny center point.
Pin position also matters. A closure placed too low on a large round bloom may allow the top to lean outward. Directional designs such as lilies, lavender sprays, and tulip clusters need their final wearing angle decided first. Pin the unfinished arrangement temporarily to a similar fabric and check its balance before permanently covering the back.
Yarn, Petal Structure, and Weight Change the Result
A thicker yarn is one way to make a flower physically larger, but it also changes the character of the petals. A delicate daisy or iris can lose crisp separation if the yarn makes every edge bulky, while a sunflower or chrysanthemum may benefit visually from extra texture. Enlarging the existing flower with a different yarn is therefore not automatically better than choosing a naturally broad flower construction.
Also consider how much shaping the design needs. Some dimensional flower tutorials use wire or other internal support, while flat motifs depend largely on the crochet fabric itself. If a brooch contains shaping wire, keep every end securely enclosed and away from the garment-facing surface. For an unwired version, the backing may need to do more of the stabilizing work.
Make a Statement Brooch Wearable, Not Just Large
Before deciding that a bloom needs to be even bigger, test its silhouette on the item where it will actually be worn. Dense coats, bags, hats, and sturdy jackets generally give a large pin more support than a loose or delicate knit. A dramatic flower that looks balanced on a table can pull visibly on a soft cardigan.
Shape can solve some of that problem. A relatively flat poppy spreads its visual size close to the fabric. A projecting calla lily produces drama with depth instead. Clusters and sprays create apparent scale by distributing several components across a wider area. That can be more practical than making one extremely heavy flower. Whatever form you choose, inspect the attachment from both front and back so the hardware is secure and does not overwhelm the textile underneath.
Crochet Wide Petal Remembrance Poppy Brooch
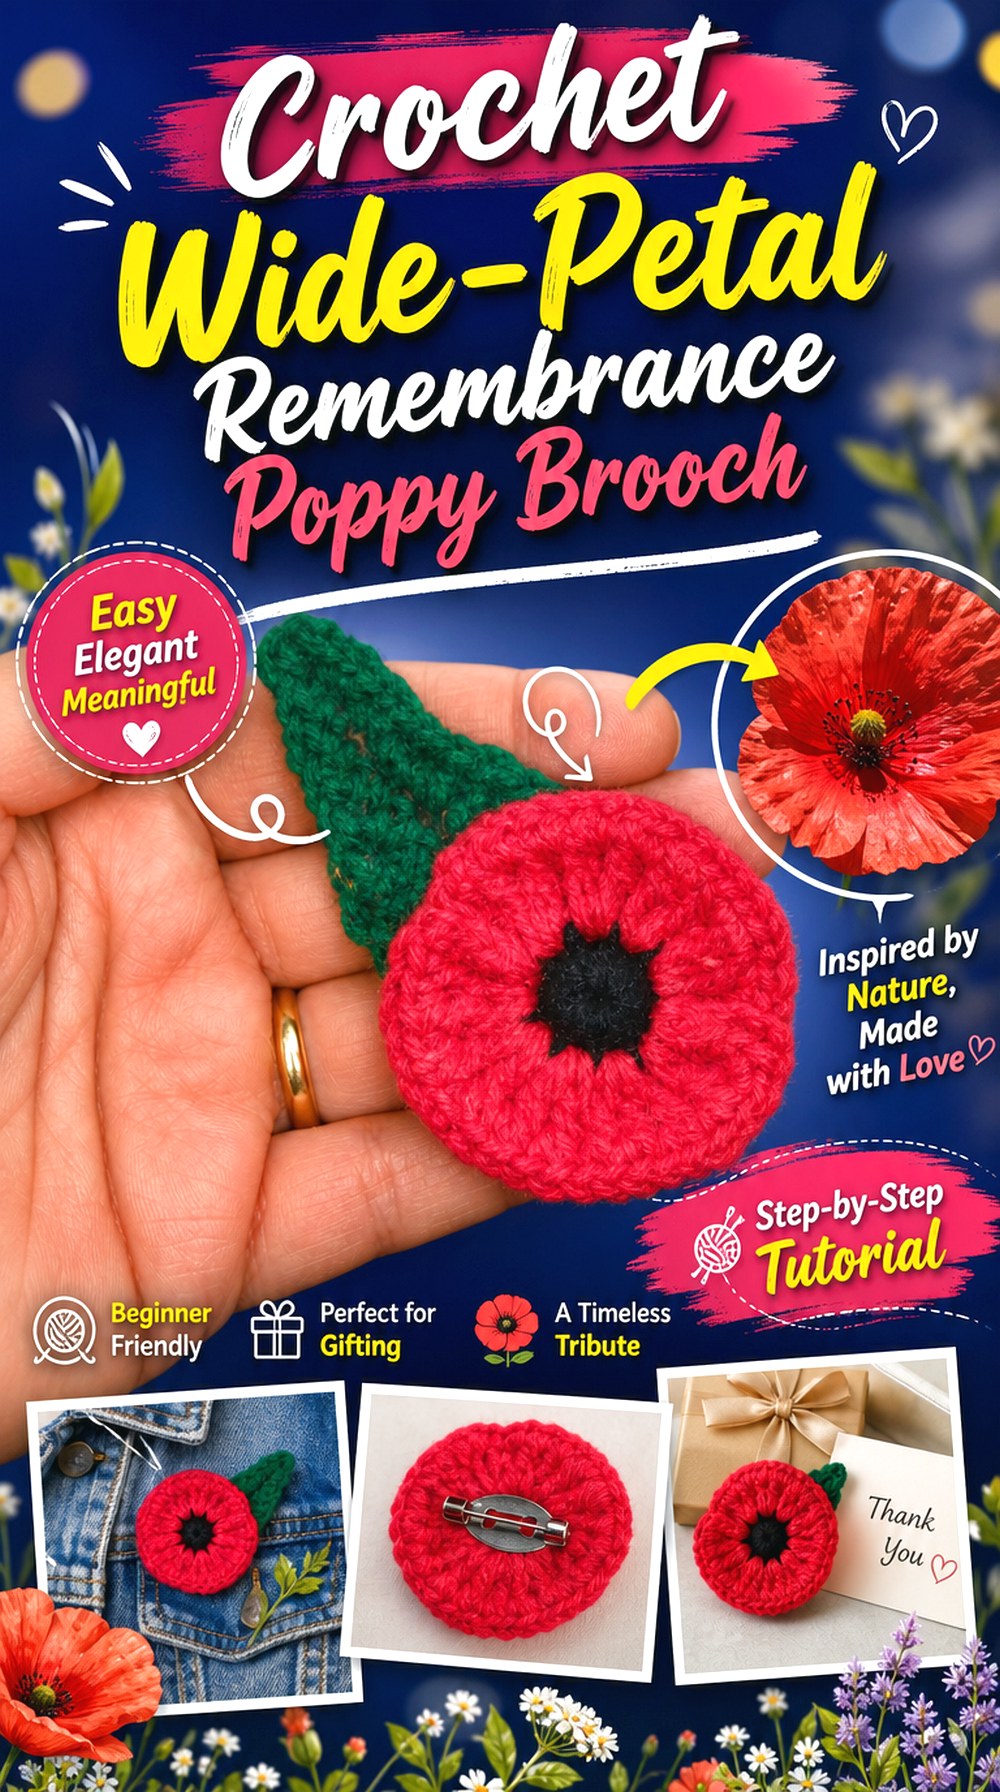
A poppy is especially well suited to an oversized brooch because its broad petals create a large silhouette without requiring a tall stack of crochet layers. The dark center gives the eye a clear focal point, while the surrounding petals can remain soft and expressive. It works particularly well on a coat lapel, a structured cardigan, or a fabric bag where the flower has enough surface behind it to stay open.
Unlike many entries in this collection, the supporting tutorial is specifically presented as a poppy brooch, making it a useful starting point for seeing how a crocheted flower translates directly into wearable ornamentation.
A Broad Poppy Needs a Firm Center
The center carries more responsibility in an oversized version than it does in a small appliqué. If the middle collapses while the petals spread outward, the whole bloom can look limp when worn vertically. Check the flower from the side as well as straight on. The goal is not necessarily a rigid disc, but enough central stability that the petals remain visually attached to one coherent flower rather than folding around the pin.
Place the Pin Above the Visual Center
For a very broad bloom, the geometric middle is not always the most stable location for the hardware. Temporarily pin the flower to scrap fabric and observe whether the upper petals lean forward. Moving the support slightly higher on the underside can help the flower hang more naturally. Keep the mechanism concealed behind the center so it does not become visible between widely separated petals.
Crochet Layered Camellia Corsage Brooch

A camellia-style brooch gets its statement scale from concentric petal layers rather than extremely long individual petals. That creates a rounded, corsage-like appearance with plenty of depth concentrated near the center. It is a good direction for readers who want a substantial flower that still keeps a tidy circular outline on a jacket, scarf, or bag.
The supporting tutorial teaches a camellia flower rather than an oversized brooch assembly, so treat the wearable backing as a separate adaptation. The layered construction makes the underside particularly important: adding more visible petal depth without widening the supporting base can make a heavy bloom rotate or sag once worn.
Layered Camellia Petals Build Depth Quickly
Additional petal layers make a flower look richer, but they also concentrate material in a relatively small area. Before enlarging a camellia by adding bulk, compare how much depth you actually want against the garment. A shallower flower can be easier to wear under an open coat, while a deeper corsage effect is better where the bloom will not be compressed by another clothing layer.
Keep the Backing Smaller Than the Outer Bloom
A concealed foundation does not need to extend beneath every petal. It should support the dense center while allowing the outer edges to retain their natural shape. Position a candidate backing behind the completed flower and look from the front and side; if its edge becomes visible when petals shift, reduce or reshape it. If it feels too small to control the heavy center, increase support without reaching the outer perimeter.
Original Tutorial and Creator Credit
Creator: Crochet Everyday
Crochet Graphic Daisy Disc Brooch
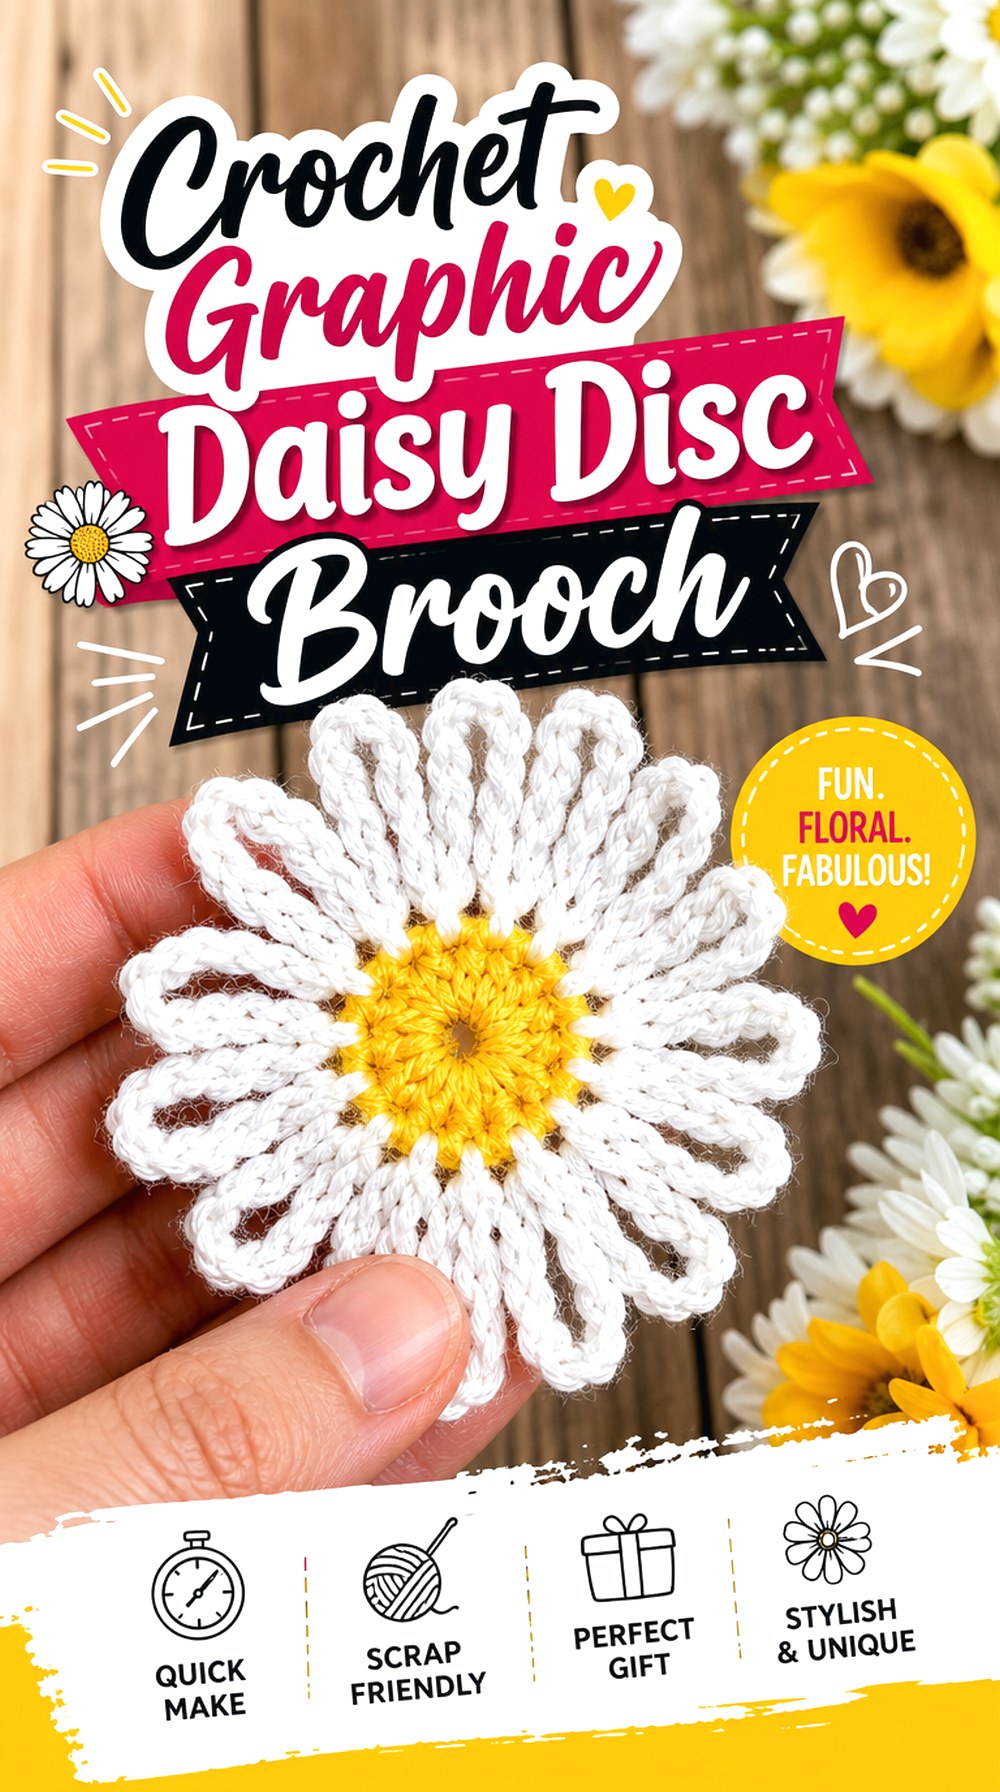
A large daisy gives you a cleaner, flatter statement than heavily ruffled flowers. The strong center-and-petal geometry reads immediately, making this a useful option for graphic accessories, cheerful jacket pins, or bold bag decoration. Because much of the flower’s size comes from petals radiating across one plane, it can appear oversized without projecting as far from the wearer as an orchid or calla lily.
Blossom Crochet’s source tutorial demonstrates a crochet daisy flower. For a brooch adaptation, concentrate on maintaining the clarity of that simple silhouette rather than adding so many backing layers that the flower loses its light, open character.
The Daisy Reads Best With a Clean Center Contrast
A daisy relies heavily on the visual boundary between its center and outer petals. When planning an oversized version, step back from the flower instead of judging colors only at close range. If the center blends into the petals, the larger silhouette can read as a generic rosette. A clear center distinction helps preserve the recognizable daisy structure even when the brooch is viewed from across a room.
A Flatter Profile Is Easier on Everyday Layers
Compared with highly dimensional blooms, a flatter daisy can sit closer to a jacket or bag. That does not eliminate the need for support, but it reduces the amount of material extending forward from the pin. If you expect to wear the brooch frequently, check whether the petal edges remain open after normal movement rather than curling underneath the central backing.
Original Tutorial and Creator Credit
Creator: Blossom Crochet
Crochet Gerbera Statement Brooch
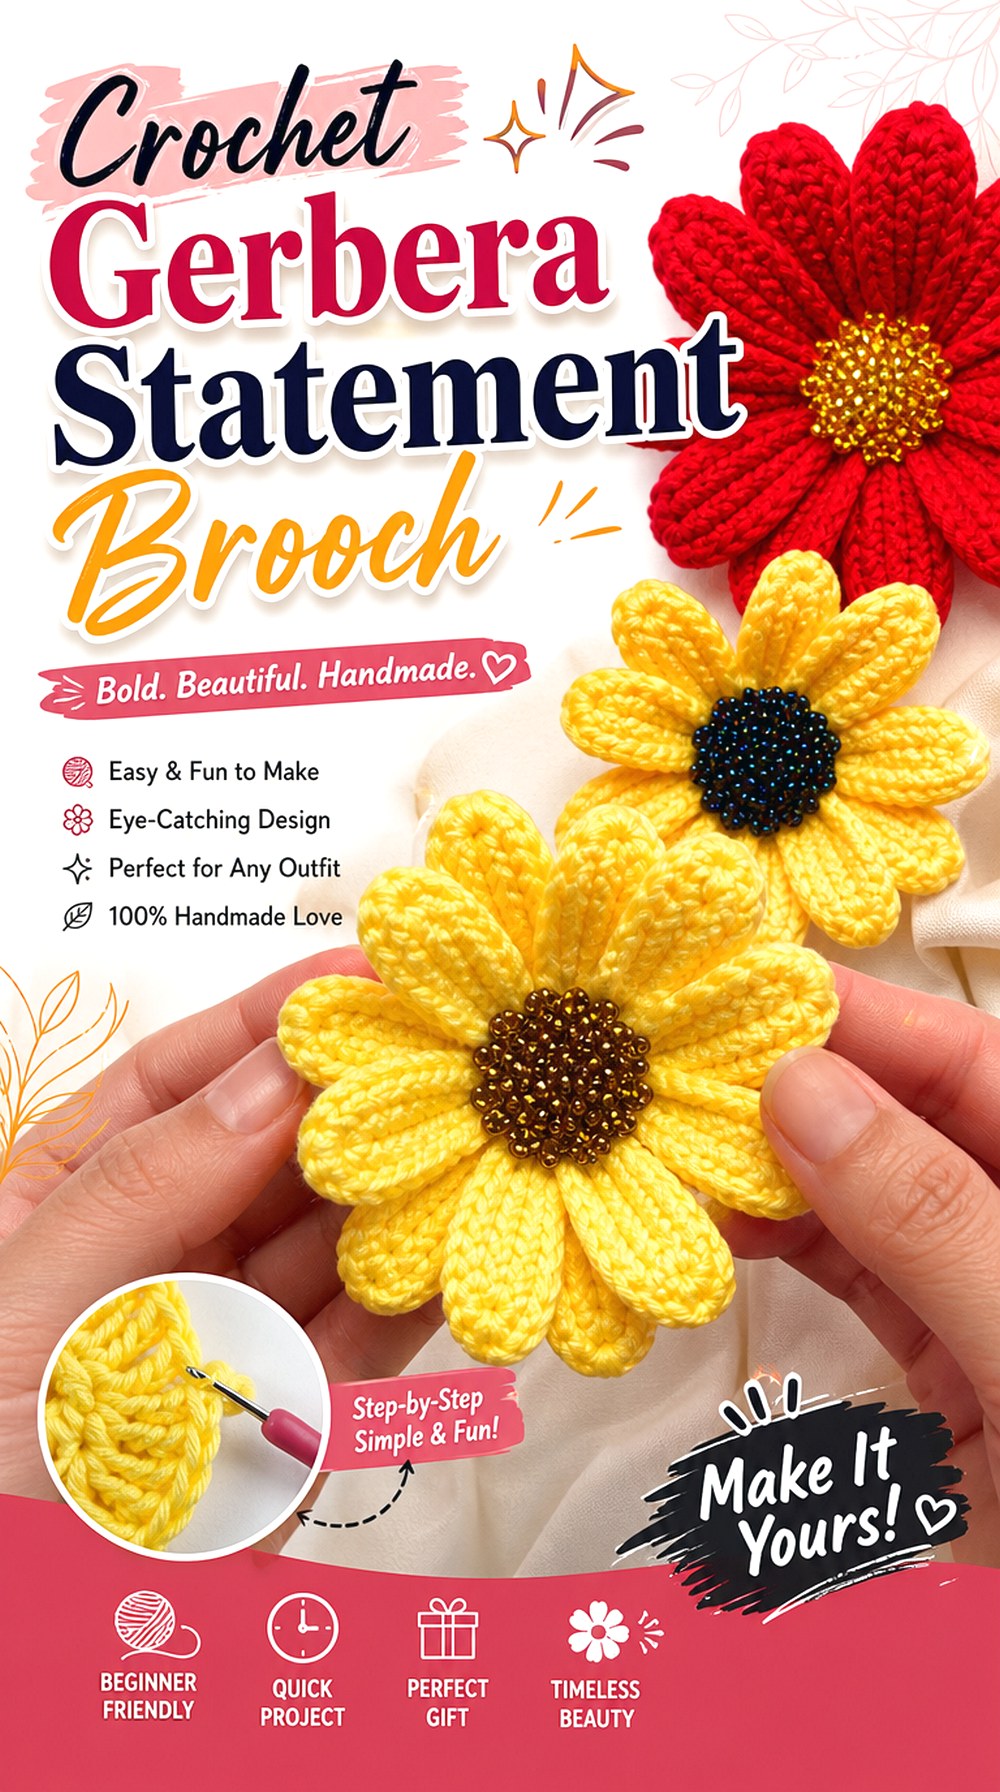
A gerbera-style flower brings a denser ring of narrow petals than the classic daisy, giving an oversized brooch more visual movement around its edge. The result can feel dramatic without relying on deep ruffles or folded petals. This shape suits a single prominent lapel flower especially well because the radial symmetry still looks intentional if the wearer changes angle.
Natagor Finlayson’s tutorial demonstrates a crochet gerbera flower. When translating that flower into a brooch, the main design question is how much of the outer petal ring can remain unsupported while still holding a neat circular outline. A very large backing would stabilize it, but it could also flatten the lively perimeter that distinguishes a gerbera.
Gerbera Petals Need Room Around the Edge
The narrow petal ring is the feature that makes this flower visually different from a broad-petal daisy. Avoid mounting it against a support so wide that those outer petals become pressed into a perfect rigid disc. Test the flower on fabric and gently move it; a little independent petal movement can preserve the botanical look while the center stays stable.
Support the Disc Without Hiding the Petal Ring
A circular backing can be useful, but judge its size from the front. If the backing becomes visible through gaps between petals, the brooch may look more like an appliqué mounted on a pad. A support concentrated beneath the central flower area usually keeps the attachment visually quieter. Check that the transition from stable center to flexible outer petals feels gradual rather than abrupt.
Original Tutorial and Creator Credit
Creator: Natagor Finlayson
Crochet Sculptural Lily Brooch
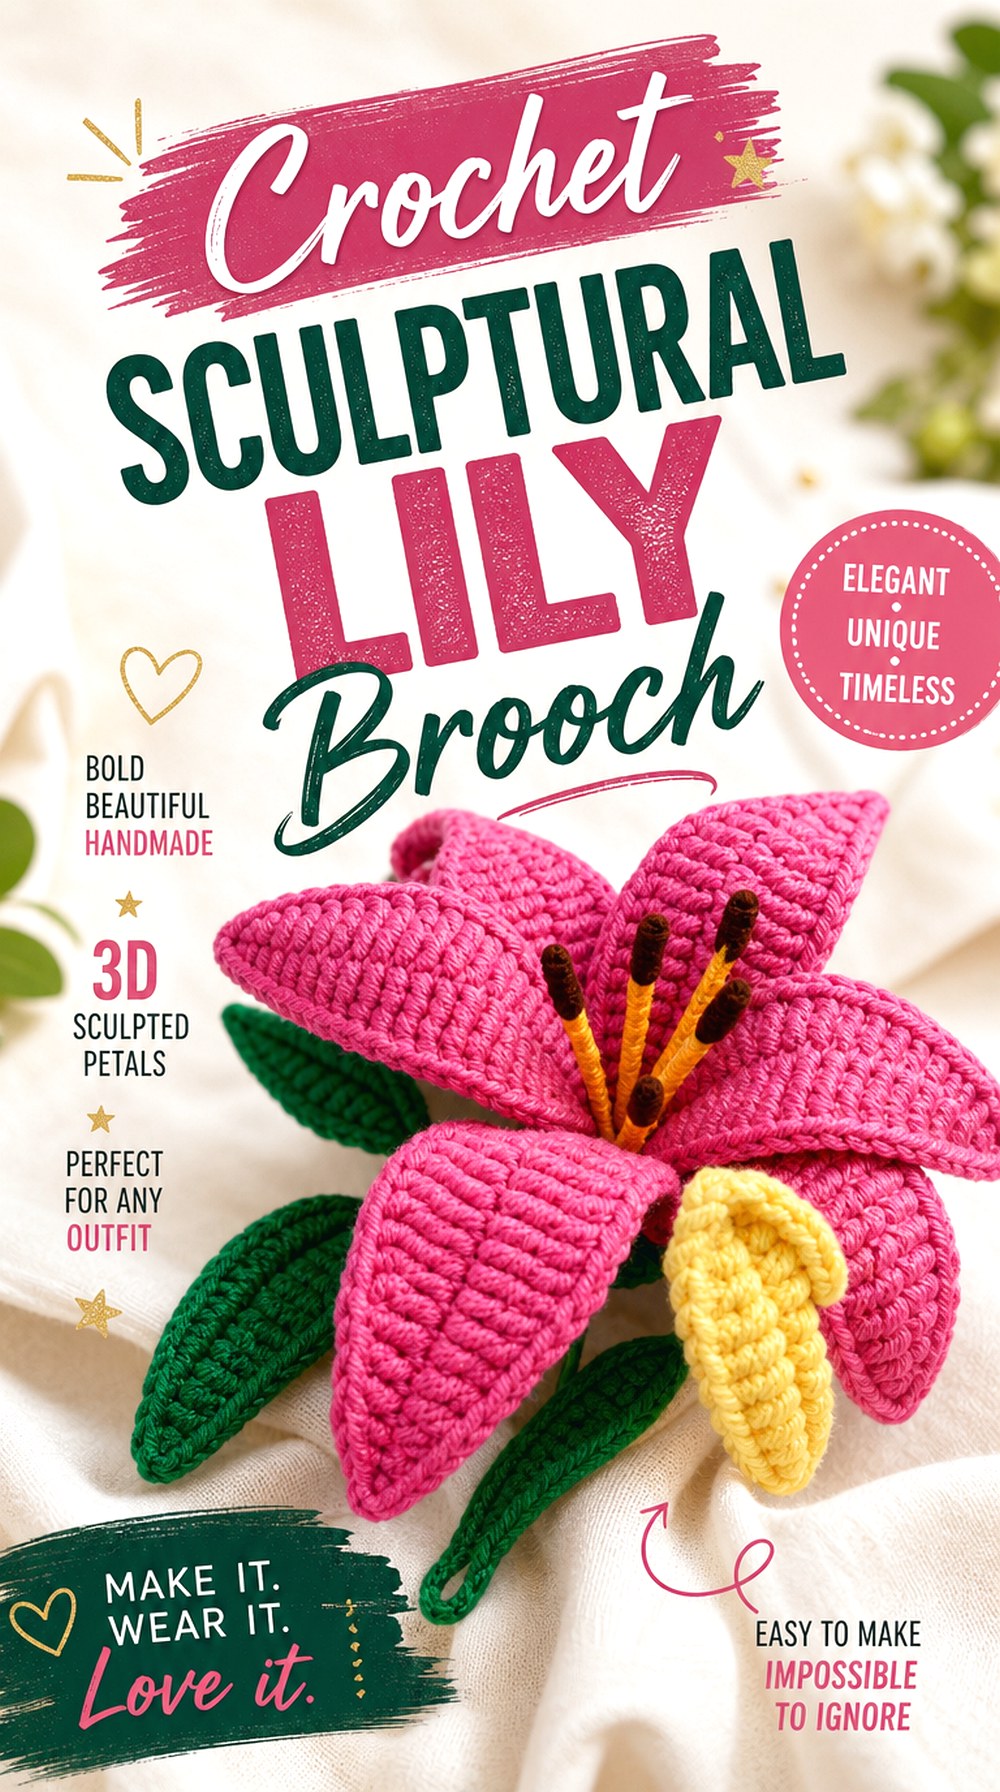
A lily takes the oversized floral-brooch idea in a distinctly sculptural direction. Rather than spreading entirely flat, its petals can project outward and create a three-dimensional silhouette. That makes it striking on a shoulder, coat lapel, bag flap, or hat where the flower has clear space around it. PinDIY’s tutorial presents a crochet lily and describes the flower as a one-piece construction, giving this option a different construction character from collections of individually layered petals.
For brooch use, projection matters as much as overall width. The flower needs to look intentional from a side view and remain comfortable in a location where its petal tips will not constantly catch against another garment.
The Lily’s Projection Changes Where It Can Be Worn
A three-dimensional bloom can feel larger than a flat flower of similar width because it occupies space in front of the garment. Before fixing the brooch hardware, hold the finished lily against the intended placement and turn sideways. A shoulder or sturdy bag may give projecting petals more clearance than the center front of a jacket, especially if a coat or scarf will sit over it.
Check Petal Tips Before Adding the Brooch Back
The tips are visually important, so any reinforcement should support rather than erase their natural movement. Look for petals that consistently fold backward or disappear behind their neighbors when the flower is vertical. Resolve the orientation first, then mount the brooch. If shaping support is incorporated, make sure no firm or sharp element can reach the clothing-facing surface.
Original Tutorial and Creator Credit
Creator: PinDIY
Crochet Oversized Sunflower Brooch
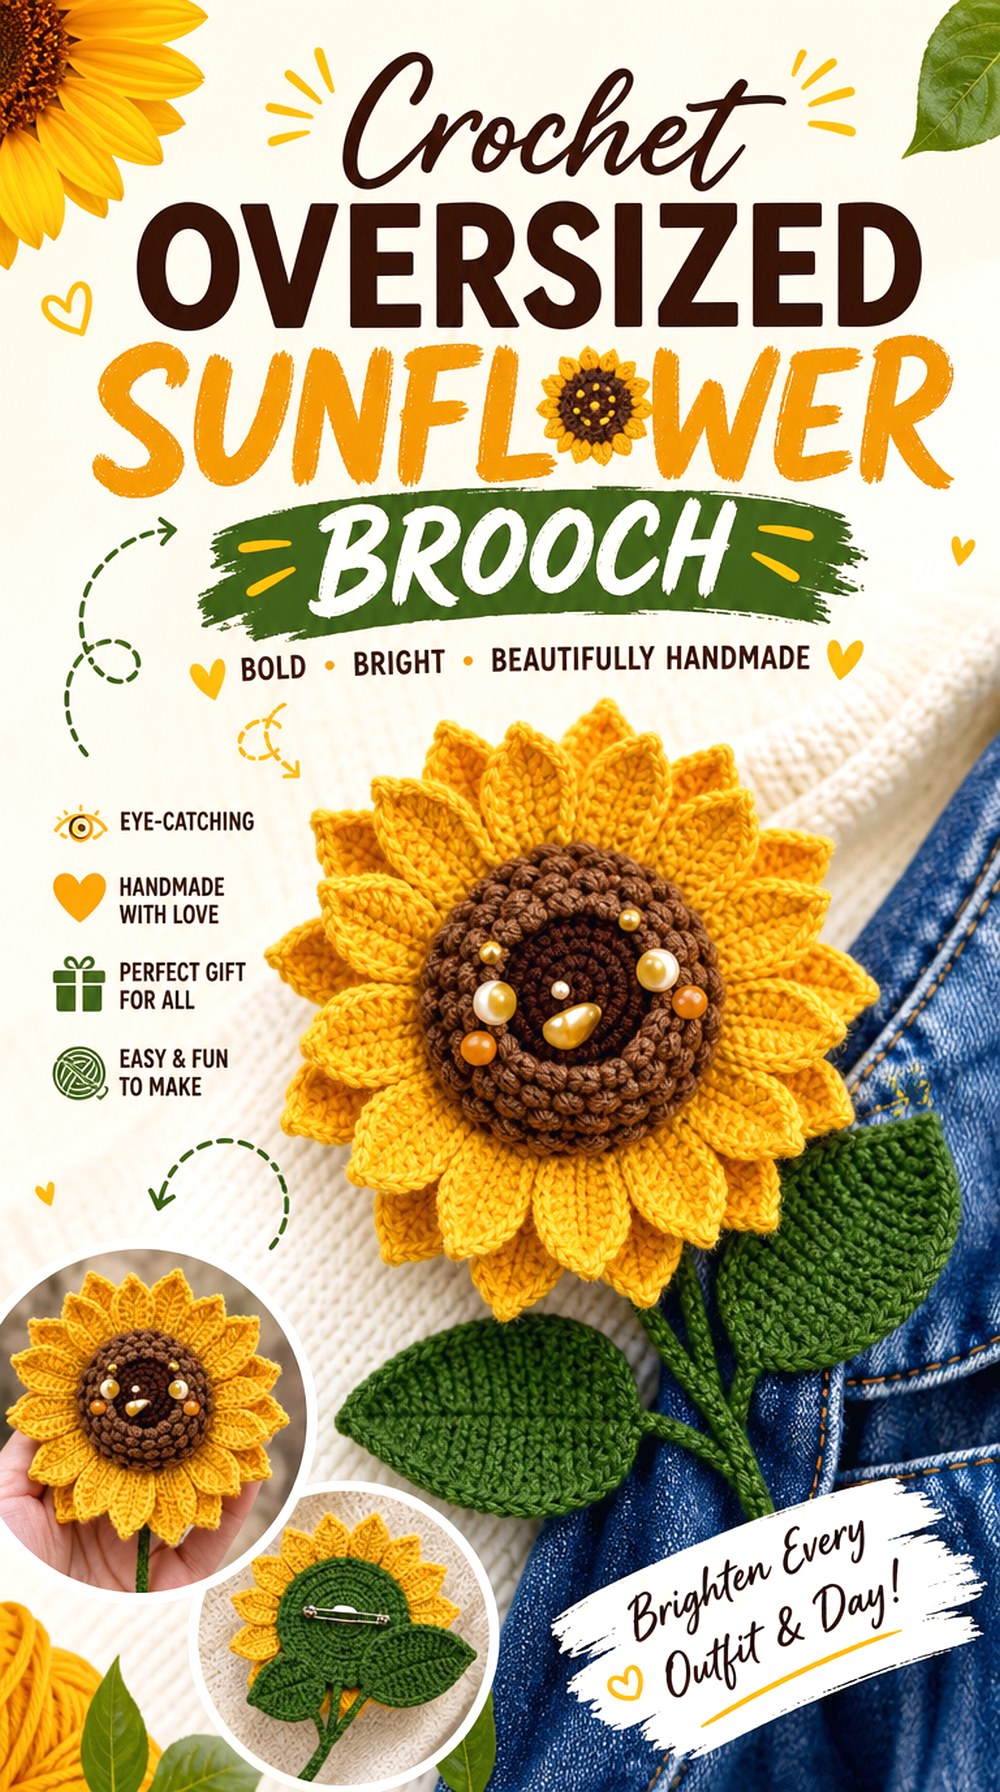
Few flower shapes communicate “statement brooch” as naturally as a sunflower. The broad center creates a strong visual anchor and the radiating petals establish width without requiring a cluster of separate blooms. Kane Crochet’s source is explicitly a large crochet sunflower tutorial, making it especially relevant when the goal is an oversized floral focal point.
This is a strong choice for a coat, tote, or other substantial textile where a wide flower has room to sit open. The main limitation is also obvious: enlarging the center and petals increases the amount of material hanging from one attachment area. Brooch engineering matters more here than it does with a tiny decorative sunflower.
A Large Sunflower Can Become Front-Heavy
Hold the finished flower vertically before mounting anything. If the center falls forward while the petal ring stays behind, the brooch may look downward-facing on clothing. A broad, stable central backing can help bring the flower closer to the garment. Also compare the effect on the intended fabric; a heavy flower that stays upright on denim may behave very differently on a loose knit.
Let the Dark Center Carry the Hardware
The visual center is a logical place to conceal structural support because its density already draws the eye. Keep hardware and backing inside that area where possible rather than extending visibly behind bright outer petals. If the flower needs more stabilization, spread support across the center’s underside instead of concentrating all the load on one small crochet loop.
Original Tutorial and Creator Credit
Creator: Kane Crochet
Crochet Ruffled Carnation Brooch
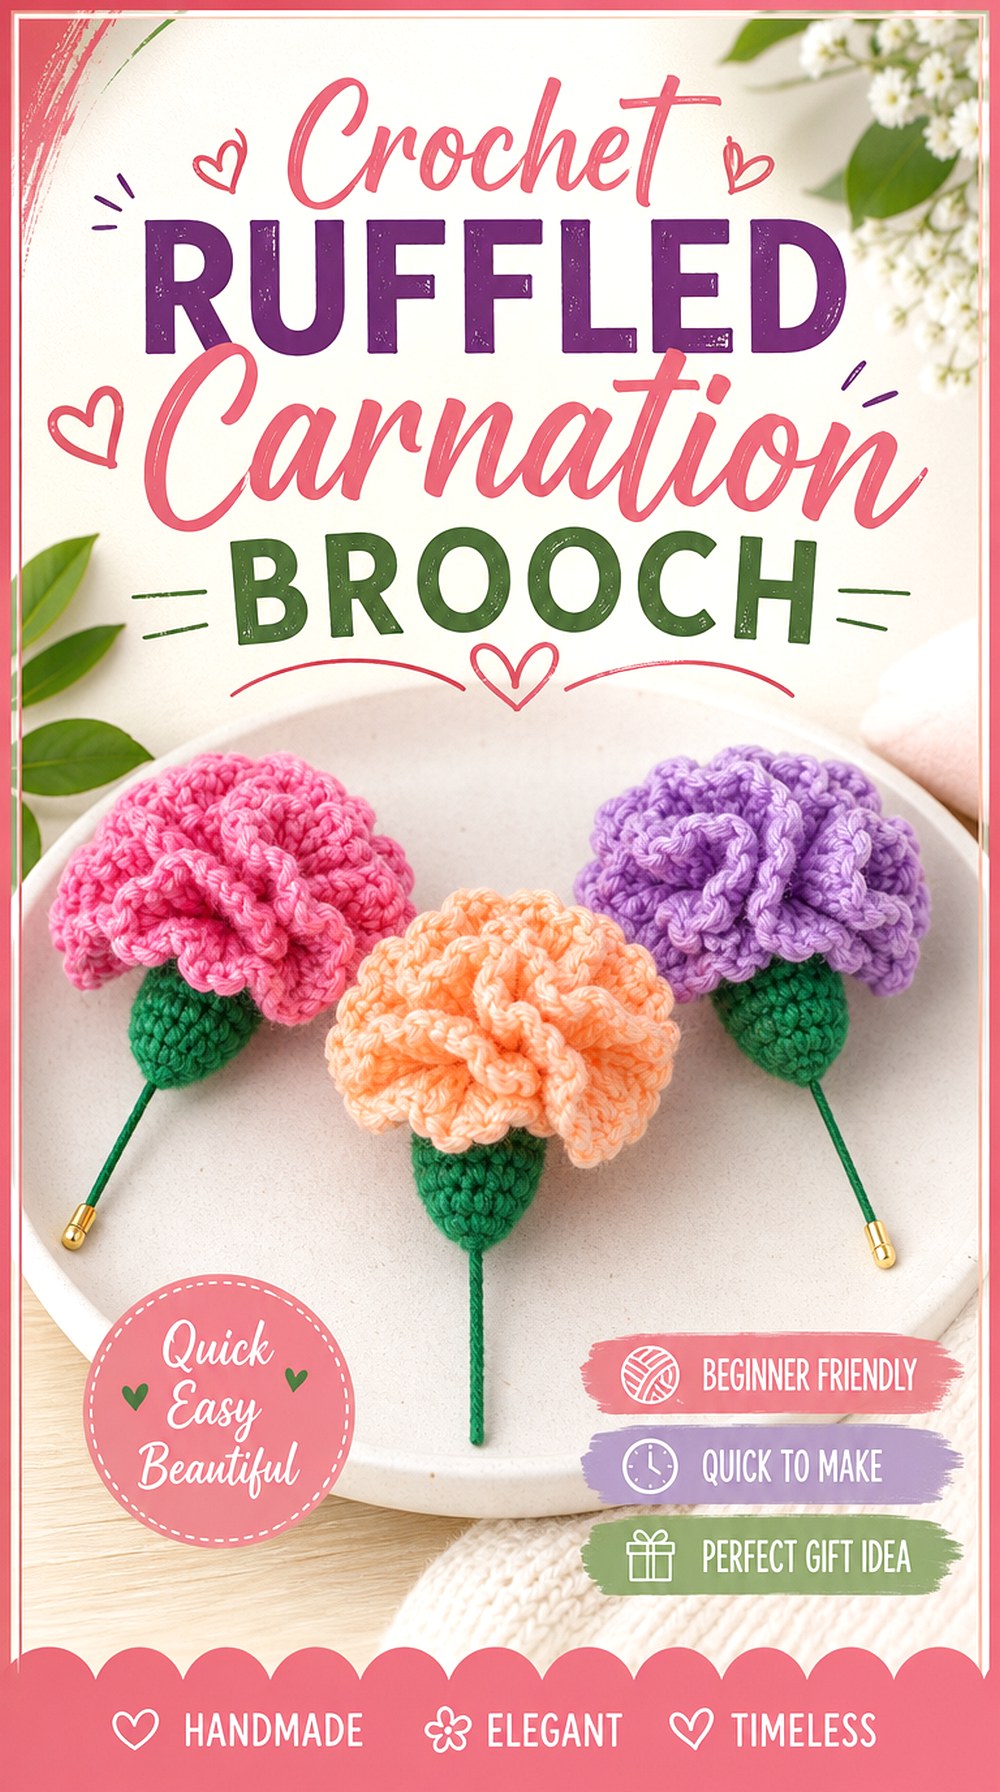
A carnation offers size through ruffles rather than long petals. Its dense, frilled surface creates a rounded bloom that can work as a soft textile corsage without taking up as much flat surface as a sunflower or poppy. Naztazia’s tutorial demonstrates a crochet carnation flower, providing a useful reference for this distinctly gathered floral texture.
For an oversized brooch, the important choice is how much volume you want. A very compressed ruffle creates a dense flower but also puts more yarn in one area. A looser presentation gives the edge more air. Either can work, but the brooch base should stabilize the gathered center rather than flatten the ruffles themselves.
Carnation Ruffles Need Compression Control
When a ruffled bloom is pinned against clothing, the layers closest to the garment can become compressed. Check the flower while it is held vertically and gently press it against the intended surface. If the outer ruffles disappear into one dense mass, consider arranging them before mounting so the edge remains readable. The goal is a textured carnation silhouette, not simply the maximum possible volume.
Turn the Gathered Base Into the Anchor Point
The densest underside of a carnation is the natural area to evaluate for a brooch foundation. Rather than attaching hardware to a single outer ruffle, support the core where the flower’s volume originates. A backing hidden beneath that core can help control rotation while leaving the frilled edge free. Always inspect the front afterward to make sure the base has not pulled the bloom into an unnatural flat shape.
Original Tutorial and Creator Credit
Creator: naztazia
Crochet Dimensional Orchid Brooch
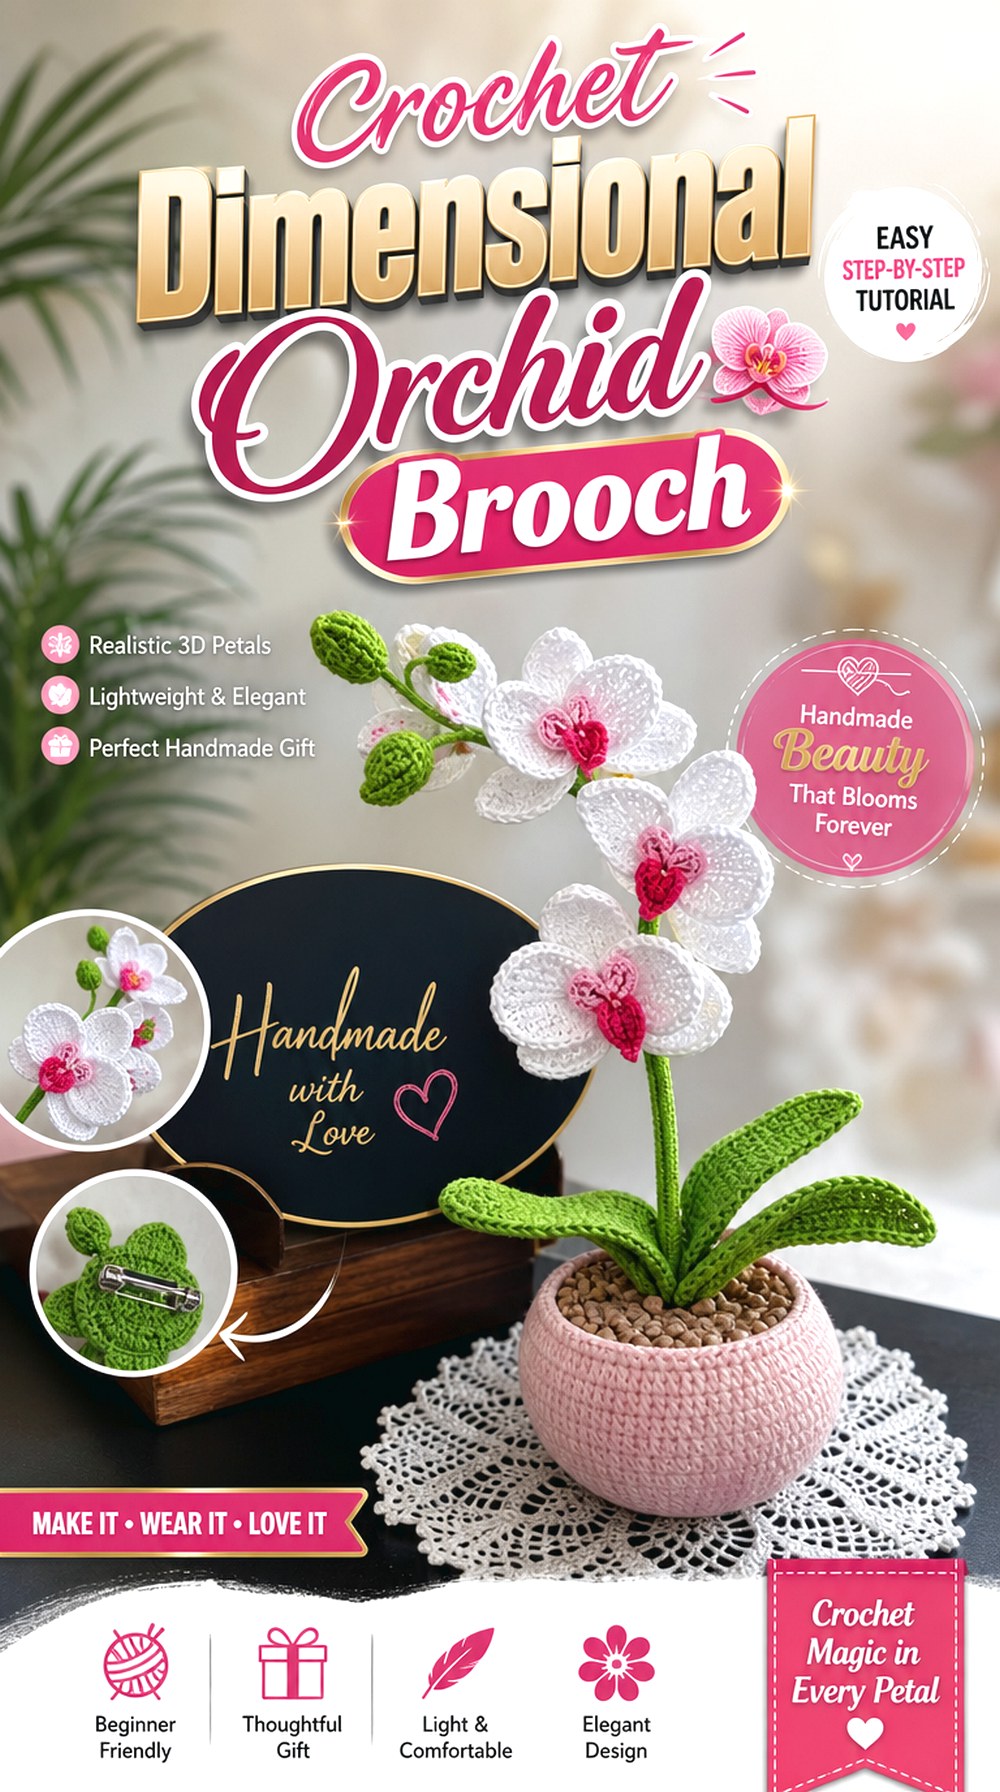
An orchid can become one of the most distinctive brooches in the collection because its asymmetrical petal arrangement does not read like a conventional round rosette. Shelen Crochet’s tutorial demonstrates a detailed crochet orchid, including the flower’s component assembly, giving you a useful source for the botanical form itself.
For wearable adaptation, decide which direction the orchid should face before covering the underside. A slight tilt can look elegant, while accidental rotation can make the finished flower seem upside down. This is a strong option for a shoulder brooch or off-center lapel placement where the shape has room to extend horizontally instead of being forced into a circular footprint.
Orchid Asymmetry Makes Orientation Important
A daisy can rotate substantially without looking wrong; an orchid cannot. Pin the completed bloom temporarily and examine it in a mirror or photograph before placing the permanent hardware. Pay attention to which petal naturally reads as the upper portion and where the flower’s weight sits. Marking that orientation on the hidden backing can prevent the final pin from being sewn in at an awkward angle.
Wired Shaping Needs a Covered Underside
Some dimensional flower designs use shaping support to hold petals in position. If you retain any wire or similarly firm component when turning the flower into a brooch, the garment-facing side deserves particular care. Keep ends fully enclosed and make sure repeated flexing cannot expose them. A neat backing is not only cosmetic here; it separates structural elements from the textile beneath the flower.
Original Tutorial and Creator Credit
Creator: Shelen Crochet
Crochet Lotus Rosette Brooch
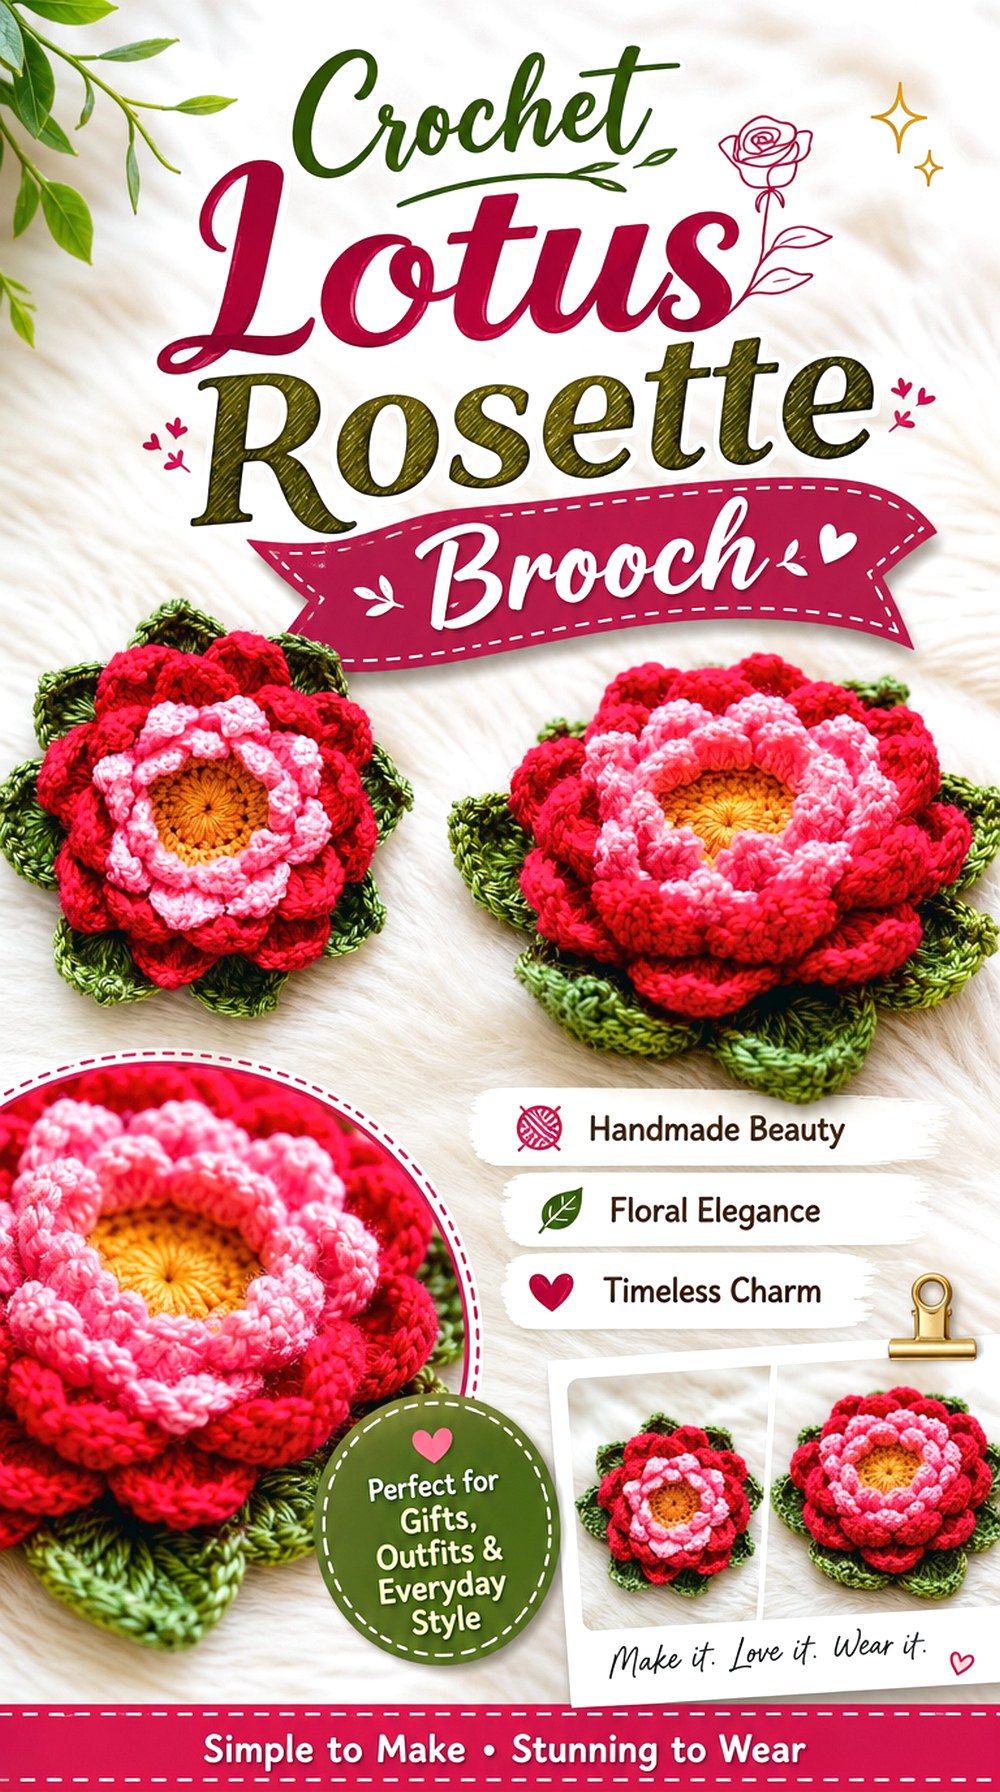
A lotus-inspired brooch combines the symmetry of a round flower with more pronounced layered petals. The resulting silhouette can form a controlled dome rather than a completely flat disc, making it a useful middle ground between daisies and strongly projecting lilies. TheHappyHues’ tutorial demonstrates a crochet lotus flower that supplies the floral reference for this adaptation.
For oversized use, this shape works best when the concentric arrangement remains visible. If the petals are compressed too tightly against the garment, the layered effect can disappear; if the middle becomes too tall and heavy, the bloom may lean. Aim for a stable base that allows the upper petals to retain their stepped appearance.
Lotus Layers Look Stronger With a Controlled Dome
View the completed flower from the side and decide whether its depth feels intentional. A gentle dome emphasizes the progression of petal layers, while an uneven mound can make one side appear heavier. Before mounting, redistribute the petals visually and make sure the flower has a clear front. The brooch back should preserve that profile rather than forcing every lower petal into the same flat plane.
Keep the Base Broad Enough for the Rosette
Because a lotus builds upward from a round foundation, a very tiny attachment point can allow the whole flower to wobble. Compare the diameter of the dense lower section with the planned backing and make sure the support catches a structurally meaningful area. It should remain hidden from the front, but it does not need to be so small that the pin carries the entire flower from one spot.
Original Tutorial and Creator Credit
Creator: TheHappyHues🍁
Crochet Calla Lily Fold Brooch
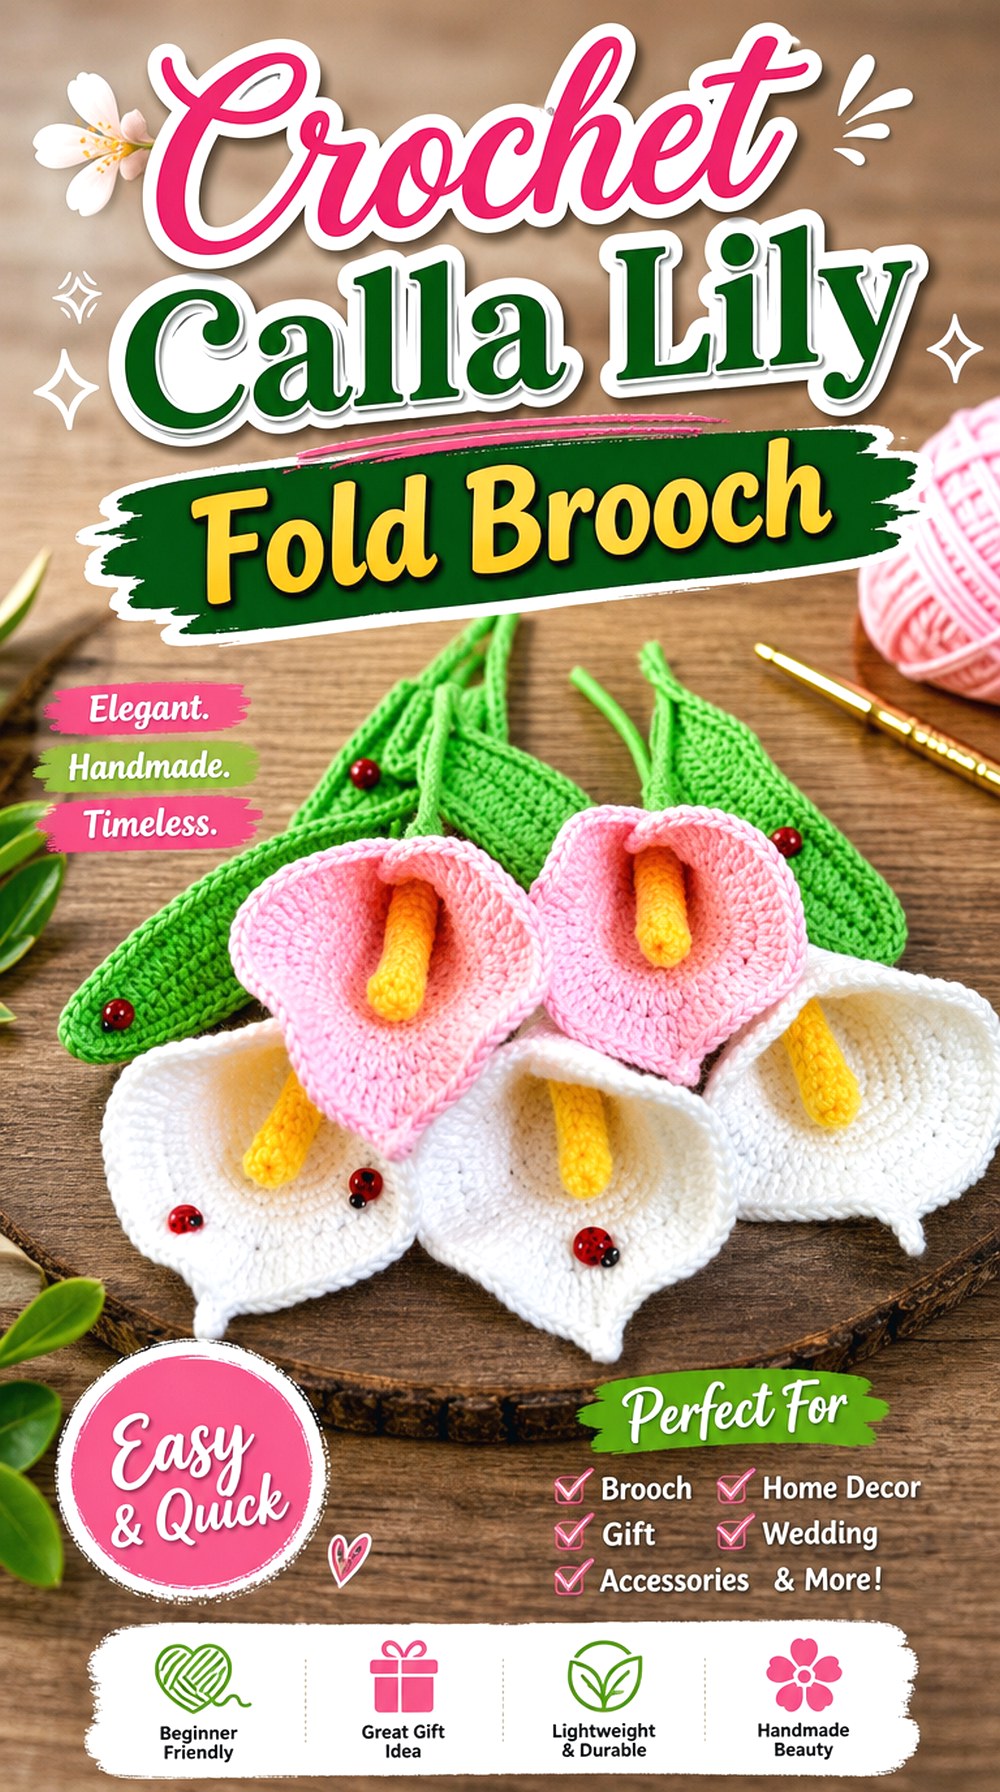
A calla lily is an alternative for readers who want an oversized brooch without a broad circular outline. Its wrapped, directional flower form creates drama through shape and projection. Crochet Cuties Creations by Esther provides a tutorial for a crochet calla lily flower, which serves as the construction reference for this wearable adaptation.
Rather than centering this brooch like a rosette, consider it as a small sculptural accent that points upward or diagonally across a lapel. A leaf can reinforce that directional look, but every additional component changes balance. Decide on the entire silhouette first, then mount the hardware so the flower does not rotate away from the intended angle.
The Calla Fold Creates a Directional Brooch
The wrapped bloom has a clear top and bottom, so pin orientation is a design decision rather than an afterthought. Test it vertically, diagonally, and slightly outward before choosing the final position. A diagonal angle may fit a lapel naturally, while a more upright position can suit a bag or hat. Photographing the alternatives can make balance easier to judge than holding the flower in one hand.
Hide the Support Where the Petal Wraps
The folded flower already creates overlapping areas where a discreet foundation can be concealed. Keep the garment-facing surface neat without filling the entire open flower with backing. The objective is to support the lower structural area while allowing the characteristic upper fold to stay dimensional. If the flower includes a long lower section, check that it does not act like a lever and pull the pin downward.
Original Tutorial and Creator Credit
Creator: Crochet Cuties Creations by Esther
Crochet Ruffled Iris Brooch
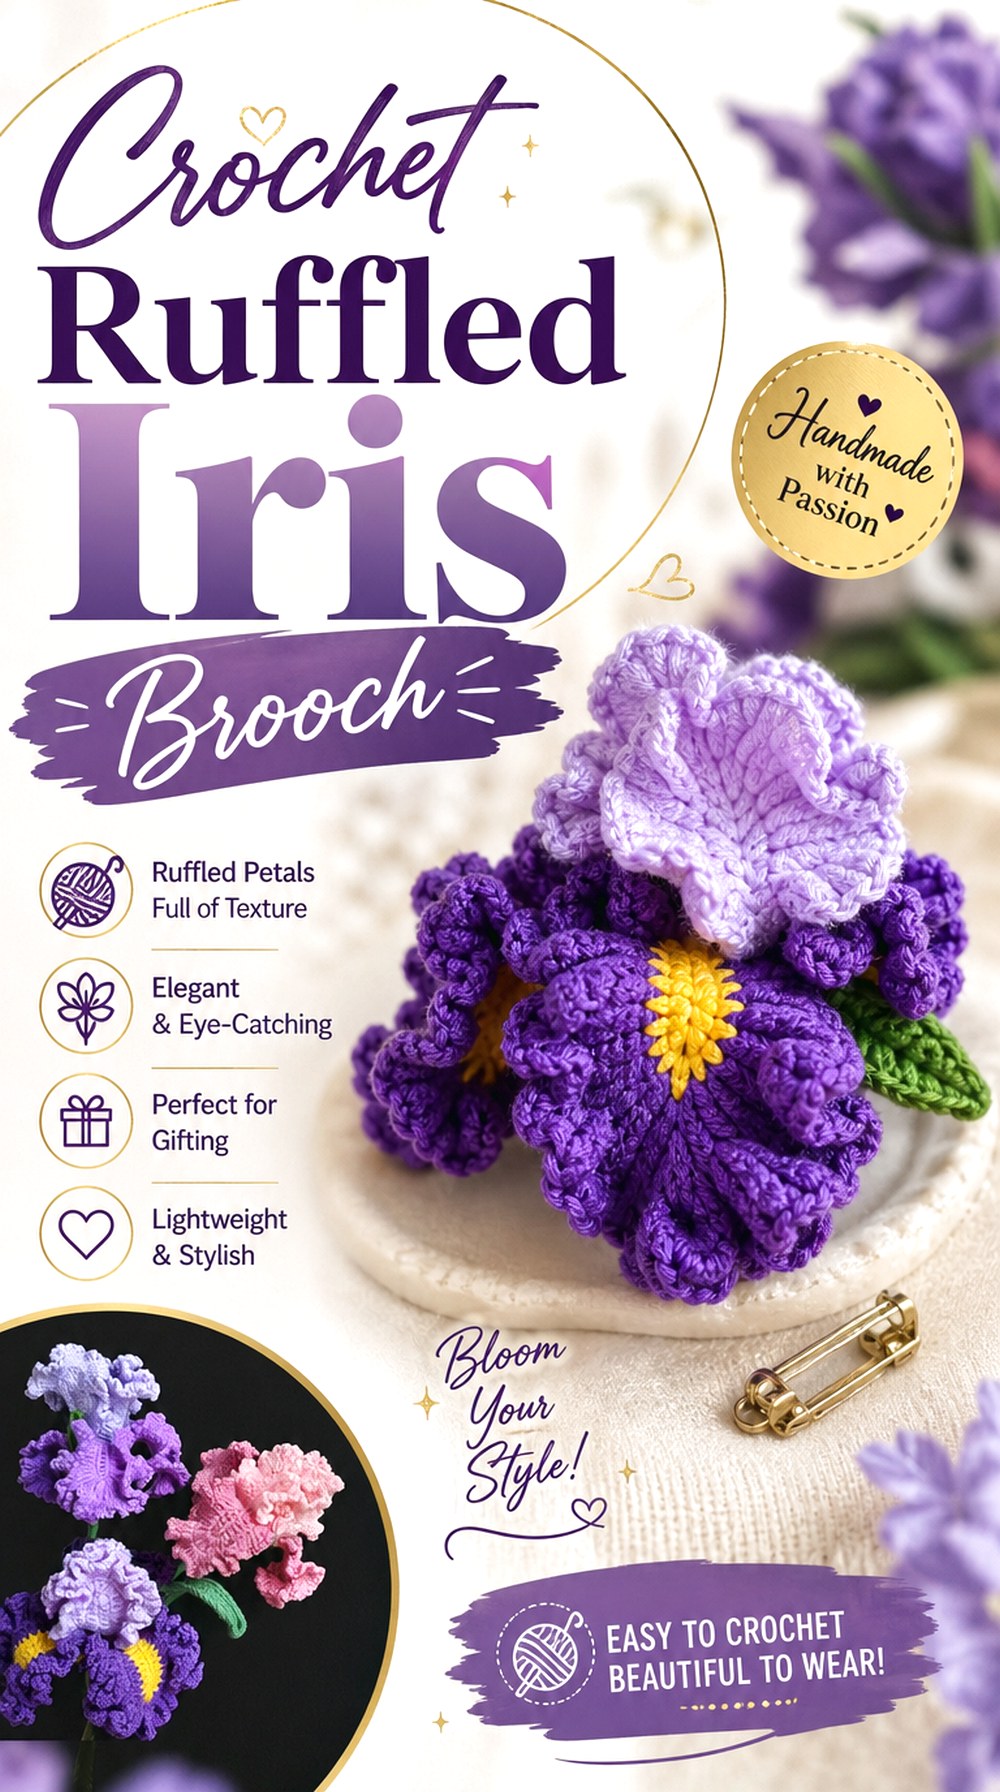
An iris gives you an irregular, botanical statement rather than a tidy radial flower. Angela Oei | Fumi’s Studio demonstrates a crochet iris with ruffled detail, and the tutorial description also references wire as part of the flower construction. That makes it especially relevant for readers comparing soft fabric-only flowers with forms that use added shaping.
As a brooch, the iris works well when its upper and lower petals remain visually distinct. Avoid treating it like a flat appliqué. The most convincing version should preserve some separation and movement while keeping the underside secure enough for vertical wear.
Iris Ruffles Need Space, Not Extra Bulk
The ruffled edge is already visually complex, so making every section thicker can obscure the petal divisions that identify the flower. If you want a larger brooch, consider scale and openness together. Hold the bloom at normal viewing distance and check whether the individual forms are still recognizable. A little negative space between sections can make a large iris feel lighter and more botanical.
Choose the Wearing Angle Before Final Assembly
Because the flower is not rotationally symmetrical, decide its “upright” orientation before sewing on the pin back. Test the bloom on the left and right lapel; one direction may complement the petal sweep better. If wire or other shaping support is retained, finish the rear surface so every structural end stays enclosed and cannot rub against the garment.
Original Tutorial and Creator Credit
Creator: Angela Oei | Fumi’s Studio
Crochet Trumpet Daffodil Brooch
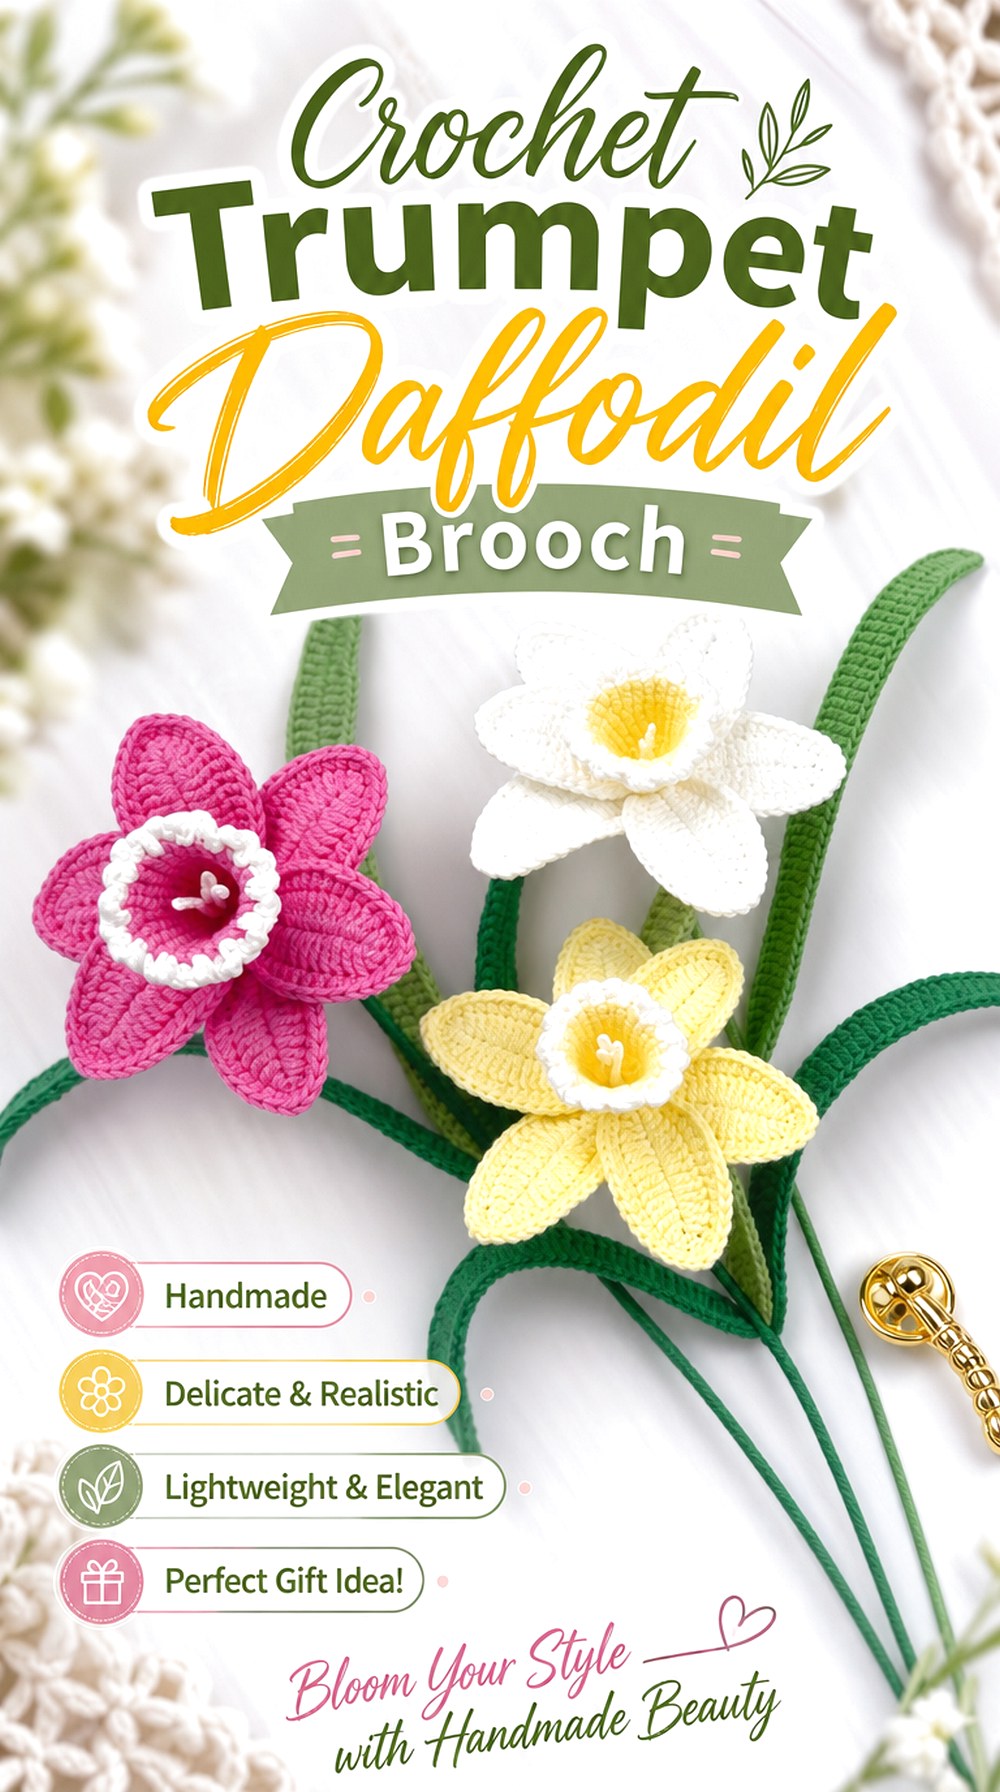
A daffodil has an instantly different profile because its central trumpet projects beyond a flatter petal ring. Loopara’s tutorial demonstrates a crochet daffodil flower, making it a suitable reference for this distinctive two-level structure. For an oversized brooch, that central projection creates strong depth without requiring the entire flower to become heavily layered.
This is a useful spring-themed option for a jacket, tote, or hat. The main challenge is keeping the trumpet visibly forward while the outer flower remains close enough to the fabric for support. If both parts collapse into the same plane, much of the daffodil’s character disappears.
The Daffodil Trumpet Should Stay Visibly Forward
Check the brooch from a three-quarter angle, not just straight on. The trumpet should remain distinguishable from the outer petal layer when the flower is vertical. If the center folds sideways under its own weight, increasing the overall brooch size may make the problem more obvious. Preserve enough structure in the central area that the depth reads intentionally.
Reinforce the Petal-to-Center Junction
The transition between the projecting center and the surrounding petals is a logical structural zone to inspect before mounting the flower. Make sure the bloom does not bend sharply at that junction when held upright. A backing should stabilize the rear without reaching so far outward that it fixes every petal into a rigid shape.
Original Tutorial and Creator Credit
Creator: Loopara
Crochet Color Blocked Pansy Brooch
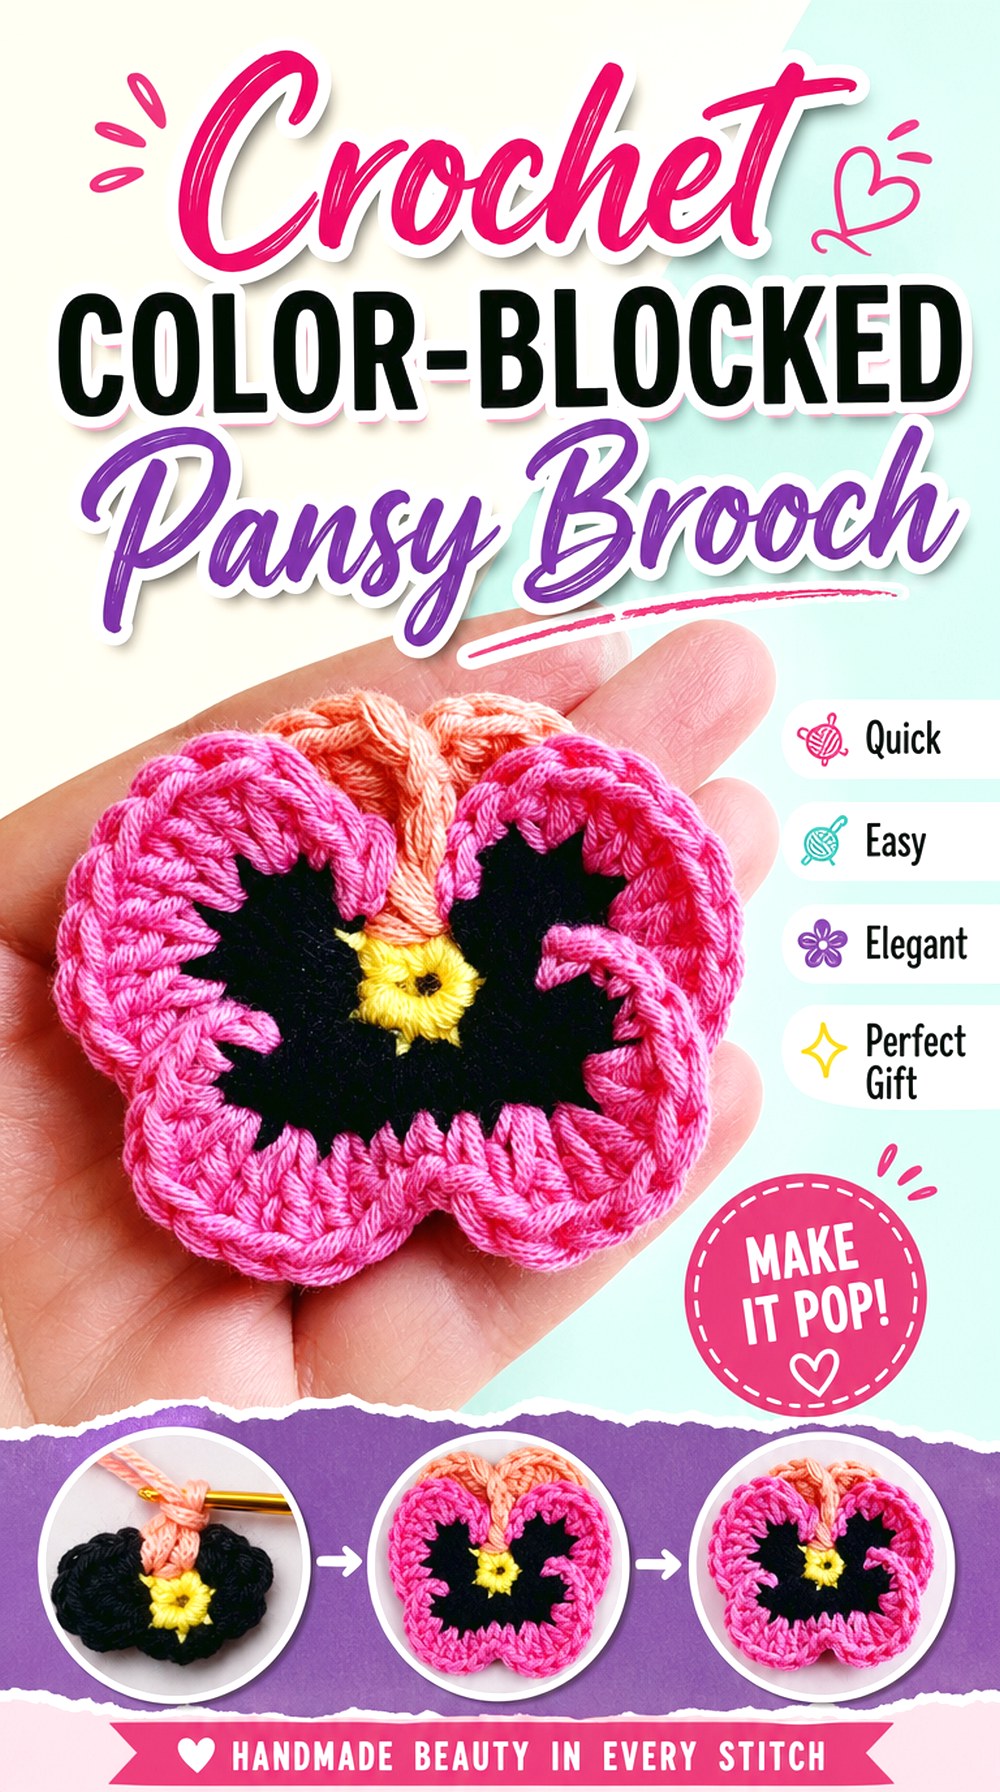
A pansy is ideal when you want strong visual detail without extreme depth. Its overlapping petals and contrasting color areas give the flower a distinctive face-like character, so it can become a bold brooch even when its profile stays relatively flat. Ahuyama Crochet’s tutorial demonstrates a crochet pansy and provides the floral source for this adaptation.
The shape also opens more color-planning possibilities than a simple daisy. Instead of enlarging every component dramatically, you can make the brooch feel more prominent through contrast. That is useful on lighter garments where a deeply layered, heavier bloom may not be as practical.
Pansy Color Blocking Does Most of the Visual Work
Evaluate the flower in the context of the garment color. A pansy with several close shades may appear richly nuanced in your hand but merge into one area from a distance. For a statement accessory, stronger separation between the major petal zones can preserve its recognizable structure. This is a design decision, not a requirement; softer tonal versions can work when you want the brooch to blend with an outfit.
A Flat Back Preserves the Face-Like Petal Layout
The flower’s expression depends on its overlapping petals staying in a readable arrangement. If the backing pulls the center too tightly, upper petals may curl underneath and disrupt that layout. Position the brooch support so it stabilizes the core without distorting the outer lobes. Test the finished piece upright and make any petal-position adjustments before permanently concealing the underside.
Original Tutorial and Creator Credit
Creator: Ahuyama Crochet
Crochet Tropical Hibiscus Brooch
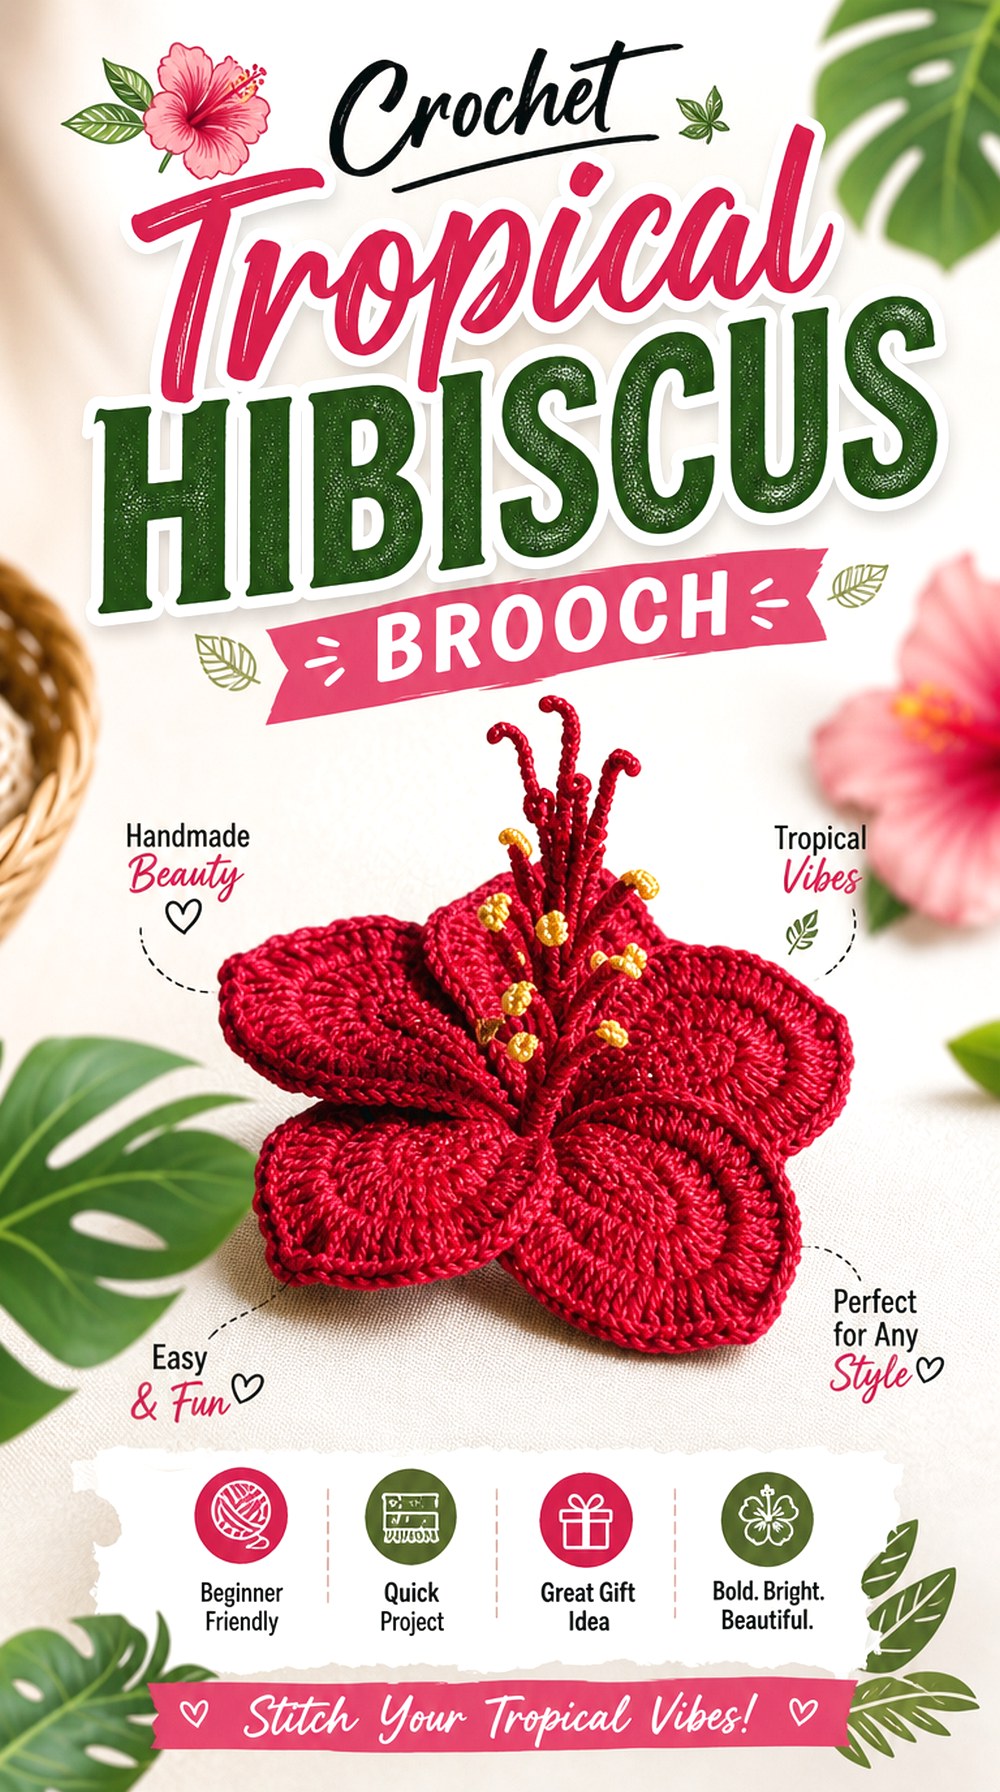
The hibiscus offers a broad tropical silhouette with open petals surrounding a prominent center. Sahar Elkady’s tutorial covers the flower’s petals, stamens, and final assembly, making it a strong source for understanding the complete floral form without requiring the article to reproduce the creator’s construction sequence.
For a brooch, the hibiscus can provide dramatic width without the densely packed mass of a carnation. It works especially well as a single focal bloom. The trade-off is that widely spread petals need enough support near their base to stay readable when the flower moves from a horizontal work surface to vertical clothing.
Hibiscus Scale Depends on the Center Staying Visible
A very large flower can overwhelm its own center if the petals become the only feature that reads from a distance. Check the balance before adding the brooch back. The central detail should remain visibly connected to the bloom instead of disappearing against similarly colored petals. That contrast helps retain the hibiscus identity even when the flower is interpreted loosely rather than botanically.
Stop the Long Petals From Collapsing Into the Pin
Hold the flower at the same angle it will be worn and check whether the lower petals fold behind the central backing. If they do, simply enlarging the support may make the brooch look stiff. Instead, assess where the petals need stability at their bases while keeping their outer edges free enough to maintain the open tropical silhouette.
Original Tutorial and Creator Credit
Creator: Sahar Elkady
Crochet Lavender Spray Brooch
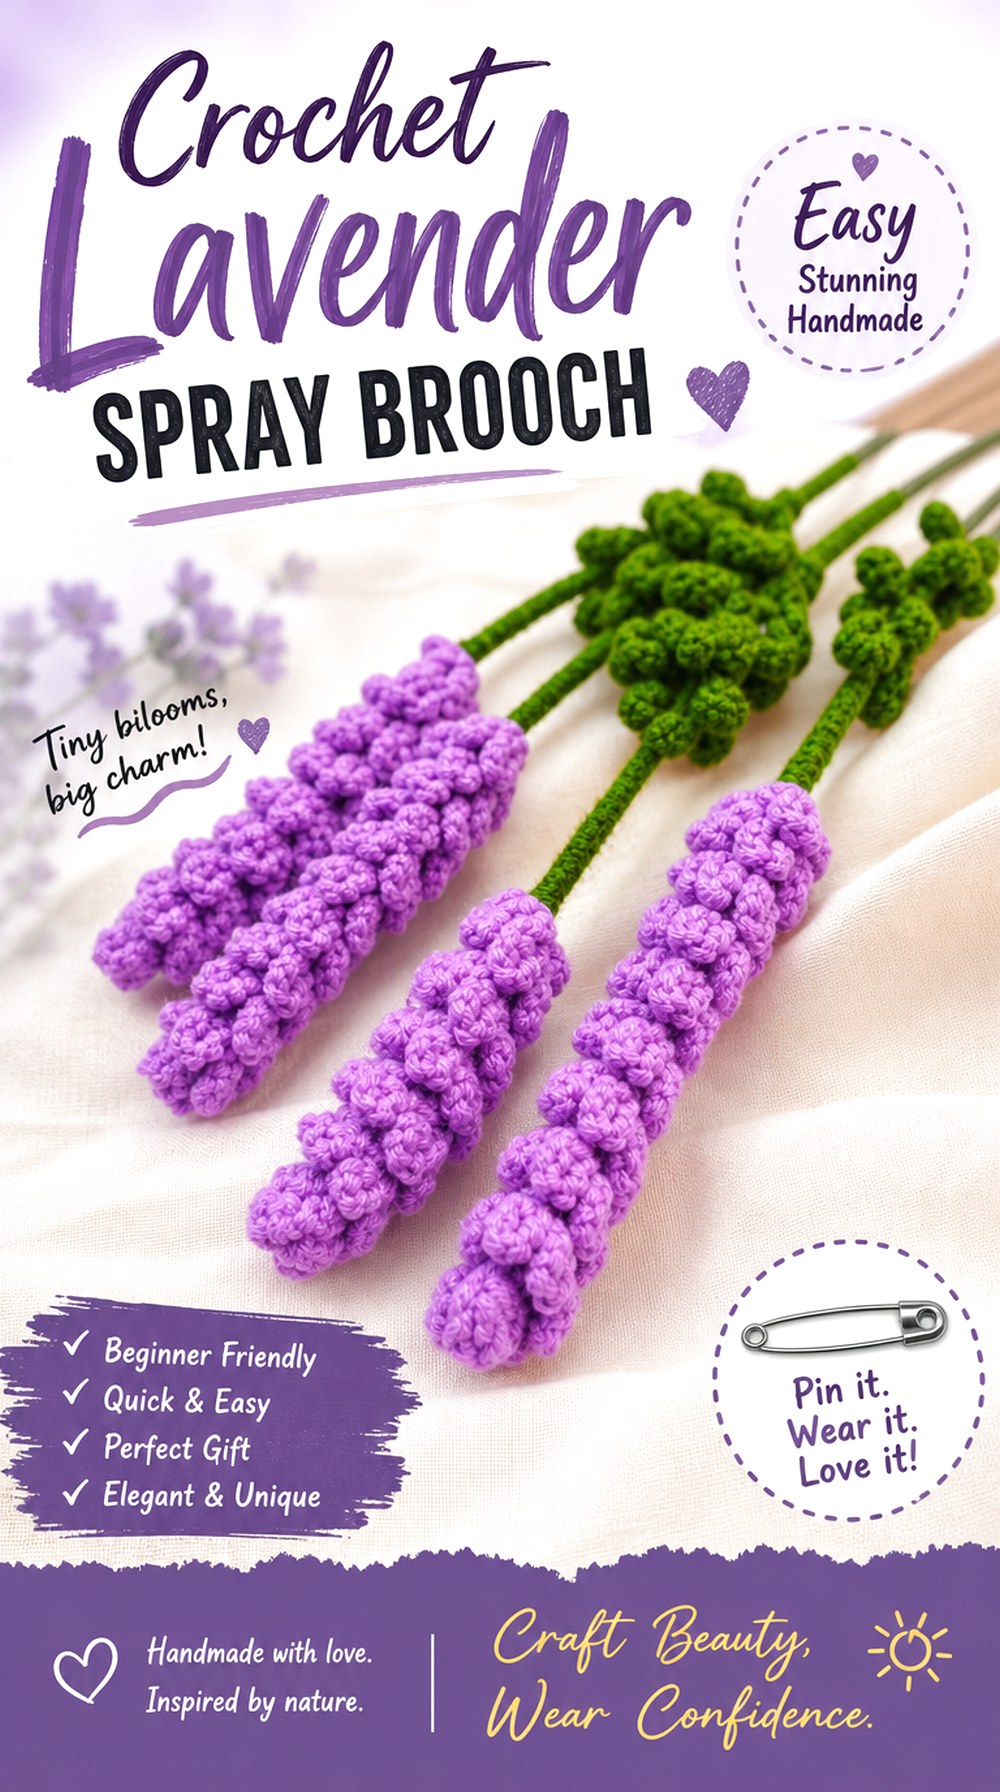
Lavender changes the idea of an oversized floral brooch completely. Instead of one large bloom, the visual impact comes from a long spray of many small floral details. Kiki Crochet’s tutorial demonstrates a crochet lavender flower and explicitly lists brooches among possible uses, which makes the concept particularly relevant to wearable adaptation.
This format is useful when you want an elongated accessory across a lapel, shoulder, hat band, or bag rather than a round corsage. Multiple sprigs can create more presence without forcing any single flower to become unrealistically large. The important planning issue is controlling their direction so the finished spray behaves as one accessory.
A Lavender Spray Needs a Long, Narrow Backing
A tiny circular backing may stabilize only the bottom of a long spray, leaving the top to twist away from the garment. Consider support that follows part of the arrangement’s length while remaining hidden behind the sprigs. Test the silhouette from the front before fixing it permanently; too much foundation can make an airy botanical spray look like a flat patch.
Cluster Several Sprigs Before You Commit to the Angle
Arrange the components on the intended garment before joining them into the final brooch. A vertical cluster feels different from a fan-shaped spray, and the location of the pin should follow that finished orientation. If several sprigs overlap at the base, check that the combined area does not become unnecessarily bulky. You want visual fullness above the attachment, not a thick knot underneath it.
Original Tutorial and Creator Credit
Creator: Kiki Crochet
Crochet Holiday Poinsettia Brooch
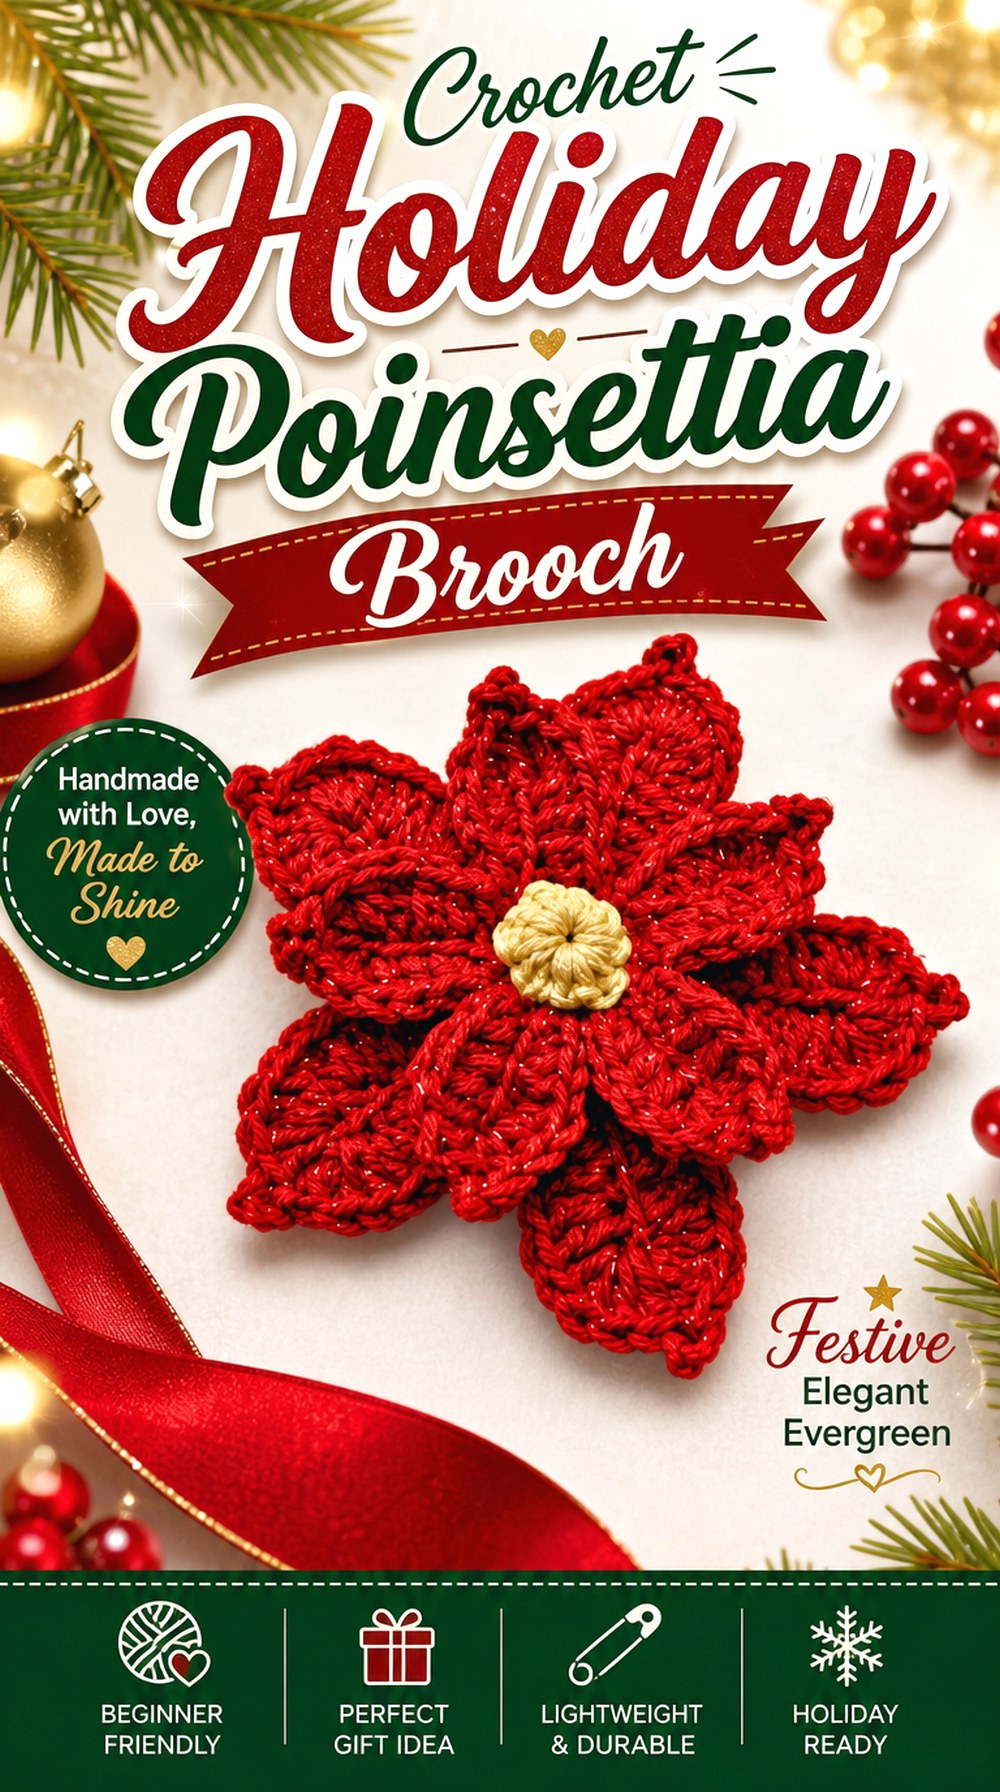
A poinsettia naturally creates a layered star-like silhouette, making it an effective holiday statement brooch without relying on a conventional round flower. Bag-O-Day Crochet provides a poinsettia flower tutorial that serves as the source for the floral form. The overlapping pointed sections make this option visually distinct from soft carnations, roses, and camellias.
As an oversized accessory, it can work on a winter coat, fabric gift bag, seasonal hat, or sturdy scarf. Because the outer points extend well beyond the center, make sure the rear support controls the middle without becoming visible between the more open sections of the bloom.
Poinsettia Layers Can Spread Beyond the Backing
A star-shaped flower rarely needs a backing that follows every point. Position the support beneath the denser center and check visibility through the gaps around it. If the flower rotates while worn, increase central stability rather than tracing the entire outline with a rigid foundation. That keeps the outer sections visually lighter and preserves the pointed silhouette.
Seasonal Fibers Should Still Pass a Wear Test
Novelty, fuzzy, or sparkly yarn can change how a festive flower behaves even if the color looks ideal. Before committing to an oversized brooch, check whether the chosen fiber keeps the petal points readable and whether surface texture catches excessively on the intended garment. Decorative appearance should not come at the cost of a flower that collapses or constantly snags against neighboring fabric.
Original Tutorial and Creator Credit
Creator: Bag-O-Day Crochet
Crochet Magnolia Bloom Brooch

A magnolia brings broad, open petals and a quieter silhouette than a densely textured sunflower or chrysanthemum. Star Crochet’s tutorial demonstrates a crochet magnolia flower, making it a suitable source for this more sculptural botanical shape. Its generous petals can create visual scale without needing a large number of separate layers.
This style suits readers who want a statement piece that looks spacious rather than busy. It can be especially effective in a restrained color palette where form matters more than contrast. As a brooch, leave enough openness around the center for the characteristic broad petals to remain individually visible.
Magnolia Petals Look Better With Open Negative Space
Oversizing does not require filling every gap. The broad petals gain definition when small spaces remain between them, particularly toward the outer edge. Hold the finished flower against the intended garment and check whether the background fabric helps separate the petals. If everything overlaps into one solid mass, the bloom may lose the open magnolia character that made it appealing in the first place.
Keep the Center of Gravity Close to the Garment
Large, broad petals can create visual width with relatively few components, but any thick central assembly can still pull forward. Evaluate the flower from the side before sewing on hardware. A stable center close to the garment allows the petals to project naturally without making the entire brooch lean. Use the smallest hidden support that gives the dense central zone reliable control.
Original Tutorial and Creator Credit
Creator: Star Crochet
Crochet Tulip Cluster Brooch
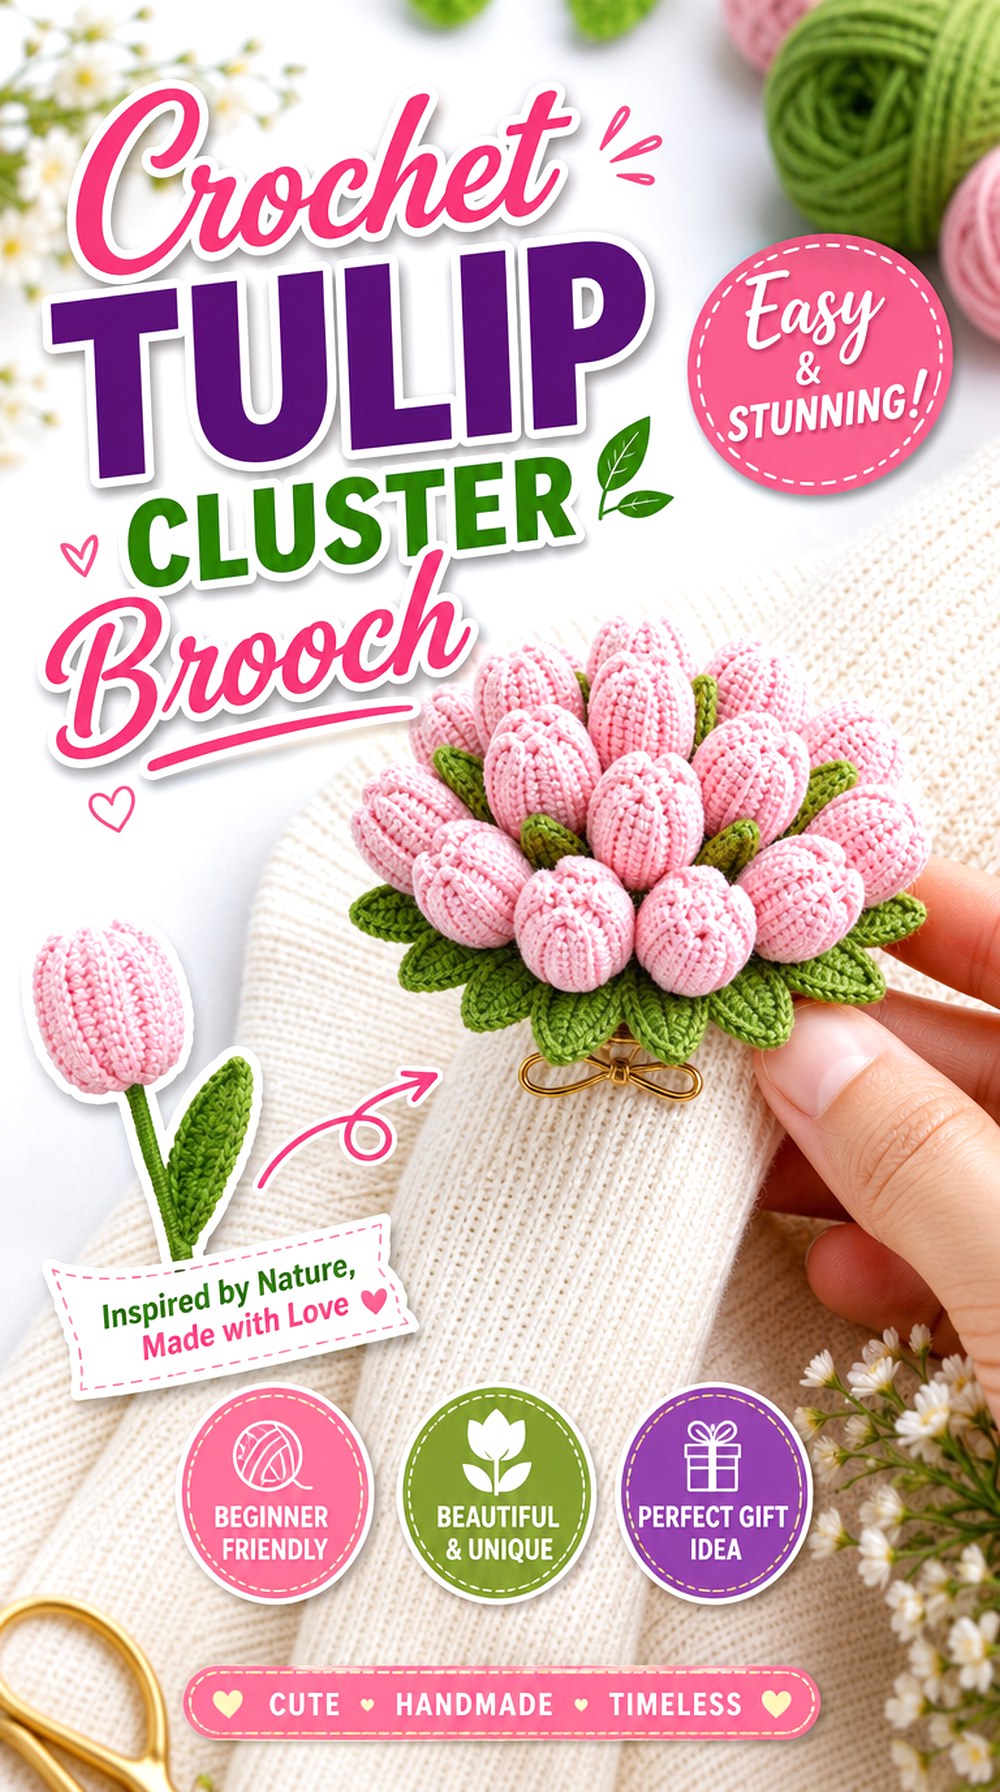
A tulip does not naturally create the flat spread of a daisy, so clustering several tulip forms is a better route to an oversized brooch than forcing one bloom to become extremely broad. Knitting World’s tutorial demonstrates a crochet tulip and bouquet presentation, making it useful inspiration for arranging several directional flowers together.
For a wearable version, remove the idea of a long stemmed bouquet and think in terms of a compact textile cluster. Two or more flower heads at different heights can create a larger silhouette while retaining the closed tulip shape. Leaves can extend the composition, but they should support the arrangement rather than simply add bulk.
A Tulip Cluster Works Better as a Small Bouquet Shape
Lay the flower heads together before permanently joining anything. If every tulip sits at exactly the same level, the cluster can become visually blocky. Slight staggering gives each closed bloom enough room to remain recognizable. Keep the overall arrangement compact enough that it behaves as one brooch rather than several independent ornaments pulling in different directions.
Stagger the Blooms Instead of Stacking Them Flat
Tulip heads have depth, so placing several directly on top of one another can create a thick center that tips away from the garment. A fan or shallow diagonal arrangement distributes the forms more evenly. Once the composition looks balanced, place the backing beneath the shared structural area rather than attaching hardware to an individual flower that must carry all the others.
Original Tutorial and Creator Credit
Creator: Knitting World
Crochet Oversized Anemone Brooch
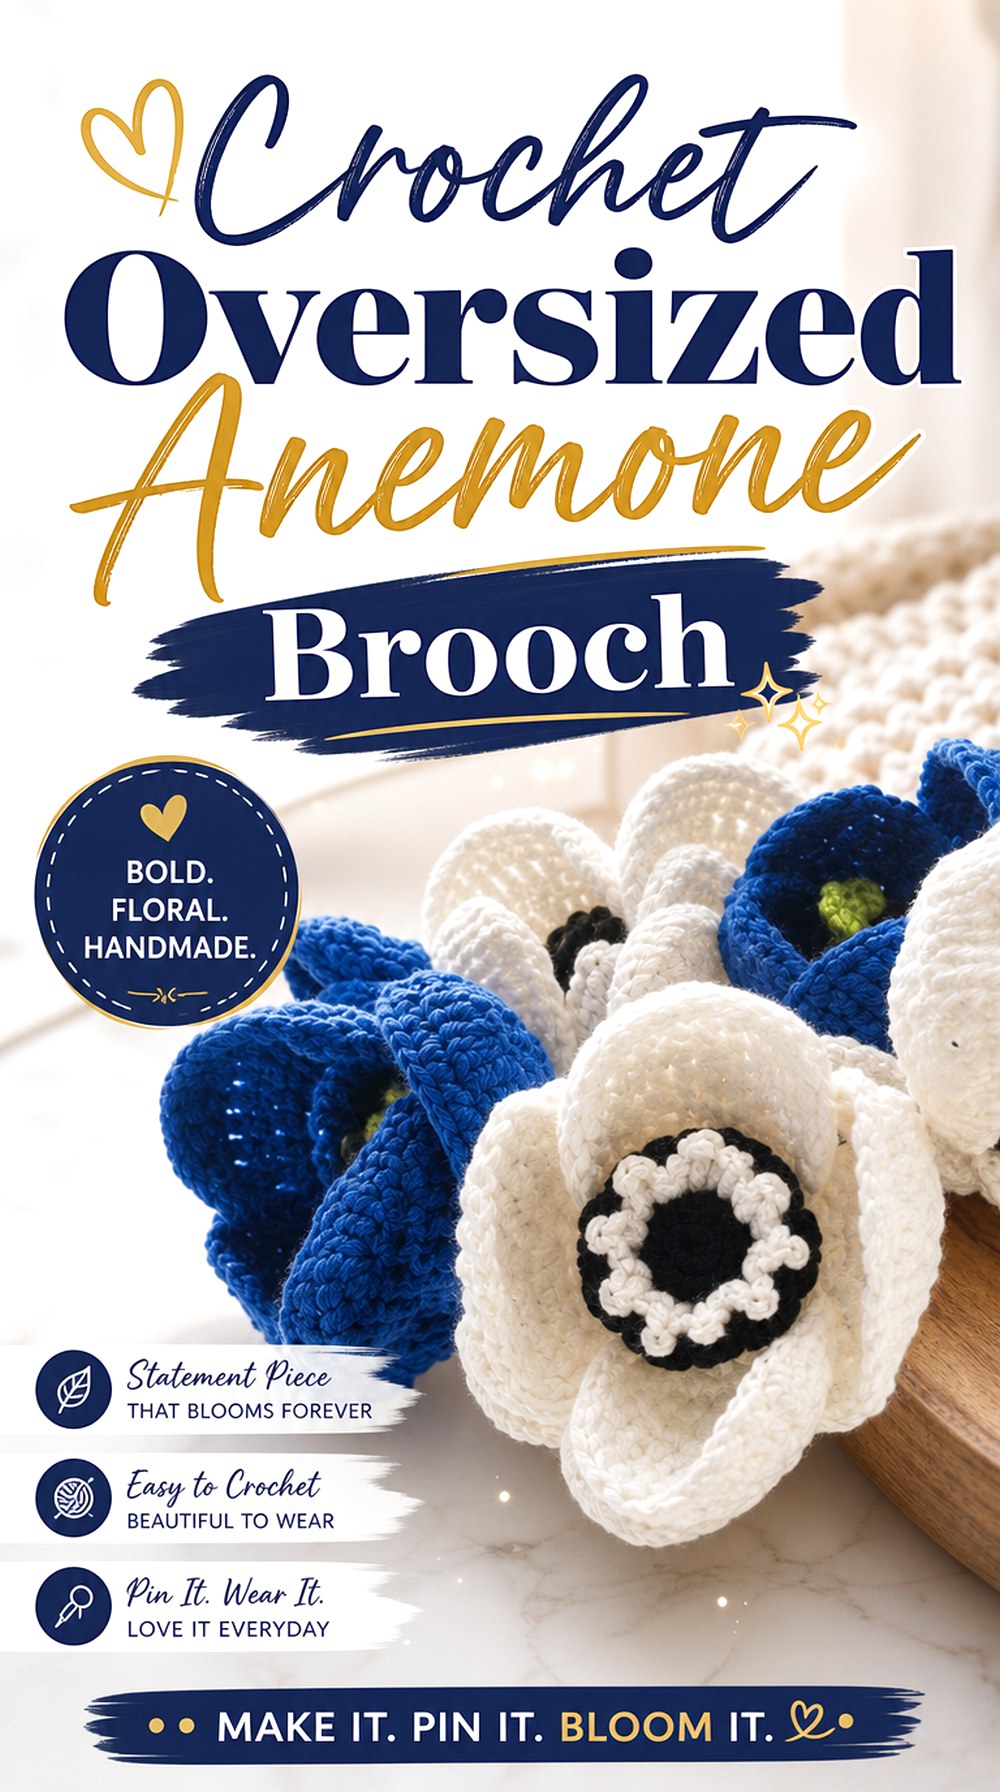
The anemone combines a dramatic center with a relatively open ring of petals, producing a bold flower that can stay visually lighter than a heavily layered rosette. Moara Crochet’s source specifically presents a crochet anemone flower, making it a strong fit for a statement-brooch adaptation.
This is a useful option if you like the broad presence of a poppy but want a different center treatment and more individually defined petals. Because each outer petal contributes strongly to the outline, uneven support becomes noticeable. The flower should remain balanced around its center when held vertically rather than allowing the bottom half to fold behind the backing.
An Anemone’s Dark Center Makes the Brooch Read From Afar
Strong center contrast can help a large flower remain recognizable from normal viewing distance. Before choosing the final palette, place yarn samples or the completed bloom against the actual garment. A dramatic center can unify a wide petal ring, while low contrast gives a softer look. Neither is inherently better, but the choice substantially changes how “statement” the brooch feels.
Individual Petals Need Even Support Around the Base
Inspect where each petal meets the central flower area. If one side bends more freely than the other, the bloom may become visually lopsided once gravity acts on it. Correct unevenness before adding the brooch hardware. The backing should support the common base of the petals while allowing their outer sections to keep enough movement for a natural flower profile.
Original Tutorial and Creator Credit
Creator: Moara Crochet
Crochet Cherry Blossom Cluster Brooch
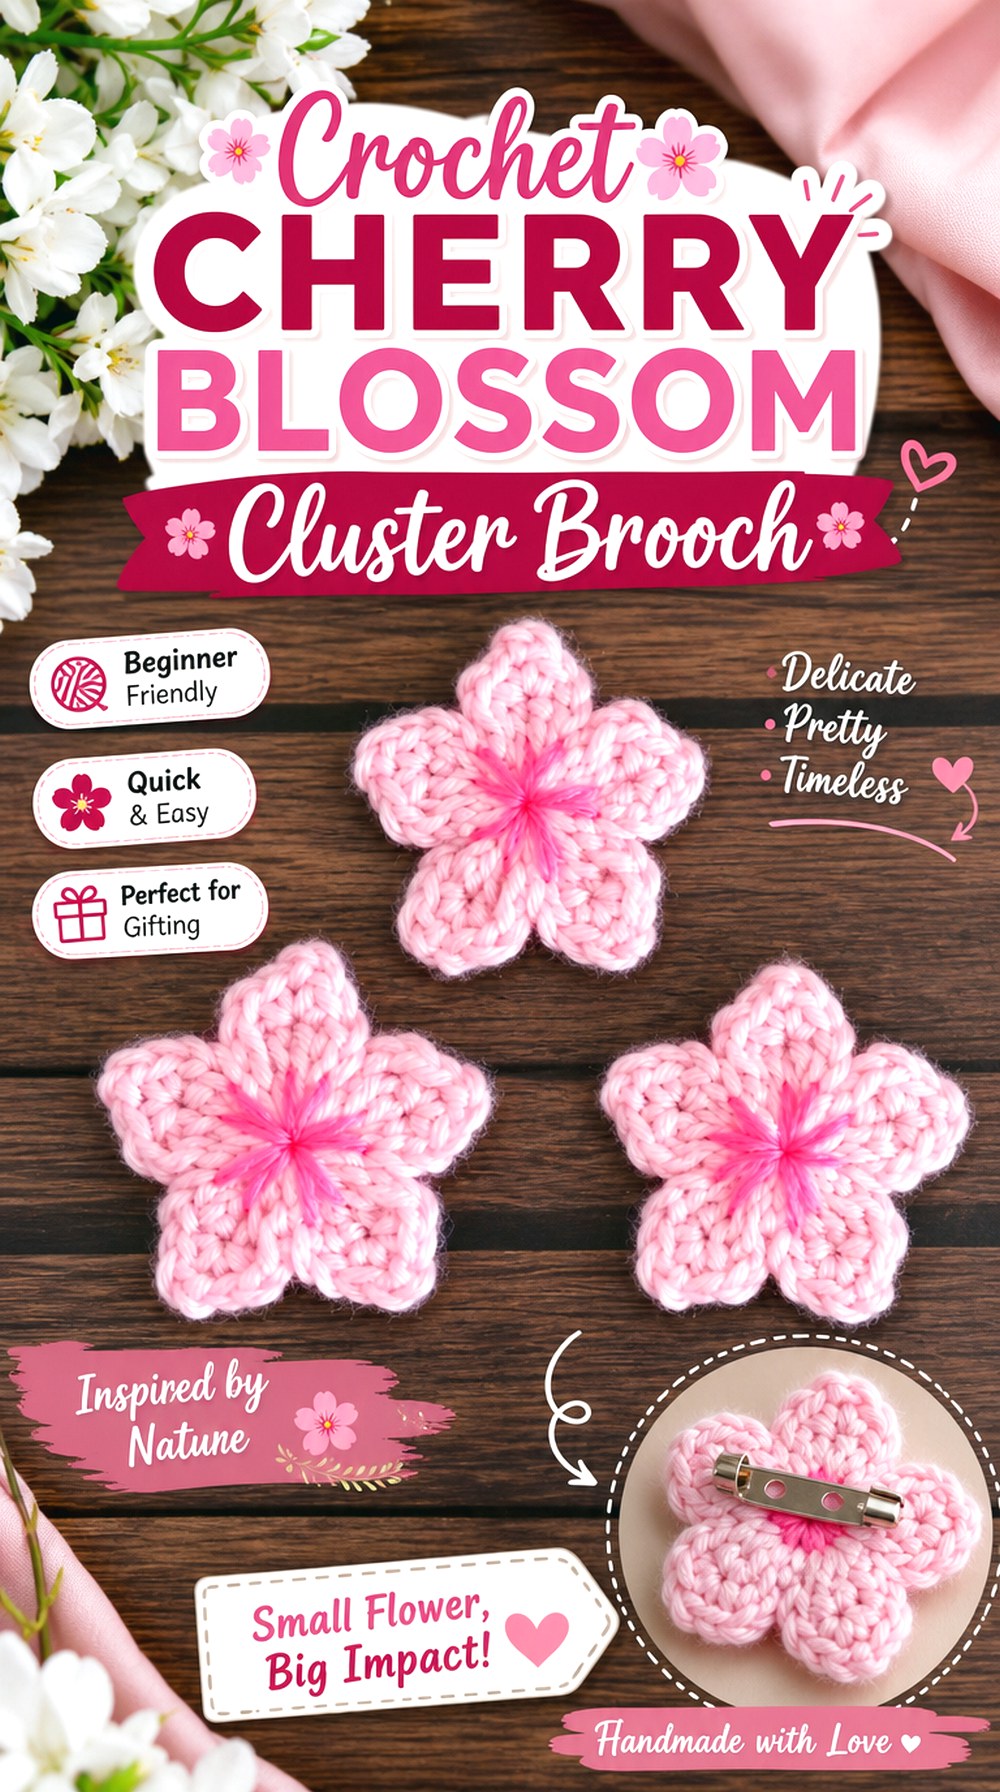
Cherry blossoms create an oversized effect through repetition instead of one giant flower. Pora Pora Crochet’s tutorial demonstrates a crochet cherry blossom flower, which can be treated as a repeatable component for this clustered brooch idea. Several blossoms arranged along a short branch-like or crescent silhouette can produce a wide accessory while each individual bloom remains delicate.
This approach is especially useful for readers who find very large single flowers too heavy-looking. Empty space becomes part of the design. The finished brooch can stretch along a lapel or bag while leaving areas of the underlying fabric visible between flowers.
Cherry Blossoms Gain Scale Through Clustering
Before making many components, arrange a few sample blossoms at different distances from one another. Closely packed flowers create a dense corsage, while wider spacing creates an airy botanical spray. Decide which effect you want before committing to the final quantity. The perceived size of the brooch comes from the whole silhouette, so every individual blossom does not need to be enlarged.
Use the Branch Direction to Control the Silhouette
A cluster looks more deliberate when the blossoms follow a clear visual direction. A shallow crescent can echo a lapel line, while a diagonal spray can move toward the shoulder. Work out that direction before adding the brooch back. If the support is attached without considering orientation, the cluster may rotate and turn a graceful branch-like form into an awkward horizontal strip.
Original Tutorial and Creator Credit
Creator: Pora Pora Crochet
Crochet Curled Rose Brooch
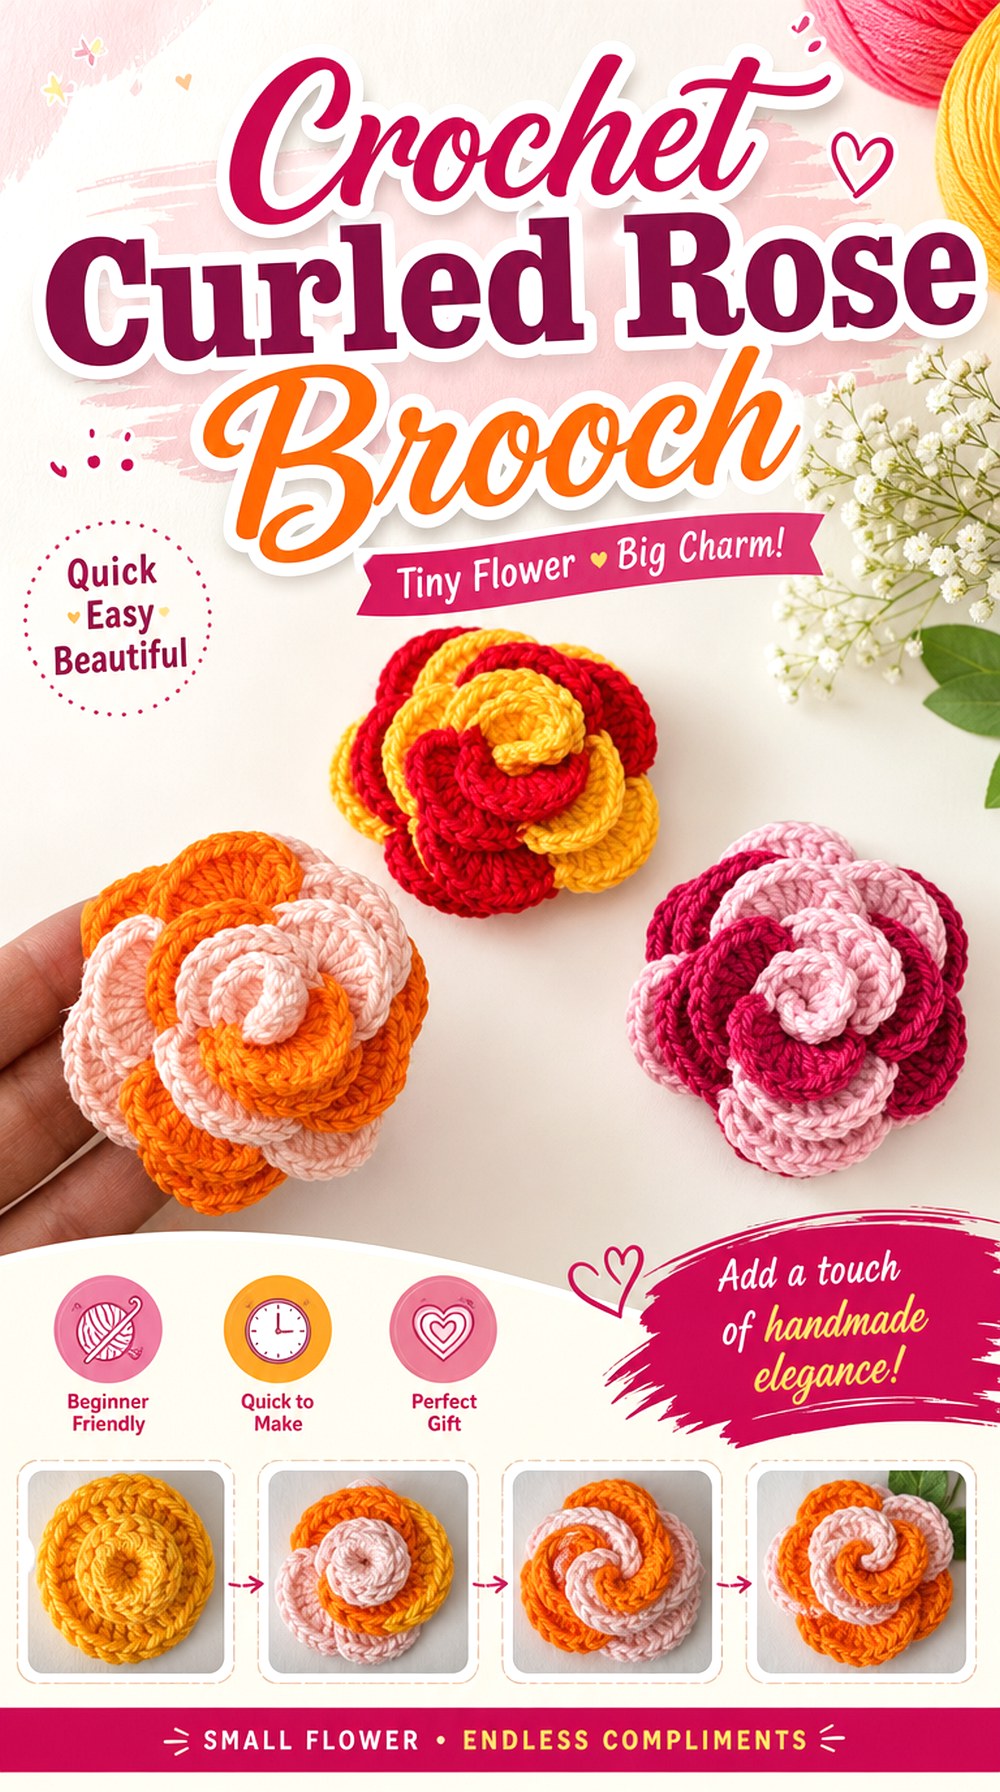
A rose creates volume through wrapped or curled petal progression, giving a brooch a classic corsage appearance with considerable depth near the center. Tuba Crochet’s flower tutorial provides the rose reference for this concept. Unlike a sunflower, the rose does not need a broad contrasting center; the spiraling petal structure becomes the focal point.
For an oversized version, resist the assumption that more thickness always improves the flower. A rose that becomes too dense can be heavy and difficult to mount cleanly. The strongest wearable version balances a secure underside with enough looseness in the outer petals to make the spiral visible.
A Rolled Rose Needs Strong Underside Stitching
The underside of a curled flower can contain several layers that all depend on the central assembly. Before attaching brooch hardware, gently handle the bloom from different directions and identify any section that shifts independently. Reinforce the flower as needed through its own structural base, then add the backing. The pin should not become the element that is accidentally holding an incompletely secured rose together.
Leaf Placement Can Balance a Heavy Bloom
One or two leaves can do more than add color. A leaf extending from one side can visually balance a dense rose and make the overall brooch appear wider without adding another full flower. Arrange leaves before mounting the hardware and check the composition vertically. Avoid placing so much material on one side that the decorative solution creates a new balance problem.
Original Tutorial and Creator Credit
Creator: Tuba Crochet
Crochet Chrysanthemum Pom Brooch

A chrysanthemum finishes the collection with a dense, highly textured silhouette. Crochet with Clare’s tutorial demonstrates a crochet chrysanthemum flower, providing a strong reference for this very different flower surface. Rather than relying on several broad petals, the visual effect comes from many narrow or loop-like elements building a rounded bloom.
That makes the chrysanthemum a good choice for a compact but substantial statement brooch. It can appear large because of its volume even when its outline is not as wide as a sunflower. The main challenge is keeping the backside controlled so the dense flower sits close enough to the garment instead of rolling outward.
Chrysanthemum Texture Creates Volume Without a Wide Petal Edge
Judge this brooch by depth as well as diameter. A very full chrysanthemum can already command attention without being made dramatically wider. If you are choosing between thicker yarn and more open texture, compare the side profile. Too much density may turn the bloom into a heavy ball, while enough separation allows the individual floral texture to remain visible.
Compress the Back Before Attaching Hardware
A textured front can hide an uneven rear surface until the flower is placed against clothing. Set the completed bloom on a flat surface and inspect whether its backside has a clear resting area. The pin and backing should sit on that stable zone rather than on protruding crochet that causes the flower to rock. Preserve the fullness on the front while making the garment-facing side comparatively controlled.
Original Tutorial and Creator Credit
Creator: Crochet with Clare
How to Choose an Oversized Floral Brooch Shape
| Brooch shape | Strongest visual effect | Main planning issue | Good ideas from this collection |
|---|---|---|---|
| Broad and fairly flat | Maximum visible width with less forward projection | Keeping petals open while supporting the center | Poppy, daisy, pansy, anemone |
| Dense and ruffled | Rich corsage-like volume | Preventing too much bulk at the attachment point | Camellia, carnation, rose, chrysanthemum |
| Strong radial bloom | Clear graphic statement | Managing a large center and outer petal ring | Gerbera, sunflower, magnolia |
| Sculptural flower | Botanical depth and unusual silhouette | Orientation, projection, and rear finishing | Lily, orchid, calla lily, iris, daffodil, hibiscus |
| Multi-flower cluster | Large overall footprint without one huge bloom | Distributing components without creating a bulky base | Tulip cluster, cherry blossom cluster |
| Long floral spray | Directional lapel or shoulder accent | Supporting more than just the bottom of the arrangement | Lavender spray |
Conclusion
The most wearable oversized floral brooch is not necessarily the flower with the greatest diameter. Choose a poppy, daisy, or anemone when you want broad impact close to the fabric; a rose, camellia, carnation, or chrysanthemum for concentrated corsage volume; and an orchid, lily, iris, or calla lily when sculptural shape matters more than symmetry. Lavender, tulip, and cherry-blossom arrangements offer another route by building size through clustering rather than one extremely large bloom.
Whichever form you choose, plan the wearing angle and backing around the finished flower instead of treating the pin as an afterthought. Use the original tutorials for their exact flower construction details, then adapt scale and mounting only after checking how the completed piece behaves on its intended fabric.
Frequently Asked Questions
How can I make a crochet flower look oversized without making it excessively heavy?
Scale can come from silhouette as well as yarn thickness. Broad petals, open spacing, leaves, or multiple small blossoms can make a brooch occupy more visual space without concentrating all the material in one dense center. Compare a cherry blossom cluster or lavender spray with a very thick single rose: both can look substantial, but they distribute their visual mass differently. Always test the completed arrangement vertically before choosing the backing.
Where should the pin back sit on a large crochet flower?
There is no universal placement because flower shapes distribute their weight differently. Start by holding the finished flower in its intended orientation and observing where it tips. Round, fairly flat blooms often need support across their dense center, while directional flowers may benefit from a position that helps preserve their chosen angle. Temporarily pin the arrangement to comparable fabric first, then finalize the concealed backing after checking it from the front and side.
Should I use felt behind an oversized crochet floral brooch?
Felt can be one possible concealed backing material, but it is not mandatory. A backing should suit the flower’s shape, stabilize the hardware, remain hidden from the front, and be compatible with the way you expect to care for the finished accessory. A very large felt circle can unnecessarily flatten an airy flower, while a backing that is too small may not control a dense center. Judge the actual finished bloom rather than using one backing size for every project.
Can I enlarge a flower tutorial simply by switching to thicker yarn?
Sometimes a thicker yarn produces a larger flower, but it also changes weight, stitch definition, flexibility, and petal thickness. A delicate iris or orchid may become visually bulky, while a sunflower may handle a stronger texture more naturally. Make a sample component when possible and compare its drape to the original flower concept. If the petals lose their recognizable form, clustering flowers or choosing a naturally larger silhouette may be a better adaptation.
What garments work best with an oversized crochet brooch?
The important factor is fabric support rather than a specific garment category. A dense jacket, coat, sturdy scarf, hat, or fabric bag may hold a substantial flower differently from a lightweight or loose knit. Test the pin on a similar fabric before wearing it on a valued garment, particularly if the brooch is heavy or the textile is delicate. Check both sagging and the effect of the pin itself on the fabric.
How do I stop a large crochet brooch from drooping forward?
First identify why it droops. The flower may have too much weight projecting in front of a narrow attachment point, the pin may sit too low, or the garment may be too soft to support it. Test the flower vertically before changing anything. A broader concealed support, a better-balanced pin position, reduced flower depth, or a sturdier wearing surface may help. Avoid automatically making the entire underside rigid, since that can distort soft petals.
Can several small crochet flowers be combined into one oversized brooch?
Yes. Clustering is particularly useful for tulips, cherry blossoms, lavender, and other flowers that do not naturally form a very broad single bloom. Arrange all components in their intended wearing position before fixing the backing, because their shared angle determines balance. Keep the central joining area controlled and allow some negative space between flowers when you want a lighter effect. The cluster should behave as one accessory rather than several flowers pulling independently.